

Yes, we're now running our only Summer Sale. All Courses are 30% off until 20th July, 2026:
Learn through the super-clean Baeldung Pro experience:
>> Membership and Baeldung Pro.
No ads, dark-mode and 6 months free of IntelliJ Idea Ultimate to start with.
1. Overview
By enabling the keyboard’s volume keys, we can conveniently manage the audio output of a system. Controlling sound with hotkeys can enhance productivity and accessibility. Typically, a keyboard offers three types of volume control: volume up, volume down, and volume mute or unmute.
In this tutorial, we’ll use a combination of tools to enable the keyboard’s volume keys in the Linux XFCE desktop environment.
2. Installing amixer
Before enabling the keyboard volume keys, we’ll check whether the audio system works properly.
To examine the audio output devices present in the system, we utilize amixer, a command-line tool that controls and provides various data about the audio system. Additionally, we can use the utility to adjust the audio settings of the default sound card.
amixer is a pre-installed tool in the XFCE desktop environment and part of the ALSA package. However, if we face any error while using the amixer tool, we can install the ALSA package using the apt command from the terminal:
$ sudo apt-get install alsa-utilsAfter successfully executing the command, let’s check the installation status of the utility:
$ amixer --version
amixer version 1.2.6
As we can see, the amixer tool has been successfully installed in the system.
3. Testing amixer
Now, let’s run the amixer tool from the terminal to know the details on the current settings of the audio system:
$ amixer
Simple mixer control 'Master',0
  Capabilities: pvolume pswitch pswitch-joined
  Playback channels: Front Left - Front Right
  Limits: Playback 0 - 65536
  Mono:
  Front Left: Playback 65536 [20%] [on]
  Front Right: Playback 65536 [20%] [on]
Simple mixer control 'Capture',0
  Capabilities: cvolume cswitch cswitch-joined
  Capture channels: Front Left - Front Right
  Limits: Capture 0 - 65536
  Front Left: Capture 10387 [16%] [on]
  Front Right: Capture 10387 [16%] [on]
In this case, the output shows the important details of the two audio mixer controls:
- capabilities
- limits
- current volume levels
- status
Furthermore, the Master control depicts the current volume level of the system, which is 20%. Additionally, when the state of the Master control is on, the audio system is in the unmute state.
Now, let’s verify the working status of the audio system by adjusting the audio settings using the amixer tool.
First, we increase the volume by 10% by specifying 10%+:
$ amixer -D pulse sset Master 10%+
Simple mixer control 'Master',0
  Capabilities: pvolume pswitch pswitch-joined
  Playback channels: Front Left - Front Right
  Limits: Playback 0 - 65536
  Mono:
  Front Left: Playback 19662 [30%] [on]
  Front Right: Playback 19662 [30%] [on]
Evidently, the audio system is working correctly, and the current volume has increased by 10%.
Similarly, let’s decrease the volume by 20% by specifying 20%-:
$ amixer -D pulse sset Master 20%-
Simple mixer control 'Master',0
  Capabilities: pvolume pswitch pswitch-joined
  Playback channels: Front Left - Front Right
  Limits: Playback 0 - 65536
  Mono:
  Front Left: Playback 6555 [10%] [on]
  Front Right: Playback 6555 [10%] [on]
This time, we can see that the current volume decreased by 20%.
Finally, we might want to toggle the state of the Master control to test the mute and unmute functionality of the audio system:
$ amixer -D pulse set Master toggle
Simple mixer control 'Master',0
  Capabilities: pvolume pswitch pswitch-joined
  Playback channels: Front Left - Front Right
  Limits: Playback 0 - 65536
  Mono:
  Front Left: Playback 6555 [10%] [off]
  Front Right: Playback 6555 [10%] [off]
As we can see, after executing the command, the state of the Master control changes, which indicates that the audio system goes into the mute or off (0) state.
4. Setting Keys for Controlling Volume
To activate the volume keys from the keyboard, first, we go to the Start menu and search for Keyboard, then start the Keyboard tool.
Let’s take a glimpse at the main screen of the Keyboard tool:
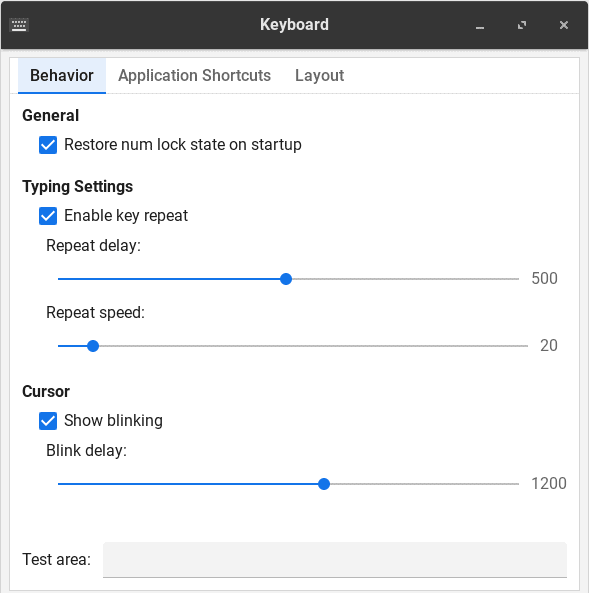
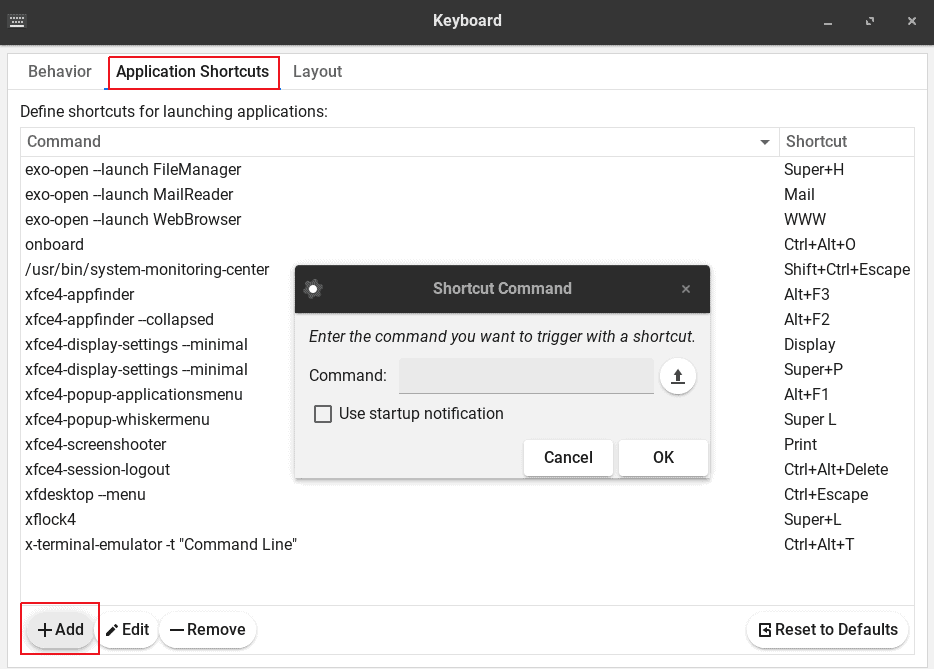
Now, we go to the Application Shortcuts tab, where all the activated shortcuts and the assigned keys are listed.
To enable the volume keys, we click the Add button. A dialog box appears. In this box, we specify the action that we’d like to execute:
After we set the command, we press a key to select it as a shortcut for the event:
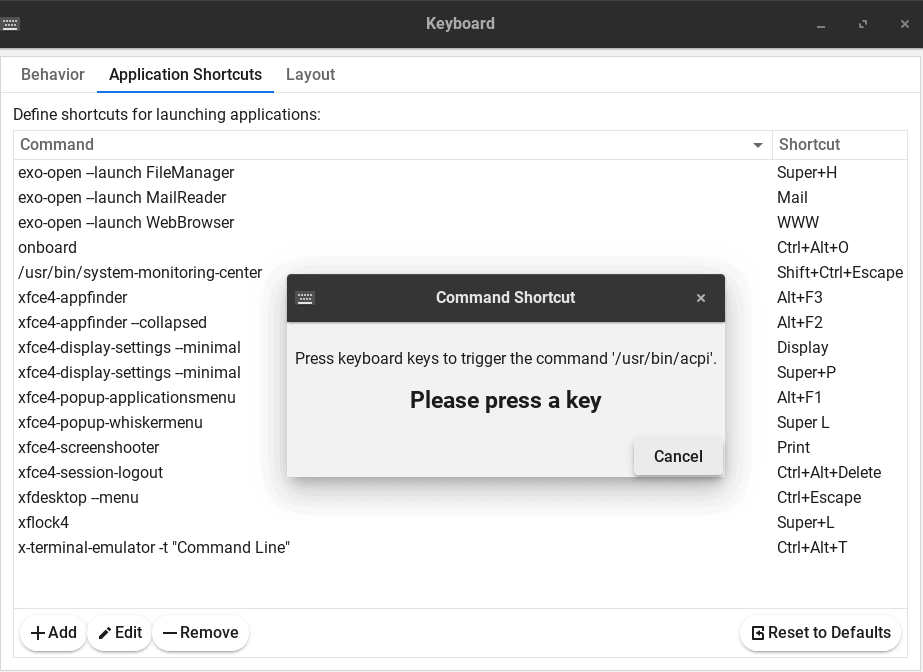
Thus, we can set a key to launch a specific action or tool. Furthermore, let’s see the commands that we need to enter in the Keyboard tool for the volume up, volume down, and toggling the state of the audio output in the system:
amixer -D pulse sset Master 5%+
amixer -D pulse sset Master 5%-
amixer -D pulse set Master toggle
Finally, we assign the default volume keys (key F6 for mute or unmute, F7 for decreasing the volume, and F8 for increasing the volume) to enable volume control from the keyboard.
5. Conclusion
In this article, we discussed how to enable the keyboard’s volume keys in the Linux XFCE desktop environment.
First, we checked the working status of the audio system using the amixer tool. Finally, using the Keyboard tool, we enabled the keyboard’s volume keys to work correctly.