

Learn through the super-clean Baeldung Pro experience:
>> Membership and Baeldung Pro.
No ads, dark-mode and 6 months free of IntelliJ Idea Ultimate to start with.
Learn through the super-clean Baeldung Pro experience:
>> Membership and Baeldung Pro.
No ads, dark-mode and 6 months free of IntelliJ Idea Ultimate to start with.
Linux and macOS have a shared history. However, this doesn’t imply that programs may easily switch between the two operating systems. It often requires a virtual machine or a translation layer to run macOS programs on Linux.
In this tutorial, we’ll explore ways to run Xcode on Linux.
Xcode is a software development tool created by Apple that’s:
Since it’s closed-source software, we cannot simply run the Xcode app on Linux. However, the open-source movement is strong in the whole Unix world, shared by both macOS and Linux. So, it’s unsurprising that the low-level tools and libraries used to build Xcode are open source.
Despite this, the high-level components of the IDE are proprietary content made for macOS, and running the Xcode app directly on Linux would violate the Apple Xcode End User Licensing Agreement.
Nevertheless, the open-source low-level toolchain for Xcode allows us to run the original Xcode command-line tool on Linux. We can do this with third-party tools.
Darling is a translation layer that enables Linux users to run macOS applications. Currently, Darling works with simple graphical user interface (GUI) apps and several command-line apps. Hence, we can run the Xcode command-line tool using Darling.
First, we’ll download the necessary dependencies for our Linux distro. For example, let’s download and install what’s required on Ubuntu:
$ sudo apt-get install cmake clang bison flex xz-utils libfuse-dev libudev-dev pkg-config \
libc6-dev:i386 linux-headers-generic gcc-multilib libcap2-bin libcairo2-dev libgl1-mesa-dev \
libtiff5-dev libfreetype6-dev libfreetype6-dev:i386 git libelf-dev libxml2-dev libegl1-mesa-dev \
libfontconfig1-dev libbsd-dev
Next, let’s clone the Darling git repository to our local machine:
$ git clone --recursive https://github.com/darlinghq/darling.gitThen, we’ll change into the Darling clone directory:
$ cd darlingNow, let’s make a build directory for the build process:
$ mkdir build && cd buildInside the build directory, we configure the build with CMake:
$ cmake ..Now, let’s build Darling with make:
$ makeImportantly, the actual build process can take up to an hour, depending on the resources of our machine.
Finally, we’ll install Darling, build the Darling kernel module, and install darling_mach:
$ sudo make install
$ make lkm
$ sudo make lkm_install
At this point, we’ve set up Darling on our Linux system. Next, we’ll proceed to install and run the Xcode command-line tool.
To run a program on Linux with Darling, first, we’ll access the Darling subsystem and launch a macOS shell environment running the darling shell:
$ darling shellNow, we can run macOS system commands. Of course, additional macOS software installation happens within the darling shell. Hence, running commands doesn’t work without connecting to Darling.
Finally, we can download and install Xcode command-line tools from Apple:
$ xcode-select --installOf course, the Xcode package and its command-line tools are subject to the Apple End User Licensing Agreement (EULA).
As usual, one way to run macOS apps on Linux is via a virtual machine (VM). With virtualization software like VirtualBox, we can set up a macOS VM.
Similarly, QEMU is a virtual machine emulator and virtualizer. Using QEMU alongside KVM natively applies the virtual machine on the Linux kernel.
To demonstrate, we’ll use the macOS-Simple-KVM project to set up a simple macOS VM in QEMU/KVM setup. For this setup, the Linux system must have:
Notably, we can install these requirements on Debian-based systems using the package installer:
$ sudo apt-get install qemu-system qemu-utils python3 python3-pip
Reading package lists... Done
Building dependency tree
Reading state information... Done
...
However, we can follow the guide on the project documentation to install these requirements on other Linux distributions.
Next, let’s set up the Linux KVM to run macOS. First, we’ll download the project archive to our home directory (~):
$ cd ~
$ wget https://github.com/foxlet/macOS-Simple-KVM/archive/refs/heads/master.zip
Then, using the unzip command-line utility on the terminal, let’s extract the contents of the file:
$ unzip master.zipWe now have the ~/macOS-Simple-KVM-master directory.
First, to simplify the management of the macOS VM, let’s create a folder for the virtual machine:
$ mkdir ~/Linux_KVMNext, let’s move our project directory to the new directory:
$ mv ~/macOS-Simple-KVM-master/ ~/Linux_KVM/macOS-Simple-KVM-masterFurther, we’ll proceed to download installation media for macOS in our project directory. First, let’s change to the macOS-Simple-KVM-master directory:
$ cd ~/Linux_KVM/macOS-Simple-KVM-masterNow, let’s download installation media for macOS:
$ ./jumpstart.sh
Requirement already satisfied: requests /usr/lib/python3/dist-packages (from -r requirements .txt (line 1)) (2.23.0)
...
Archive successfully decompressed as ~/Linux_KVM/macOS-Simple-KVM-master/BaseSystem.img
By default, the macOS-Simple-KVM-master/jumpstart.sh script downloads the macOS Catalina installation image.
Following the download of the base system image, we can proceed to create a virtual hard disk. This disk is the location where we’ll install the macOS.
Now, we’ll use the qemu-img utility to create the virtual hard disk:
$ qemu-img create -f qcow2 MyDisk.qcow2 64G
formatting 'MyDisk.qcow2', fmt=qcow2 size=673847625632 cluster_size=65536 lazy_refcounts=off refcount bits=16
Here, qemu-img creates a virtual disk using the create subcommand and the -f flag. Also, the virtual disk has the name MyDisk.qcow2 in the qcow2 format with an estimated size of 64GB.
Next, let’s append the command to use the disk to the ~/macOS-Simple-KVM-master/basic.sh script:
    -drive id=SystemDisk,if=none,file=MyDisk.qcow2 \
    -device ide-hd,bus=sata.4,drive=SystemDisk \
At this point, we have a VM ready for macOS installation.
Now, to install the macOS, let’s run the basic.sh script file in the terminal:
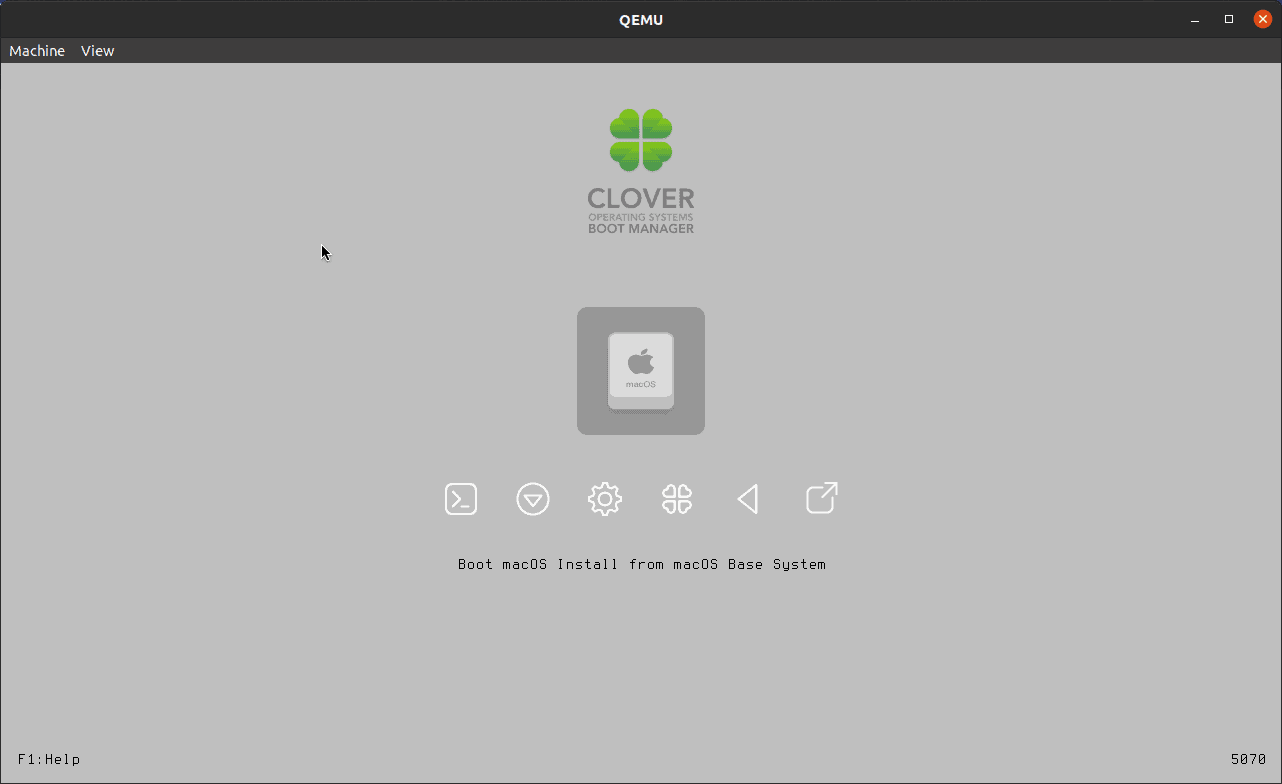
$ ./basic.shIn essence, this command will display the initial installation screen of the macOS operating system. Note the difference in resolution between the host and guest. Then, we’ll press Enter and continue with the installation process:
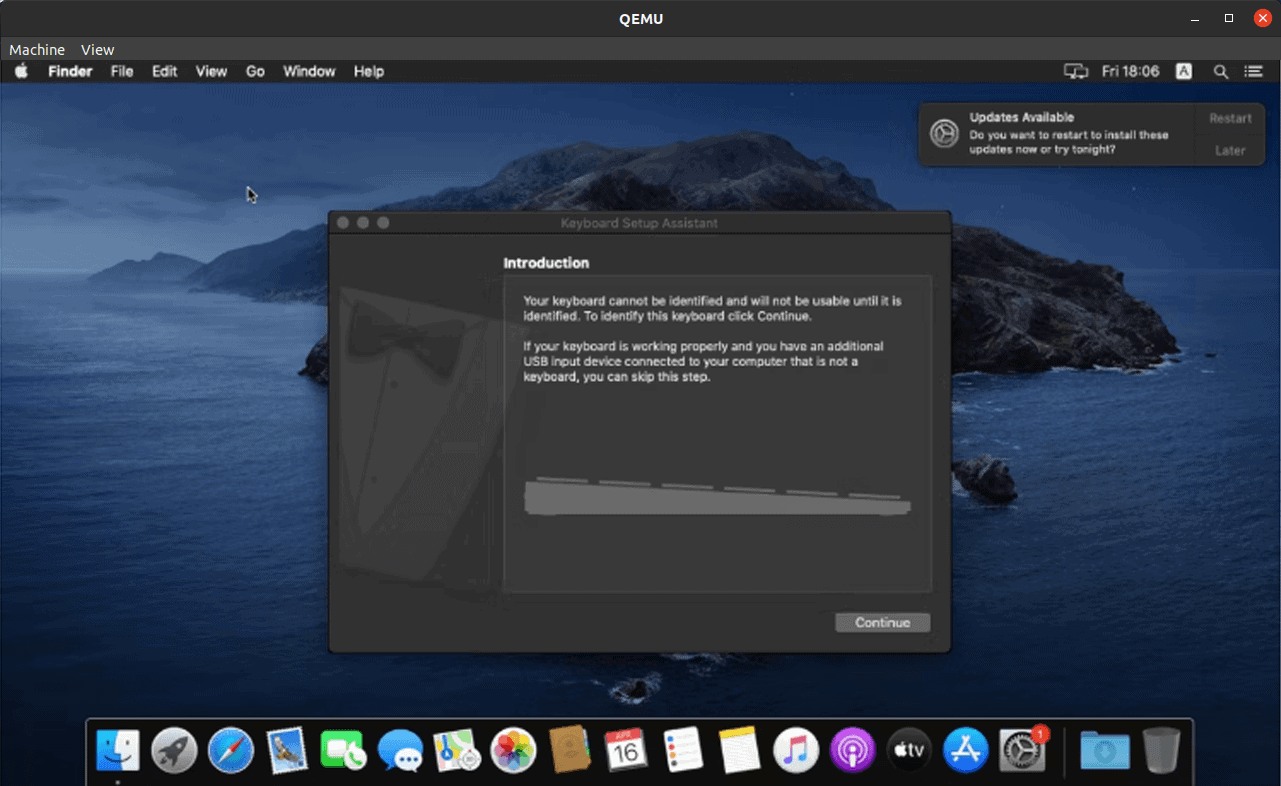
Upon completing the installation, we should have a screen like the one below running on QEMU:
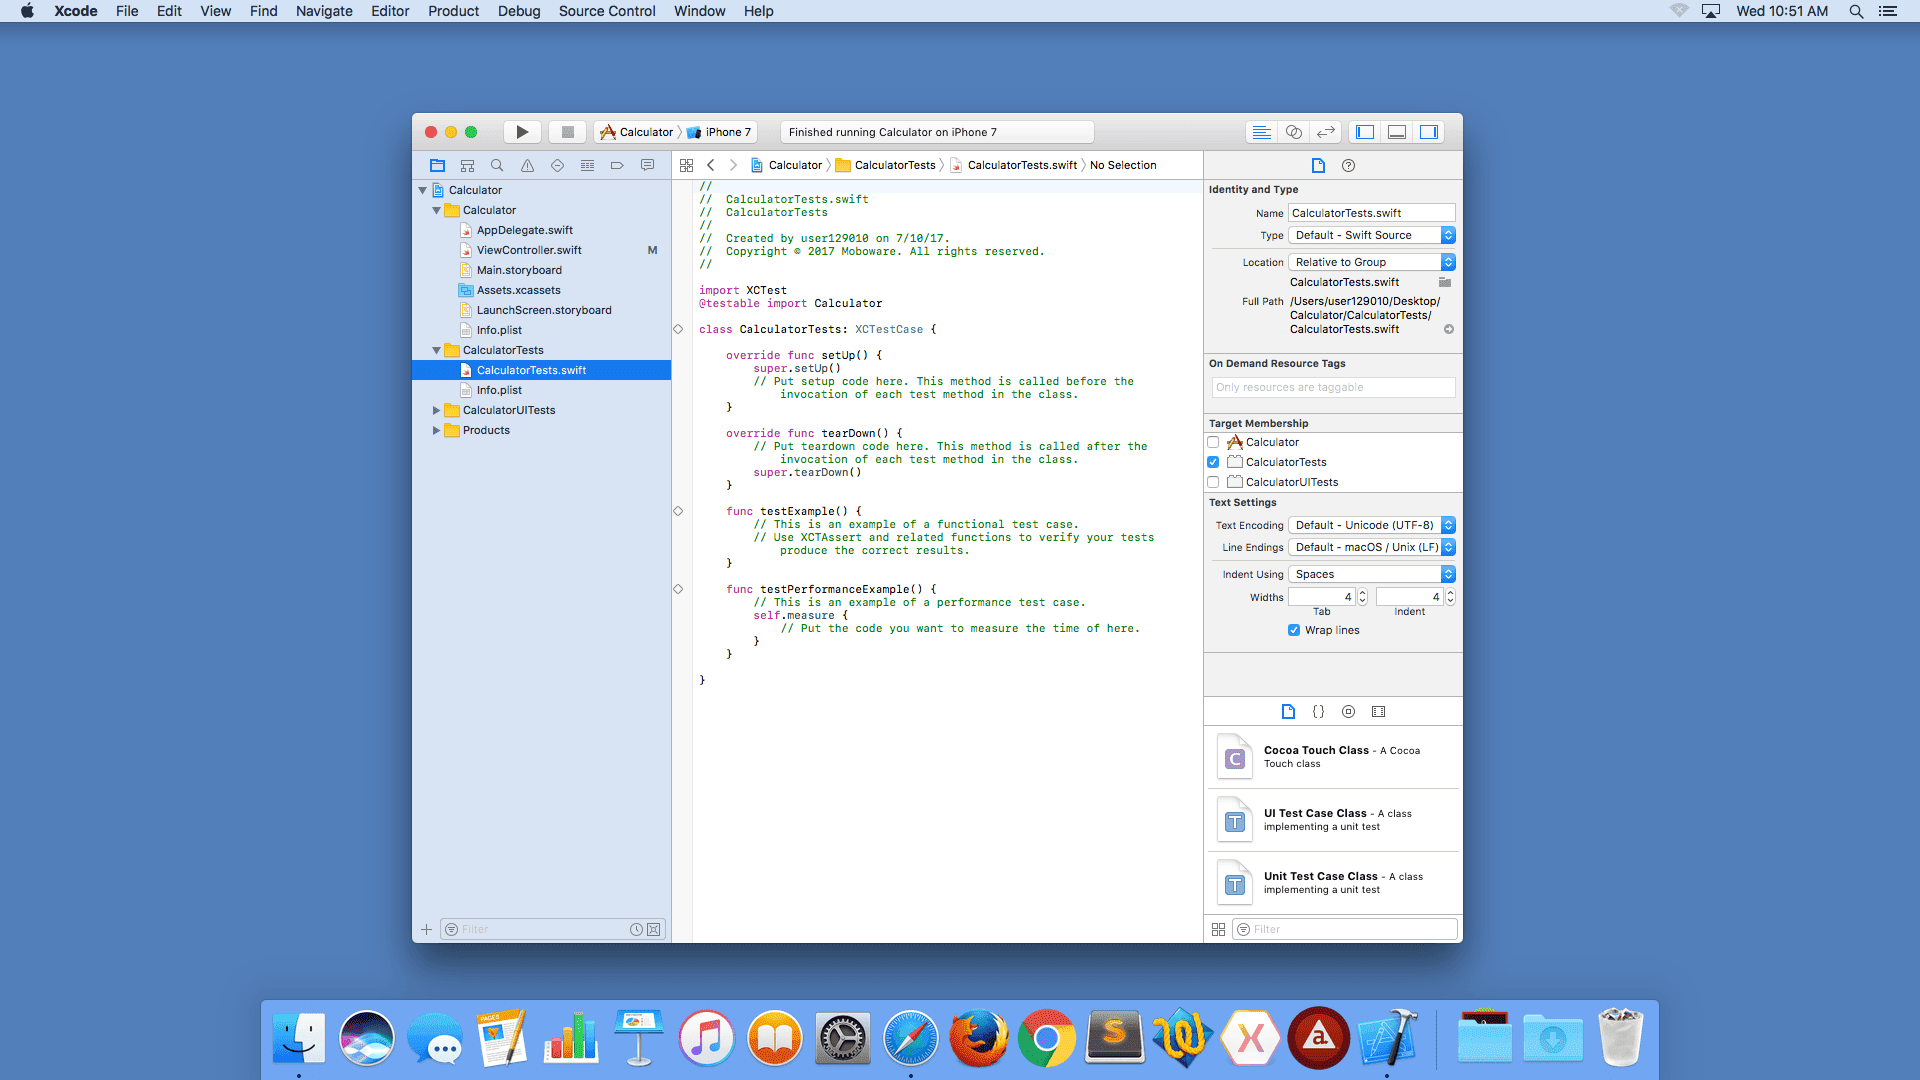
Now, we can proceed to download and install Xcode on the virtual machine.
In general, to download Xcode on our virtual machine, there are a few steps to complete:
Finally, we can install Xcode from the command line:
$ xcode-select --installLastly, we can proceed to open Xcode from the Applications folder. However, Xcode may prompt us to install additional required components:
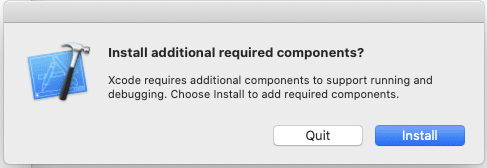
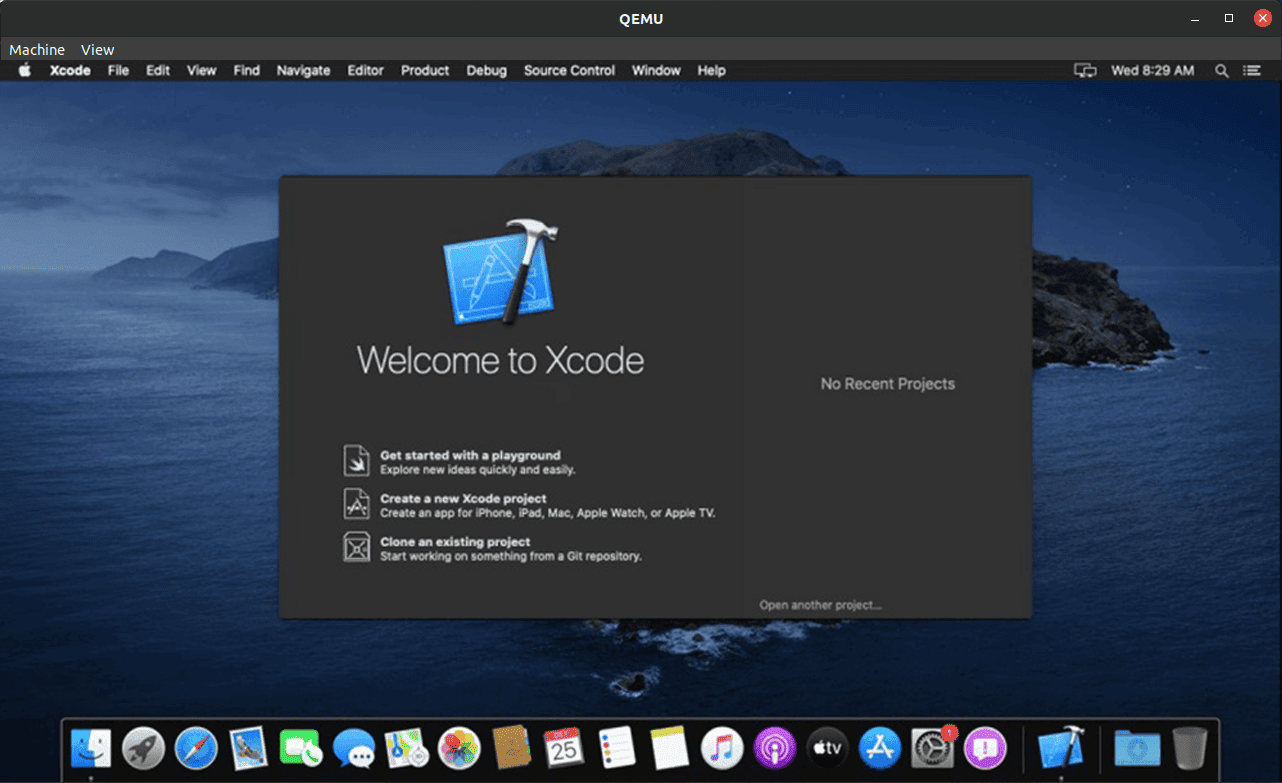
We’ll click install. This installation can take a few minutes. Finally, we can proceed to Xcode:
Importantly, this method of running macOS is subject to Apple’s legal terms and conditions.
Alternatively, the easiest way to use Xcode on Linux is via the cloud. Cloud service providers like MacinCloud provide “Mac-in-the-Cloud” solutions via the Internet. Notably, a user can access on-demand Mac servers.
Similarly, MacStadium is another cloud option. In addition, they provide desktop and application development services.
In this article, we saw different ways to run Xcode on Linux. Also, we briefly discussed “Mac-in-the-Cloud” services.