

Yes, we're now running our only Summer Sale. All Courses are 30% off until 20th July, 2026:
Learn through the super-clean Baeldung Pro experience:
>> Membership and Baeldung Pro.
No ads, dark-mode and 6 months free of IntelliJ Idea Ultimate to start with.
1. Overview
In this article, we’ll discuss the different GUI utilities to trim audio and video files in Linux. We’ll explore the strengths of each trimming tool and highlight the best use cases for them.
2. Video Trimmer
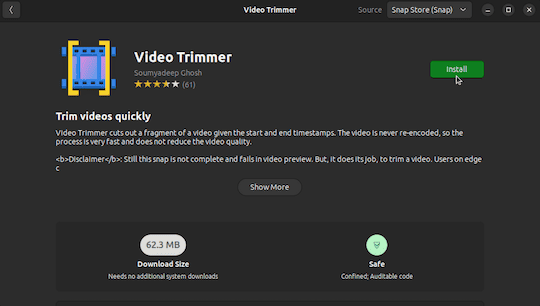
Video Trimmer is a GNOME-based application to quickly trim videos without re-encoding. By default, it’s not installed in GNOME. So we’ll need to download it.
2.1. Installation
Usually, we install it from a software store like Ubuntu Software Centre, where we can install it as a Snap:
Alternatively, we can also use the snap tool:
$ sudo snap install video-trimmerSimilarly, we can also install it as Flatpak. However, we need to add the Flathub repository first:
$ flatpak remote-add --if-not-exists flathub https://flathub.org/repo/flathub.flatpakrepoNow, we install it from Flathub:
$ flatpak install org.gnome.gitlab.YaLTeR.VideoTrimmer2.2. Trimming a Video
Once installed, it should be available in the applications menu. Upon launching, we’ll be presented with a simple user interface:
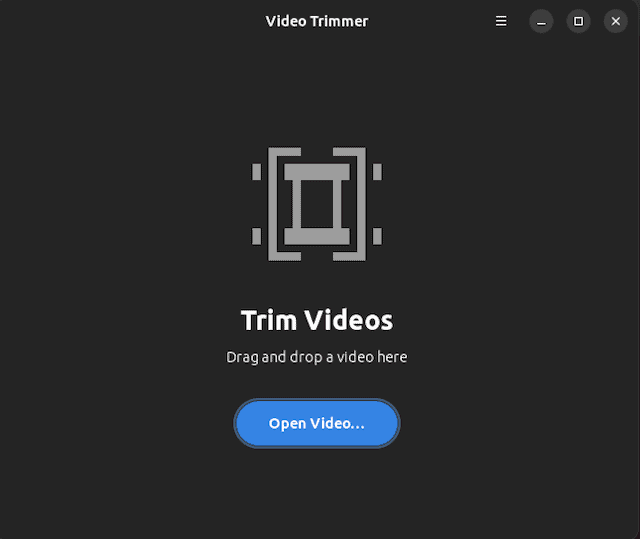
Let’s open a video file by clicking the “Open Video” button or pressing Ctrl+O. Then, we can visually select the start and end of the clip by arranging the markers:

Alternatively, we can also put the times ourselves into the text boxes.
Once set, we can save the clip by pressing the “Trim” button, which displays the save dialog to save the clip, as well as toggle a couple of additional options for the file.
3. LosslessCut
LosslessCut is a cross-platform tool for cutting media files. It’s very simple to use yet very effective at performing basic operations without any quality loss. Unlike Video Trimmer, LosslessCut is quite comprehensive.
However, it’s built using Electron, which often has a reputation for being heavy on resources. So, on older computers, we might want to use something else.
3.1. Installation
The easy way to install LosslessCut is from Snap Store or Flathub:
# Snap Store
$ sudo snap install losslesscut

# Flathub
$ flatpak install no.mifi.losslesscut
After installation, we can launch it from the applications menu.
3.2. Trimming Media Files
Once we launch the program, we go to File → Open to open a local audio or a video file. LosslessCut displays a preview of the media file along with the playback and trimming controls.
In the seek bar, we set the position for the start and end of the clip:

Afterward, we select the “Export” button to save the clip with our configured output options.
4. Plumber
Plumber is a video manipulation tool that lets us trim videos as well as convert them to GIFs. In addition to manipulating local files, it can trim online videos from YouTube and supported websites. It does so without downloading the entire video, thereby saving us a lot of bandwidth.
4.1. Installation
Officially, it’s only available in the Snap Store:
$ sudo snap install plumberIf Snap isn’t an option, then we can build it from source.
4.2. Initial Config
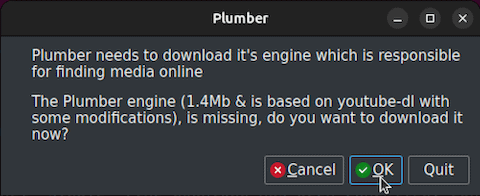
On the first launch, Plumber prompts us to download the Plumber engine, which enables it to trim online videos. The Plumber engine depends on the famous youtube-dl tool. Let’s go ahead and click “OK“:
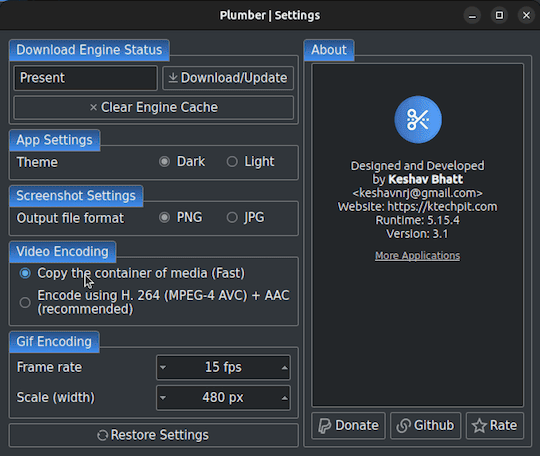
Afterward, it displays the output and encoding settings. In the panel, we’ll select “Copy the container of media (Fast)” to quickly trim local files. However, online videos will be re-encoded either way. Apart from this, we can also set the GIF encoding options:
4.3. Trimming and Exporting
Once we’re done setting up, we can paste a video link in the URL input. Then, we press the “Start” button to let Plumber probe the video on the Internet. It downloads the necessary metadata for the video:
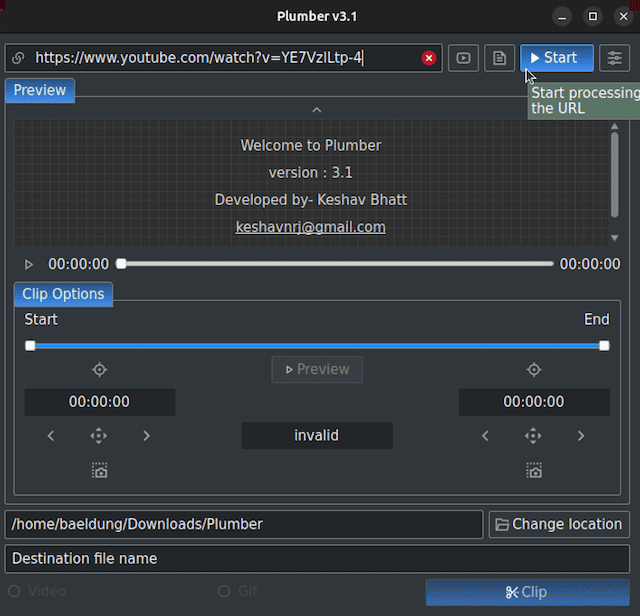
Afterward, we can adjust the clip slider by dragging the start and end markers. Then, we can optionally select the destination. Next, we select the output type, which we set to “Gif“:
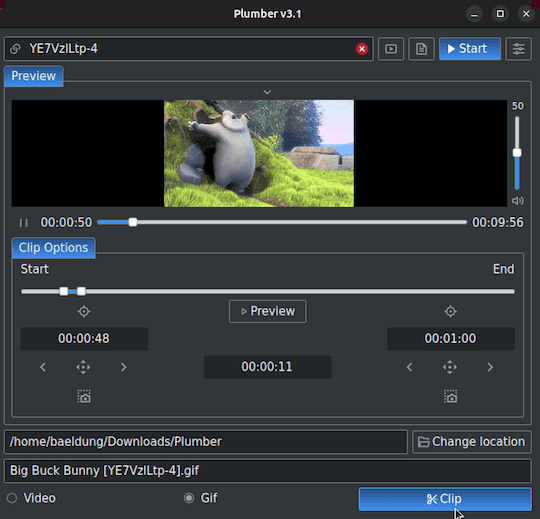
Once we’re set, we press “Clip” to trim and then export the clip as a GIF.
5. Pitivi
We looked at very basic tools that were solely designed for trimming video and audio files. Now, we’ll explore a somewhat advanced tool that gives us more control.
Pitivi provides an intuitive interface to edit video and audio files. Not only can it trim audio and video files, but it can also join multiple clips, apply effects and filters, crop clips, and more.
5.1. Installation
Pitivi is available in most official package repositories under its canonical name pitivi:
$ sudo apt install -y pitiviAlternatively, we can also install it from Flathub:
$ flatpak install flathub org.pitivi.Pitivi5.2. Using Pitivi
We can launch Pitivi from the application menu. It presents us with a Welcome screen where we either create or open an existing project:
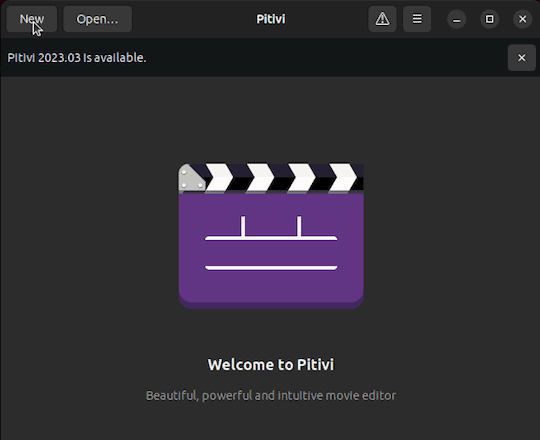
We’ll go with “New” to create a new project. Pitivi opens the editor window, where we’ll import the required media files that we need to trim:
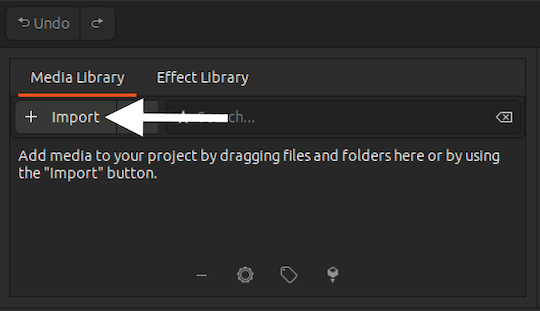
Once we press “Import“, we’ll select the video using the file picker. The video will be placed in the “Media Library“, from which we’ll drag the video to the timeline.
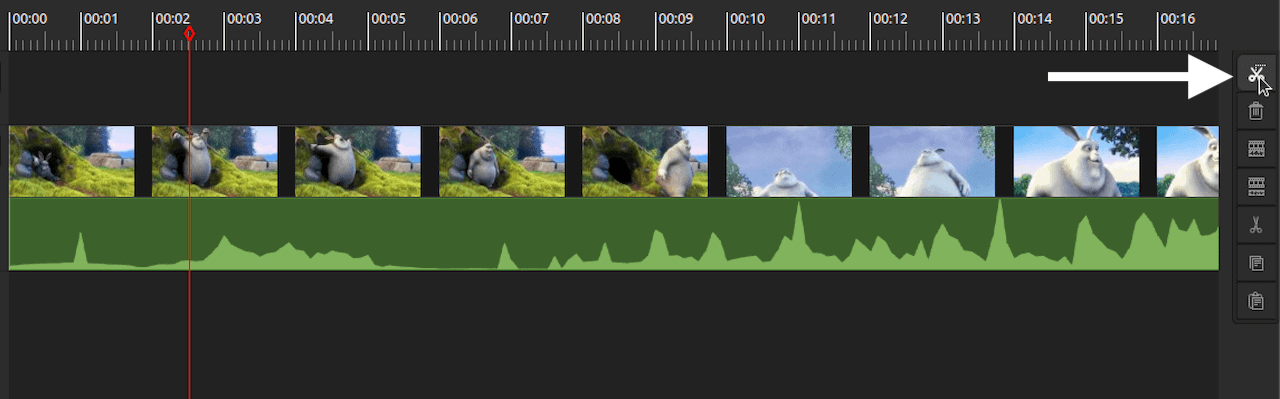
In the timeline, we seek the start position by clicking the right mouse button and, then clicking the cut button:
Similarly, we seek to the end position of the clip and click cut:
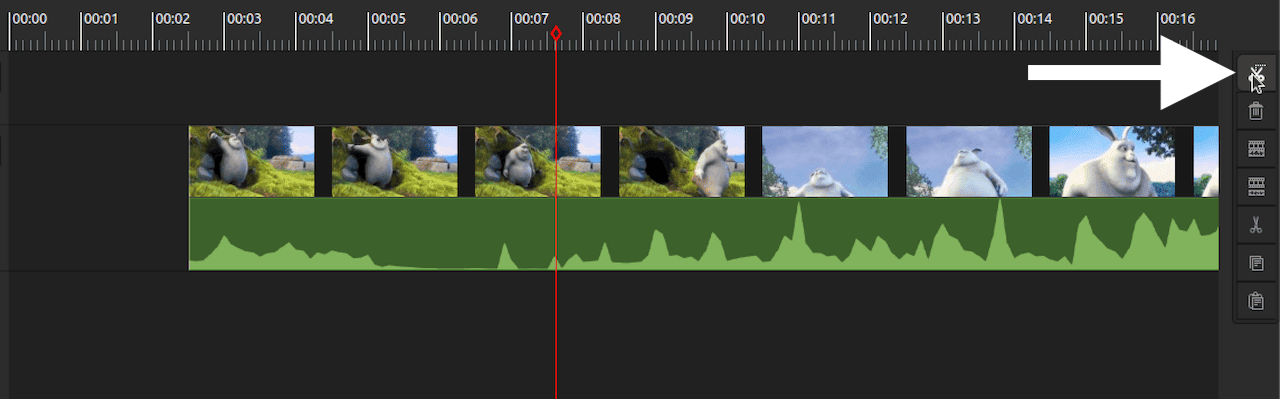
Next, let’s remove all the other clips by selecting them and pressing the Delete button on the keyboard. This step is important because we don’t want any other bits of the video rendered in the final clip:

We save this clip by rendering the project. So, we simply click the “Render” button on the title bar:

Pitivi displays a render dialog where we configure the encoding options:
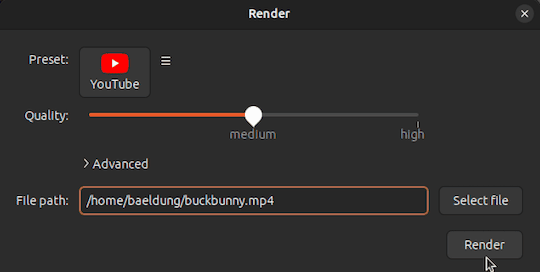
Once everything is set, we press the “Render” button to begin the render process.
6. Conclusion
In this article, we saw how to trim video and audio files using the GUI tools available for Linux distributions. We also learned that each of these tools provides different user interfaces, but the pattern for trimming media files is quite similar.
Apart from that, we also explored the different uses for each tool.