

Learn through the super-clean Baeldung Pro experience:
>> Membership and Baeldung Pro.
No ads, dark-mode and 6 months free of IntelliJ Idea Ultimate to start with.
Learn through the super-clean Baeldung Pro experience:
>> Membership and Baeldung Pro.
No ads, dark-mode and 6 months free of IntelliJ Idea Ultimate to start with.
tmux is a terminal multiplexer command-line tool. It enables us to access multiple terminal sessions in a single window. One useful feature tmux offers is the ability to split the terminal window into multiple panes. These different panes can then run separate terminal sessions, greatly improving our productivity.
Within a multi-pane window, we might sometimes want to minimize some panes temporarily and bring them back later. In this tutorial, we’ll look at three different methods for temporarily minimizing a tmux pane from the current window.
Let’s consider the case where we have three panes on our tmux window:
--------------------------
|             |      2   |
|             |          |
|        1    |----------|
|             |      3   |
|             |          |
--------------------------
What we want to do first is to minimize pane 3 temporarily, so that we can have pane 1 and 2 side by side:
--------------------------
|             |          |
|             |          |
|        1    |       2  |
|             |          |
|             |          |
--------------------------
Then, at a later time, we want to revert the pane 3 so that we can get back to the initial state.
Although tmux doesn’t offer straightforward minimize and maximize functions for panes, there are several approaches we can use to hide the pane temporarily.
The first method involves detaching an existing pane from the current window into its own window. Then, later on, when we want to revert, we’ll join the pane back to the original window. To accomplish this, we’ll use the break-pane command to detach and the join-pane command to reattach.
For demonstration purposes, we’ll use this method to see how we can temporarily detach pane 3 with the break-pane command. Then, we’ll bring it back later into its original place on the window using the join-pane command.
To detach pane 3, we’ll need to select pane 3 as our active pane on the window. We can activate a pane by issuing the prefix key, which by default is Ctrl followed by the B key. Then, hitting the arrow key enables us to activate the pane in that direction.
After we’ve selected pane 3, we can detach it into a separate window using the break-pane command. First, we enter Command mode using the prefix key followed by the colon key. Once the console bar shows a colon prefix, we can enter the command break-pane -dP:
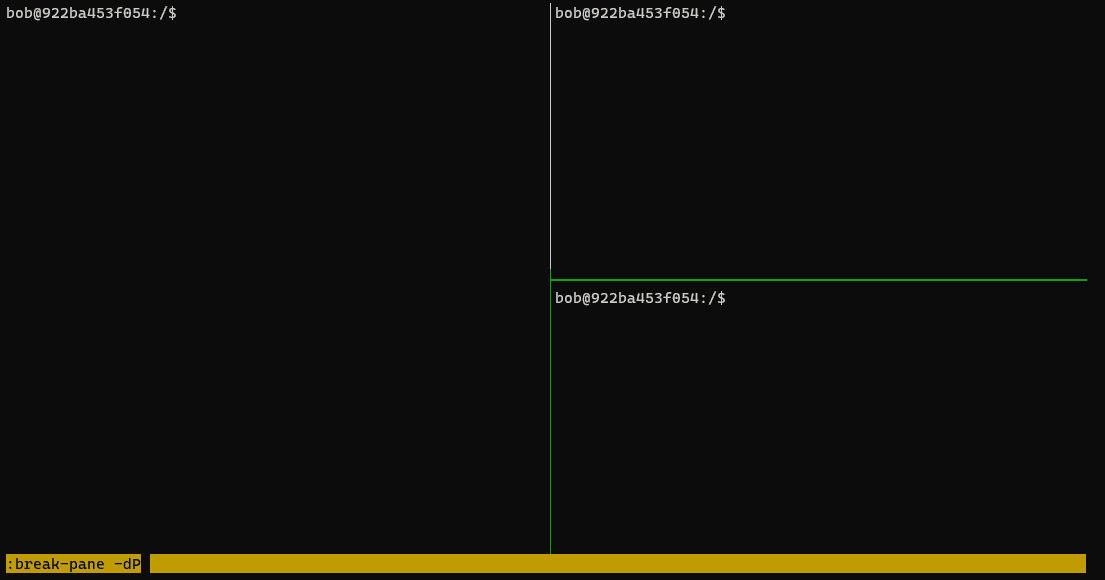
The -d option sends the pane to the background, effectively hiding it from the main window. Additionally, the -P option prints a triplet value that tells us where the detached pane is, so that we can join it back later. The program displays the information in the form of session:window.pane at the top right of the leftover pane.
In our example, the program shows that pane 3 is now pane 0 of window 1 in a session with the name break-join:
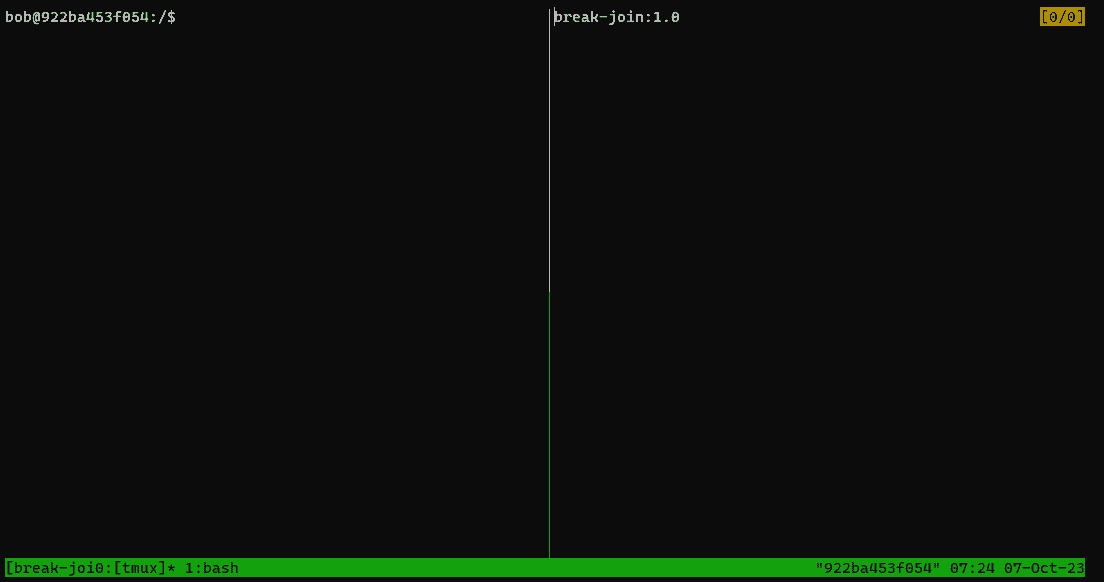
After we’ve taken note of the information, we can press the q key to continue working on our window.
When it’s time to join back the pane, we can use the join-pane command on the tmux window to join back our pane 3.
To do that, we’ll first select pane 2 to activate the pane. Then, we enter Command mode again. Lastly, we input join-pane followed by the options -vs and the location of our pane as the argument.
In our example, we’ll enter the join-pane command with the argument break-join:1.0 as the location of our pane:
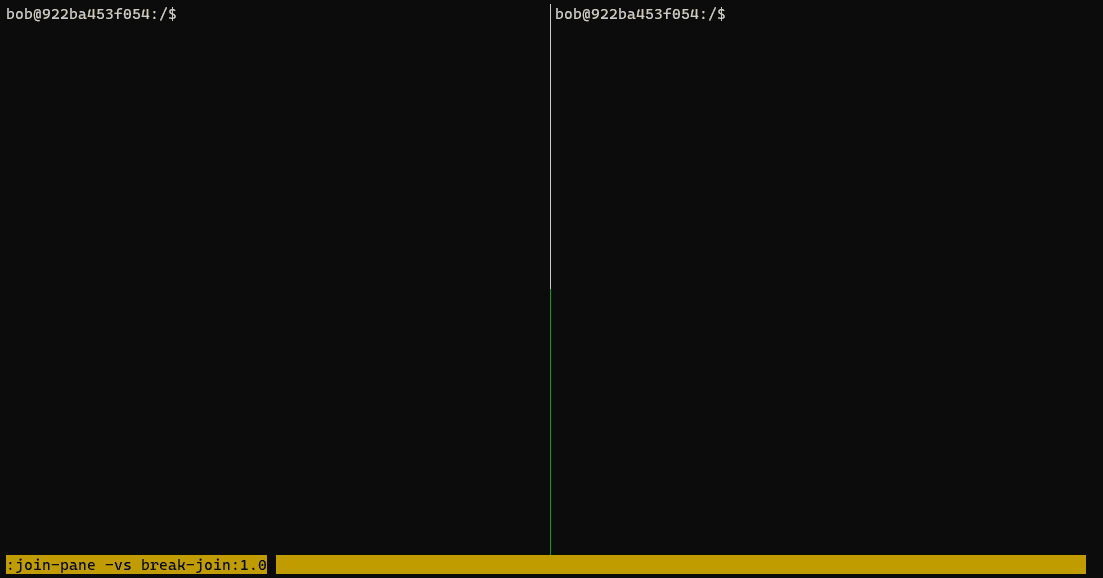
The -v option tells the tmux to split the current pane vertically. If the original pane is horizontally split, we’ll use the -h option instead. In the case where we get the splitting wrong, we can detach the pane again and rejoin it back using the appropriate split.
Then, the -s option allows us to specify the source pane we want to join to the current pane.
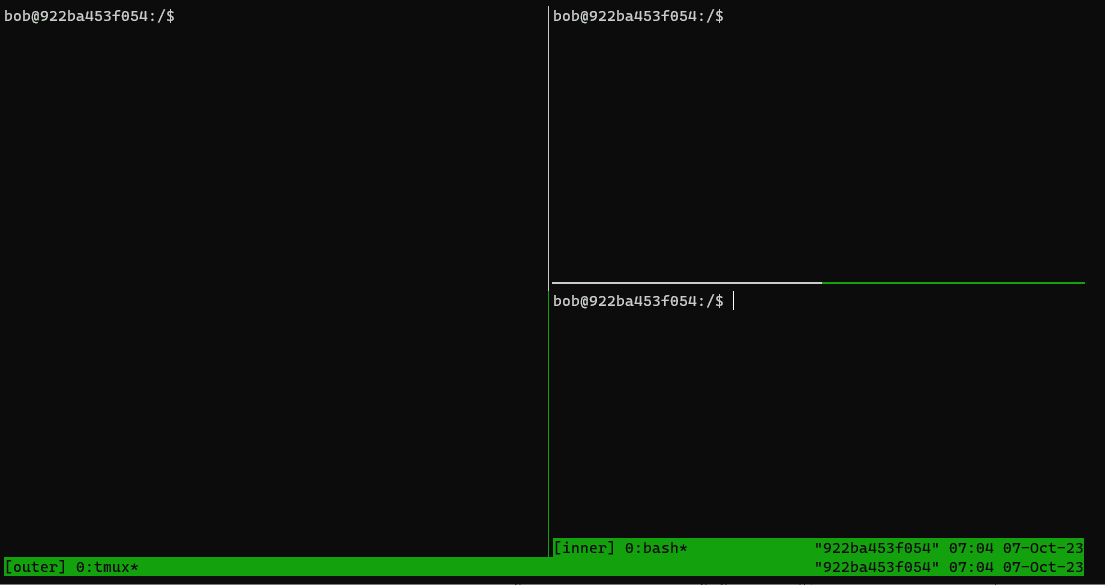
Instead of detaching and reattaching to hide panes, we can utilize the zoom pane function in the tmux command to expand pane 2, effectively hiding pane 3. To prevent the zoom from overshadowing pane 1, we’ll need to run pane 2 and pane 3 as a separate tmux session nested within the tmux session of pane 1.
Let’s overview what the session structure would look like after we’ve set it up:
(0)  - inner: 1 windows (attached)
(1)  └─> - 0: sh* (2 panes)
(2)      ├─> 0: sh "922ba453f054"
(3)      └─> 1: sh "922ba453f054"
(4)  - outer: 1 windows (attached)
(5)  └─> - 0: [tmux]*Z (2 panes)
(6)      ├─> 0: sh "922ba453f054"
(7)      └─> 1: tmux "922ba453f054"
The pane index 1 of the outer session houses the inner session, which in turn consists of the two panes on the right.
This method involves first starting a tmux session and creating two panes side by side. Then, on the right side pane, we start another tmux session:
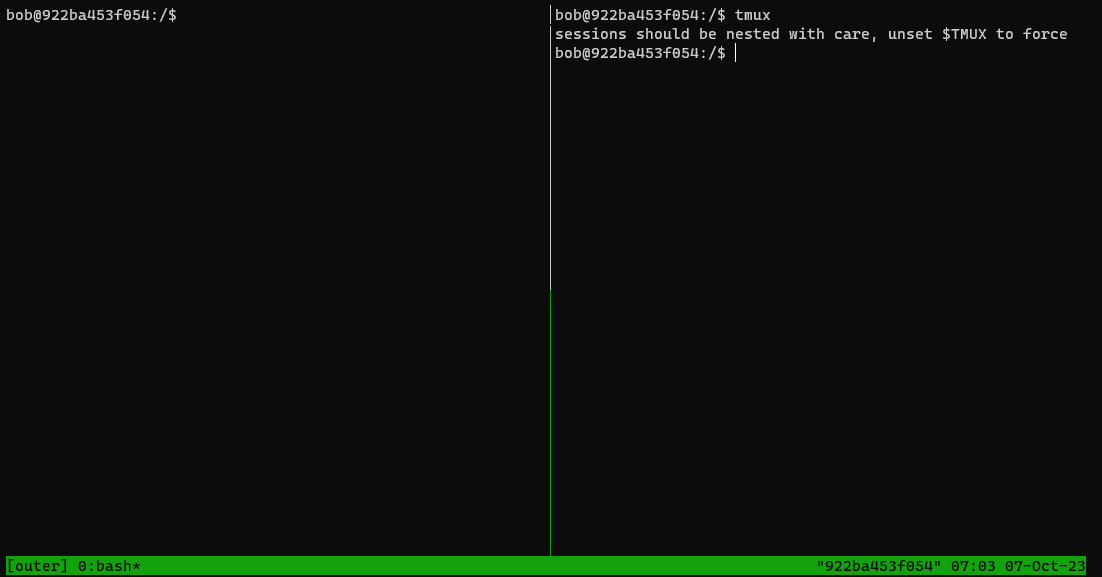
When we attempt to start another tmux session inside an existing tmux session, we might see a warning message:
$ tmux
sessions should be nested with care, unset $TMUX to force
To force create a nested session, we’ll just need to unset the TMUX environment variable and rerun the tmux command:
$ unset TMUXNext, we can split the nested tmux session into a vertical layout using the prefix key with the colon key, resulting in the three-pane layout we have:
Notably, to send a command to the nested session, we’ll need to hit the prefix key two times. Hitting the prefix key just one time creates the additional pane in the outer tmux session instead.
With the current setup, we can hide pane 3 by issuing the zoom command on pane 2. The default key binding for zooming on a pane is the prefix key followed by z:
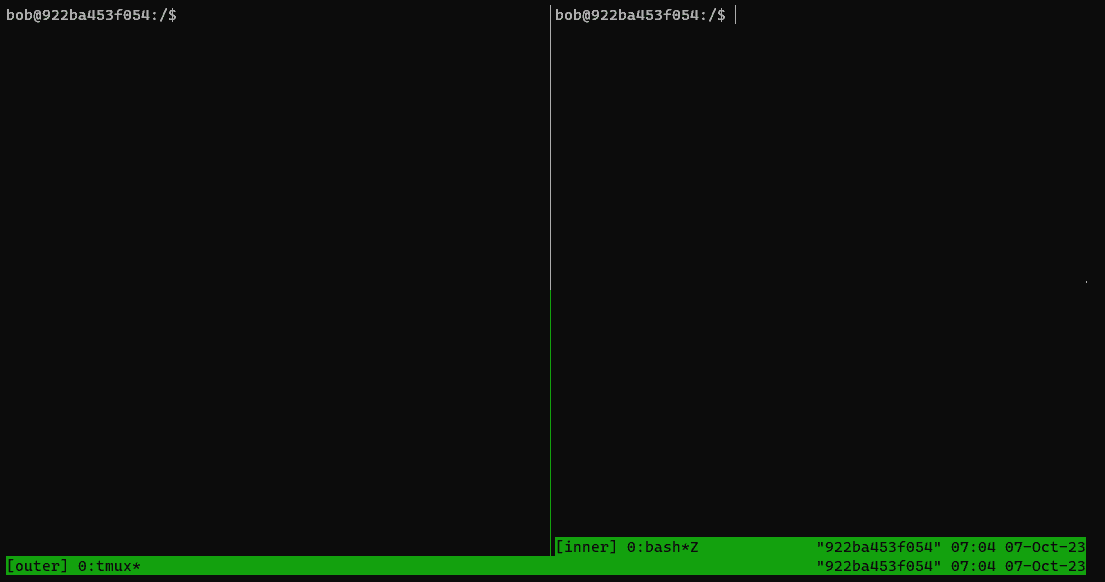
Notably, the inner tmux session is annotated with a *Z to indicate that it’s currently in a zoomed-in mode.
To bring back pane 3, we’ll just need to undo the zoom on pane 2 using the same key combination: prefix key followed by the Z key.
The important bit for this method is that panes 2 and 3 are in a separate tmux session different from that of pane 1. If we create the layout without the nested session, issuing the zoom command on pane 2 causes it to fill up the entire window, effectively hiding pane 1 as well.
Despite being crude and not perfect, the final approach is usually the simplest among the three approaches. The idea is that to hide a pane, we’ll resize the pane to the smallest possible size.
This approach doesn’t hide the pane entirely like the first and second methods, but it can be useful in scenarios where we don’t need a perfect hiding of the pane.
To resize the pane, we’ll enter into the command mode and enter the resize-pane command. Additionally, we’ll pass the -D option along with an integer value to adjust the pane size downward:
resize-pane -D 50After we hit Return to submit the command, the tmux adjusts the size downward by 50 units. Depending on the size of the tmux pane, we might need a larger value.
tmux limits the adjustment such that the height of the pane is at least one line tall:

When we want to revert, we can resize the pane again using the same command.
In this article, we looked at the problem of temporarily minimizing a pane so that we could focus on the other panes. Additionally, we saw how to bring back the pane later to continue working in it.
To solve the problem, we first demonstrated the break-pane and join-pane commands that the tmux command offers.
Besides that, we also looked at the nested tmux session approach. The idea is to create pane 2 and 3 in a nested session relative to the pane 1.
Finally, we learned that we can use the resize-pane command to minimize the pane to one line of height. Despite its flaws, this approach has the benefit of being the simplest among the three methods.