

Learn through the super-clean Baeldung Pro experience:
>> Membership and Baeldung Pro.
No ads, dark-mode and 6 months free of IntelliJ Idea Ultimate to start with.
Learn through the super-clean Baeldung Pro experience:
>> Membership and Baeldung Pro.
No ads, dark-mode and 6 months free of IntelliJ Idea Ultimate to start with.
Web-based SSH clients offer a convenient and platform-independent solution to access remote Linux systems from any machine with a Web browser. This way, a web-based SSH client eliminates the need for installing additional software on the client machine. Web-based SSH clients have several applications in Linux system administration. For one thing, they’re useful when installing a traditional SSH client isn’t possible or convenient. For example, Web-based clients are handy while working on a public computer or accessing a system from a mobile device.
In this tutorial, we’ll see how to connect to an SSH server via a Web browser. For this purpose, we’ve used a Ubuntu machine running the OpenSSH server.
WebSSH is a Python tool for connecting to an SSH server over a Web browser. The look and feel of WebSSH is similar to SSHEasy.
Let’s set up WebSSH to work on our Ubuntu system. For this, we need Python 3 and its package manager, pip.
Let’s install pip using apt:
$ sudo apt install python3-pippip is responsible for installing additional packages, in our case, webssh:
$ sudo pip3 install webssh
Collecting webssh
Downloading webssh-1.6.2.tar.gz (182 kB)
━━━━━━━━━━━━━━━━━━━━━━━━━━━━━━━━━━━━━━━
Next, we use the which command to see where WebSSH is located:
$ which wssh
/usr/local/bin/wssh
Finally, we run the wssh command to start the WebSSH service:
$ wssh
[I 240403 07:13:30 settings:125] WarningPolicy
[I 240403 07:13:30 main:38] Listening on :8888 (http)
...
As we can see from the output above, WebSSH is listening on port 8888 on the local machine.
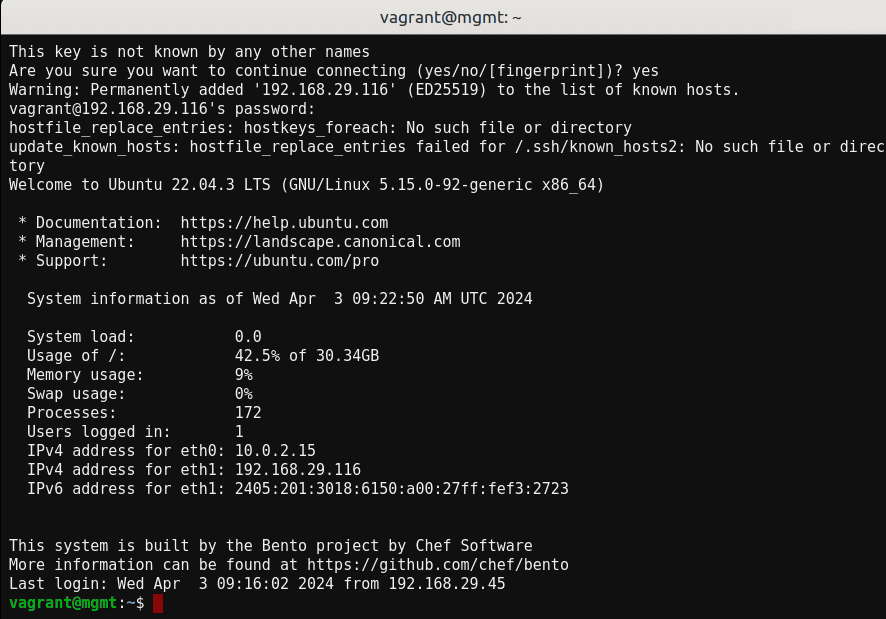
Let’s open a Web browser and connect to the server by its IP and port 8888:
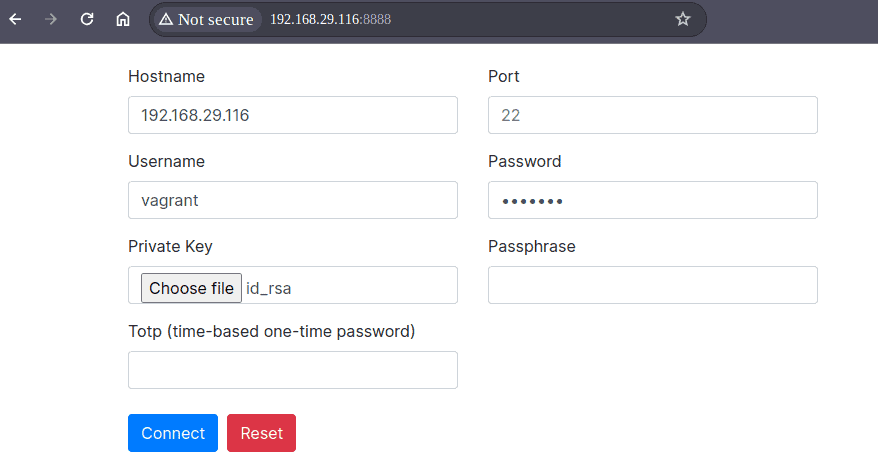
In the above window, we enter the respective SSH credentials.
Since we’re connecting over a local machine, we see the Not secure alert in the browser window. However, we can make it secure with LetsEncrypt if needed.
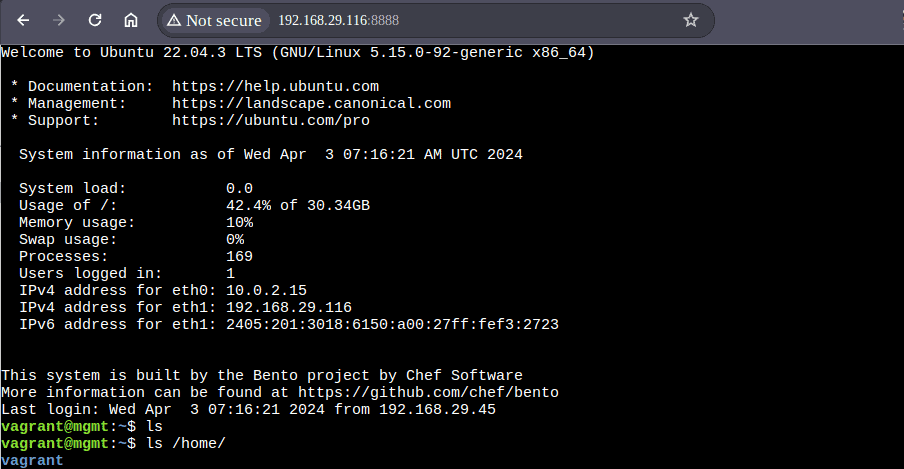
Finally, we can see the terminal prompt:
WebSSH has a long list of features, including two-factor authentication and DSA, RSA, ECDSA, and Ed25519 key authentication.
Secure Shell is a terminal emulator and SSH (SFTP) client. For convenience, it’s created as a Google Chrome extension built by Google.
We can use Secure Shell to connect to devices on the local network or Internet.
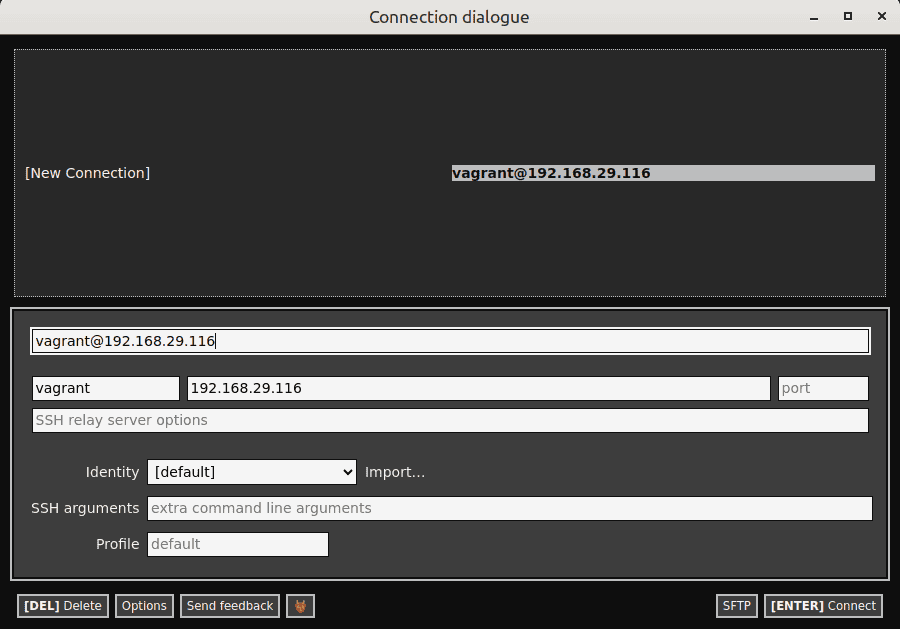
After installing the extension, we launch it by clicking it in the Extensions menu.
Further, we connect with the username along with the hostname or IP of the target server:
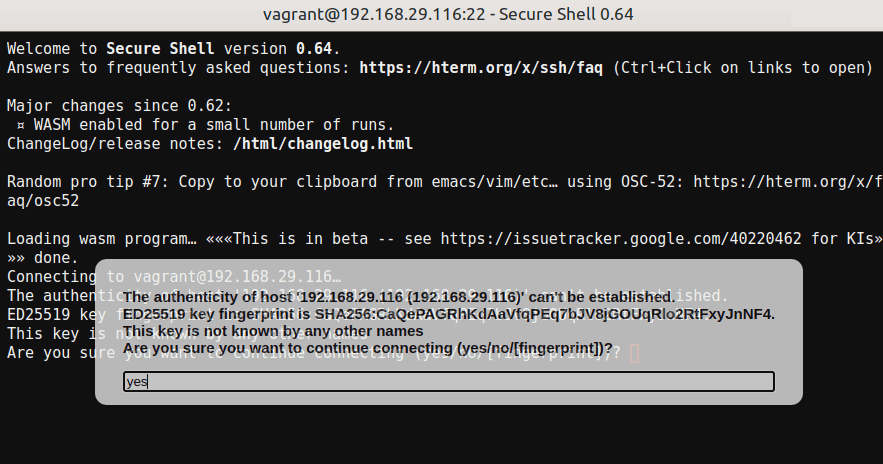
Next, we confirm the server’s fingerprint followed by entering the server’s password:
Finally, we see the default terminal prompt of the target server:
Secure Shell has lots of options to customize its appearance.
Shellinabox is another web-based SSH terminal. Specifically, it provides an experience similar to a native shell interface.
Let’s install Shellinabox on the system using apt:
$ sudo apt install shellinabox
Reading package lists... Done
Building dependency tree... Done
...
At this point, we can configure Shellinabox by editing the /etc/default/shellinabox file:
$ cat /etc/default/shellinabox
# Should shellinaboxd start automatically
SHELLINABOX_DAEMON_START=1
# TCP port that shellinboxd's webserver listens on
SHELLINABOX_PORT=4200
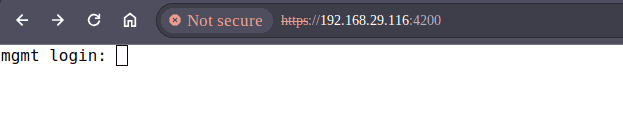
...Here, we can set the desired options, such as port number. By default, Shellinabox listens on port 4200.
Lastly, we restart the Shellinabox service:
$ sudo systemctl restart shellinaboxNow, let’s access the Shellinabox client by opening a Web browser and navigating to https://server_ip:4200:
Then, we can proceed to log in with our user credentials:

Markedly, we can use more interactive features in Shellinabox. For example, we can customize the tool’s look and feel by right-clicking inside the browser window.
SSHEasy is a web-based SSH client with a user-friendly interface. It’s developed on top of Golang’s SSH and SFTP library. Moreover, SSHEasy doesn’t store credentials or any other information.
To use the SSHEasy client, we first open the SSHEasy webpage:
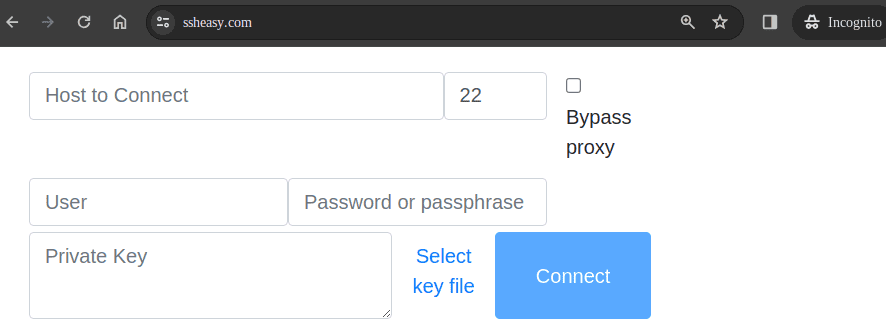
Here, we input some required information:
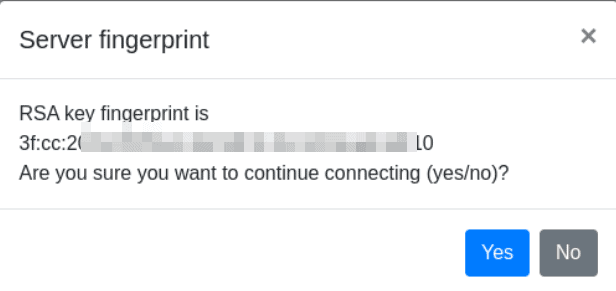
Finally, we press the Connect button. Then, we verify and accept the target machine’s fingerprint:
After a successful login, we should see the terminal for the remote machine:
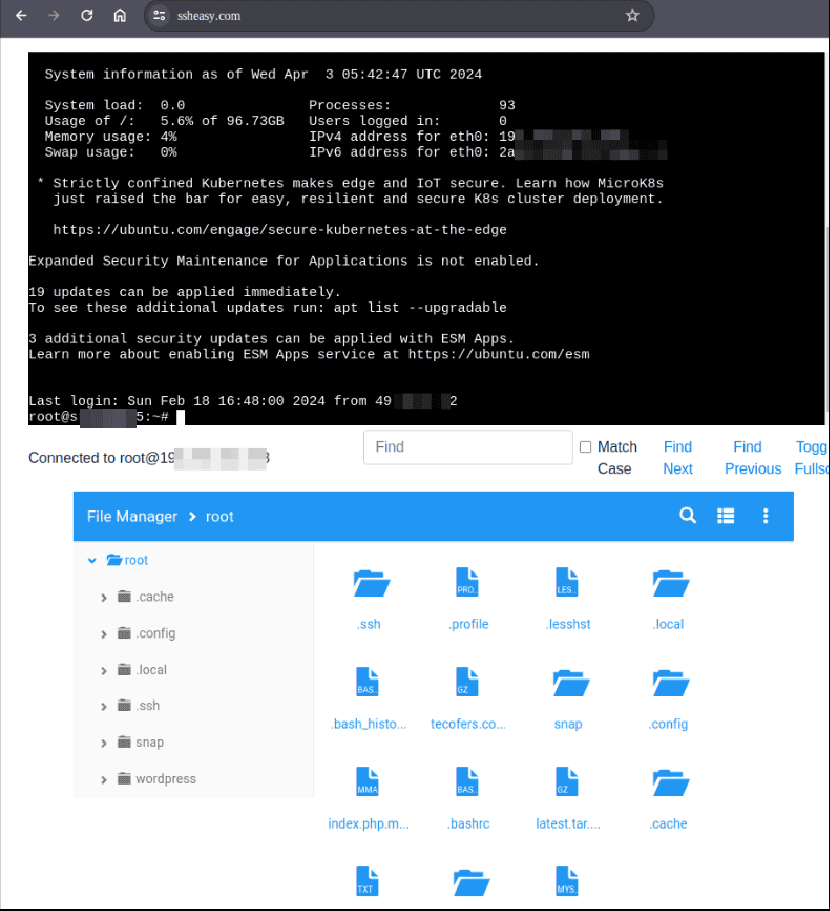
Additionally, SSHEasy features a web-based file manager. We can use it to navigate to and manage different files and directories.
The source code for SSHEasy can be seen on GitHub.
In this article, we covered several web-based SSH clients to access an SSH server.
First, we used WebSSH, which is a Python tool. Next, we used Chrome’s Secure Shell extension. Further, we learned how to use the Shellinabox tool. Finally, we used the SSHEasy tool.