

Learn through the super-clean Baeldung Pro experience:
>> Membership and Baeldung Pro.
No ads, dark-mode and 6 months free of IntelliJ Idea Ultimate to start with.
Last updated: December 12, 2023
Learn through the super-clean Baeldung Pro experience:
>> Membership and Baeldung Pro.
No ads, dark-mode and 6 months free of IntelliJ Idea Ultimate to start with.
We need to protect the confidentiality of our PDF documents. This helps us to prevent unauthorized access and also to safeguard their integrity.
One way to achieve this is by adding a password to a PDF file. After doing so, our file will be encrypted and unable to be opened without the right authorization.
As we continue to interact with the file, we may find ourselves in a position where we need to remove the password. A good example might be if we would like to share the file. Another case would be if we need to open it several times and find inserting the password rather tedious continuously.
In this tutorial, we’ll look at the various ways in which we can remove password protections in a PDF file.
PDFtk (PDF Toolkit) is a popular cross-platform tool that we can use to manage our PDFs. Let’s now install it.
On Ubuntu or Debian-based systems, we install pdftk as below:
$ sudo apt-get install pdftkTo remove a password, we simply use the command:
$ pdftk protected.pdf password output out.pdfWe should then replace protected.pdf with the name of our password-protected file. Similarly, the password is simply a placeholder for the file’s password.
After running the above command, the tool will create a new file (out.pdf) without any password permissions. However, we’ll notice a warning from your Linux environment:
Warning: Using a password on the command line interface can be insecure.
Use the keyword PROMPT to supply a password via standard input instead.
This warning tells us that it is unsafe to enter the password via the command line. The first concern is that someone close enough, while we’re putting in the password, could potentially see it. Even though we were certain that we entered the password without another person in our vicinity, there’s another concern.
Other users on the system could be able to access the password from the shell history. To avoid all this, we can provide the password using the PROMPT option as below:
$ pdftk protected.pdf input_pw PROMPT output out.pdfThis will show a prompt to enter your password.
QPDF is another popular command line tool that we can use. We can install it on Ubuntu/Debian using:
$ sudo apt-get install qpdfWe can generate the unencrypted file using:
$ qpdf -password=pass1234 -decrypt protected.pdf open.pdfThe above command creates a new unprotected file called open.pdf from a file (protected.pdf), which was secured using pass1234.
Ubuntu 22 comes shipped with this graphical PDF file opener by default. If we don’t have it installed on your system, we can visit the Ubuntu Software Center and search for it.
Once installed, we can double-click the protected PDF document to open it:
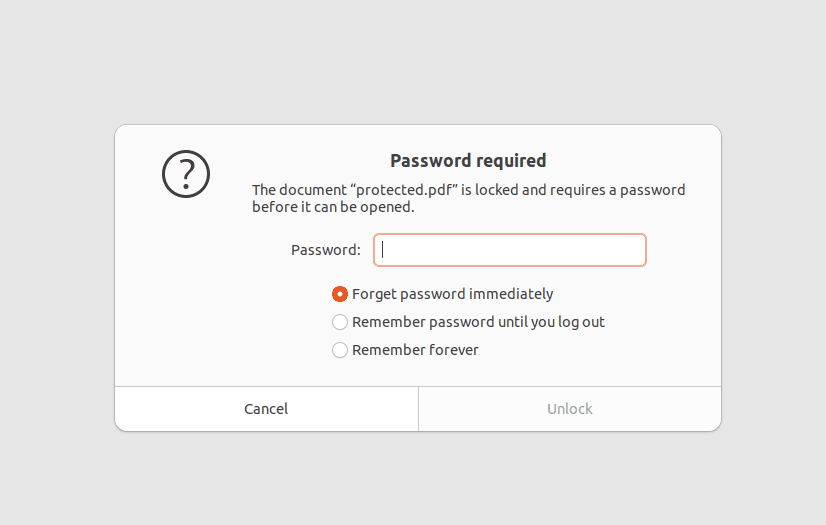
This will present us with three options to enter our password:
If we’re looking at opening the document just one time, then option 1 should do. However, if we intend to open and close the doc multiple times during our session, then the second option is the best.
We may need to again add the password after removing it. Here’s how we can achieve that:
$ pdftk input.pdf output protected.pdf user_pw YOURPASSWORDSimply replace YOURPASSWORD with our password. The input.pdf and protected.pdf correspond to the file we wanted to encrypt and its output file name, respectively. Note that we can use the same name for input and output files if needed.
In this tutorial, we have learned two command line tools and one graphical software for removing password protections.
Please remember that it’s insecure to enter passwords directly through the command line.