

Learn through the super-clean Baeldung Pro experience:
>> Membership and Baeldung Pro.
No ads, dark-mode and 6 months free of IntelliJ Idea Ultimate to start with.
Last updated: June 13, 2025
Learn through the super-clean Baeldung Pro experience:
>> Membership and Baeldung Pro.
No ads, dark-mode and 6 months free of IntelliJ Idea Ultimate to start with.
In a digital world where information is key, Optical Character Recognition (OCR) technology plays a pivotal role in transforming printed or handwritten text into editable, searchable, and shareable digital content.
OCR is the process that converts an image or Portable Document Format (PDF) of text into machine-readable text format.
For Linux users, there’s a wealth of OCR tools available to choose from, each with its unique features and capabilities.
In this tutorial, we’ll delve into the world of OCR tools tailored for Linux, shedding light on some of the best options available to help us harness the transformative capabilities of text recognition.
Tesseract OCR is an open-source optical character recognition engine available for various operating systems.
Originally developed by Hewlett-Packard, Tesseract is now maintained by Google, making it a robust and reliable choice for Linux users. In addition, it supports over 100 languages, which ensures its versatility around the world.
Tesseract’s strength lies in several main points:
Now, let’s delve deeper into the use of this OCR engine.
We start by installing the tesseract command on our system via the local package manager.
On Ubuntu, we can use the APT package manager:
$ sudo apt-get install tesseract-ocrAlternatively, on Arch Linux, we can use Pacman:
$ sudo pacman -S tesseractFinally, on Fedora Linux, we can employ DNF:
$ sudo dnf install tesseractAfter the installation, let’s use Tesseract OCR to extract text from an image. In addition, we’ll explore some of the available options.
Tesseract has a basic usage syntax:
$ tesseract input_image output_text_fileThe input_image option represents the image or document with text that we want to extract and the output_text_file represents the output text file after extraction.
Assuming we have a sample image called harvard_first_page.png, let’s use Tesseract to extract text from the image:
$ tesseract harvard_first_page.png havard_first_page_text
Tesseract Open Source OCR Engine v4.1.1 with Leptonica
Warning: Invalid resolution 0 dpi. Using 70 instead.
Estimating resolution as 110
As a result, the command above extracts a text file named havard_first_page_text.txt that we can modify further with any text editor.
By default, Tesseract uses English for text recognition. However, in case we have text in a different language, we can specify the language using the -l option:
$ tesseract harvard_first_page.png havard_first_page_text_french -l fraThe option above extracts all French text in the input image.
Moreover, we can control the output file type with the -c option:
$ tesseract harvard_first_page.png havard_first_page_text -c PDFIn this case, the output file is in the PDF format.
If we’re looking to perform OCR specifically on PDF files, OCRmyPDF is a specialized tool worth considering. It combines the power of OCR with PDF processing capabilities. In fact, OCRmyPDF employs Tesseract under the hood and automates the OCR process for image-only PDF files.
OCRmyPDF preserves the original PDF formatting while adding searchable text layers and is especially valuable for digitizing scanned documents or making existing image-only PDFs more accessible.
We can install the ocrmypdf command through pip, Python‘s package manager:
$ pip install ocrmypdfOf course, we need Python installed before using pip.
We can use OCRmyPDF to add searchable text layers to the input PDF:
$ ocrmypdf input.pdf output.pdfConsequently, the output.pdf file should now have searchable text layers that we can copy and paste.
OCRmyPDF also works on image-only PDF files in different languages. We just download the appropriate language model from Tesseract’s GitHub repository or any other reliable sources:
$ wget https://github.com/tesseract-ocr/tessdata/raw/main/spa.traineddata -P /usr/share/tesseract-ocr/4.00/tessdata/In this case, we’re using wget to download the Spanish language model from Tesseract’s GitHub repo.
Now, we can use OCRmyPDF to add searchable OCR text to our Spanish PDF file:
$ ocrmypdf --language spa input.pdf output.pdfThe –language spa flag specifies that we want to use the Spanish language model for OCR.
We can also generate a log file during processing that contains information about each page’s OCR results:
$ ocrmypdf --logfile ocrmypdf.log input.pdf output.pdfThe information includes any errors or warnings that we can review to identify any potential issues.
gImageReader is a user-friendly, graphical OCR tool for Linux that offers a simple and intuitive interface, making it accessible and beginner-friendly.
It relies on the Tesseract OCR engine but packages it in a user-friendly interface.
gImageReader offers several main features:
Now, let’s go over the basic installation and usage.
The tool is available on most Linux distros, and we can install it from the local package manager.
On Debian-based Distros, we can use the APT package manager:
$ sudo apt-get install gimagereaderAlternatively, to install gImageReader on Arch Linux, we can use the Arch User Repository (AUR) with an AUR helper like yay:
$ sudo pacman -S yayOnce yay is installed, we can use it to search for and install gImageReader:
$ yay -S gimagereaderFinally, on Fedora Linux, we can use DNF:
$ sudo dnf install gimagereaderLet’s explore how we can use gImageReader to extract text from an image and then explore some of the features available.
After installing gImageReader, we can search and open it from the applications menu by typing gImageReader:

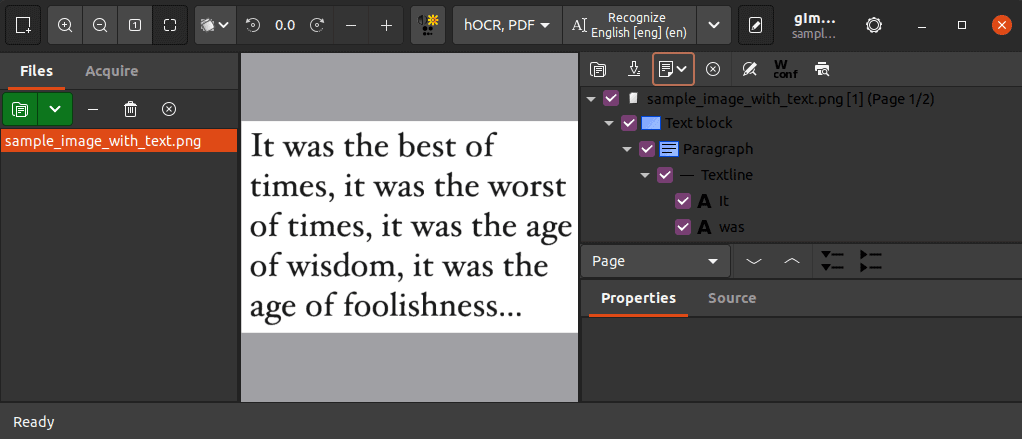
Once open, we’ll see the main window of gImageReader:
We can import one or multiple images from the screen above by clicking on the relevant option from the left sidebar:
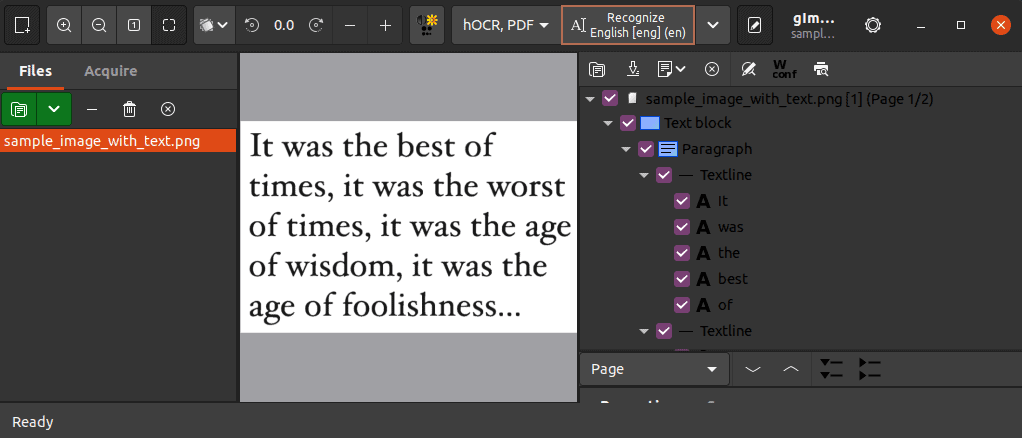
Next, we can use the Recognize option on the top navbar to scan and extract text from the image:
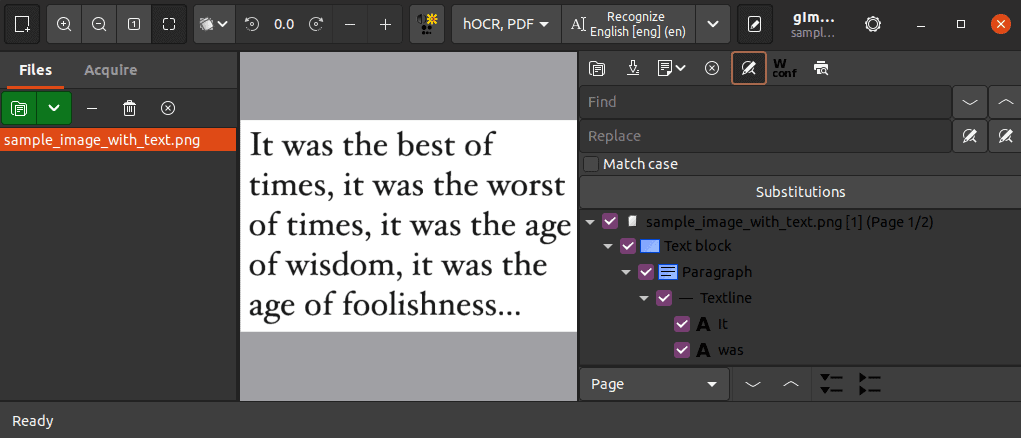
Moreover, we can perform manual corrections by using the find and replace option on the right sidebar:
Finally, to get the final text file, we use the export option on the right sidebar:
gImageReader supports exporting the output in plain text, ODT, or PDF format.
CuneiForm is an open-source OCR tool available to Linux users. While it may not be as well-known as Tesseract, it offers accuracy and multilingual support.
CuneiForm is designed to convert scanned documents and images containing text into machine-readable and editable text. It handles complex layouts well and supports a wide range of fonts and output file formats.
Let’s start by installing CuneiForm.
On Debian-based distros, we can use the APT package manager:
$ sudo apt-get install -y cuneiformOn Arch Linux, we can use an Arch User Repository (AUR) package and an AUR helper like yay:
$ yay -S cuneiform-linuxFinally, on Fedora Linux, we can employ the DNF package manager:
$ dnf install cuneiform-qtAfter the installation, let’s go over the basic usage.
We can use CuneiForm to extract text from an image in the terminal:
$ cuneiform -l <language_code> -o output_file.txt sample_image.pngOf course, we replace <language_code> above with the corresponding language on the image. Currently, CuneiForm supports over 20 different languages.
What’s more, we can change the name of the output file output_file.txt to match any desired name.
We can also employ the -f option to specify the output file:
$ cuneiform -l <language_code> -f pdf -o output.pdf input_image.pngAs a result, the output file is in the PDF format.
Paperwork is an open-source document manager and note-taking application that helps users organize, search, and manage their documents in digital format.
It simplifies the process of digital organization by offering a comprehensive set of features that enable us to scan, categorize, search, and manage documents.
Paperwork was designed as a scan-and-forget tool, meaning we can scan a new document and forget about it until the day we’ll need it again because it keeps a record.
We can install Paperwork on Debian from the APT package manager:
$ sudo apt install paperwork-gtkOn Arch Linux, we can use Pacman to install Paperwork:
$ pacman -S paperworkFinally, on Fedora Linux, we can use the DNF package manager:
$ sudo dnf -y install paperworkAfter installation, let’s find out how we can use Paperwork to extract text from documents.
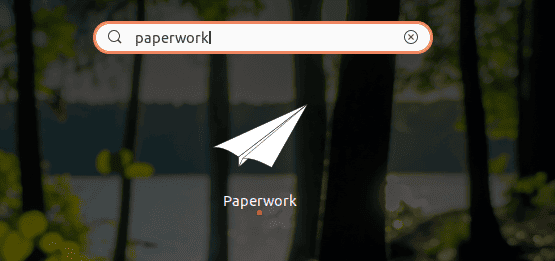
At this point, we can open Paperwork by searching for it in the applications menu:
Alternatively, we can open it by using the paperwork command in the terminal:
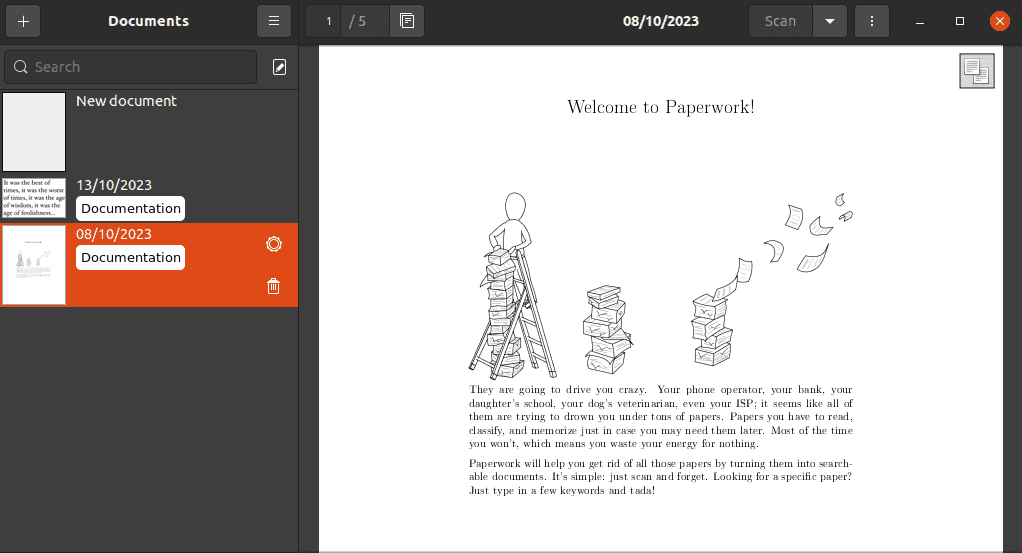
$ paperworkThe main Paperwork window shows a left sidebar that contains all the previously scanned documents. Further, the main section shows a preview of the selected document and the top navigation contains options to scan, import, export, and print documents:
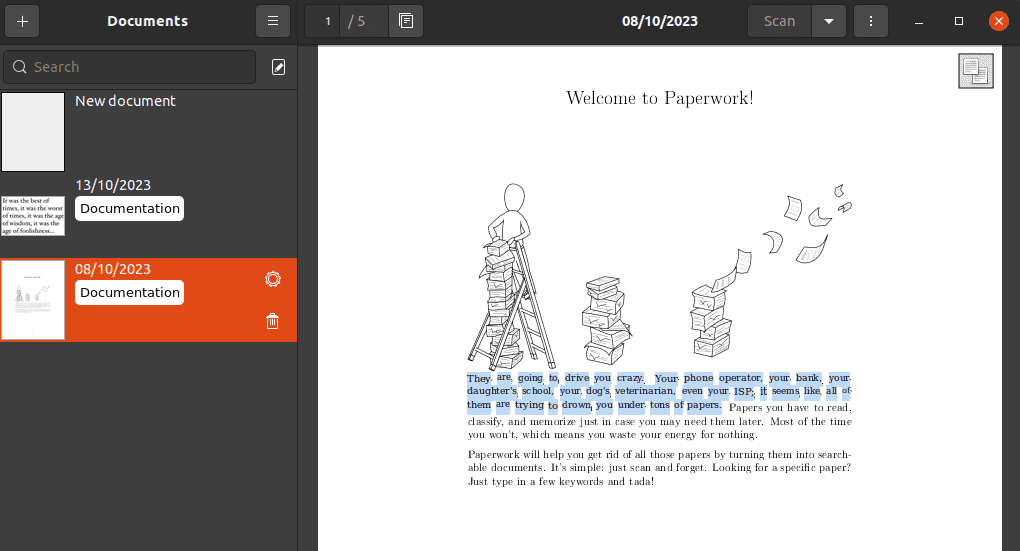
Paperwork scans and converts all the text from an image or a scanned document into text that we can select, copy, and paste if necessary. It adds searchable text layers on the document uploaded in the same way as OCRmyPDF:
Moreover, we can use the search on the left sidebar to find a specific word or set of words from all previously scanned and imported documents:
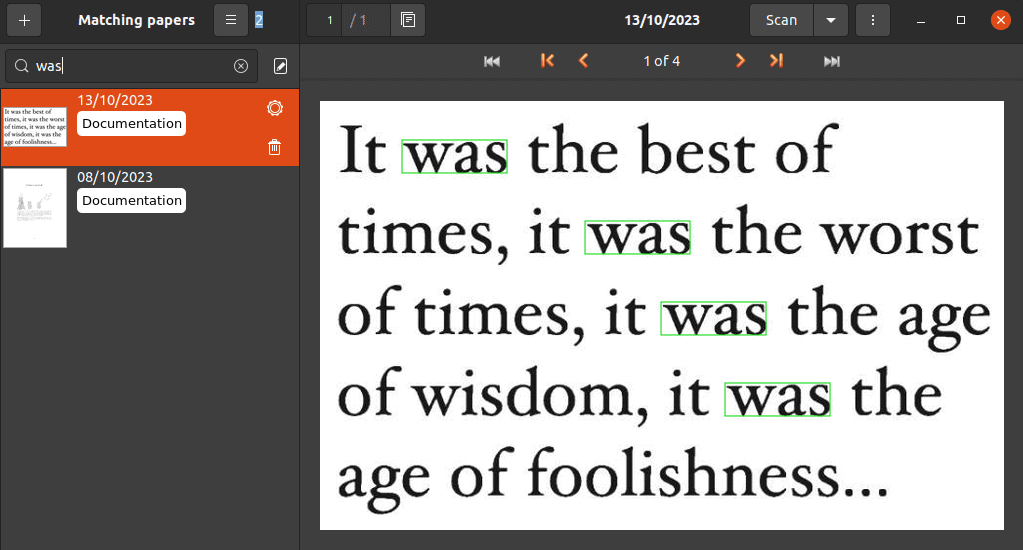
In fact, Paperwork can highlight all matches of a word or phrase in all documents and pages.
In this article, we’ve explored different OCR tools that we can use to convert printed documents into searchable and editable text. Linux users have no shortage of options when it comes to command-line or GUI-based OCR tools.
All the tools we discussed offer distinct features and capabilities making them some of the best OCR tools available for Linux systems. Consequently, the tool to use ultimately depends on personal preferences, level of comfort with different interfaces, and the task at hand.
With these tools at our disposal, we can unlock the power of text recognition on our system. This makes digitization and data extraction more accessible and efficient than ever before.