

Yes, we're now running our only Summer Sale. All Courses are 30% off until 20th July, 2026:
Linux GUI Tools for Git Similar to Sourcetree
Last updated: March 18, 2024
Learn through the super-clean Baeldung Pro experience:
>> Membership and Baeldung Pro.
No ads, dark-mode and 6 months free of IntelliJ Idea Ultimate to start with.
1. Overview
Without a doubt, Git has grown to become the dominant version control system. Git provides more source code handling options compared to older version control systems, like Subversion and CVS. In addition, its distributed nature makes it suitable for projects with teams that work remotely.
We can create and manage a git repository on our Linux machine with the git command on a terminal. Nevertheless, many of us may prefer to use a git client with a graphical user interface. Such an application may offer a better user experience. A popular git client is Sourcetree. With Sourcetree, we can perform most git operations like clone, push, pull, branch, commit, and also view the history of our commits. On the negative side, Sourcetree is available only in Windows.
In this tutorial, we’ll demonstrate two Sourcetree alternatives. To begin with, we’ll show Git Cola, an open source git client distributed under the GPL license. Then we’ll examine gitg, the Gnome git client, which is also open source and distributed under the GPL license.
2. Git Cola
Git Cola is an open-source git client with a graphical user interface. It’s written in Python. We can find the source code on GitHub, and it’s distributed under the GPL 2.0 license.
2.1. Installation
We can find the Git Cola package in our Linux distribution repositories, thus making installation pretty easy. On Debian, we may open a terminal and install it with apt:
$ apt install git-colaAt this point, we’ve successfully installed the tool.
2.2. Starting the Tool
To start the application, we open a terminal and type:
$ git-colaWe should be able to see the first window of Git Cola:
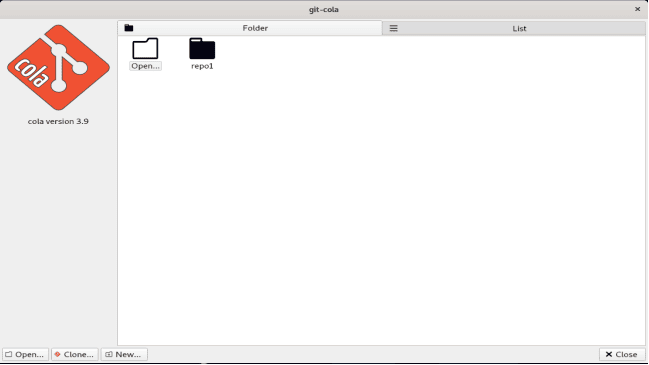
In this window, we have three options. The first is to open an existing git repository from the filesystem with the button “Open”. The second is to clone an existing project from a remote repository with the button “Clone”. Finally, the third is to create a new repository in the filesystem, with the button New.
2.3. Create a New Repository
To create a new repository, we first create the folder of the repository in the filesystem. Then we press the button New in the Git Cola tool and select our newly created folder:

At this point, we’ve successfully initialized a new repository in folder myrepo, and we’re ready to start creating files.
2.4. Making Changes
Let’s create some files:
$ touch sourcefile1.txt
$ echo "Hello World of Git Cola" >> sourcefile1.txt
$ mkdir folder1
$ cd folder1
$ touch sourcefile2.txt
$ echo "Hello World of Git Cola, two times" >> sourcefile2.txt
We’ve created two new files, sourcefile1.txt and folder1/sourcefile2.txt. Let’s see the status of the repository in Git Cola:
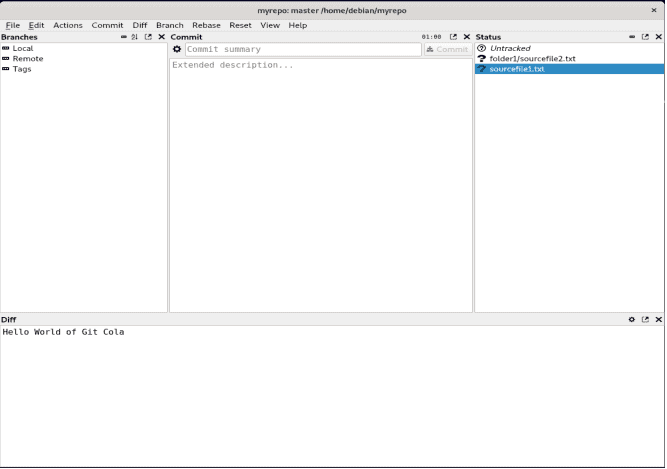
We can observe the two files in the status panel on the left of the screen. At this point, the two files are untracked. Do note the bottom “Diff” panel, which currently displays the difference between the file and the repository index. This is equivalent to running git diff.
2.5. Staging and Committing Files
At this point, we’re ready to stage and commit the files to the repository. We may perform staging by pressing the menu button “Stage All Untracked” on the “Commit” menu or by pressing Alt + U keys.
After staging, we can commit the two files. We can do this in the central panel. We have to enter a commit summary in the respective textbox and press the commit button. Note that the commit summary is mandatory. Otherwise, the commit button won’t become enabled. Likewise, we may commit with the menu button “C0mmit” on the “Commit” menu or by pressing the keys Ctrl + Return.
Git creates the master branch on our local repository after the first commit. We can view this in Git Cola on the left panel under the Local branches section.
2.6. Commits History
Let’s make one more change to sourcefile1.txt:
$ echo "Hello world of git, for the third time" >> sourcefile1.txtNow let’s stage and commit our change as we did in the previous section. We can see our two commits by opening the DAG window, which is accessible from the “View” menu:
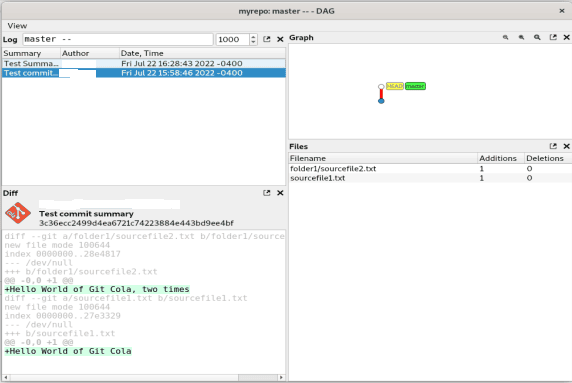
We can see the DAG window that displays the commits of the master branch. If we select a commit, we can see the files committed. Moreover, if we select a file, we can see the changes made to the file in comparison with the previous version. Finally, a graph with our commits is generated. This graph could be useful in branching and merging scenarios.
2.7. Viewing Our Repository Contents
We can view the contents of our repository with the file browser of Git Cola. The file browser is accessible through the view menu:
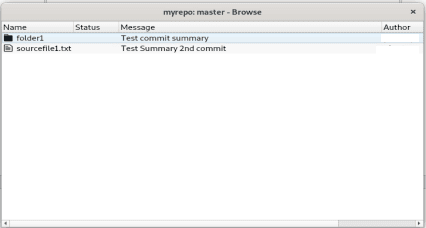
As a result, we can see the contents on the top level of our repository. On right-clicking a file or folder, we have some interesting options available, like viewing the commit history for the file or opening the editor to edit the file.
2.8. Branching
In the DAG window, we can select a commit and create a new branch from this commit. Let’s name our branch branch1. The branch is automatically checked out on creation. As a result, we’re ready to edit some files and commit them to our branch from the Git Cola main window, as we did in the master branch in the previous sections. We can view our commit history in the DAG window:
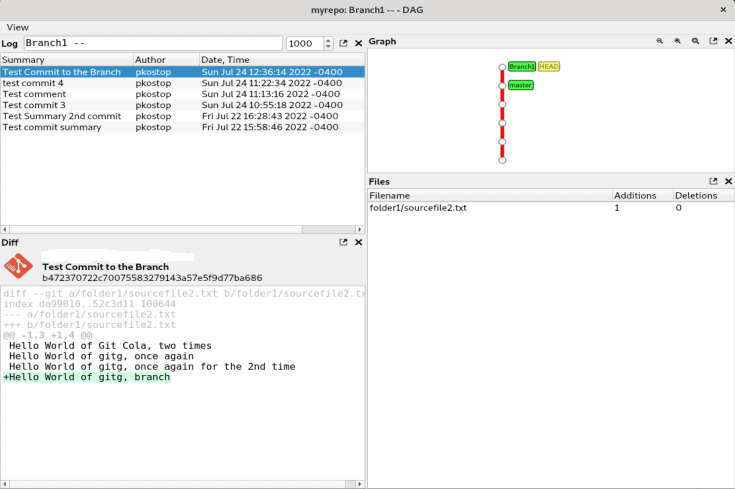
Here we’ve selected the last commit that was performed to the branch.
3. Gitg
Gitg is developed by the GNOME project, and it’s distributed under the GPL license. Interestingly, it’s written in Vala, a programming language that generates C code. The project’s source code is available in GitLab.
3.1. Installation
Installation is easy through our distribution repositories. For example, in Ubuntu or Debian, we may use apt:
$ sudo apt install gitgAlternatively, in case we can’t install it from a repository, we may try to download and install it from the project’s repository in GitLab. Do note that this process is more complicated and involves additional tools to complete it:
$ wget https://download.gnome.org/sources/gitg/41/LATEST-IS-41 -O gitg-41.tar.xz
$ tar Jxf gitg-41.tar.xz
$ cd gitg-41/
$ meson --prefix=/usr build
$ ninja -C build
$ sudo ninja -C build install
As can be seen, we’ve installed version 4.1 of gitg on our Linux machine. In any case, note that depending on our system, we may have to install additional dependencies.
3.2. First Steps
We can start gitg on a terminal simply by typing:
$ gitgAs a result, the initial screen of gitg appears:
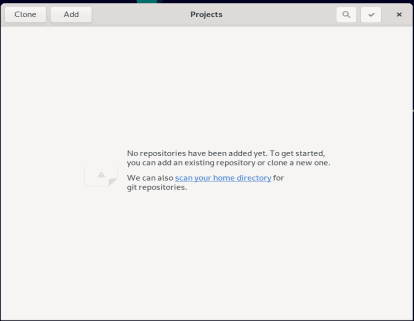
In the initial screen, we may choose to clone, initialize or import an existing repository. In our case, we’ll import the repository myrepo that we’ve created in the previous sections by pressing the Add button and navigating to folder myrepo:
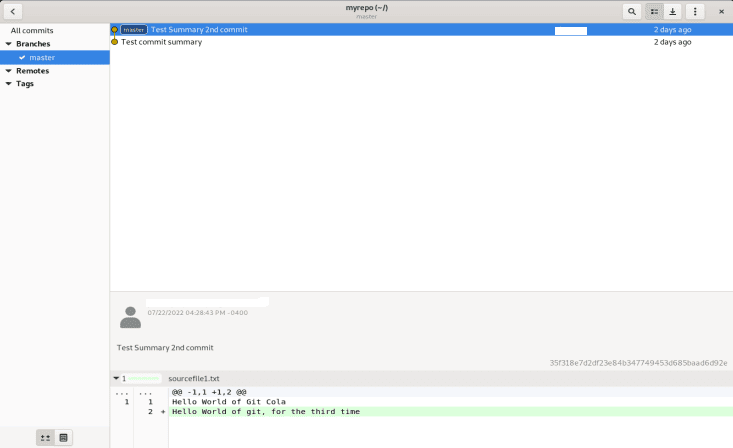
As can be seen, we can view the history of our commits. If we select a commit record, we may view the files and the changes that we committed in the bottom panel.
3.3. Making Changes
Let’s make some changes in our files to check how we can perform staging and commit:
$ echo "Hello World of gitg" >> sourcefile1.txt
$ echo "Hello World of gitg, once again" >> folder1/sourcefile2.txt
Let’s return to the gitg windows and see what has happened:
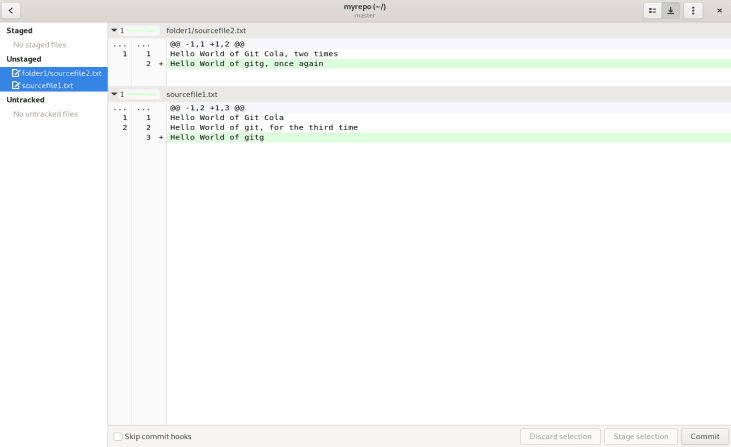
To view our changes, we have to press the button with the down arrow in the top left corner of the gitg window. As can be seen, the left panel contains an overview of staged, unstaged, and untracked files. Moreover, the panel in the center includes the difference between a specific modified file and the git repository index.
3.4. Staging and Committing
Following our file editing, we can stage our changes. There are multiple ways to do it. The first is to select one or more changes in the central panel and press the Stage Selection button. Likewise, we can select one file in the left panel, right-click, and then select Stage Changes in the context menu. Finally, we can right-click the Unstaged label on the left panel and select Stage Changes to stage everything.
Conversely, if we change our minds, we can always unstage by pressing the Unstage selection button that has appeared after staging. Following our staging action, our files have moved to the Staged section of the left panel. As a result, we’re now ready to commit by hitting the commit button in the bottom left corner:

After entering a comment and committing, we may return to the history view and verify that our new commit appears in the history of commits.
3.5. Viewing the Tree of a Commit
Occasionally we want to view the contents of our repository. We can do this in gitg if we press the button that displays the files of a tree object. This button is in the bottom left of the gitg window:

With this button selected, we can browse our commit history and see how our repository files have changed. Moreover, if we choose the last commit, we can view the contents of our files as they currently are on our repository.
3.6. Branching and Committing to the Branch
Let’s create a new branch. We can do this by right-clicking on a commit from our commit history and selecting the Create Branch option. Then we enter a branch name, say branch1, and create our new branch. It’s displayed under the Branches section in the left panel. Furthermore, we check out the branch1 branch by right-clicking it and selecting the Check out option.
Now we’re ready to make some changes and commit them to the branch. We edited some files and committed them as described in the previous sections. Our view should be like this:
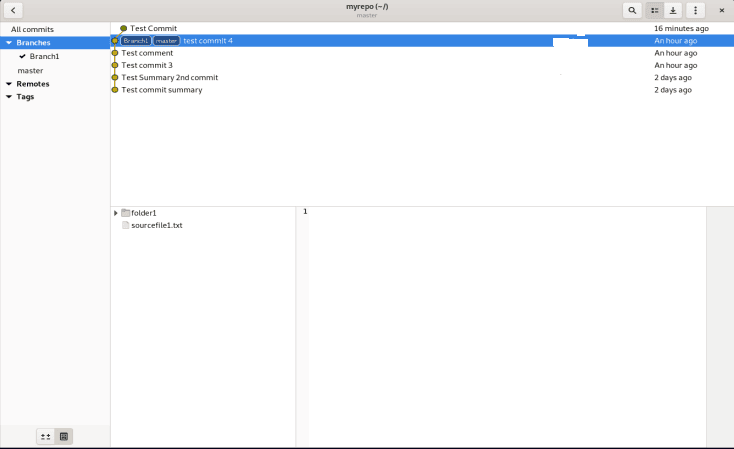
As can be seen, our commit to the branch is displayed on our commit history, and the branch1 branch is selected on the left panel.
4. Conclusion
To sum up, the world of git is vast. At the present time, there are many operations and tools. Undoubtedly, the Linux ecosystem isn’t lacking git tools. Furthermore, we should keep in mind that the git version control system’s initial purpose was to be used by the developers of the Linux project.
In this article, we’ve presented two git graphical user interface clients: Git Cola and Gitg. We’ve described how we can perform basic git operations like initializing a repository, staging changes, and committing and branching in both of these tools.