

Learn through the super-clean Baeldung Pro experience:
>> Membership and Baeldung Pro.
No ads, dark-mode and 6 months free of IntelliJ Idea Ultimate to start with.
Learn through the super-clean Baeldung Pro experience:
>> Membership and Baeldung Pro.
No ads, dark-mode and 6 months free of IntelliJ Idea Ultimate to start with.
In this tutorial, we’ll learn how to create a GIF from a screen recording in Linux. We’ll start by exploring how we can record our screen under X11 and Wayland. Then, we’ll convert the recorded video to GIF and optimize it for the web.
Finally, we’ll explore an alternative approach to quickly recording the screen as a GIF with Peek.
On Linux, the method for recording screens differs between X11 and Wayland due to their underlying architecture. On X11, we can use utilities like FFmpeg, SimpleScreenRecorder, and Kazam. These tools offer a bunch of awesome features.
However, on Wayland, screen recording is more tightly integrated with the Desktop Environment to provide enhanced security. Therefore, tools implemented for X11 don’t work directly in Wayland. Fortunately, there are tools like wf-recorder and the GNOME in-built recording tool that we can use to record screens easily.
While some tools can accomplish this task in a simpler way, the manual approach provides much more flexibility. Thus, they allow us to create GIFs more aligned with our requirements.
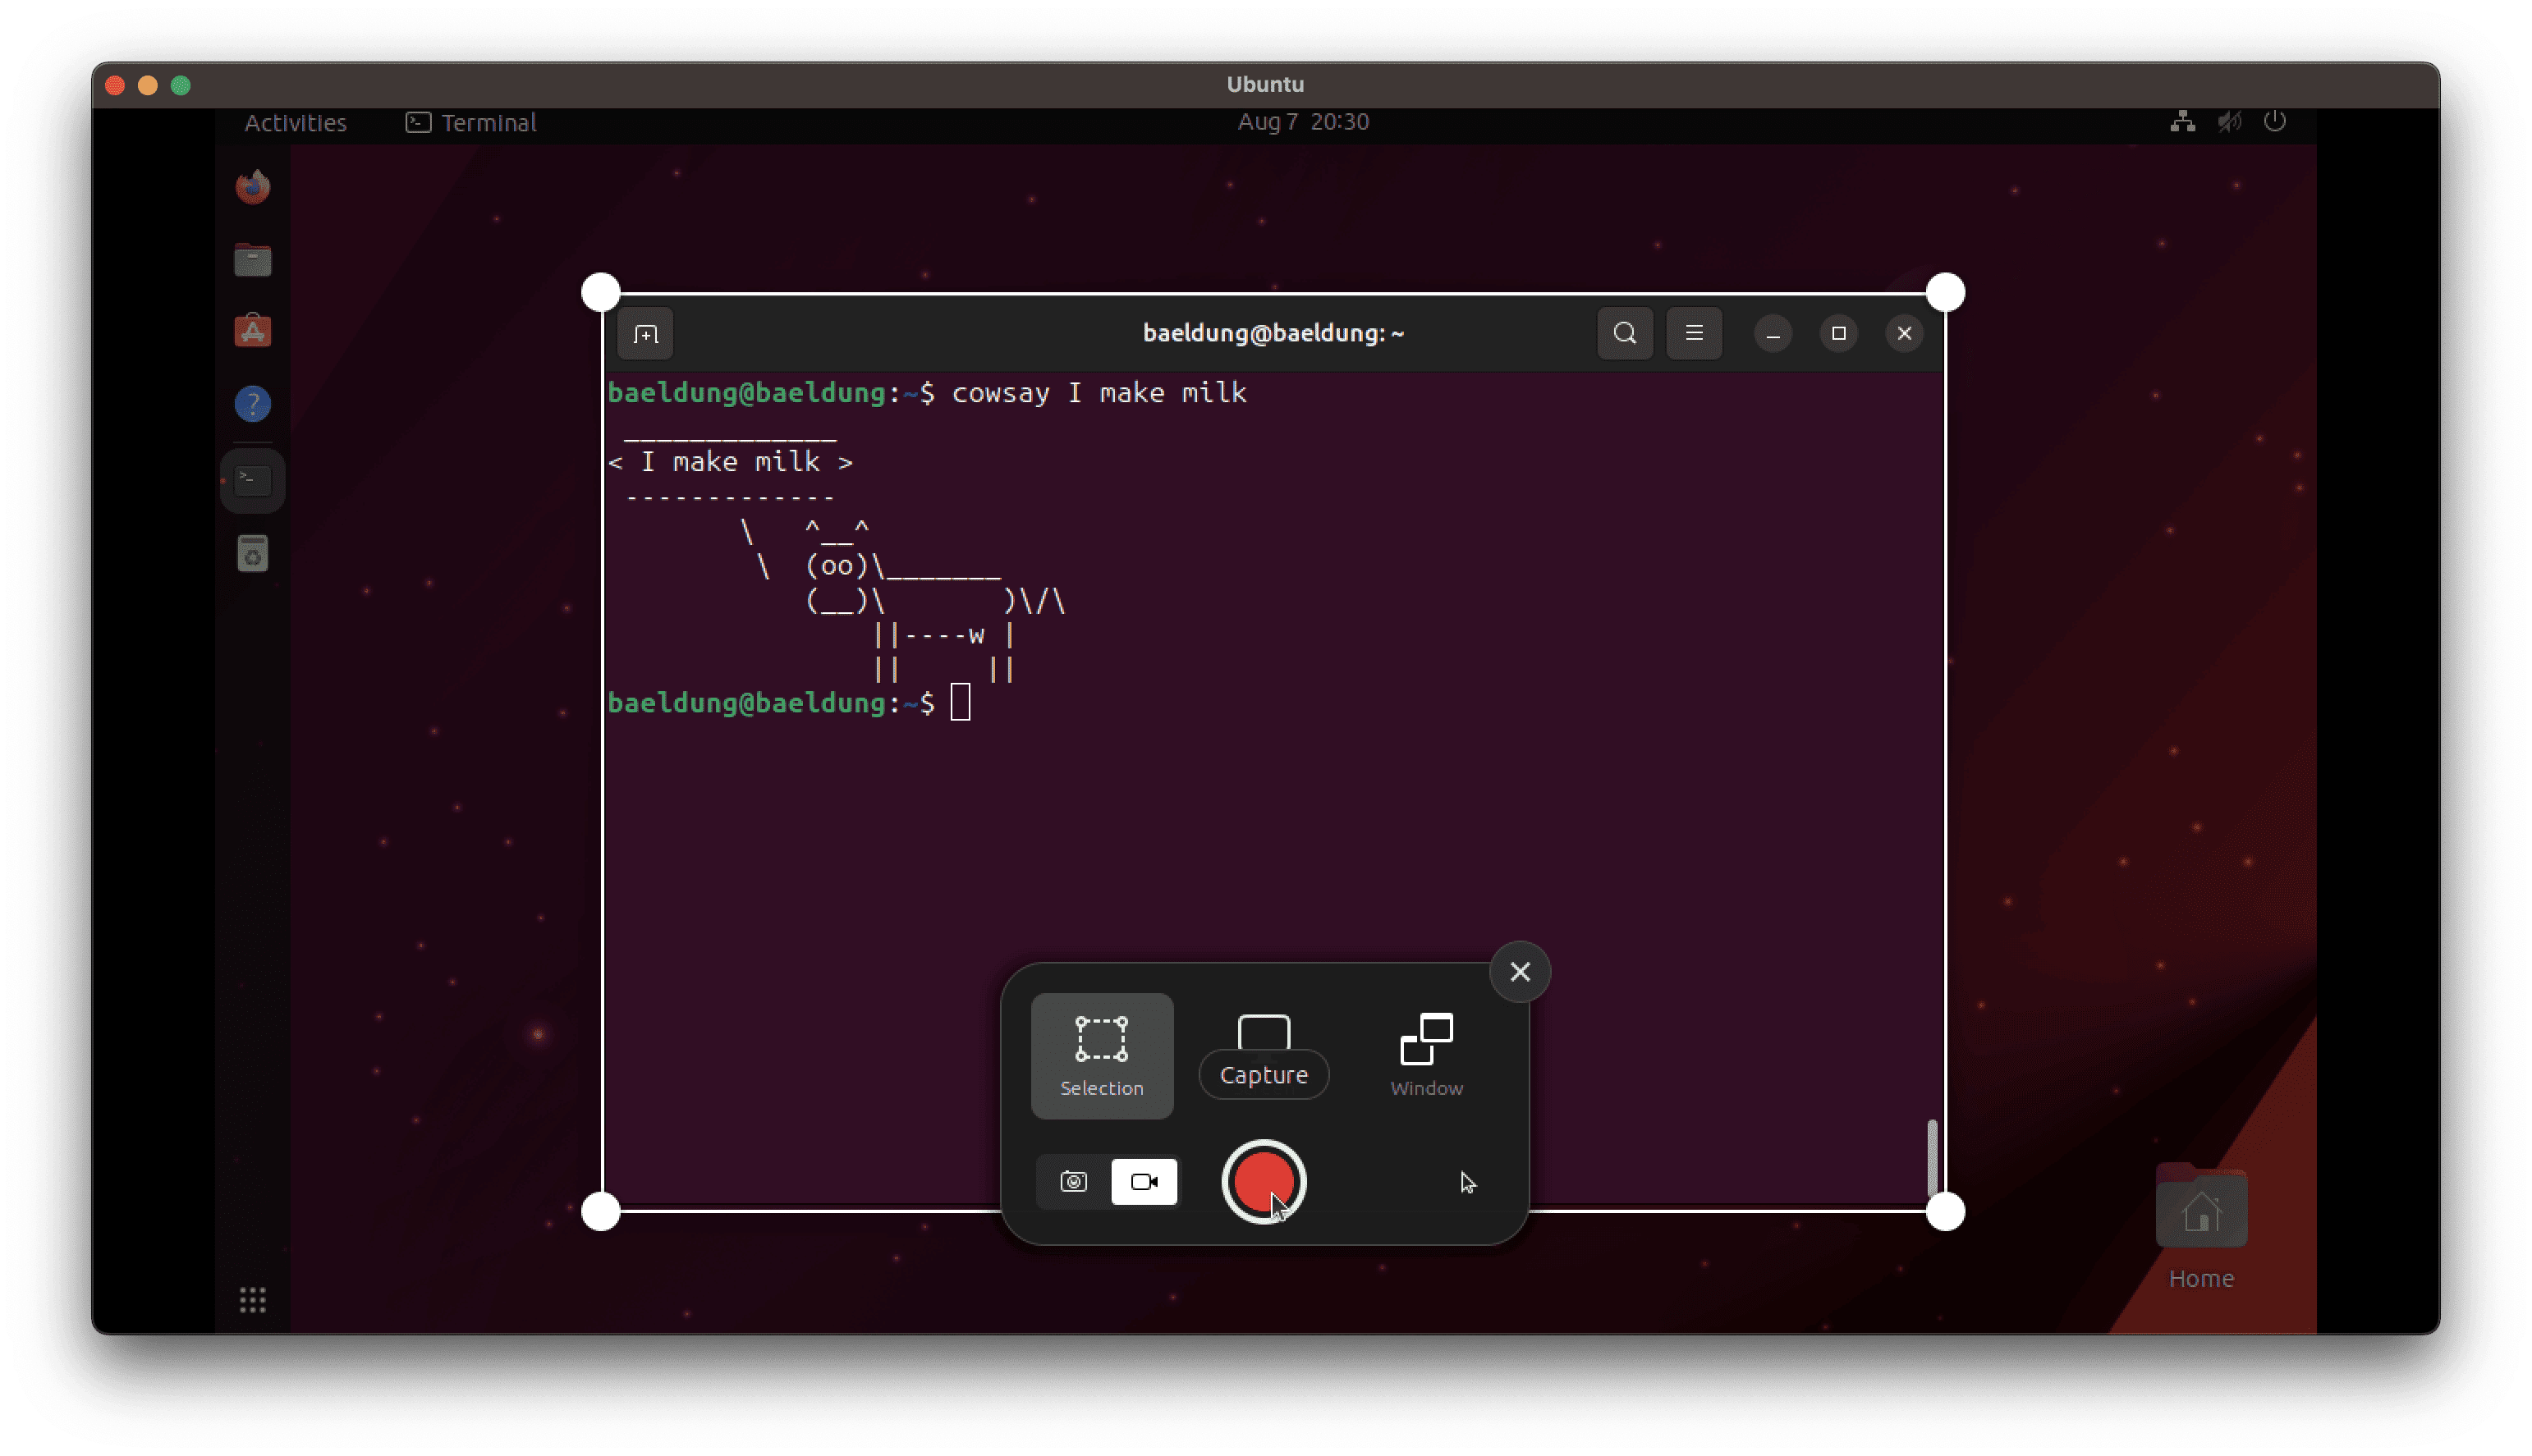
Most modern Desktop Environments provide an in-built solution for screen recording. For instance, we can fire up the GNOME Screenshot utility to record our screen:
But wait, there’s more! We’re not confined to just one tool. We can use FFmpeg, the ultimate Swiss Army knife for multimedia processing. With FFmpeg, we can screen record as well as convert the recorded video to GIF.
Not only that, but we can also use it for Desktop Environments and Window Managers that don’t include an in-built utility to record screens.
Let’s record our primary display using ffmpeg:
$ ffmpeg -f x11grab -y -framerate 20 -s 1920x1080 -i :0.0 -c:v libx264 \
  -preset superfast -crf 18 "$(date +'%Y-%m-%d_%H-%M-%S').mp4"
Let’s break this down:
We can change the resolution based on our requirements. In addition, a lower -crf value produces a high-quality video at the expense of file size. It can be between 0–51, where 0 means lossless.
In some cases, we aren’t sure about the screen resolution, but we want to capture the entire screen. For that specific use case, we can grab the screen resolution dynamically:
$ xdpyinfo | grep dimensions | awk '{ print $2 }'
1280x757
We can inject this handy snippet in the command to substitute the value for -s:
$ ffmpeg \
   -f x11grab \
   -y \
   -framerate 20 \
   -s "$(xdpyinfo | grep dimensions | awk '{ print $2 }' )" \
   -i :0.0 \
   -c:v libx264 \
   -preset superfast \
   -crf 21 \
   "$(date +'%Y-%m-%d_%H-%M-%S').mp4"
Once our recording is complete, we can head over to the terminal and terminate the process using Ctrl+C. It sends the -SIGINT signal, and FFmpeg quits gracefully.
And that’s not all! Once we’re done recording, we can convert the video to GIF and optimize the resulting GIF.
Currently, there is no direct support in FFmpeg for capturing the screen on Wayland. However, like X11, some Desktop Environments using Wayland also contain utilities for recording screens. For instance, the GNOME Screenshot can record the screen under Wayland without any issues.
However, if we’re using something else like SwayWM or Hyprland, we can use wf-recorder, which is available on most official package repositories.
Once installed, we can simply run wf-recorder to record the entire current display:
$ wf-recorderIn addition, we can also specify the geometry using the -g option. However, we can make this much easier with slurp. The slurp utility lets us select the region and prints its geometry to the standard output:
$ wf-recorder -g "$(slurp)"Like wf-recorder, slurp is also available in most official package repositories.
Once we have our recorded video, we can use FFmpeg to convert it to GIF:
$ ffmpeg -i Recording.mp4 \
    -vf "fps=10,scale=640:-1:flags=lanczos,split[s0][s1];[s0]palettegen[p];[s1][p]paletteuse" \
    -loop 0 Recording.gif
Here is a breakdown of -vf (video filters):
The -loop option indicates the number of counts to loop the GIF. We’ve set it to 0 to loop the GIF indefinitely.
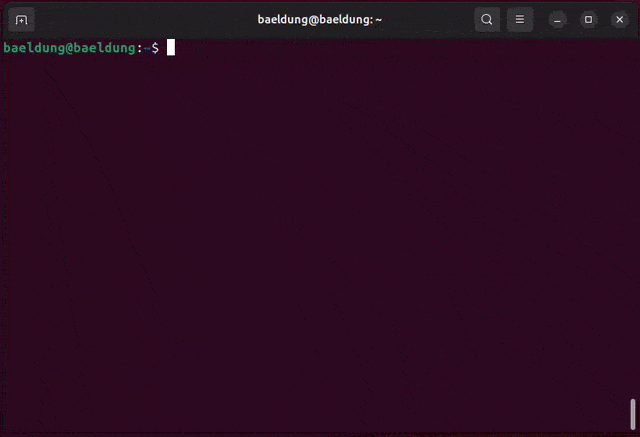
Once we run the command, it outputs a GIF file that’s good enough to use. Here’s a simple demo:
The resulting GIF that we created in the previous section is around 300 KB:
$ du -h Recording.gif | cut -f1
344K
However, we can optimize it further by about 50% using ImageMagick‘s mogrify tool:
$ mogrify -layers optimize -fuzz 10% Recording.gifLet’s break this down:
Once the command has been processed, we can check the size of the resulting GIF:
$ du -h Recording.gif | cut -f1
177K
Notably, the size shrunk down to 177 KB with no real loss of quality, which makes it more suitable for use on the web.
If we want to quickly record our screen as GIF, we can opt out for a quicker solution. For this purpose, we can use Peek on both X11 and Wayland.
Peek is a screen recording tool for Linux. It has an intuitive UI for quickly visualizing screen captures. While it doesn’t give us much control, it’s suitable for scenarios where we don’t care about optimizations and custom image processing.
We can download Peek from its official website.
Once we fire up Peek, we’ll need to position the window according to our requirements:
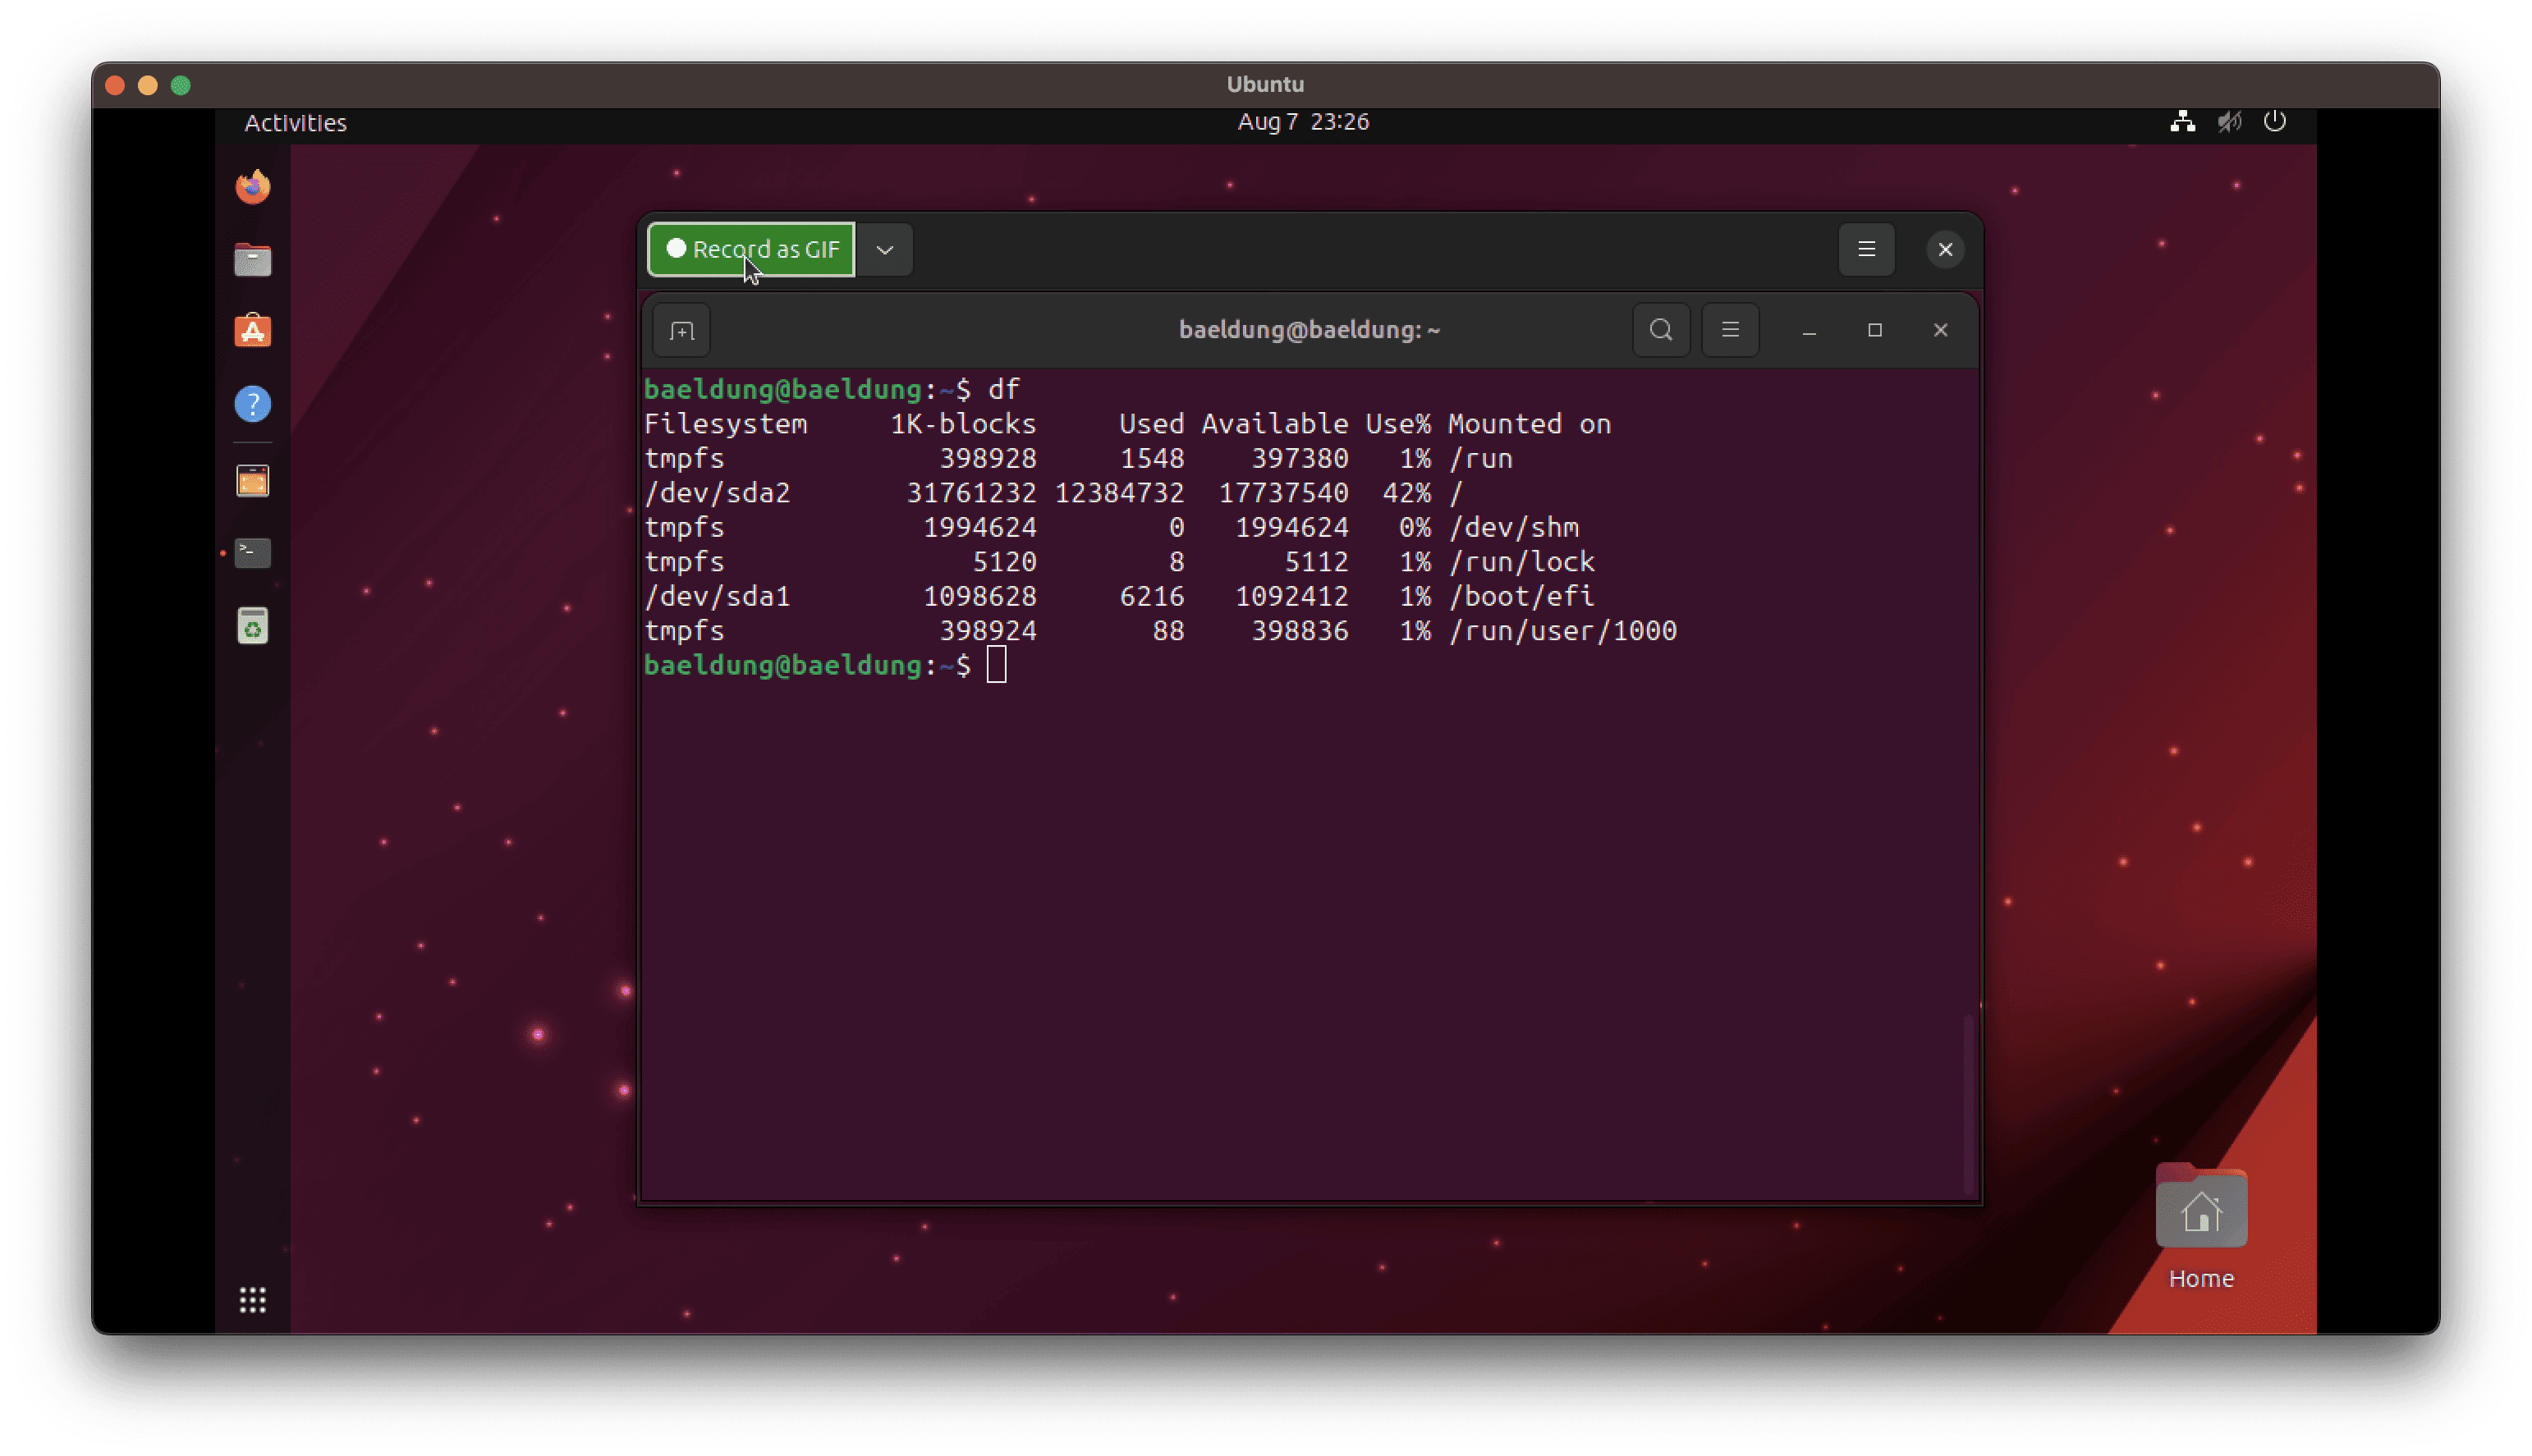
Once it’s set, we can press the “Record as GIF” button to start recording.
In this article, we explored how to record screens on both X11 and Wayland. Apart from that, we discussed how to convert the resulting video to GIF and optimize it further.
Finally, we looked at the Peek utility to quickly record our screens as a GIF.