

Yes, we're now running our only Summer Sale. All Courses are 30% off until 20th July, 2026:
Learn through the super-clean Baeldung Pro experience:
>> Membership and Baeldung Pro.
No ads, dark-mode and 6 months free of IntelliJ Idea Ultimate to start with.
1. Overview
With the release of GNOME 3, dconf replaced gconf as the default configuration tool and database. Specifically, this change aimed to improve performance, reduce complexity, and provide a more modern and efficient configuration system in a GNOME desktop environment. So, whether we want to modify the appearance settings, customize keyboard shortcuts, or adjust power management preferences, we can use the dconf Editor on the system with ease.
In this tutorial, we’ll check out methods for using the dconf Editor on an Ubuntu 22.04 installation GNOME desktop.
Notably, we use the term dconf Editor throughout this article to underline the dconf command as the backbone of the Dconf Editor front-end.
2. Installing the dconf Editor
The dconf Editor is a graphical tool used to configure settings in Linux. In particular, we can use it to navigate and modify system options stored in the dconf database.
To clarify, the dconf database is a key-value store that manage different aspects of a system.
So, let’s install the dconf Editor. For this, first, we open a terminal and install the dconf-editor package via apt:
$ sudo apt install dconf-editorAfter a successful installation, we can use the dconf Editor via the shell or another system interface.
3. Using the dconf Command
The dconf command-line tool offers a direct way to interact with the dconf configuration system through the terminal.
3.1. Read Entries
For instance, we use dconf to read the current status of the automatic-timezone settings on the GNOME desktop environment:
$ dconf read /org/gnome/desktop/datetime/automatic-timezone
false
In the above command, we can see that the automatic-timezone feature is currently set to false.
3.2. Write Entries
Now, we use the dconf write command and enable the automatic-timezone feature:
$ dconf write /org/gnome/desktop/datetime/automatic-timezone trueHere, we passed true as the value of the /org/gnome/desktop/datetime/automatic-timezone configuration value. Consequently, the dconf Editor enables the system to automatically adjust the timezone.
3.3. List Entries
Naturally, there are other features of the dconf command.
For example, we can list whole branches of the hierarchical organization of /org/gnome/desktop/ with the dconf list command:
$ dconf list /org/gnome/desktop/
app-folders/
datetime/
input-sources/
interface/
notifications/
privacy/
search-providers/
session/
wm/
As a result, we can see a list of entries under the GNOME desktop settings.
3.4. Dump Configuration
The dconf dump command enables us to export the current configuration of a branch to a file. Moreover, we can use it to share a configuration or create backups on the system.
For instance, here, we export the current configuration of /org/gnome/desktop/datetime/ to the datetime-config-backup.txt file:
$ dconf dump /org/gnome/desktop/datetime/ > datetime-config-backup.txtNow, let’s use the cat command to view the content of the datetime-config-backup.txt file:
$ cat datetime-config-backup.txt
[/]
automatic-timezone=true
Thus, we successfully saved the current configuration of the specified branch in a file.
3.5. Load Configuration
In a Linux terminal, we can use the dconf load command to load the configuration data from a file into the dconf database. In addition, we can also use it to apply an existing or saved configuration to a branch and its relevant values.
Now, let’s use the dconf load command to load the configuration for /org/gnome/desktop/datetime from the datetime-config-backup.txt file:
$ dconf load /org/gnome/desktop/datetime/ < datetime-config-backup.txtThus, dconf load applies the saved configuration to the selected branch.
4. Using the dconf Editor
We can use the dconf Editor to customize several aspects of a GNOME desktop environment, its applications, and overall system behavior.
To do so, we now open the Activities menu, type dconf Editor, and open the application:

As a result, we can see a tree-like structure that organizes the configuration settings hierarchically in the dconf Editor:
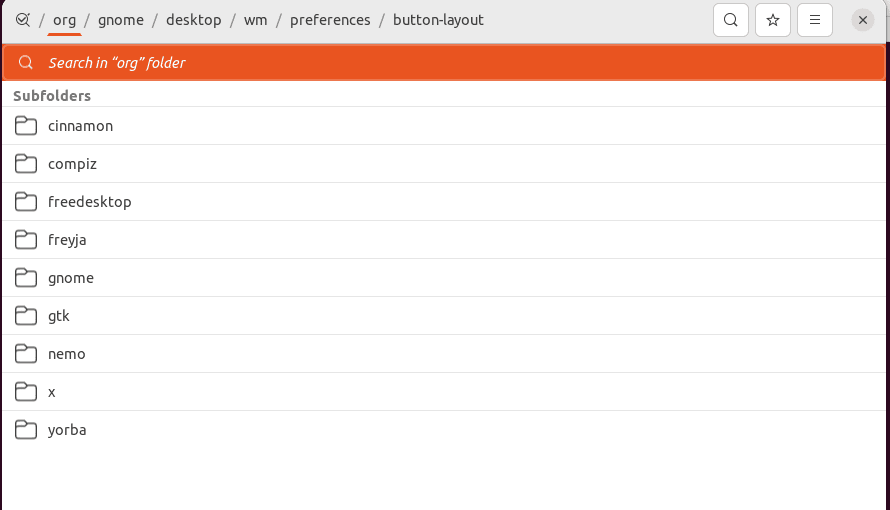
Now, let’s see how we can go through and work with this data.
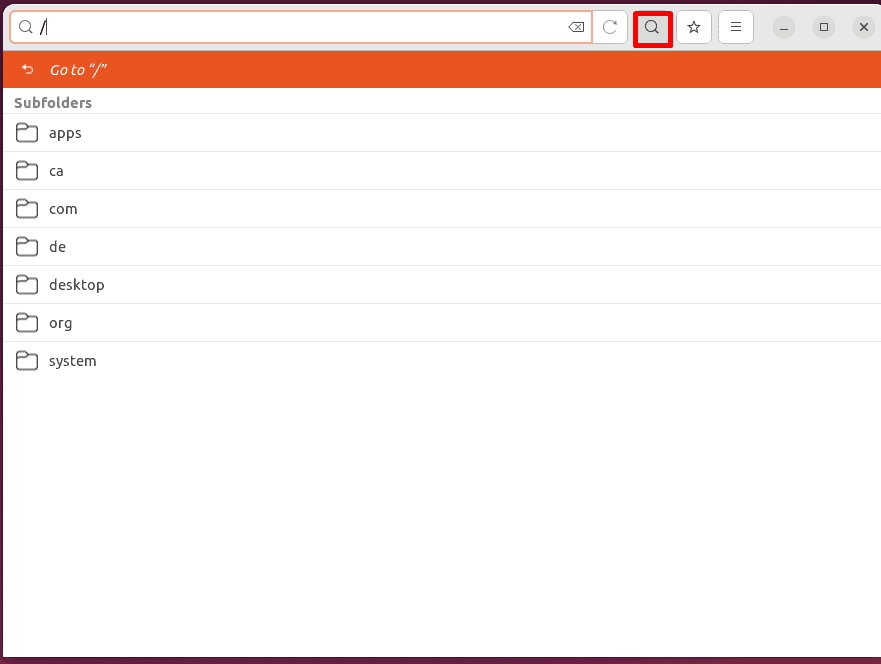
4.1. Search Entries
Now, to search for any specific entry or navigate to a particular path in the dconf Editor, we click on the search icon and type the complete path in the address bar:
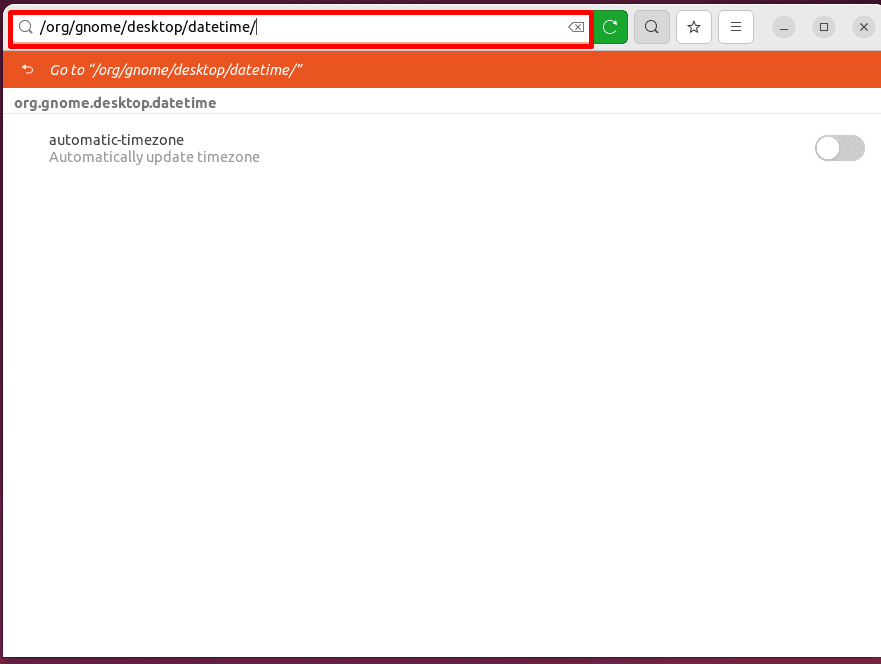
Then, for example, we navigate to the /org/gnome/desktop/datetime/ path and look for the automatic-timezone toggle:
Next, we enable the automatic-timezone toggle, and click the reload icon to apply the changes:

Thus, the changes reflect on the timezone settings of our system.
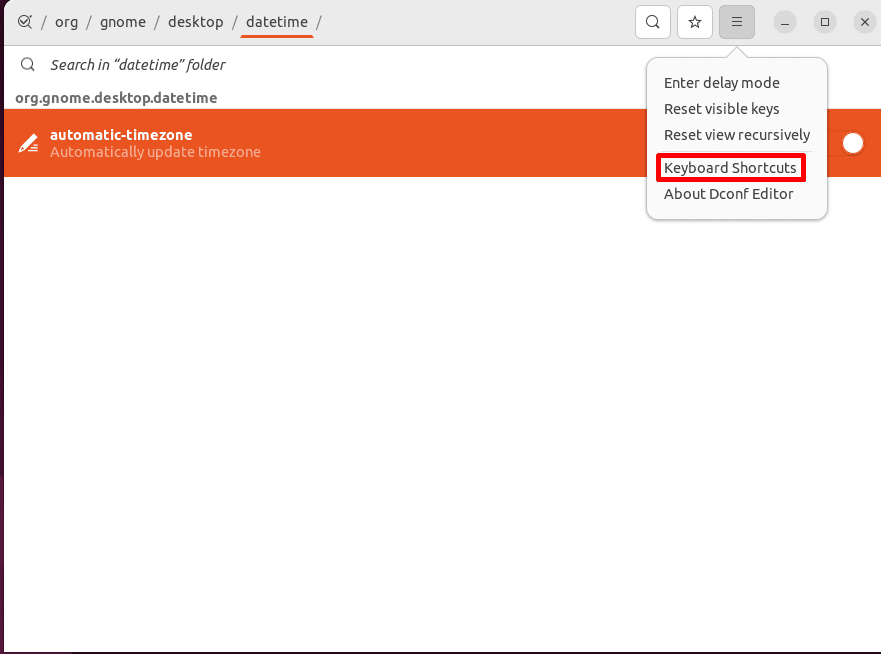
4.2. View Keyboard Shortcuts
We can also use different keyboard shortcuts to efficiently navigate and interact within the dconf Editor.
To do so, we click on the three horizontal lines icon and select the Keyboard Shortcuts option:
Let’s check the result:
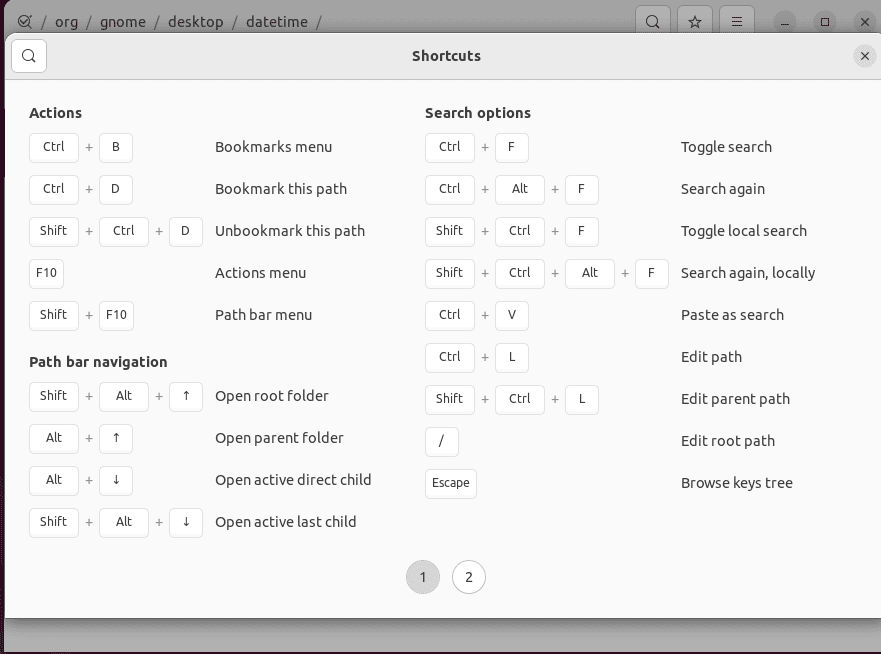
Consequently, we can now see the first page which contains different keyboard shortcuts related to Actions, Path bar navigation, and Search options of the dconf Editor.
Now, we click on 2 from the bottom of the opened window to go to the next page:
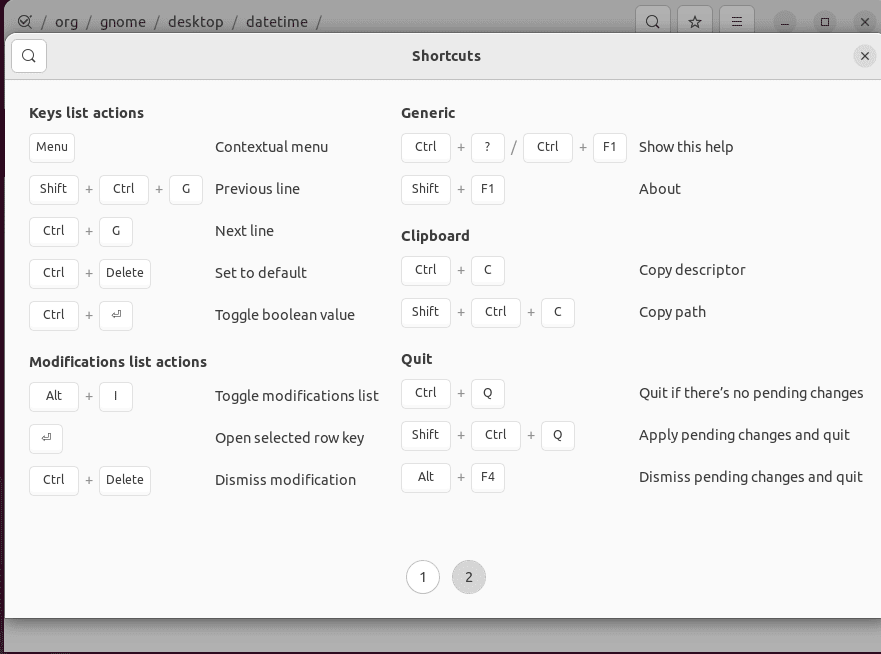
As a result, we can see keyboard shortcuts related to Keys list actions, Modifications list actions, Generic, Clipboard, and Quit options of the dconf Editor.
5. Conclusion
In this article, we learned different methods to edit the dconf database in Linux.
Particularly, we saw that the dconf command enables us to configure the dconf database entries using a shell. On the other hand, we can use the dconf Editor to perform the same operations through a more user-friendly and interactive interface.
Ultimately, we can select any of these methods based on our preference for using a shell or the system interface.