1. Overview
In this tutorial, we’ll focus on testing a secured REST service that uses Keycloak for authentication and authorization with Swagger UI.
2. The Challenge
Like other web resources, REST APIs are often secured. So, the service consumer (such as a Swagger UI) needs not only to handle the HTTP call itself but also needs to provide authentication information to the service provider.
Keycloak is an IAM server that allows authentication and authorization outside the service provider’s implementation. It’s part of the architecture, as shown in the following diagram:

As we can see, both the service provider and the service consumer need to contact the Keycloak server. First, we’ll need to install a Keycloak server and integrate it into a Spring Boot application as a REST service provider. Then, we need to extend the Swagger UI.
3. Integrating Swagger UI
For the integration between spring-boot and swagger-ui, add the library to the list of your project dependencies (No additional configuration is needed):
<dependency>
     <groupId>org.springdoc</groupId>
     <artifactId>springdoc-openapi-starter-webmvc-ui</artifactId>
     <version>2.5.0</version>
</dependency>
4. Using Standards
Extending the Swagger UI by vendor-specific code is only sensible for peculiar cases. So, we should prefer using vendor-independent standards. The following sections will describe how to implement this.
4.1. Existing Standards
First, we need to know which standards exist. For authentication and authorization, there’s a protocol like OAuth2. For SSO, we could use OpenID Connect (OIDC) as an extension to OAuth2.
The standard to describe a REST API is OpenAPI. This standard includes defining multiple security schemes, including OAuth2 and OIDC:
paths:
  /api/v1/products:
    get:
      ...
      security:
        - my_oAuth_security_schema:
          - read_access
...
securitySchemes:
  my_oAuth_security_schema:
    type: oauth2
    flows:
      implicit:
        authorizationUrl: https://api.example.com/oauth2/authorize
        scopes:
          read_access: read data
          write_access: modify data
4.2. Extend the Service Provider
In a code-first approach, the service provider can generate the OpenAPI documentation based on the code. So, the security schemes must also be provided this way. For example, with Spring Boot, including SpringDoc, we could write such a configuration class:
@Configuration
public class OpenAPISecurityConfig {

    @Value("${keycloak.auth-server-url}")
    String authServerUrl;
    @Value("${keycloak.realm}")
    String realm;

    private static final String OAUTH_SCHEME_NAME = "my_oAuth_security_schema";

    @Bean
    public OpenAPI openAPI() {
        return new OpenAPI().components(new Components()
            .addSecuritySchemes(OAUTH_SCHEME_NAME, createOAuthScheme()))
            .addSecurityItem(new SecurityRequirement().addList(OAUTH_SCHEME_NAME))
            .info(new Info().title("Todos Management Service")
                .description("A service providing todos.")
                .version("1.0"));
    }

    private SecurityScheme createOAuthScheme() {
        OAuthFlows flows = createOAuthFlows();
        return new SecurityScheme().type(SecurityScheme.Type.OAUTH2)
            .flows(flows);
    }

    private OAuthFlows createOAuthFlows() {
        OAuthFlow flow = createAuthorizationCodeFlow();
        return new OAuthFlows().implicit(flow);
    }

    private OAuthFlow createAuthorizationCodeFlow() {
        return new OAuthFlow()
            .authorizationUrl(authServerUrl + "/realms/" + realm + "/protocol/openid-connect/auth")
            .scopes(new Scopes().addString("read_access", "read data")
                .addString("write_access", "modify data"));
    }

}
Using other technologies would lead to different implementations, of course. But we should always be aware of the OpenAPI that has to be generated.
4.3. Extend the Service Consumer
Swagger UI supports OpenAPI authentication schemes by default – no need to customize it. We’ll get a possibility to authenticate then:
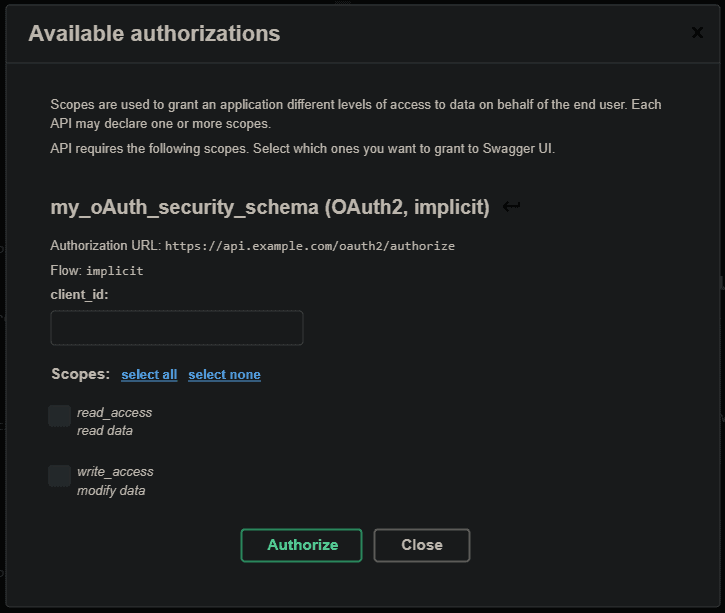
Other clients would have different solutions. For example, there’s an NPM module for Angular applications that provides OAuth2 and OpenID Connect (OIDC) in a straightforward way.
5. Testing the Endpoints from SwaggerUI
By following the configurations provided in this article, you should have already configured a User that should be able to log in to the application. In order to use swagger-UI, you should also configure the client (login-app) and enable the Implicit Flow Authentication method:

You also need to link the Application Scopes (read and write) by first creating the scopes in the Client Scope session:
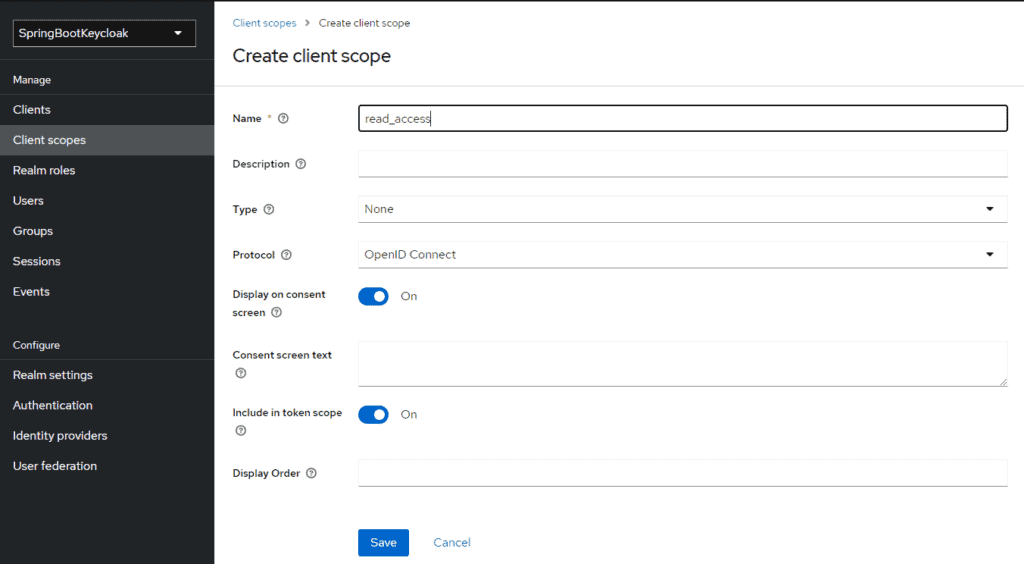
and then adding them to the list of enabled scopes for the application:
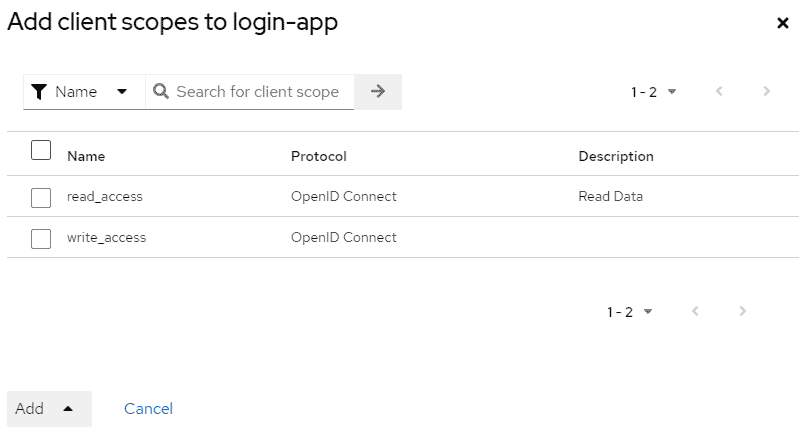
Now you will be able to be authenticated with the right scopes in the swagger-ui app, reachable at the address http://localhost:8081/swagger-ui/index.html:
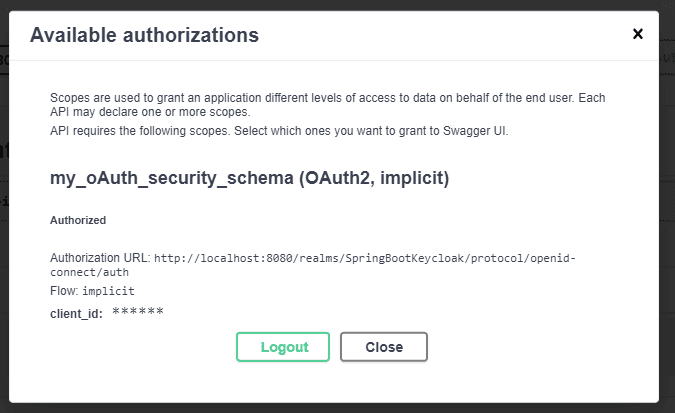
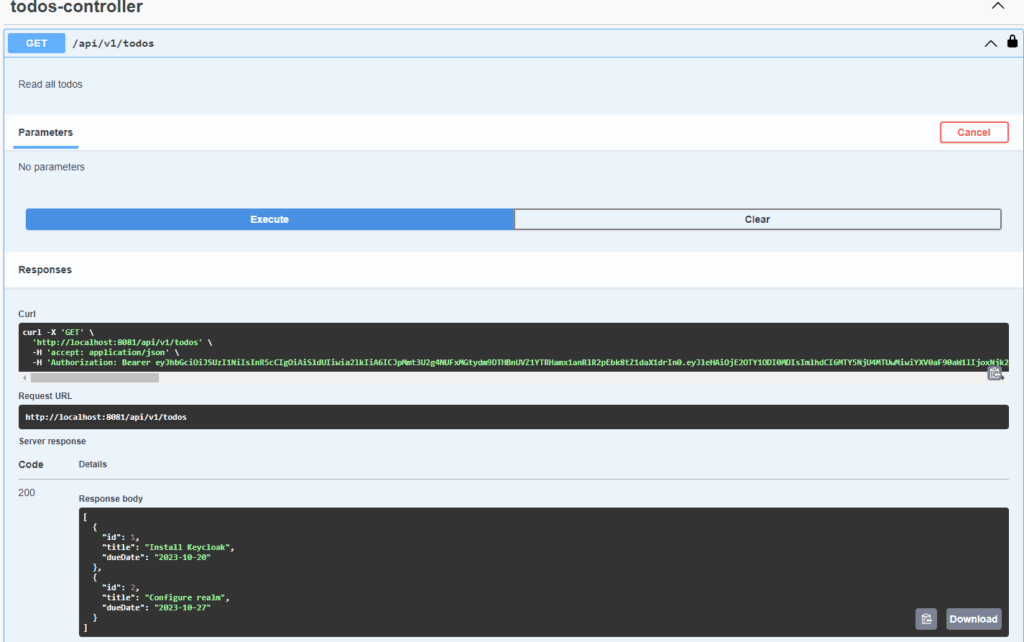
Finally, we can hit the Controller endpoints defined in the swagger:
6. Conclusion
In this article, we pointed out the possibilities of testing REST services with Swagger UI in the case of using Keycloak as an IAM. The best solution is to use standards like OpenAPI, OAuth2, and OpenID Connect, which are all supported by the tools.
As always, all the code is available over on GitHub.


