

Mocking is an essential part of unit testing, and the Mockito library makes it easy to write clean and intuitive unit tests for your Java code.
Get started with mocking and improve your application tests using our Mockito guide:
Handling concurrency in an application can be a tricky process with many potential pitfalls. A solid grasp of the fundamentals will go a long way to help minimize these issues.
Get started with understanding multi-threaded applications with our Java Concurrency guide:
Spring 5 added support for reactive programming with the Spring WebFlux module, which has been improved upon ever since. Get started with the Reactor project basics and reactive programming in Spring Boot:
Since its introduction in Java 8, the Stream API has become a staple of Java development. The basic operations like iterating, filtering, mapping sequences of elements are deceptively simple to use.
But these can also be overused and fall into some common pitfalls.
To get a better understanding on how Streams work and how to combine them with other language features, check out our guide to Java Streams:
Explore Spring Boot 3 and Spring 6 in-depth through building a full REST API with the framework:
Yes, Spring Security can be complex, from the more advanced functionality within the Core to the deep OAuth support in the framework.
I built the security material as two full courses - Core and OAuth, to get practical with these more complex scenarios. We explore when and how to use each feature and code through it on the backing project.
You can explore the course here:
Spring Data JPA is a great way to handle the complexity of JPA with the powerful simplicity of Spring Boot.
Get started with Spring Data JPA through the guided reference course:
Refactor Java code safely — and automatically — with OpenRewrite.
Refactoring big codebases by hand is slow, risky, and easy to put off. That’s where OpenRewrite comes in. The open-source framework for large-scale, automated code transformations helps teams modernize safely and consistently.
Each month, the creators and maintainers of OpenRewrite at Moderne run live, hands-on training sessions — one for newcomers and one for experienced users. You’ll see how recipes work, how to apply them across projects, and how to modernize code with confidence.
Join the next session, bring your questions, and learn how to automate the kind of work that usually eats your sprint time.
Yes, we're now running our only Summer Sale. All Courses are 30% off until 20th July, 2026:
Yes, we're now running our only Summer Sale. All Courses are 30% off until 20th July, 2026:
1. Introduction
Keycloak is an open-source Identity and Access Management (IAM) solution focusing on modern applications and services. When users authenticate through Keycloak, tokens issued by the server contain important information about the authenticated user and the client to which tokens were issued.
Keycloak’s tokens contain some default attributes, such as iss (issuer), exp (expiration time), sub (subject), and aud (audience). But many times, these aren’t enough, and we might need to add some extra information to the tokens. In this situation, we use a protocol mapper.
In this tutorial, we’ll show how to add a custom protocol mapper to the Keycloak authorization server.
2. Protocol Mapper
A Keycloak token is just a JSON object that contains a set of claims and is usually digitally signed. Let’s check out an example of a token’s payload and its collection of standardized claims:
{
  "exp": 1680679982,
  "iat": 1680679682,
  "jti": "bebf7b2c-f813-47be-ad63-0ca6323bba19",
  "iss": "http://192.168.198.128:8085/auth/realms/baeldung",
  "aud": "account",
  "sub": "648b0687-c002-441d-b797-0003b30168ed",
  "typ": "Bearer",
  "azp": "client-app",
  "acr": "1",
  ...
  "scope": "email profile",
  "clientId": "client-app",
  "clientHost": "192.168.198.1",
  "email_verified": false,
  "preferred_username": "service-account-client-app",
  "clientAddress": "192.168.198.1"
}
Protocol mappers map items such as an email address to a specific claim in the identity and access token. We can customize the claims in the token with specific details by adding protocol mappers to the clients.
3. Setting Up a Keycloak Server
In this tutorial, we’ll be using the Keycloak standalone version. We’ve already covered how to set up a Keycloak server, so we won’t go into details on how it’s done here.
Let’s add a new realm called baeldung and a new client called client-app to our Keycloak instance:
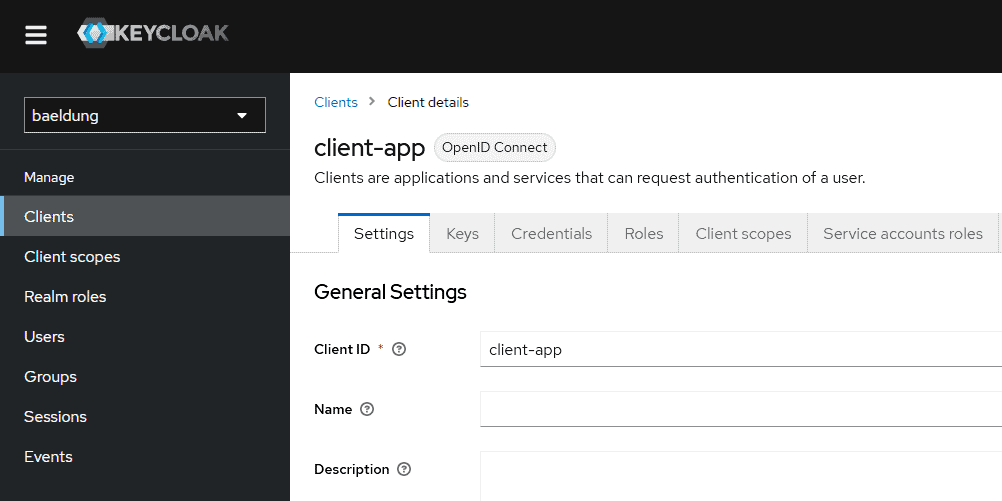
We’ll leave all the defaults except the Client authentication and Service accounts roles fields:
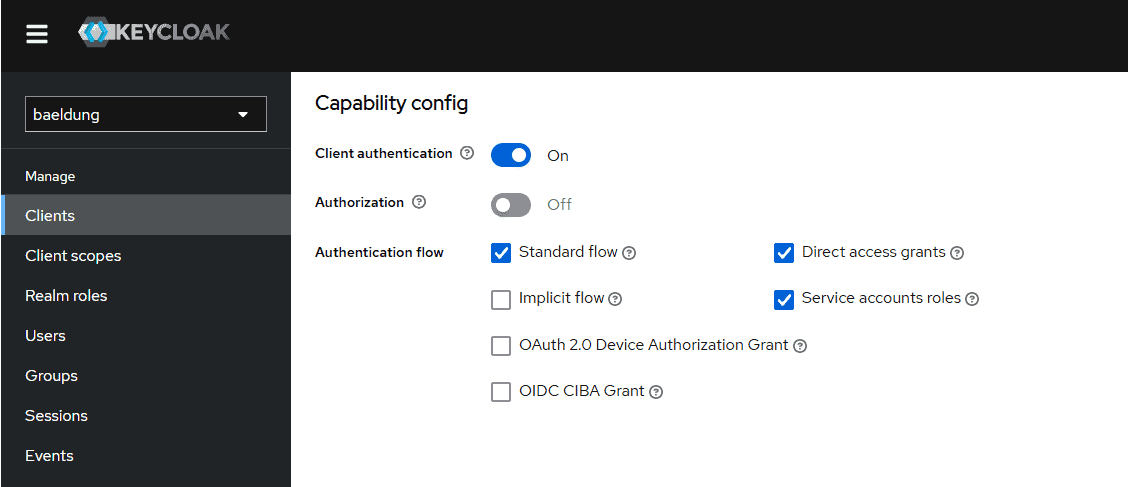
The Service accounts roles field enables support of the Client Credentials Grant for this client.
4. Custom Protocol Mapper Implementation
Now that we’ve set up our Keycloak server, we’ll create a custom protocol mapper and configure it in the Keycloak server.
4.1. Dependencies
Our custom protocol mapper is a regular Maven project that creates a JAR file.
Let’s start by declaring the keycloak-core, keycloak-server-spi, keycloak-server-spi-private, and keycloak-services dependencies in our pom.xml:
<dependency>
    <groupId>org.keycloak</groupId>
    <artifactId>keycloak-core</artifactId>
    <scope>provided</scope>
    <version>21.0.1</version>
</dependency>
<dependency>
    <groupId>org.keycloak</groupId>
    <artifactId>keycloak-server-spi</artifactId>
    <scope>provided</scope>
    <version>21.0.1</version>
</dependency>
<dependency>
    <groupId>org.keycloak</groupId>
    <artifactId>keycloak-server-spi-private</artifactId>
    <scope>provided</scope>
    <version>21.0.1</version>
</dependency>
<dependency>
    <groupId>org.keycloak</groupId>
    <artifactId>keycloak-services</artifactId>
    <scope>provided</scope>
    <version>21.0.1</version>
</dependency>
4.2. Extending the AbstractOIDCProtocolMapper Class
Now let’s create our protocol mapper. For that, we extend the AbstractOIDCProtocolMapper class and implement all abstract methods:
public class CustomProtocolMapper extends AbstractOIDCProtocolMapper implements OIDCAccessTokenMapper,
  OIDCIDTokenMapper, UserInfoTokenMapper {

    public static final String PROVIDER_ID = "custom-protocol-mapper";

    private static final List<ProviderConfigProperty> configProperties = new ArrayList<>();

    static {
        OIDCAttributeMapperHelper.addTokenClaimNameConfig(configProperties);
        OIDCAttributeMapperHelper.addIncludeInTokensConfig(configProperties, CustomProtocolMapper.class);
    }

    @Override
    public String getDisplayCategory() {
        return "Token Mapper";
    }

    @Override
    public String getDisplayType() {
        return "Custom Token Mapper";
    }

    @Override
    public String getHelpText() {
        return "Adds a Baeldung text to the claim";
    }

    @Override
    public List<ProviderConfigProperty> getConfigProperties() {
        return configProperties;
    }

    @Override
    public String getId() {
        return PROVIDER_ID;
    }

    @Override
    protected void setClaim(IDToken token, ProtocolMapperModel mappingModel,
      UserSessionModel userSession, KeycloakSession keycloakSession,
      ClientSessionContext clientSessionCtx) {
        OIDCAttributeMapperHelper.mapClaim(token, mappingModel, "Baeldung");
    }
}
We’ve chosen “custom-protocol-mapper” for our provider ID, which is the ID of the token mapper. We need this ID to configure the protocol mapper in our Keycloak server.
The main method is setClaim(). It adds our data to the token. Our setClaim() implementation simply adds a Baeldung text to the token.
The getDisplayType() and getHelpText() methods are for the admin console. The getDisplayType() method defines the text that will be shown in the admin console when listing the protocol mapper. The getHelpText() method is the tooltip text shown when we pick the protocol mapper.
4.3. Bringing It All Together
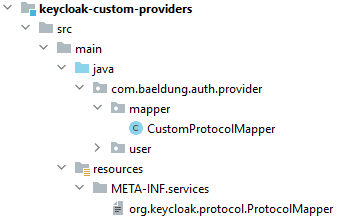
We mustn’t forget to create a service definition file and add it to our project. This file should be named org.keycloak.protocol.ProtocolMapper and placed in the META-INF/services directory of our final JAR. Also, the content of the file is the fully qualified class name of the custom protocol mapper implementation:
com.baeldung.auth.provider.mapper.CustomProtocolMapperThe directory structure is depicted below:
Now, the project is ready to run. First, we create a JAR file using the Maven install command:
mvn clean installNext, we deploy the JAR file to Keycloak by adding it to the providers directory of Keycloak. After that, we must restart the server to update the server’s provider registry with the implementation from our JAR file:
$ bin/kc.sh start-devAs we can see in the console output, Keycloak registers our custom protocol mapper:
Updating the configuration and installing your custom providers, if any. Please wait.
2023-04-05 14:55:42,588 WARN  [org.keycloak.services] (build-108) KC-SERVICES0047: custom-protocol-mapper (com.baeldung.auth.provider.CustomProtocolMapper) is implementing the internal SPI protocol-mapper.
Finally, if we go to the Provider info page, available at Keycloak’s admin console, we’ll see our custom-protocol-mapper:
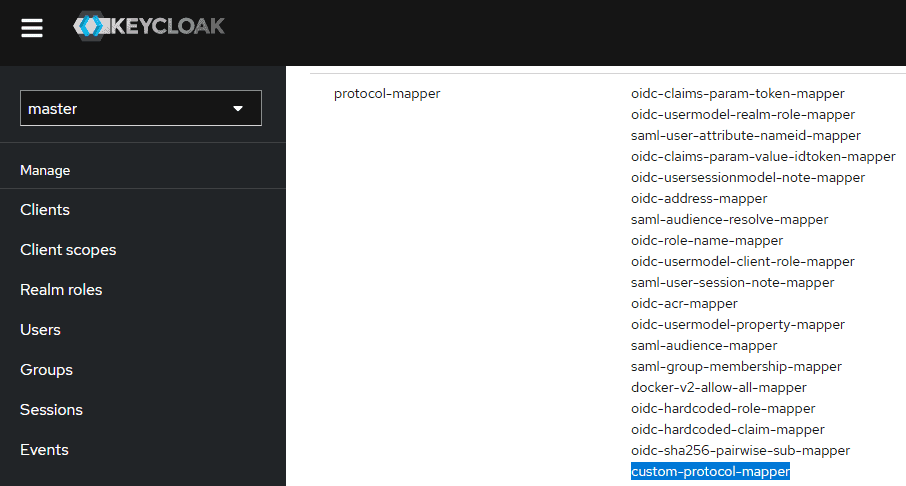
Now, we can configure the server to use our custom protocol mapper.
4.4. Configuring a Client
In Keycloak, we can add custom claims using the admin panel. For that, we need to go to our client on the admin console. Recall that earlier, we’d created a client, client-app. After that, we navigate to the Client scopes tab:
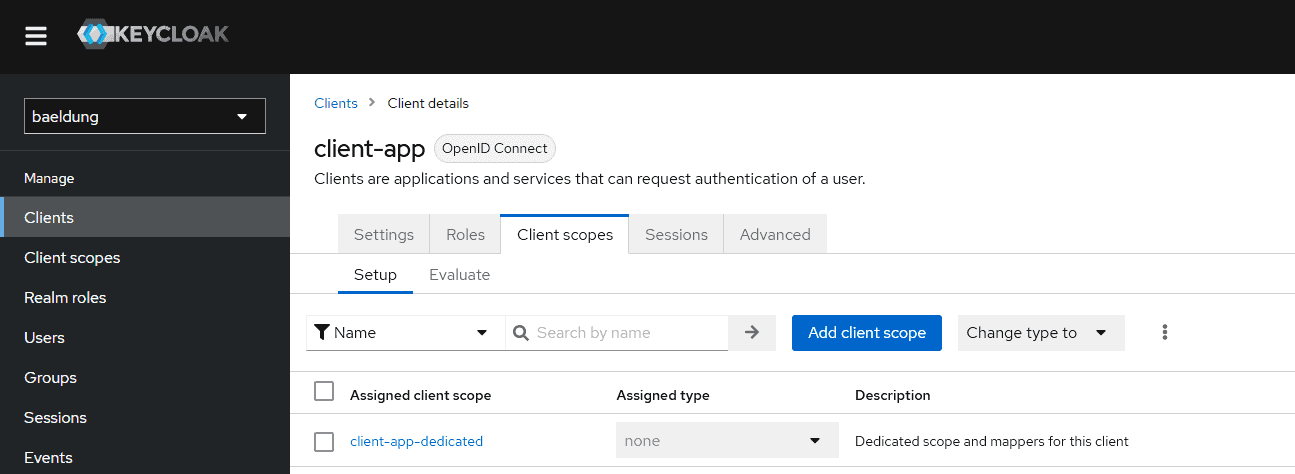
Now, let’s click on client-app-dedicated and go to its Add mapper By configuration to create a new mapping:
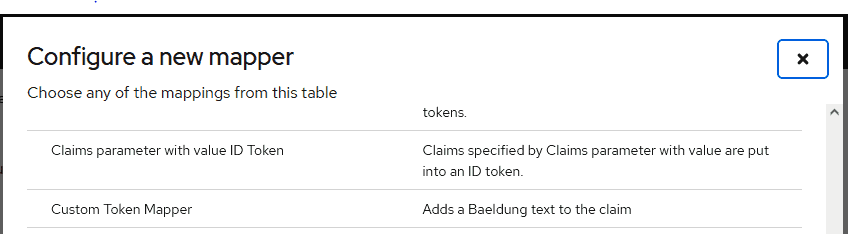
Here, we need to enter the Mapper type for our custom mapper. We’ll type “Custom Token Mapper“, which is the value we used for the getDisplayType() method in our CustomProtocolMapper class:
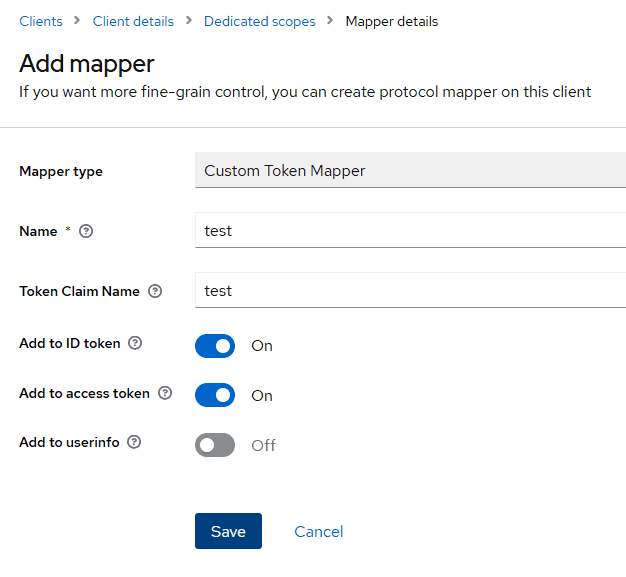
Next, we give a Name to the mapper and save it. Then, when we go back to the client-app-dedicated, we’ll see the new mapping in the list:

Now, we’re ready to test our protocol mapper.
5. Testing
Let’s get an access token for the client using the Client Credential grant type:
curl --location --request POST 'http://server-ip:server-port/auth/realms/baeldung/protocol/openid-connect/token' \
--header 'Content-Type: application/x-www-form-urlencoded' \
--data-urlencode 'client_id=client-app' \
--data-urlencode 'client_secret=<client-secret>' \
--data-urlencode 'grant_type=client_credentials'
If we obtain an access token and decode it using jwt.io, we find the test claim in the token’s body:
{
  "exp": 1680679982,
  "iat": 1680679682,
  ...
  "email_verified": false,
  "test": "Baeldung",
  "preferred_username": "service-account-client-app",
  "clientAddress": "192.168.198.1"
}
As we can see, the value of the test claim is Baeldung.
6. Conclusion
In this article, we implemented a custom protocol mapper in the Keycloak server. In general, a token is a set of attributes or claims. Protocol mappers will provide the option to add custom claims to a token.


