1. Introduction
CRaSH is a reuseable shell that deploys in a JVM and helps us interact with the JVM.
In this tutorial, we’ll see how to install CRaSH as a standalone application. Also, we’ll embed in a Spring Web application and create some custom commands.
2. Standalone Installation
Let’s install CRaSH as a standalone application by downloading the distribution from CRaSH’s official website.
The CRaSH directory structure contains three important directories cmd, bin, and conf:
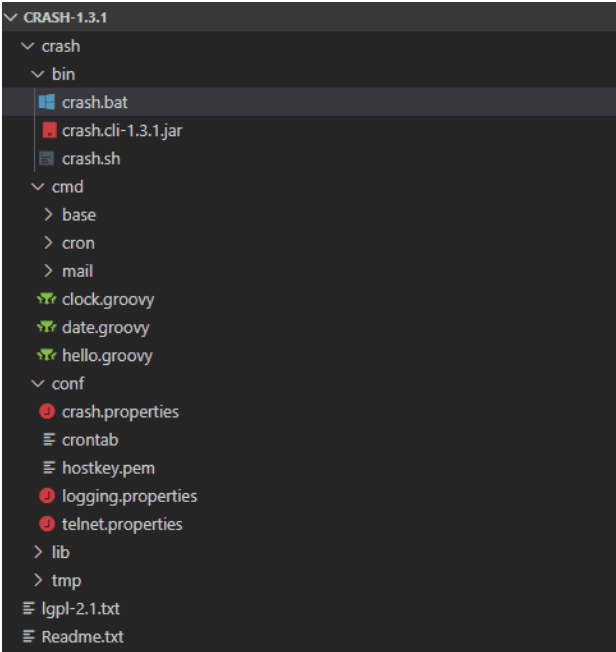
The bin directory contains the standalone CLI scripts to start CRaSH.
The cmd directory holds all the commands that it supports out of the box. Also, this is where we can put our custom commands. We’ll look into that in the later sections of this article.
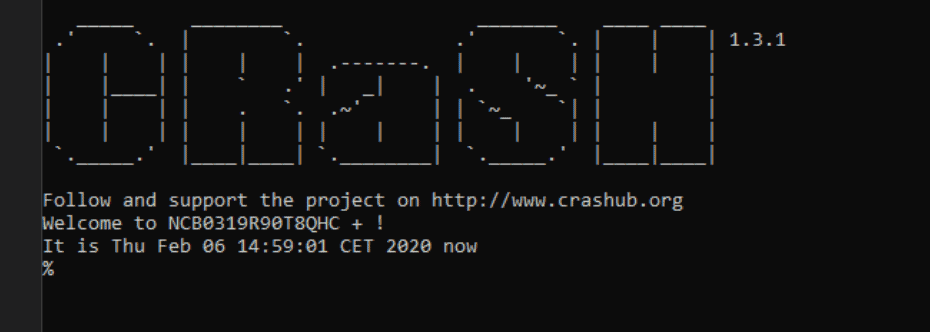
To start the CLI, we go to bin and start the standalone instance with either the crash.bat or crash.sh:
3. Embedding CRaSH in a Spring Web Application
Let’s embed CRaSH into a Spring web application. First, we’ll need some dependencies:
<dependency>
    <groupId>org.crashub</groupId>
    <artifactId>crash.embed.spring</artifactId>
    <version>1.3.2</version>
</dependency>
<dependency>
    <groupId>org.crashub</groupId>
    <artifactId>crash.cli</artifactId>
    <version>1.3.2</version>
</dependency>
<dependency>
    <groupId>org.crashub</groupId>
    <artifactId>crash.connectors.telnet</artifactId>
    <version>1.3.2</version>
</dependency>
We can check for the latest version in Maven Central.
CRaSH supports both Java and Groovy, so we’ll need to add Groovy for the Groovy scripts to work:
<dependency>
    <groupId>org.codehaus.groovy</groupId>
    <artifactId>groovy</artifactId>
    <version>3.0.0-rc-3</version>
</dependency>
Its latest version is also in Maven Central.
Next, we need to add a listener in our web.xml:
<listener>
    <listener-class>org.crsh.plugin.WebPluginLifeCycle</listener-class>
</listener>
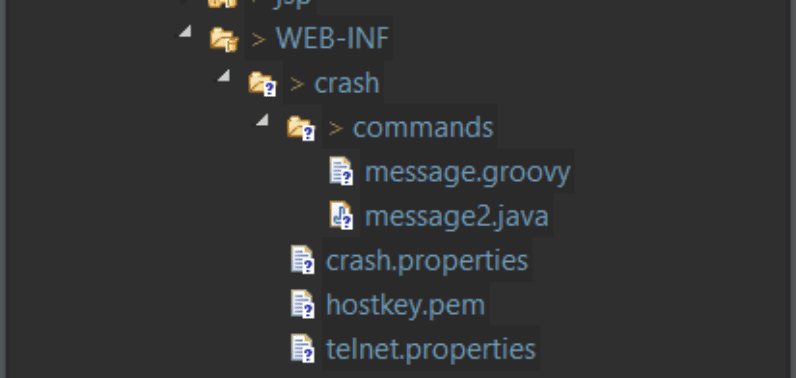
With the listener now ready, let’s add properties and commands in the WEB-INF directory. We’ll create a directory named crash and put commands and properties inside it:
Once we deploy the application, we can connect to the shell via telnet:
telnet localhost 5000
We can change the telnet port in the crash.properties file using crash.telnet.port property.
Alternatively, we can also create a Spring bean to configure the properties and override the command’s directory locations:
<bean class="org.crsh.spring.SpringWebBootstrap">
    <property name="cmdMountPointConfig" value="war:/WEB-INF/crash/commands/" />
    <property name="confMountPointConfig" value="war:/WEB-INF/crash/" />
    <property name="config">
        <props>
             <prop key="crash.telnet.port">5000</prop>
         </props>
     </property>
</bean>
4. CRaSH and Spring Boot
Spring Boot used to offer CRaSH as an embedded sell, via its remote shell:
<dependency>
    <groupId>org.springframework.boot</groupId>
    <artifactId>spring-boot-starter-remote-shell</artifactId>
</dependency>
Unfortunately, the support is now deprecated. If we still want to use the shell along with a Spring Boot application, we can use the attach mode. In the attach mode, CRaSH hooks into the JVM of the Spring Boot application instead of its own:
crash.sh <PID>
Here, <PID> the process id of that JVM instance. We can retrieve the process ids for JVM’s running on a host using the jps command.
5. Creating a Custom Command
Now, let’s create a custom command for our crash shell. There are two ways we can create and use the commands; one using Groovy, and also with Java. We’ll look into them one by one.
5.1. Command with Groovy
First, let’s create a simple command with Groovy:
class message {

    @Usage("show my own message")
    @Command
    Object main(@Usage("custom message") @Option(names=["m","message"]) String message) {
        if (message == null) {
            message = "No message given...";
        }
        return message;
    }
}
The @Command annotation marks the method as a command, @Usage is used to display the usage and parameters of the command, and finally, the @Option is for any parameters to be passed to the command.
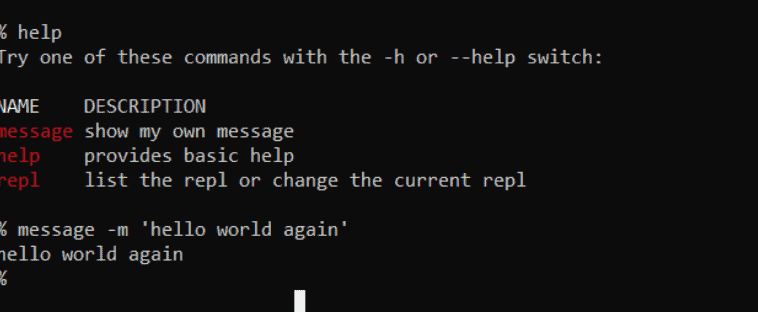
Let’s test the command:
5.2. Command with Java
Let’s create the same command with Java:
public class message2 extends BaseCommand {
    @Usage("show my own message using java")
    @Command
    public Object main(@Usage("custom message")
      @Option(names = { "m", "message" }) String message) {
        if (message == null) {
            message = "No message given...";
        }
        return message;
    }
}
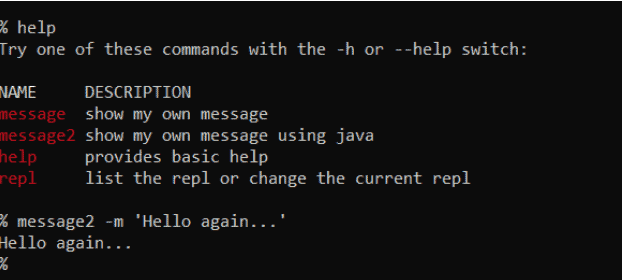
The command is similar to that of Groovy, but here we need to extend the org.crsh.command.BaseCommand.
So, let’s test again:
6. Conclusion
In this tutorial, we looked in to installing CRaSH as a standalone application, embedding it in a Spring web application. Also, we created customs commands with Groovy as well as Java.
As always, the code is available over on GitHub.


