A Controller, Service and DAO Example with Spring Boot and JSF
Last updated: March 17, 2024

Mocking is an essential part of unit testing, and the Mockito library makes it easy to write clean and intuitive unit tests for your Java code.
Get started with mocking and improve your application tests using our Mockito guide:
Handling concurrency in an application can be a tricky process with many potential pitfalls. A solid grasp of the fundamentals will go a long way to help minimize these issues.
Get started with understanding multi-threaded applications with our Java Concurrency guide:
Spring 5 added support for reactive programming with the Spring WebFlux module, which has been improved upon ever since. Get started with the Reactor project basics and reactive programming in Spring Boot:
Since its introduction in Java 8, the Stream API has become a staple of Java development. The basic operations like iterating, filtering, mapping sequences of elements are deceptively simple to use.
But these can also be overused and fall into some common pitfalls.
To get a better understanding on how Streams work and how to combine them with other language features, check out our guide to Java Streams:
Explore Spring Boot 3 and Spring 6 in-depth through building a full REST API with the framework:
Yes, Spring Security can be complex, from the more advanced functionality within the Core to the deep OAuth support in the framework.
I built the security material as two full courses - Core and OAuth, to get practical with these more complex scenarios. We explore when and how to use each feature and code through it on the backing project.
You can explore the course here:
Spring Data JPA is a great way to handle the complexity of JPA with the powerful simplicity of Spring Boot.
Get started with Spring Data JPA through the guided reference course:
Refactor Java code safely — and automatically — with OpenRewrite.
Refactoring big codebases by hand is slow, risky, and easy to put off. That’s where OpenRewrite comes in. The open-source framework for large-scale, automated code transformations helps teams modernize safely and consistently.
Each month, the creators and maintainers of OpenRewrite at Moderne run live, hands-on training sessions — one for newcomers and one for experienced users. You’ll see how recipes work, how to apply them across projects, and how to modernize code with confidence.
Join the next session, bring your questions, and learn how to automate the kind of work that usually eats your sprint time.
Yes, we're now running our only Summer Sale. All Courses are 30% off until 20th July, 2026:
Yes, we're now running our only Summer Sale. All Courses are 30% off until 20th July, 2026:
1. Introduction
JavaServer Faces is a server-side, component-based user interface framework. It was originally developed as part of the Jakarta EE.
In this tutorial, we’ll learn how to integrate JSF into a Spring Boot application. As an example, we’ll implement a simple application to create a TO-DO list.
2. Maven Dependencies
We have to extend our pom.xml to use JSF technologies:
<dependency>
    <groupId>org.apache.tomcat.embed</groupId>
    <artifactId>tomcat-embed-jasper</artifactId>
</dependency>
<!--JSF-->
<dependency>
    <groupId>org.glassfish</groupId>
    <artifactId>jakarta.faces</artifactId>
    <version>4.1.0-M1</version>
</dependency>
The jakarta.faces artifact contains the JSF APIs, and the implementations as well. We can find detailed information here.
3. Configuring the JSF Servlet
The JSF framework uses XHTML files to describe the content and structure of the user interface. The server side generates the JSF files from the XHTML descriptions.
Let’s start by creating a static structure in an index.xhtml file in the src/main/webapp directory:
<f:view xmlns="http://www.w3c.org/1999/xhtml"
  xmlns:f="http://java.sun.com/jsf/core"
  xmlns:h="http://java.sun.com/jsf/html">
    <h:head>
        <meta charset="utf-8"/>
        <meta http-equiv="X-UA-Compatible" content="IE=edge,chrome=1"/>
        <title>TO-DO application</title>
    </h:head>
    <h:body>
        <div>
            <p>Welcome in the TO-DO application!</p>
            <p style="height:50px">
                This is a static message rendered from xhtml.
            </p>
        </div>
    </h:body>
</f:view>
The content will be available at <your-url>/index.jsf. However, please note that we’ll get an error message on the client side if we try to reach the content at this stage:
There was an unexpected error (type=Not Found, status=404).
No message available
There won’t be any backend error message. Even so, we can figure out that we’ll need a JSF servlet to handle the request, and the servlet mapping to match the request with the handler.
Since we’re in Spring Boot, we can easily extend our application class to handle the required configuration:
@SpringBootApplication
public class JsfApplication extends SpringBootServletInitializer {

    public static void main(String[] args) {
        SpringApplication.run(JsfApplication.class, args);
    }

    @Bean
    public ServletRegistrationBean servletRegistrationBean() {
        FacesServlet servlet = new FacesServlet();
        ServletRegistrationBean servletRegistrationBean =
          new ServletRegistrationBean(servlet, "*.jsf");
        return servletRegistrationBean;
    }
}
This looks great, and pretty reasonable, but unfortunately it’s still not good enough. When we try to open <your-url>/index.jsf now, we’ll get another error:
java.lang.IllegalStateException: Could not find backup for factory jakarta.faces.context.FacesContextFactory.Unfortunately, we need a web.xml beside the Java configuration. Let’s create it in src/webapp/WEB-INF:
<servlet>
<servlet-name>Faces Servlet</servlet-name>
<servlet-class>jakarta.faces.webapp.FacesServlet</servlet-class>
<load-on-startup>1</load-on-startup>
</servlet>
<servlet-mapping>
<servlet-name>Faces Servlet</servlet-name>
<url-pattern>*.jsf</url-pattern>
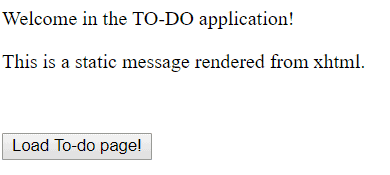
</servlet-mapping>Now our configuration is ready to go, and we can open <your-url>/index.jsf:
Welcome in the TO-DO application!

This is a static message rendered from xhtml.
Before we create our user interface, we’ll create the backend of the application.
4. Implementing the DAO Pattern
DAO stands for data access object. Usually, the DAO class is responsible for two concepts: encapsulating the details of the persistence layer and providing a CRUD interface for a single entity. We can find a detailed description in this tutorial.
To implement the DAO pattern, we’ll first define a generic interface:
public interface Dao<T> {

    Optional<T> get(int id);
    Collection<T> getAll();
    int save(T t);
    void update(T t);
    void delete(T t);
}
Now we’ll create our first, and only, domain class in this to-do application:
public class Todo {

    private int id;
    private String message;
    private int priority;

    // standard getters and setters

}
The next class will be the implementation of Dao<Todo>. The beauty of this pattern is that we can provide a new implementation of this interface anytime.
Consequently, we can change the persistence layer without touching the rest of the code.
For our example, we’ll use an in-memory storage class:
@Component
public class TodoDao implements Dao<Todo> {

    private List<Todo> todoList = new ArrayList<>();

    @Override
    public Optional<Todo> get(int id) {
        return Optional.ofNullable(todoList.get(id));
    }

    @Override
    public Collection<Todo> getAll() {
        return todoList.stream()
          .filter(Objects::nonNull)
          .collect(Collectors.collectingAndThen(Collectors.toList(), Collections::unmodifiableList));
    }

    @Override
    public int save(Todo todo) {
        todoList.add(todo);
        int index = todoList.size() - 1;
        todo.setId(index);
        return index;
    }

    @Override
    public void update(Todo todo) {
        todoList.set(todo.getId(), todo);
    }

    @Override
    public void delete(Todo todo) {
        todoList.set(todo.getId(), null);
    }
}
5. The Service Layer
The DAO layer’s main goal is to handle the details of the persistence mechanism, while the service layer stands on top of it to handle business requirements.
Notice that the DAO interface will be referenced from the service:
@Scope(value = "session")
@Component(value = "todoService")
public class TodoService {

    @Autowired
    private Dao<Todo> todoDao;
    private Todo todo = new Todo();

    public void save() {
        todoDao.save(todo);
        todo = new Todo();
    }

    public Collection<Todo> getAllTodo() {
        return todoDao.getAll();
    }

    public int saveTodo(Todo todo) {
        validate(todo);
        return todoDao.save(todo);
    }

    private void validate(Todo todo) {
        // Details omitted
    }

    public Todo getTodo() {
        return todo;
    }
}
Here, the service is a named component. We’ll use the name to reference the bean from the JSF context.
This class also has a session scope, which will be satisfying for this simple application.
For more information on Spring scopes, we can take a look at this tutorial. Since Spring’s built-in scopes have a different model than JSF, it’s worth considering defining a custom scope.
More guidance on this is available in this tutorial.
6. The Controller
Just like in a JSP application, the controller will handle the navigation between the different views.
Next, we’ll implement a minimalistic controller. It’ll navigate from the opening page to the to-do list page:
@Scope(value = "session")
@Component(value = "jsfController")
public class JsfController {

    public String loadTodoPage() {
        checkPermission();
        return "/todo.xhtml";
    }

    private void checkPermission() {
        // Details omitted
    }
}
The navigation is based on the returned name. Thus, the loadTodoPage will send us to the todo.xhtml page, which we’ll implement next.
7. Connecting JSF and Spring Beans
Now let’s see how we can reference our components from the JSF context. First, we’ll extend the index.xthml:
<f:view
  xmlns="http://www.w3c.org/1999/xhtml"
  xmlns:f="http://java.sun.com/jsf/core"
  xmlns:h="http://java.sun.com/jsf/html">
    <h:head>
       // same code as before
    </h:head>
    <h:body>
        <div>
           // same code as before
           <h:form>
             <h:commandButton value="Load To-do page!" action="#{jsfController.loadTodoPage}" />
           </h:form>
        </div>
    </h:body>
</f:view>
Here we introduced a commandButton inside of a form element. This is important, since every UICommand element (e.g. commandButton) has to be placed inside of a UIForm element (e.g. form).
At this stage, we can start our application and examine <your-url>/index.jsf:
Unfortunately, we’ll get an error when we click on the button:
There was an unexpected error (type=Internal Server Error, status=500).
jakarta.el.PropertyNotFoundException:
/index.xhtml @11,104 action="#{jsfController.loadTodoPage}":
Target Unreachable, identifier [jsfController] resolved to null
The message clearly states the problem: the jsfController resolved to null. The corresponding component is either not created, or it’s invisible from the JSF context.
In this situation the latter is true.
We need to connect the Spring context with the JSF context within the webapp/WEB-INF/faces-config.xml:
<?xml version="1.0" encoding="UTF-8"?>
<faces-config xmlns="http://xmlns.jcp.org/xml/ns/javaee"
  xmlns:xsi="http://www.w3.org/2001/XMLSchema-instance"
  xsi:schemaLocation="http://xmlns.jcp.org/xml/ns/javaee/web-facesconfig_2_2.xsd"
  version="2.2">
    <application>
        <el-resolver>org.springframework.web.jsf.el.SpringBeanFacesELResolver</el-resolver>
    </application>
</faces-config>
Now that our controller is ready to work, we’ll need the todo.xhtml.
8. Interacting With a Service From JSF
Our todo.xhtml page will have two purposes. First, it’ll display all the to-do elements.
Second, it’ll offer the opportunity to add new elements to the list.
For that, the UI component will interact directly with the service declared earlier:
<f:view xmlns="http://www.w3c.org/1999/xhtml"
  xmlns:f="http://java.sun.com/jsf/core"
  xmlns:h="http://java.sun.com/jsf/html">
    <h:head>
        <meta charset="utf-8"/>
        <meta http-equiv="X-UA-Compatible" content="IE=edge,chrome=1"/>
        <title>TO-DO application</title>
    </h:head>
    <h:body>
        <div>
            <div>
                List of TO-DO items
            </div>
            <h:dataTable value="#{todoService.allTodo}" var="item">
                <h:column>
                    <f:facet name="header"> Message</f:facet>
                    #{item.message}
                </h:column>
                <h:column>
                    <f:facet name="header"> Priority</f:facet>
                    #{item.priority}
                </h:column>
            </h:dataTable>
        </div>
        <div>
            <div>
                Add new to-do item:
            </div>
            <h:form>
                <h:outputLabel for="message" value="Message: "/>
                <h:inputText id="message" value="#{todoService.todo.message}"/>
                <h:outputLabel for="priority" value="Priority: "/>
                <h:inputText id="priority" value="#{todoService.todo.priority}" converterMessage="Please enter digits only."/>
                <h:commandButton value="Save" action="#{todoService.save}"/>
            </h:form>
        </div>
    </h:body>
</f:view>
The two purposes mentioned above are implemented in two separate div elements.
In the first, we used a dataTable element to represent all the values from todoService.AllTodo.
The second div contains a form where we can modify the state of the Todo object in the TodoService.
We use the inputText element to accept user input, whereas the second input is automatically converted into an int. With the commandButton, the user can persist (into the memory now) the Todo object with the todoService.save.
9. Conclusion
The JSF framework can be integrated into the Spring framework. We have to choose which framework will manage the beans, and in this article, we used the Spring framework.
However, the scope model is a bit different than the JSF framework, so we might consider defining custom scopes in the Spring context.


