Getting Started With the Temporal Workflow Engine in Java
Last updated: December 3, 2025


Mocking is an essential part of unit testing, and the Mockito library makes it easy to write clean and intuitive unit tests for your Java code.
Get started with mocking and improve your application tests using our Mockito guide:
Handling concurrency in an application can be a tricky process with many potential pitfalls. A solid grasp of the fundamentals will go a long way to help minimize these issues.
Get started with understanding multi-threaded applications with our Java Concurrency guide:
Spring 5 added support for reactive programming with the Spring WebFlux module, which has been improved upon ever since. Get started with the Reactor project basics and reactive programming in Spring Boot:
Since its introduction in Java 8, the Stream API has become a staple of Java development. The basic operations like iterating, filtering, mapping sequences of elements are deceptively simple to use.
But these can also be overused and fall into some common pitfalls.
To get a better understanding on how Streams work and how to combine them with other language features, check out our guide to Java Streams:
Explore Spring Boot 3 and Spring 6 in-depth through building a full REST API with the framework:
Yes, Spring Security can be complex, from the more advanced functionality within the Core to the deep OAuth support in the framework.
I built the security material as two full courses - Core and OAuth, to get practical with these more complex scenarios. We explore when and how to use each feature and code through it on the backing project.
You can explore the course here:
Spring Data JPA is a great way to handle the complexity of JPA with the powerful simplicity of Spring Boot.
Get started with Spring Data JPA through the guided reference course:
Refactor Java code safely — and automatically — with OpenRewrite.
Refactoring big codebases by hand is slow, risky, and easy to put off. That’s where OpenRewrite comes in. The open-source framework for large-scale, automated code transformations helps teams modernize safely and consistently.
Each month, the creators and maintainers of OpenRewrite at Moderne run live, hands-on training sessions — one for newcomers and one for experienced users. You’ll see how recipes work, how to apply them across projects, and how to modernize code with confidence.
Join the next session, bring your questions, and learn how to automate the kind of work that usually eats your sprint time.
1. Introduction
Many applications require orchestration engines to implement a business process. In particular, the Java world has no shortage of battle-proven options, including both open and proprietary ones.
In this tutorial, we’ll introduce Temporal, an open-source workflow engine first released in 2020, inspired by its authors’ earlier works at Uber, Azure, and Amazon.
2. What Is Temporal?
Temporal enables one to write workflows using one of the supported languages, including Java, Go, TypeScript, and more. These workflows coordinate activities, which are units of work that can be anything from sending an email to submitting a payment approval request, or any other such business process.
From an architectural perspective, Temporal follows the well-known orchestrator variant of the Saga microservices pattern. The primary characteristic of this pattern is the presence of a centralized coordinator service that tracks the progress of workflow instances and dispatches commands to workers that handle the execution of individual activities.
If a worker crashes or an activity fails, the Temporal coordinator transparently retries and resumes execution from where it stopped. This is especially valuable in distributed systems, where failures are more or less inevitable.
Deploy-wise, Temporal provides a few options:
- stand-alone server, used for local development
- on-premises deployment on a Docker-compatible engine, Kubernetes, or bare-metal
- SaaS-based with a managed Temporal instance with support, SLAs, and so on
For the demonstrations here, we use the stand-alone server. The online documentation provides more details about the other options.
3. Core Concepts
Before diving into specific code, let’s briefly cover the main components and ideas behind Temporal.
3.1. Workflow
A workflow defines the sequence of activities required to perform a given business use case.
A workflow instance can also start other child workflows. Those child instances run synchronously or asynchronously with respect to their parent and, by default, are terminated if the parent terminates. Alternatively, a parent workflow can change this behavior so that a child workflow continues to execute independently.
Workflows are deterministic and can take days, weeks, or even years to complete.
Let’s see an example of the deterministic workflows requirement. Determinism means that, for a given input, the workflow code must always follow the same execution path.
For instance, let’s suppose we have a simple workflow logic:
public selectDeliveryMethod(Order order) {

    int weight = deliveryActivities.calculateWeight(order);
    if (weight > 100 ) {
         deliveryActivities.sendByTrain(order);
    }
    else {
         deliveryActivities.sendByAirplane(order);
    }
}
This code is deterministic because it always executes one path as long as the result of the first call is the same. If we change the decision logic to use the current time, we lose determinism, as the result can vary depending on the time of day it’s executed.
The reason behind this determinism requirement is that Temporal keeps a log of all activity calls, which is used to replay workflow executions in case of worker failures. For a full discussion on this subject, the official documentation is a good starting point.
3.2. Activity
Activities perform the heavy lifting in a workflow, executing the required actions associated with a given workflow step. For instance, a booking workflow can have an activity that sends a message to an airline to secure a seat, another to send an email to the customer, and so on.
Activities should stick to the single-responsibility rule and are typically short-lived. If the activity fails, it can simply throw an exception and let Temporal handle the failure.
By default, an activity that terminates due to an exception is automatically resubmitted according to a retry policy. Temporal also enables developers to indicate that a given activity should not be retried by throwing an ApplicationFailure exception.
An important requirement for activities is that they must be idempotent. By design, Temporal’s resiliency mechanism follows the at least once principle. In practice, this means that a given activity may be executed more than once when recovering from a failure.
For instance, an activity may be completed successfully, but a network issue could prevent the worker from sending back the result. The server gets a timeout and retries its execution. In this scenario, it is up to the activity code to detect that this is a duplicate request and return the same result it would have returned in the first call.
3.3. Worker
Workers are stand-alone applications that execute workflow and activity code. They poll Temporal for tasks and report back the results.
Typically, a production environment has multiple instances of a given worker application to provide both throughput and resilience.
3.4. Task Queue
Logical queues managed by a Temporal server route workflow and activity tasks to workers. Since workers poll those queues to get tasks, they also work as the primary method for distributing loads across available workers.
3.5. Temporal Server
The backend service that manages workflow state, persistence, and coordination. The server also provides a web UI to monitor the execution of workflows, workers, and so on.
4. Setting Up Temporal for Local Development
The local development server is embedded in Temporal’s CLI tool, temporal, available for download. The package contains a single executable, which we can save to any directory.
To start the development server, we use the server start-dev subcommand of the temporal command:
$ temporal server start-dev
CLI 1.4.1 (Server 1.28.0, UI 2.39.0)

Server:  localhost:7233
UI:      http://localhost:8233
Metrics: http://localhost:34031/metrics
Once started, we can check its web UI administration interface:
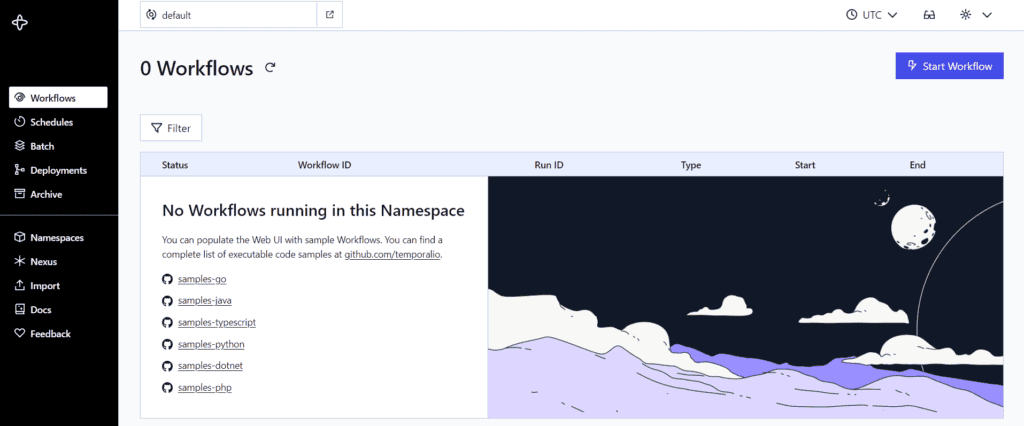
As expected, there are no workflow instances yet. Notably, the test server has no persistence, so stopping it may result in data loss.
5. Creating a Basic Workflow
Let’s create a simple Hello World workflow, which consists of a single Hello activity.
5.1. Project Setup
To begin with, we add the required SDK dependencies to a new Java project:
<dependency>
    <groupId>io.temporal</groupId>
    <artifactId>temporal-sdk</artifactId>
    <version>1.31.0</version>
</dependency>

<dependency>
    <groupId>io.temporal</groupId>
    <artifactId>temporal-testing</artifactId>
    <version>1.31.0</version>
    <scope>test</scope>
</dependency>
The latest versions of these dependencies are available on Maven Central:
Next, we continue with the process initiation.
5.2. Defining the Workflow Interface
A workflow interface defines the entry point for a workflow. It’s a regular Java interface annotated with @WorkflowInterface that contains exactly one method annotated with @WorkflowMethod.
To that end, let’s see the HelloWorkflow interface:
@WorkflowInterface
public interface HelloWorkflow {
    @WorkflowMethod
    String hello(String person);
}
Importantly, the interface name, without the package, is used by Temporal as the workflow type. We can change this default behavior by using the name optional attribute of the @WorkflowMethod annotation to use an alternative name.
Besides the entry point method, a workflow interface can have additional methods used to interact with it:
- @SignalMethod: send asynchronous messages to a workflow
- @QueryMethod: return state information about a running workflow
- @UpdateMethod: change the state of a running workflow
- @UpdateValidatorMethod: validate data sent to an @UpdateMethod before sending it to the associated handler
For this guide, we don’t cover those annotations.
5.3. Defining and Implementing the Activity Interface
For a given workflow, we also need to define one or more interfaces that define methods corresponding to its activities. In this case, the workflow we have contains a single activity, so we have a rather trivial interface:
@ActivityInterface
public interface SayHelloActivity {
    @ActivityMethod
    String sayHello(String person);
}
The activity interface must have the @ActivityInterface annotation. Moreover, we should annotate all activity methods with @ActivityMethod. By default, the method name becomes the activity name, displayed in the UI. We can use the annotation name attribute to define a different one, if needed.
We can now write the interface implementation:
public class SayHelloActivityImpl implements SayHelloActivity {
    public String sayHello(String person) {
        return "Hello, " + person;
    }
}
Notably, up to this point, the code can be written without any knowledge of Temporal concepts. This keeps the activity code clean and makes unit and integration testing much easier to implement.
5.4. Implementing the HelloWorkflow Interface
Workflow implementation classes contain the code that orchestrates the execution of activities to complete a given goal.
For this example, all we have to do is call its single activity:
public class HelloWorkflowImpl implements HelloWorkflow {

    private final SayHelloActivity activity = Workflow.newActivityStub(
      SayHelloActivity.class,
      ActivityOptions.newBuilder()
        .setStartToCloseTimeout(Duration.ofSeconds(10))
        .build()
    );

    @Override
    public String hello(String person) {
        return activity.sayHello(person);
    }
}
During initialization, we create an instance of the SayHelloActivity using the Temporal stub factory methods. Here, we define a deadline for individual executions – 10 seconds in this case.
Despite its apparent simplicity, there’s a lot going on when the sayHello method is called:
- The server creates an entry in the workflow history corresponding to the activity invocation.
- A new activity message is put in the execution queue.
- A worker fetches the message, executes the activity method, and sends back the result to the server.
- The server creates an entry to record the successful execution of the activity.
- The server returns the result to the workflow code.
Hiding these activities behind the scenes is part of the convenience that Temporal offers.
5.5. Setting Up the Worker
To run the example, we also need a Worker, which hosts implementations for the workflow and activities:
public class HelloWorkflowApplication {
    private static final String QUEUE_NAME = "say-hello-queue";

    public static void main(String[] args) {
        var service = WorkflowServiceStubs.newLocalServiceStubs();
        var client = WorkflowClient.newInstance(service);
        var factory = WorkerFactory.newInstance(client);
        var worker = factory.newWorker(QUEUE_NAME);

        HelloWorkflowRegistrar.newInstance().register(worker);
        factory.start();
    }
}
This fairly minimalistic worker has some boilerplate code required to initialize the Temporal engine and create the local worker that polls for workflow and activity execution requests.
Also, we use the HelloWorkflowRegistrar (available online) helper to inform Temporal which workflow types and activities we handle. Using a helper like this helps to keep the classes related to a given workflow nicely packaged together, improving maintainability.
Finally, we start the main event loop by calling WorkerFactory.start(). At this point, the worker starts polling Temporal and executing workflows.
Still, a few points are worth mentioning:
- This code assumes that Temporal is accessible on the localhost at the default port.
- The QUEUE_NAME constant defines the task queue from which messages are consumed.
In a real-life scenario, we should enable users to customize both the Temporal endpoint and queue name using an externalization mechanism – command-line parameters, environment variables, and similar.
Moreover, while it’s convenient to put both implementations in the same deployable artifact, this isn’t a strict requirement. For instance, we can have workers that only deal with workflow logic while others handle activities. In fact, those workers don’t even need to be written in the same language.
6. Starting a Workflow
Now that we have all the pieces of the Temporal puzzle in place, we should be able to run the workflow.
6.1. Initiating the Worker
First, let’s start the worker. When using an IDE like Eclipse or IntelliJ, we just run the HelloWorkflowApplication‘s main() method. We can also run it directly from Maven using the exec plugin:
mvn compile exec:java -Dexec.mainClass=com.baeldung.temporal.workflows.hello.HelloWorkflowApplicationRegardless of the chosen method, we should see messages on the console indicating that the worker poller is up:
INFO  c.b.t.w.h.HelloWorkflowApplication - Registering workflows and activities...
INFO  c.b.t.w.h.HelloWorkflowApplication - Starting worker...
INFO  i.t.i.worker.MultiThreadedPoller - start: MultiThreadedPoller{name=Workflow Poller taskQueue="say-hello-queue", namespace="default", identity=992243@sacha}
INFO  i.t.i.worker.MultiThreadedPoller - start: MultiThreadedPoller{name=Activity Poller taskQueue="say-hello-queue", namespace="default", identity=992243@sacha}
INFO  i.t.s.WorkflowServiceStubsImpl - Created WorkflowServiceStubs for channel: ManagedChannelOrphanWrapper{delegate=ManagedChannelImpl{logId=1, target=127.0.0.1:7233}}
At this point, we should be able to use the worker for workflows.
6.2. Starting a Workflow With the CLI
Perhaps the simplest way to start a workflow is to use the temporal CLI tool:
$ temporal workflow start --task-queue say-hello-queue --type HelloWorkflow -i \"Baeldung\"The output should have a common format:
Running execution:
  WorkflowId  <workflowId>
  RunId       <runId>
  Type        HelloWorkflow
  Namespace   default
  TaskQueue   say-hello-queue
Now, let’s use the generated WorkflowId to query its result:
$ temporal workflow result -w <workflowId>
Results:
  Status          COMPLETED
  Result          "Hello, Baeldung"
  ResultEncoding  json/plain
Thus, the output shows the workflow result. In this case, this is just the input value preceded by Hello and a comma.
6.3. Web UI Results
In the web UI, we can see that there’s an entry from this workflow instance:
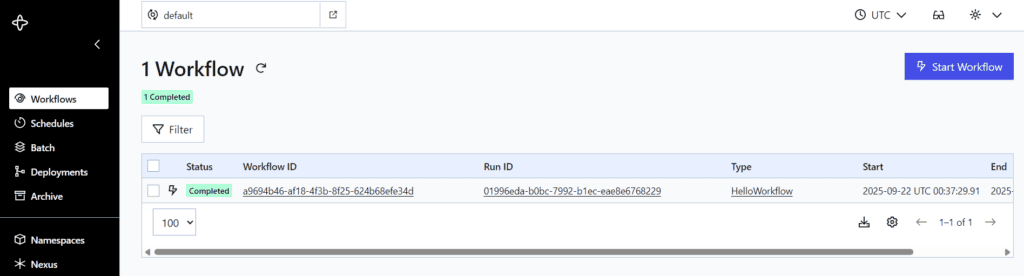
We can get additional details about this execution by clicking on it:
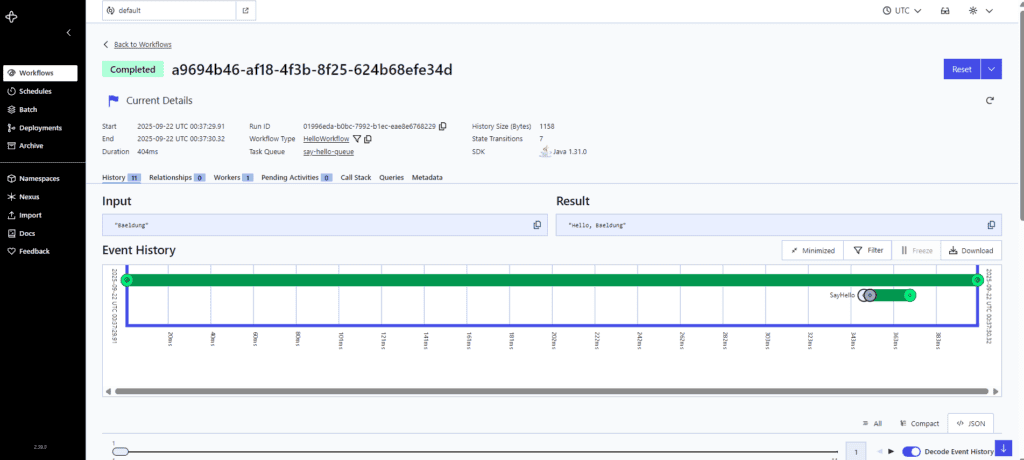
Both the UI and CLI provide additional functionality that enables us to track workflows while running or stopping.
6.4. Starting a Workflow Using the API
In real-world applications, we usually start workflows using the Temporal API. The WorkflowClient is the main API entry point that enables us to interact with a running Temporal service.
There are three ways to create a WorkflowClient:
- TestWorkflowEnvironment.getWorkflowClient(): connect to an in-process Temporal service suitable for unit and integration tests
- WorkflowServiceStubs.newLocalServiceStubs(): get a service stub pre-configured to connect to a Temporal development server running locally and use it with WorkflowClient.newInstance()
- WorkflowServiceStubs.newServiceStubs(): connect to a Temporal server (on-premises or cloud-based)
Once we have a WorkflowClient, we use newWorflowStub() to create an instance of the workflow interface. From there, the easiest way to start an instance is to call the @WorkflowMethod-annotated method.
So, let’s see an integration test example that uses the second option to create a client and then start the Hello workflow:
@Test
void givenPerson_whenSayHello_thenSuccess() {

    var service = WorkflowServiceStubs.newLocalServiceStubs();
    var client = WorkflowClient.newInstance(service);

    var wfid = UUID.randomUUID().toString();

    var workflow = client.newWorkflowStub(
      HelloWorkflow.class,
      WorkflowOptions.newBuilder()
        .setTaskQueue(QUEUE_NAME)
        .setWorkflowId(wfid)
        .build()
    );

    // Run the workflow synchronously
    var result = workflow.hello("Baeldung");
    assertEquals("Hello, Baeldung", result);
}
This call blocks until the workflow completes, which isn’t normally what we want.
In fact, a more common case is to start the workflow so it runs asynchronously with respect to the caller:
var execution = WorkflowClient.start(workflow::hello,"Baeldung");
var workflowStub = client.newUntypedWorkflowStub(execution.getWorkflowId());
The WokflowClient.start() method takes the workflow entry point method and one or more arguments. It returns a WorkflowExecution that contains the workflowId and runId associated with this instance.
6.6. Interaction via the API
The WorkflowStub we created right after starting the workflow enables us to interact with it.
For instance, we can get the workflow result using getResult() or getAsyncResult(). Let’s use the former, which returns a CompletableFuture:
var future = workflowStub.getResultAsync(String.class);
var result = future.get();
assertEquals("Hello, Baeldung", result);
There are functionalities available from this stub:
- cancel or terminate a running instance
- query the internal state
- send signals
- retrieve information about all the steps run so far
These are convenient in common control scenarios.
7. Conclusion
In this article, we’ve covered the basics of the Temporal workflow engine, focusing on initial project setup and presenting its core concepts.
In summary, although the engine offers many options and possibilities, working with it is designed to be fairly straightforward in practice.


