

Mocking is an essential part of unit testing, and the Mockito library makes it easy to write clean and intuitive unit tests for your Java code.
Get started with mocking and improve your application tests using our Mockito guide:
Handling concurrency in an application can be a tricky process with many potential pitfalls. A solid grasp of the fundamentals will go a long way to help minimize these issues.
Get started with understanding multi-threaded applications with our Java Concurrency guide:
Spring 5 added support for reactive programming with the Spring WebFlux module, which has been improved upon ever since. Get started with the Reactor project basics and reactive programming in Spring Boot:
Since its introduction in Java 8, the Stream API has become a staple of Java development. The basic operations like iterating, filtering, mapping sequences of elements are deceptively simple to use.
But these can also be overused and fall into some common pitfalls.
To get a better understanding on how Streams work and how to combine them with other language features, check out our guide to Java Streams:
Explore Spring Boot 3 and Spring 6 in-depth through building a full REST API with the framework:
Yes, Spring Security can be complex, from the more advanced functionality within the Core to the deep OAuth support in the framework.
I built the security material as two full courses - Core and OAuth, to get practical with these more complex scenarios. We explore when and how to use each feature and code through it on the backing project.
You can explore the course here:
Spring Data JPA is a great way to handle the complexity of JPA with the powerful simplicity of Spring Boot.
Get started with Spring Data JPA through the guided reference course:
Refactor Java code safely — and automatically — with OpenRewrite.
Refactoring big codebases by hand is slow, risky, and easy to put off. That’s where OpenRewrite comes in. The open-source framework for large-scale, automated code transformations helps teams modernize safely and consistently.
Each month, the creators and maintainers of OpenRewrite at Moderne run live, hands-on training sessions — one for newcomers and one for experienced users. You’ll see how recipes work, how to apply them across projects, and how to modernize code with confidence.
Join the next session, bring your questions, and learn how to automate the kind of work that usually eats your sprint time.
Yes, we're now running our only Summer Sale. All Courses are 30% off until 20th July, 2026:
Yes, we're now running our only Summer Sale. All Courses are 30% off until 20th July, 2026:
1. Introduction
In this tutorial, we’re going to learn how to resize (scale) an image using Java. We’ll explore both core Java and open-source third-party libraries that offer the image resize feature.
It’s important to mention that we can scale images both up and down. In the code samples in this tutorial, we’ll resize images to smaller sizes since, in practice, that’s the most common scenario.
2. Resize an Image Using Core Java
Core Java offers the following options for resizing images:
- Resize using java.awt.Graphics2D
- Resize using Image#getScaledInstance
2.1. java.awt.Graphics2D
Graphics2D is the fundamental class for rendering 2-dimensional shapes, text, and images on the Java platform.
Let’s start by resizing an image using Graphics2D:
BufferedImage resizeImage(BufferedImage originalImage, int targetWidth, int targetHeight) throws IOException {
    BufferedImage resizedImage = new BufferedImage(targetWidth, targetHeight, BufferedImage.TYPE_INT_RGB);
    Graphics2D graphics2D = resizedImage.createGraphics();
    graphics2D.drawImage(originalImage, 0, 0, targetWidth, targetHeight, null);
    graphics2D.dispose();
    return resizedImage;
}
Let’s see what the image looks like before and after resizing:


The BufferedImage.TYPE_INT_RGB parameter indicates the color model of the image. A full list of available values is available in the official Java BufferedImage documentation.
Graphics2D accepts additional parameters called RenderingHints. We use RenderingHints to influence different image processing aspects and most importantly image quality and processing time.
We can add a RenderingHint using the setRenderingHint method:
graphics2D.setRenderingHint(RenderingHints.KEY_INTERPOLATION, RenderingHints.VALUE_INTERPOLATION_BILINEAR);A full list of RenderingHints can be found in this Oracle tutorial.
2.2. Image.getScaledInstance()
This approach using Image is very simple and it produces images of satisfying quality:
BufferedImage resizeImage(BufferedImage originalImage, int targetWidth, int targetHeight) throws IOException {
    Image resultingImage = originalImage.getScaledInstance(targetWidth, targetHeight, Image.SCALE_DEFAULT);
    BufferedImage outputImage = new BufferedImage(targetWidth, targetHeight, BufferedImage.TYPE_INT_RGB);
    outputImage.getGraphics().drawImage(resultingImage, 0, 0, null);
    return outputImage;
}
Let’s see what happens with a picture of something yummy:
We can also direct the scaling mechanism to use one of the available approaches by providing the getScaledInstance() method with a flag that indicates the type of algorithm to be used for our image resampling needs:
Image resultingImage = originalImage.getScaledInstance(targetWidth, targetHeight, Image.SCALE_SMOOTH);All the available flags are described in the official Java Image documentation.
3. Imgscalr
Imgscalr uses Graphic2D in the background. It has a simple API with a few different methods for image resizing.
Imgscalr provides us with either the best-looking result, the fastest result, or a balanced result depending on the scaling option we pick. Other image manipulation features are also available – like those for cropping and rotation. Let’s show how it works in a simple example.
We’ll add the following Maven dependency:
<dependency>
    <groupId>org.imgscalr</groupId>
    <artifactId>imgscalr-lib</artifactId>
    <version>4.2</version>
</dependency>
Check Maven Central for the latest version.
The simplest way to use Imgscalr is:
BufferedImage simpleResizeImage(BufferedImage originalImage, int targetWidth) throws Exception {
    return Scalr.resize(originalImage, targetWidth);
}
Where originalImage is the BufferedImage to be resized and targetWidth is the width of a result image. This approach will keep the original image proportions and use default parameters – Method.AUTOMATIC and Mode.AUTOMATIC.
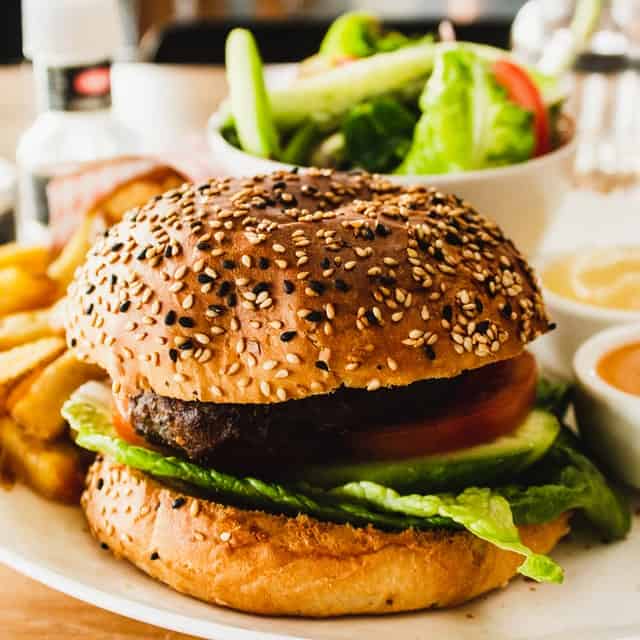
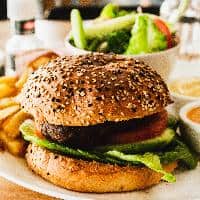
How does it do with a picture of delicious fruit? Let’s see:


The library also allows multiple configuration options, and, it handles image transparency in the background.
The most important parameters are:
- mode – used to define the resizing modes that the algorithm will use. For example, we can define whether we would like to keep proportions of the image (options are AUTOMATIC, FIT_EXACT, FIT_TO_HEIGHT, and FIT_TO_WIDTH)
- method – instructs the resizing process so that its focus is on speed, quality, or both. Possible values are AUTOMATIC, BALANCED, QUALITY, SPEED, ULTRA_QUALITY
It’s also possible to define additional resize properties that will provide us with logging or direct the library to do some color modifications on the image (make it lighter, darker, grayscale, and so on).
Let’s use the full resize() method parameterization:
BufferedImage resizeImage(BufferedImage originalImage, int targetWidth, int targetHeight) throws Exception {
    return Scalr.resize(originalImage, Scalr.Method.AUTOMATIC, Scalr.Mode.AUTOMATIC, targetWidth, targetHeight, Scalr.OP_ANTIALIAS);
}
And now we get:

Imgscalr works with all files supported by Java Image IO – JPG, BMP, JPEG, WBMP, PNG, and GIF.
4. Thumbnailator
Thumbnailator is an open-source image resizing library for Java that uses progressive bilinear scaling. It supports JPG, BMP, JPEG, WBMP, PNG, and GIF.
We’ll include it in our project by adding the following Maven dependency to our pom.xml:
<dependency>
    <groupId>net.coobird</groupId>
    <artifactId>thumbnailator</artifactId>
    <version>0.4.11</version>
</dependency>
Available dependency versions can be found on Maven Central.
It has a very simple API and allows us to set output quality in percentage:
BufferedImage resizeImage(BufferedImage originalImage, int targetWidth, int targetHeight) throws Exception {
    ByteArrayOutputStream outputStream = new ByteArrayOutputStream();
    Thumbnails.of(originalImage)
        .size(targetWidth, targetHeight)
        .outputFormat("JPEG")
        .outputQuality(1)
        .toOutputStream(outputStream);
    byte[] data = outputStream.toByteArray();
    ByteArrayInputStream inputStream = new ByteArrayInputStream(data);
    return ImageIO.read(inputStream);
}
Let’s see how this smiling photograph looks before and after resizing:


It also has an option for batch processing:
Thumbnails.of(new File("path/to/directory").listFiles())
    .size(300, 300)
    .outputFormat("JPEG")
    .outputQuality(0.80)
    .toFiles(Rename.PREFIX_DOT_THUMBNAIL);
As Imgscalr, Thumblinator works with all files supported by Java Image IO – JPG, BMP, JPEG, WBMP, PNG, and GIF.
5. Marvin
Marvin is a handy tool for image manipulation and it offers a lot of useful basic (crop, rotate, skew, flip, scale) and advanced (blur, emboss, texturing) features.
As before, we’ll add Maven dependencies needed for Marvin resizing:
<dependency>
    <groupId>com.github.downgoon</groupId>
    <artifactId>marvin</artifactId>
    <version>1.5.5</version>
    <type>pom</type>
</dependency>
<dependency>
    <groupId>com.github.downgoon</groupId>
    <artifactId>MarvinPlugins</artifactId>
    <version>1.5.5</version>
</dependency>
Available Marvin dependency versions can be found on Maven Central, along with the Marvin Plugins versions.
The downside of Marvin is that it doesn’t offer an additional scaling configuration. Also, the scale method requires an image and image clone which is a bit cumbersome:
BufferedImage resizeImage(BufferedImage originalImage, int targetWidth, int targetHeight) {
MarvinImage image = new MarvinImage(originalImage);
Scale scale = new Scale();
scale.load();
scale.setAttribute("newWidth", targetWidth);
scale.setAttribute("newHeight", targetHeight);
scale.process(image.clone(), image, null, null, false);
return image.getBufferedImageNoAlpha();
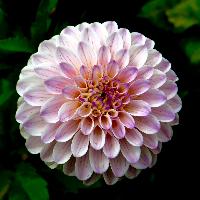
}Let’s now resize an image of a flower and see how it goes:

6. Best Practice
Image processing is an expensive operation in terms of resources, so picking the highest quality is not necessarily the best option when we don’t really need it.
Let’s see the performance of all of the approaches. We took one 1920×1920 px image, and scaled it to 200×200 px. The resulting observed times are as follows:
- java.awt.Graphics2D – 34ms
- Image.getScaledInstance() – 235ms
- Imgscalr – 143ms
- Thumbnailator – 547ms
- Marvin – 361ms
Also, while defining the target image width and height, we should pay attention to the image aspect ratio. This way image will preserve its original proportions and will not be stretched.
7. Conclusion
This article illustrated a few ways to resize an image in Java. We also learned how many different factors can influence the resize process.


