Lossy and Lossless Image Compression Using Java
Last updated: January 8, 2024


Mocking is an essential part of unit testing, and the Mockito library makes it easy to write clean and intuitive unit tests for your Java code.
Get started with mocking and improve your application tests using our Mockito guide:
Handling concurrency in an application can be a tricky process with many potential pitfalls. A solid grasp of the fundamentals will go a long way to help minimize these issues.
Get started with understanding multi-threaded applications with our Java Concurrency guide:
Spring 5 added support for reactive programming with the Spring WebFlux module, which has been improved upon ever since. Get started with the Reactor project basics and reactive programming in Spring Boot:
Since its introduction in Java 8, the Stream API has become a staple of Java development. The basic operations like iterating, filtering, mapping sequences of elements are deceptively simple to use.
But these can also be overused and fall into some common pitfalls.
To get a better understanding on how Streams work and how to combine them with other language features, check out our guide to Java Streams:
Explore Spring Boot 3 and Spring 6 in-depth through building a full REST API with the framework:
Yes, Spring Security can be complex, from the more advanced functionality within the Core to the deep OAuth support in the framework.
I built the security material as two full courses - Core and OAuth, to get practical with these more complex scenarios. We explore when and how to use each feature and code through it on the backing project.
You can explore the course here:
Spring Data JPA is a great way to handle the complexity of JPA with the powerful simplicity of Spring Boot.
Get started with Spring Data JPA through the guided reference course:
Refactor Java code safely — and automatically — with OpenRewrite.
Refactoring big codebases by hand is slow, risky, and easy to put off. That’s where OpenRewrite comes in. The open-source framework for large-scale, automated code transformations helps teams modernize safely and consistently.
Each month, the creators and maintainers of OpenRewrite at Moderne run live, hands-on training sessions — one for newcomers and one for experienced users. You’ll see how recipes work, how to apply them across projects, and how to modernize code with confidence.
Join the next session, bring your questions, and learn how to automate the kind of work that usually eats your sprint time.
1. Introduction
In this tutorial, we’ll explore how to compress images using Java. We’ll start by compressing images using the built-in library in Java for image compression. Then we’ll cover the alternative library Apache Commons Imaging.
Let’s start by learning a little bit about image compression.
2. What Is Image Compression?
Image compression allows us to reduce the size of an image file without significantly compromising its visual quality. There are two types of compression. First, we use lossy compression to accept a reduced image quality while achieving a much smaller file size. For instance, we have JPEG and WebP formats for lossy compression. Second, we use lossless compression to preserve data and information during compression. For example, PNG and GIF formats are used during lossless compression.
Now, we’ll focus on lossy compression using the JPEG format, as it is the most used format on the internet. Afterward, we’ll check how to compress PNG images, known as PNG image optimization.
3. Compressing Images with Java Image I/O
First, we’ll use Java Image I/O‘s built-in API for reading and writing images. It supports various image formats, including JPEG, PNG, BMP, and GIF. Let’s see how to compress an image using Java Image I/O:
File inputFile = new File("input_image.jpg");

BufferedImage inputImage = ImageIO.read(inputFile);

Iterator<ImageWriter> writers = ImageIO.getImageWritersByFormatName("jpg");
ImageWriter writer = writers.next();

File outputFile = new File("output.jpg");
ImageOutputStream outputStream = ImageIO.createImageOutputStream(outputFile);
writer.setOutput(outputStream);

ImageWriteParam params = writer.getDefaultWriteParam();
params.setCompressionMode(ImageWriteParam.MODE_EXPLICIT);
params.setCompressionQuality(0.5f);

writer.write(null, new IIOImage(inputImage, null, null), params);

outputStream.close();
writer.dispose();
First, we are reading the image from the resources file. Then, we create an ImageWriter for the JPG format, setting this writer’s output file. Before we can write the image, we create the ImageWriteParam object to define the compression mode and the compression quality to 50%. Finally, we write the image, close the output stream, and clean the writer.
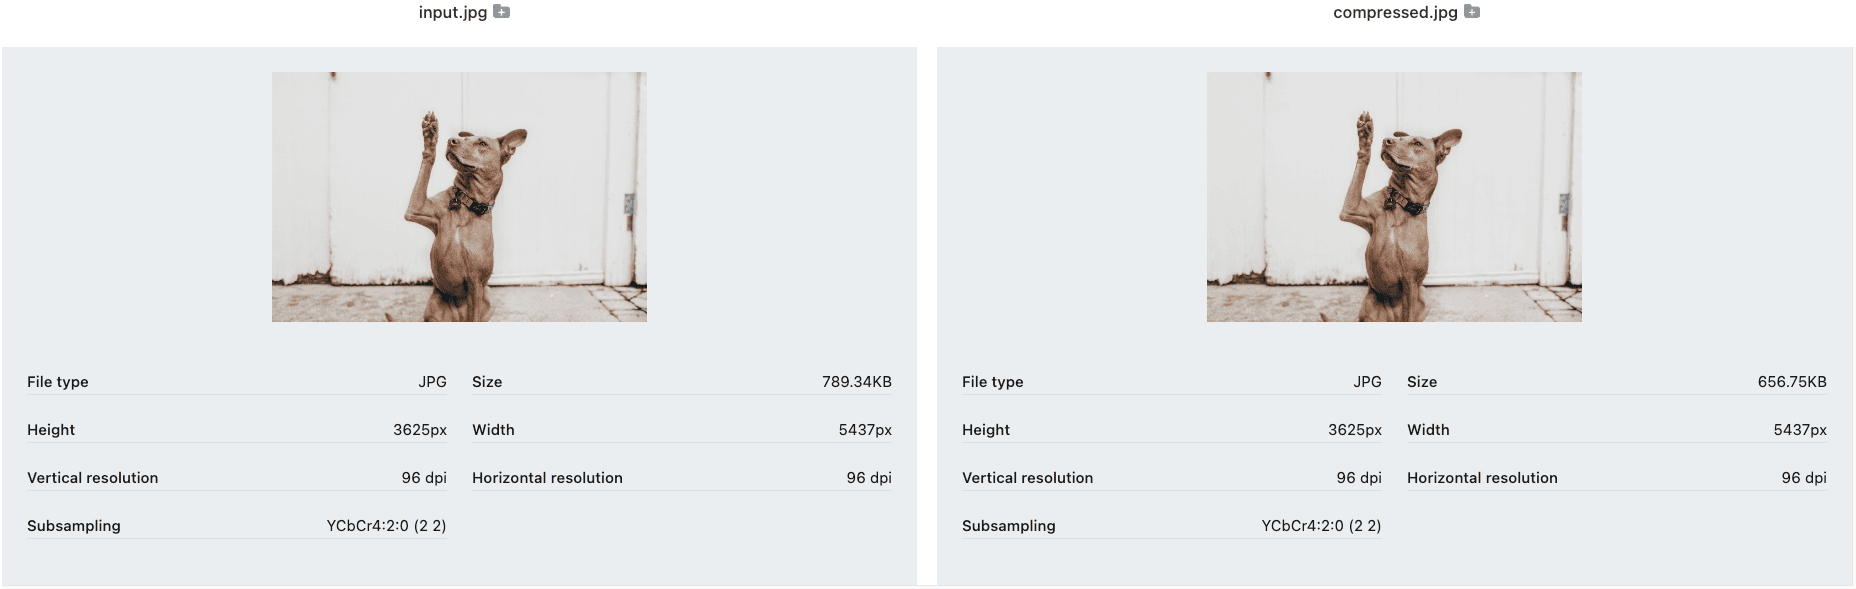
For example, by compressing an example image by 50%, we almost reduced the file size from 790KB to 656KB, a little below 83% of the initial size. Hence, the change in the quality of the picture isn’t noticeable:
4. Compressing Images Using Thumbnails Library
The Thumbnails library is a straightforward and versatile library for resizing and compressing images. Let’s first add the library to our pom.xml:
<dependency>
    <groupId>net.coobird</groupId>
    <artifactId>thumbnailator</artifactId>
    <version>0.4.19</version>
</dependency>
Let’s see how to compress an image using the Thumbnails class:
File input = new File("input_image.jpg");
File output = new File("output.jpg");

Thumbnails.of(input)
  .scale(1)
  .outputQuality(0.5)
  .toFile(output);
Here, the scale(1) method keeps the original image dimensions while outputQuality(0.5) sets the output quality to 50%.
5. Compressing Images with Pngtastic Library
PNG optimization is a type of compression specifically designed for PNG images. We’ll use the Pngtastic library to optimize a PNG image. First, let’s add the latest repository to our pom.xml:
<dependency>
    <groupId>com.github.depsypher</groupId>
    <artifactId>pngtastic</artifactId>
    <version>1.7</version>
</dependency>
Finally, we can use the PngOptimizer class to compress a PNG file:
PngImage inputImage = new PngImage(Files.newInputStream(Paths.get(inputPath)));
PngOptimizer optimizer = new PngOptimizer();
PngImage optimized = optimizer.optimize(inputImage);
OutputStream output = Files.newOutputStream(Paths.get(outputPath));
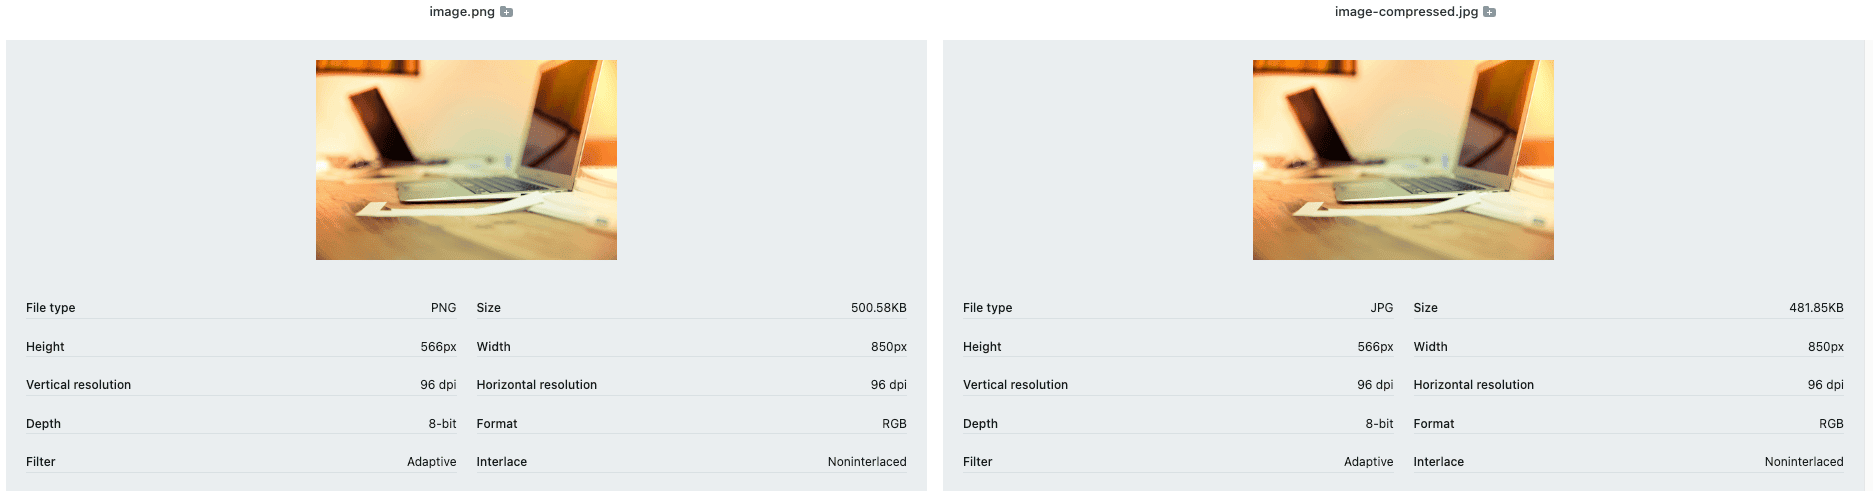
optimized.writeDataOutputStream(output);We use the .optimize() method to let the library decide the best compression. Being a lossless compression, it is hard to reduce the size of the image significantly. Here, we reduced the size from 500 KB to 481 KB.
6. Conclusion
In this article, we’ve covered two approaches to lossy compression using Java: the built-in Java Image I/O API and the Apache Commons Imaging library. Then, we used the Pngtastic library to do lossless compression on PNG images.


