1. Overview
This tutorial is an introduction to Java configuration for Spring Security which enables users to easily configure Spring Security without the use of XML.
Java configuration was added to Spring Framework in Spring 3.1, was extended to Spring Security in Spring 3.2, and is defined in a class annotated with @Configuration.
2. Maven Dependencies
To integrate Spring Security into a Spring Boot application, we need to add the spring-boot-starter-security dependency in our pom.xml:
<dependency>
    <groupId>org.springframework.boot</groupId>
    <artifactId>spring-boot-starter-security</artifactId>
</dependency>
3. Web Security With Java Configuration
Let’s start with a basic example of a Spring Security Java configuration:
@Configuration
public class SecurityConfig {

  @Bean
  public UserDetailsService inMemoryUserDetailsService(
    PasswordEncoder passwordEncoder) {
    UserDetails user = User.builder()
      .username("user")
      .password(passwordEncoder.encode("password"))
      .roles("USER")
      .build();
    return new InMemoryUserDetailsManager(user);
  }

}
This configuration class sets up a basic in-memory authentication mechanism using Spring Security.
It defines a single user with a username/password of user/password. Also, it assigns the USER role. We use the InMemoryUserDetailsManager, which stores user details in memory. Additionally, we need a PasswordEncoder bean for encoding the password of the user:
@Bean
public PasswordEncoder passwordEncoder() {
    return PasswordEncoderFactories.createDelegatingPasswordEncoder();
}
4. Web Security
To configure our authorization rules and our authentication mechanisms, we publish a SecurityFilterChain bean:
@Bean
public SecurityFilterChain filterChain(HttpSecurity http) throws Exception {
    http
      .authorizeHttpRequests((authz) -> authz
        .anyRequest().authenticated())
      .httpBasic(withDefaults());
    return http.build();
}
The above configuration makes sure any request to the application is authenticated with HTTP basic authentication.
Now, when we start the application and navigate to http://localhost:8080/app/, a basic authentication login prompt appears. After entering the username “user” and the password “password“, the server validates the credentials. If the authentication is successful, we can access the requested resource.
5. Form Login
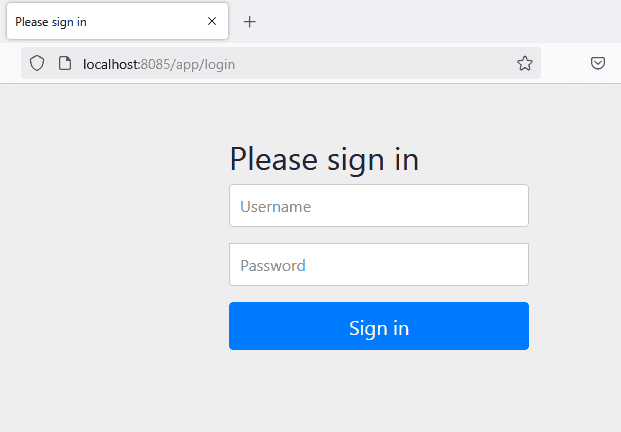
We can add browser-based login and a default login page by adding the formLogin DSL call to our declaration:
@Bean
public SecurityFilterChain filterChain(HttpSecurity http) throws Exception {
    http
      .authorizeHttpRequests((authz) -> authz
        .anyRequest().authenticated())
      .formLogin(withDefaults())
      .httpBasic(withDefaults());
    return http.build();
}
At startup, we can see that a default page is generated for us:

6. Authorization With Roles
Let’s now configure some simple authorization on each URL using roles:
@Bean
public SecurityFilterChain filterChain(HttpSecurity http) throws Exception {
    http
      .authorizeHttpRequests((authz) -> authz
        .requestMatchers("/").hasRole("USER")
        .requestMatchers("/admin/**").hasRole("ADMIN")
        .anyRequest().authenticated()
      )
      .formLogin(withDefaults())
      .httpBasic(withDefaults());
    return http.build();
}
These restrict access to the root (/) for users with the USER role and /admin/** for those with the ADMIN role, while any authenticated user can access the rest of the site.
Notice how we’re using the type-safe API hasRole.
7. Logout
As with many other aspects of Spring Security, logout has some great defaults provided by the framework.
By default, a logout request invalidates the session, clears any authentication caches, clears the SecurityContextHolder, and redirects to the login page.
Here’s a simple logout config:
@Bean
public SecurityFilterChain filterChain(HttpSecurity http) throws Exception {
    http
      // ...
      .logout(withDefaults());
    return http.build();
}
However, if we want to get more control over the available handlers, here’s what a more complete implementation will look like:
@Bean
public SecurityFilterChain filterChain(HttpSecurity http,
    LogoutSuccessHandler webSecurityUserLogoutHandler)
    throws Exception {
    http
      // ...
      .logout((logout) -> logout
        .logoutSuccessUrl("/")
        .invalidateHttpSession(true)
        .logoutSuccessHandler(webSecurityUserLogoutHandler)
        .deleteCookies("JSESSIONID")
      );
    return http.build();
}

@Bean
public LogoutSuccessHandler webSecurityUserLogoutHandler() {
    return (request, response, authentication) -> {
      System.out.println("User logged out successfully!");
      response.sendRedirect("/app");
    };
}
This setup provides a clean and secure logout process while giving flexibility in handling post-logout actions.
8. Authentication
Let’s look at another way of allowing authentication with Spring Security.
8.1. In-Memory Authentication
Recall that, in the beginning, we used in-memory configuration:
@Bean
public UserDetailsService inMemoryUserDetailsService(
    PasswordEncoder passwordEncoder) {
    UserDetails user = User.builder()
      .username("user")
      .password(passwordEncoder.encode("password"))
      .roles("USER")
      .build();
    UserDetails admin = User.builder()
      .username("admin")
      .password(passwordEncoder.encode("password"))
      .roles("ADMIN")
      .build();
    return new InMemoryUserDetailsManager(user, admin);
}
8.2. JDBC Authentication
To move that to JDBC, first, we add the h2 dependency to our pom.xml:
<dependency>
    <groupId>com.h2database</groupId>
    <artifactId>h2</artifactId>
    <scope>runtime</scope>
</dependency>
Also, we need to configure the H2 database in application.properties:
spring.datasource.url=jdbc:h2:mem:testdb
spring.datasource.username=sa
spring.datasource.password=
spring.datasource.driver-class-name=org.h2.Driver
spring.sql.init.schema-locations=classpath:org/springframework/security/core/userdetails/jdbc/users.ddl
This defines a data source that we can depend on for the next piece:
@Bean
public UserDetailsManager jdbcUserDetailsManager(DataSource dataSource,
    PasswordEncoder passwordEncoder) {
    JdbcUserDetailsManager jdbcUserDetailsManager = new JdbcUserDetailsManager(dataSource);
    UserDetails user = User.builder()
      .username("user")
      .password(passwordEncoder.encode("password"))
      .roles("USER")
      .build();
    UserDetails admin = User.builder()
      .username("admin")
      .password(passwordEncoder.encode("password"))
      .roles("ADMIN")
      .build();
    jdbcUserDetailsManager.createUser(user);
    jdbcUserDetailsManager.createUser(admin);
    return jdbcUserDetailsManager;
}
Also, we need to set up an embedded DataSource that is initialized with the default user schema.
Of course, with both the above examples, we also need to define the PasswordEncoder bean as outlined. Spring Security provides one in org/springframework/security/core/userdetails/jdbc/users.ddl.
We use @Profile (inmemory or jdbc) for selecting which UserDetailsManager beans should be active:
spring.profiles.active=inmemory
9. Conclusion
In this quick tutorial, we covered the basics of Java Configuration for Spring Security and focused on the code samples that illustrate the simplest configuration scenarios.
The code backing this article is available on GitHub. Once you're
logged in as a Baeldung Pro Member, start learning and coding on the project.


