

Mocking is an essential part of unit testing, and the Mockito library makes it easy to write clean and intuitive unit tests for your Java code.
Get started with mocking and improve your application tests using our Mockito guide:
Handling concurrency in an application can be a tricky process with many potential pitfalls. A solid grasp of the fundamentals will go a long way to help minimize these issues.
Get started with understanding multi-threaded applications with our Java Concurrency guide:
Spring 5 added support for reactive programming with the Spring WebFlux module, which has been improved upon ever since. Get started with the Reactor project basics and reactive programming in Spring Boot:
Since its introduction in Java 8, the Stream API has become a staple of Java development. The basic operations like iterating, filtering, mapping sequences of elements are deceptively simple to use.
But these can also be overused and fall into some common pitfalls.
To get a better understanding on how Streams work and how to combine them with other language features, check out our guide to Java Streams:
Explore Spring Boot 3 and Spring 6 in-depth through building a full REST API with the framework:
Yes, Spring Security can be complex, from the more advanced functionality within the Core to the deep OAuth support in the framework.
I built the security material as two full courses - Core and OAuth, to get practical with these more complex scenarios. We explore when and how to use each feature and code through it on the backing project.
You can explore the course here:
All Access is finally out, with all of my Spring courses. Learn JUnit is out as well, and Learn Maven is coming fast. And, of course, quite a bit more affordable. Finally.
>> GET THE COURSESpring Data JPA is a great way to handle the complexity of JPA with the powerful simplicity of Spring Boot.
Get started with Spring Data JPA through the guided reference course:
Refactor Java code safely — and automatically — with OpenRewrite.
Refactoring big codebases by hand is slow, risky, and easy to put off. That’s where OpenRewrite comes in. The open-source framework for large-scale, automated code transformations helps teams modernize safely and consistently.
Each month, the creators and maintainers of OpenRewrite at Moderne run live, hands-on training sessions — one for newcomers and one for experienced users. You’ll see how recipes work, how to apply them across projects, and how to modernize code with confidence.
Join the next session, bring your questions, and learn how to automate the kind of work that usually eats your sprint time.
1. Overview
Proper documentation is essential for seamless interaction with software – especially when working with an API for other developers. While we have tools like Swagger, Smart-Doc introduces a different approach that integrates smoothly with existing development practices.
In this tutorial, we’ll learn the basics of Smart-Doc and demonstrate how to set it up in a Spring Boot project. We’ll then generate documentation in HTML, OpenAPI specification format, and Postman collection formats.
2. Getting Started With Smart-Doc
Smart-Doc is a Java library that automatically generates documentation in multiple formats, including HTML, AsciiDoc, Postman, and OpenAPI. It doesn’t rely on special annotations; it analyzes the source code and existing Javadoc comments to produce accurate and up-to-date documentation.
It supports various types of services, including REST APIs, WebSockets, and gRPC. Also, it works out of the box with frameworks and tools such as Spring Boot, JMeter, JAX-RS, and Quarkus.
To start using Smart-Doc, we need to define a configuration file inside the resources folder. This file typically includes settings such as server URL and output directory.
3. Maven Plugin
To use Smart-Doc, we need to add the smart-doc-maven-plugin to our pom.xml and define the path to the configuration file:
<plugin>
    <groupId>com.ly.smart-doc</groupId>
    <artifactId>smart-doc-maven-plugin</artifactId>
    <version>3.1.1</version>
    <configuration>
        <configFile>./src/main/resources/smart-doc.json</configFile>
        <projectName>Book API</projectName>
    </configuration>
</plugin>
This plugin allows us to generate Smart-Doc documentation by running a Maven command. Also, we specify the location of the configuration file for generating documentation. Finally, we define the project name.
Next, let’s define a configuration file named smart-doc.json in our resources folder:
{
  "outPath": "./src/main/resources/doc",
  "serverUrl": "localhost:8080"
}
Here, we define the outPath, which specifies the output directory where the generated documentation is saved. The serverUrl specifies the base server URL for testing the API request.
4. Spring Boot Project
To understand how Smart-Doc works, let’s bootstrap a Spring Boot project by adding the spring-boot-starter-web to the pom.xml:
<dependency>
    <groupId>org.springframework.boot</groupId>
    <artifactId>spring-boot-starter-web</artifactId>
    <version>3.5.4</version>
</dependency>
The spring-boot-starter-web dependency allows us to build REST APIs with an embedded server.
4.1. Model Class
Next, let’s create a POJO class to represent an entity:
public class Book {
    /**
     * Book ID
     */
    private Long id;

    /**
     * Author
     */
    private String author;

    /**
     * Book Title
     */
    private String title;

    /**
     * Book Price
     */
    private Double price;
}
In the code above, we document each field using Javadoc comments.
4.2. Repository Class
Next, let’s create a repository class:
@Repository
public class BookRepository {
    private static final Map<Long, Book> books = new ConcurrentHashMap<>();

    static {
        Book book = new Book(1L, "George Martin", "A Song of Ice and Fire", 10000.00);
        books.put(1L, book);
    }

    public Optional<Book> findById(long id) {
        return Optional.ofNullable(books.get(id));
    }

    public void add(Book book) {
        books.put(book.getId(), book);
    }

    public List<Book> getBooks() {
        return new ArrayList<>(books.values());
    }

    public boolean delete(Book book) {
        return books.remove(book.getId(), book);
    }
}
Here, we create a simple repository with basic Create, Read, Update, and Delete (CRUD) operations.
4.3. Controller Class
Next, let’s create a controller class with detailed Javadoc:
/**
 * The type Book controller.
 *
 * @author Baeldung.
 */
@RestController
@RequestMapping("/api/v1")
public class BookController {
    @Autowired
    private BookRepository bookRepository;

    /**
     * Create book.
     *
     * @param book the book
     * @return the book
     */
    @PostMapping("/books")
    public ResponseEntity<Book> createBook(@RequestBody Book book) {
        bookRepository.add(book);

        return ResponseEntity.ok(book);
    }

    /**
     * Get all books.
     *
     * @return the list
     */
    @GetMapping("/books")
    public ResponseEntity<List<Book>> getAllBooks() {
        return ResponseEntity.ok(bookRepository.getBooks());
    }

    /**
     * Gets book by id.
     *
     * @param bookId the book id|1
     * @return the book by id
     */
    @GetMapping("/book/{id}")
    public ResponseEntity<Book> getBookById(@PathVariable(value = "id") Long bookId) {
        Book book = bookRepository.findById(bookId)
          .orElseThrow(() -> new ResponseStatusException(HttpStatusCode.valueOf(404)));
        return ResponseEntity.ok(book);
    }

    /**
     * Update book response entity.
     *
     * @param bookId      the book id|1
     * @param bookDetails the book details
     * @return the response entity
     */
    @PutMapping("/books/{id}")
    public ResponseEntity<Book> updateBook(@PathVariable(value = "id") Long bookId, @Valid @RequestBody Book bookDetails) {
        Book book = bookRepository.findById(bookId)
          .orElseThrow(() -> new ResponseStatusException(HttpStatusCode.valueOf(404)));
        book.setAuthor(bookDetails.getAuthor());
        book.setPrice(bookDetails.getPrice());
        book.setTitle(bookDetails.getTitle());

        bookRepository.add(book);
        return ResponseEntity.ok(book);
    }

    /**
     * Delete book.
     *
     * @param bookId the book id|1
     * @return the true
     */
    @DeleteMapping("/book/{id}")
    public ResponseEntity<Boolean> deleteBook(@PathVariable(value = "id") Long bookId) {
        Book book = bookRepository.findById(bookId)
          .orElseThrow(() -> new ResponseStatusException(HttpStatusCode.valueOf(404)));
        return ResponseEntity.ok(bookRepository.delete(book));
    }
}
In the code above, we document all controller methods, specify the request parameter, and the return type.
4.4. Generating Documentation
Finally, let’s generate the documentation with the Smart-Doc Maven command:
$ mvn smart-doc:html
The command above generates the HTML documentation in the resources/doc directory:
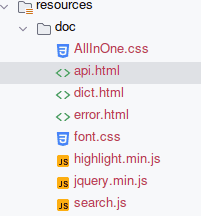
The api.html file contains the documentation.
5. Reviewing the HTML Documentation
After running the Maven command, let’s open the api.html file to review the generated documentation:
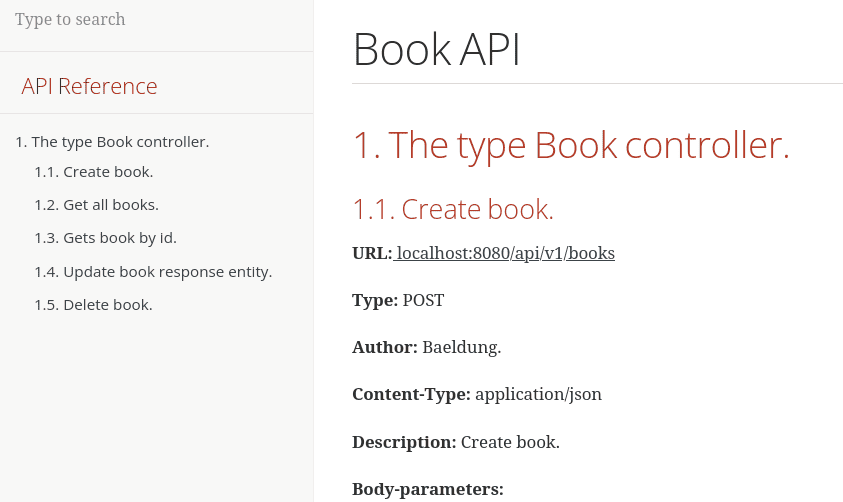
On the left-hand side, Smart-Doc lists all the controller methods; clicking on a method navigates to a detailed section with description and parameter details.
Let’s further scroll down to see more details about the create book endpoint:
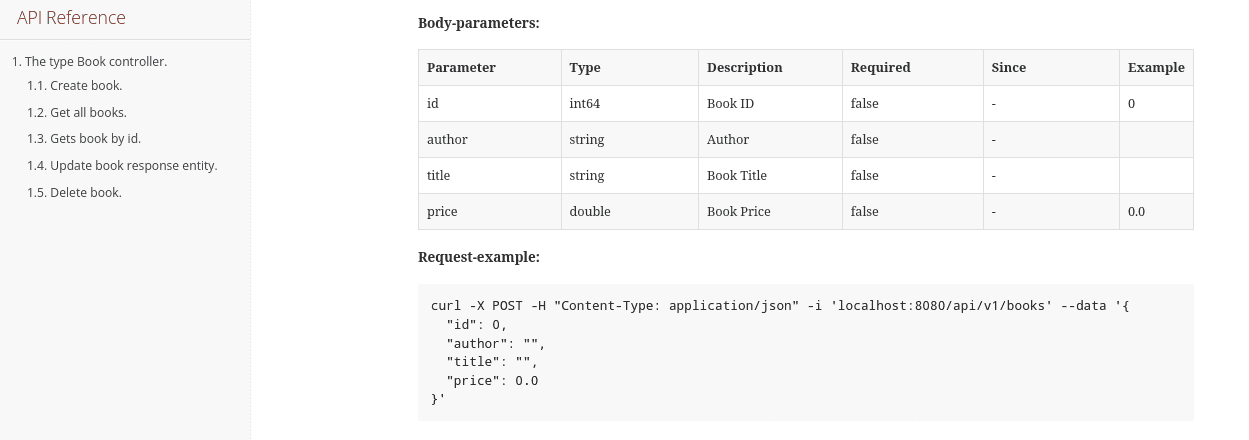
The table above shows the expected input type, parameters, and return values. The parameter descriptions are derived directly from the Javadoc comments in the entity class.
6. Generating Postman Documentation
Moving, let’s generate a documentation that can be imported and tested in Postman. To do this, let’s run the following command:
$ mvn smart-doc:postmanThe command above generated a postman.json file in our output directory:
{
  "info": {
    "schema": "https://schema.getpostman.com/json/collection/v2.1.0/collection.json",
    "_postman_id": "91daa5c0-3bfe-4002-823b-875398e2bb2e",
    "name": "Book API"
  },
  "item": [
    {
      "name": "default",
      "item": [
        {
          "name": "The type Book controller.",
          "item": [
            {
              "name": "Create book.",
              "request": {
                "method": "POST",
                "body": {
                  "mode": "raw",
                  "raw": "{\n  \"id\": 0,\n  \"author\": \"\",\n  \"title\": \"\",\n  \"price\": 0.0\n}",
                  "options": {
                    "raw": {
                      "language": "json"
                    }
                  }
                },
// ...
}
Here, we see some sections of the generated postman.json file. It can be imported into Postman, making it easy to test the API endpoints directly.
7. Generating OpenAPI Specification
Alternatively, we can generate an OpenAPI specification in the JSON format:
$ mvn smart-doc:openapiThis command generates an openapi.json file in the output directory:
{
  "openapi": "3.1.0",
  "info": {
    "title": "Book API",
    "version": "v1.0.0"
  },
  "servers": [
    {
      "url": "localhost:8080"
    }
  ],
  "tags": [
    {
      "name": "BookController",
      "description": "The type Book controller."
    }
  ],
  "paths": {
    "/api/v1/books": {
      "post": {
        "summary": "Create book.",
        "deprecated": false,
        "tags": [
          "BookController"
        ],
        "requestBody": {
          "content": {
            "application/json": {
              "schema": {
                "$ref": "#/components/schemas/5d33d487e2ec7c29e2a7819f08a7c5f7"
              },
              "examples": {
                "json": {
                  "summary": "test data",
                  "value": "{\n  \"id\": 0,\n  \"author\": \"\",\n  \"title\": \"\",\n  \"price\": 0.0\n}"
                }
              }
            }
          }
        },
// ..
}
The generated JSON file can be imported into the Swagger Editor, which renders a Swagger UI-style documentation page.
8. Conclusion
In this article, we explored how to use Smart-Doc to generate API documentation. We demonstrated the setup with a simple Spring Boot project, documented classes and controllers using Javadoc, and generated outputs in HTML. OpenAPI and Postman formats.


