

Mocking is an essential part of unit testing, and the Mockito library makes it easy to write clean and intuitive unit tests for your Java code.
Get started with mocking and improve your application tests using our Mockito guide:
Handling concurrency in an application can be a tricky process with many potential pitfalls. A solid grasp of the fundamentals will go a long way to help minimize these issues.
Get started with understanding multi-threaded applications with our Java Concurrency guide:
Spring 5 added support for reactive programming with the Spring WebFlux module, which has been improved upon ever since. Get started with the Reactor project basics and reactive programming in Spring Boot:
Since its introduction in Java 8, the Stream API has become a staple of Java development. The basic operations like iterating, filtering, mapping sequences of elements are deceptively simple to use.
But these can also be overused and fall into some common pitfalls.
To get a better understanding on how Streams work and how to combine them with other language features, check out our guide to Java Streams:
Explore Spring Boot 3 and Spring 6 in-depth through building a full REST API with the framework:
Yes, Spring Security can be complex, from the more advanced functionality within the Core to the deep OAuth support in the framework.
I built the security material as two full courses - Core and OAuth, to get practical with these more complex scenarios. We explore when and how to use each feature and code through it on the backing project.
You can explore the course here:
Spring Data JPA is a great way to handle the complexity of JPA with the powerful simplicity of Spring Boot.
Get started with Spring Data JPA through the guided reference course:
Refactor Java code safely — and automatically — with OpenRewrite.
Refactoring big codebases by hand is slow, risky, and easy to put off. That’s where OpenRewrite comes in. The open-source framework for large-scale, automated code transformations helps teams modernize safely and consistently.
Each month, the creators and maintainers of OpenRewrite at Moderne run live, hands-on training sessions — one for newcomers and one for experienced users. You’ll see how recipes work, how to apply them across projects, and how to modernize code with confidence.
Join the next session, bring your questions, and learn how to automate the kind of work that usually eats your sprint time.
1. Introduction
Graylog is a log aggregation service. Simply put, it’s capable of collecting millions of log messages from multiple sources and displaying them in a single interface.
It also provides a number of other features such as real-time alerts, dashboards with graphs and charts, and much more.
In this tutorial, we’ll see how to set up a Graylog server and send log messages to it from a Spring Boot application.
2. Setting up Graylog
There are several ways to install and run Graylog. In this tutorial, we’ll discuss the two quickest ways: Docker and Amazon Web Services.
2.1. Docker
The following commands will download all the required Docker images and start a container for each service:
$ docker run --name mongo -d mongo:3
$ docker run --name elasticsearch -p 9200:9200 -p 9300:9300 \
    -e ES_JAVA_OPTS="-Xms2g -Xmx4g" \
    -e "discovery.type=single-node" -e "xpack.security.enabled=false" \
    -e "bootstrap.memory_lock=true" --ulimit memlock=-1:-1 \
    -d docker.elastic.co/elasticsearch/elasticsearch:5.6.11
$ docker run --name graylog --link mongo --link elasticsearch \
    -p 9000:9000 -p 12201:12201 -p 514:514 -p 5555:5555 \
    -e GRAYLOG_WEB_ENDPOINT_URI="http://127.0.0.1:9000/api" \
    -d graylog/graylog:2.4.6-1
The Graylog dashboard is now available using the URL http://localhost:9000/ and the default username and password are both admin.
While the Docker setup is the simplest, it does require a substantial amount of memory. It also doesn’t work on Docker for Mac, so may not be suitable for all platforms.
2.2. Amazon Web Services
The next easiest option for setting up Graylog for testing is Amazon Web Services. Graylog provides an official AMI that includes all the required dependencies, although it does require some additional configuration after installation.
We can quickly deploy an EC2 instance with the Graylog AMI in a particular region. Graylog recommends using an instance with at least 4GB of memory.
After the instance has started, we need to SSH into the host and make a few changes. The following commands will configure the Graylog service for us:
$ sudo graylog-ctl enforce-ssl
$ sudo graylog-ctl set-external-ip https://<EC2 PUBLIC IP>:443/api/
$ sudo graylog-ctl reconfigure
We also need to update the security group that was created with the EC2 instance to allow network traffic on specific ports. The graphic below shows the ports and protocols that need to be enabled:

The Graylog dashboard is now available using the URL https://<EC2 PUBLIC IP>/ and the default username and password are both admin.
2.3. Other Graylog Installations
Aside from Docker and AWS, there are also Graylog packages for various operating systems. With this approach, we also have to set up an ElasticSearch and MongoDB service.
For this reason, Docker and AWS are much easier to set up, especially for development and testing purposes.
3. Sending in Log Messages
With Graylog up and running, we must now configure our Spring Boot application to send log messages to the Graylog server.
Any Java logging framework can support sending messages to a Graylog server using the GELF protocol.
3.1. Log4J
At this time the only officially supported logging framework is Log4J. Graylog provides an appender, which is available on Maven central.
We can enable it by adding the following Maven dependency to any pom.xml file:
<dependency>
    <groupId>org.graylog2</groupId>
    <artifactId>gelfj</artifactId>
    <version>1.1.16</version>
</dependency>
We also must exclude the logging starter module anywhere we use a Spring Boot starter module:
<dependency>
    <groupId>org.springframework.boot</groupId>
    <artifactId>spring-boot-starter-web</artifactId>
    <exclusions>
        <exclusion>
            <groupId>org.springframework.boot</groupId>
            <artifactId>spring-boot-starter-logging</artifactId>
        </exclusion>
    </exclusions>
</dependency>
Now we can define a new appender in our log4j.xml file:
<appender name="graylog" class="org.graylog2.log.GelfAppender">
    <param name="graylogHost" value="<GRAYLOG IP>"/>
    <param name="originHost" value="localhost"/>
    <param name="graylogPort" value="12201"/>
    <param name="extractStacktrace" value="true"/>
    <param name="addExtendedInformation" value="true"/>
    <param name="facility" value="log4j"/>
    <param name="Threshold" value="INFO"/>
    <param name="additionalFields" value="{'environment': 'DEV', 'application': 'GraylogDemoApplication'}"/>
</appender>
This will configure all log messages with INFO level or higher to go to the Graylog appender, which in turn sends the log message to the Graylog server.
3.2. Other Logging Frameworks
The Graylog marketplace has additional libraries that support a variety of other logging frameworks such as Logback, Log4J2, and more. Just beware that these libraries are not maintained by Graylog. Some of them are abandoned, and others have little or no documentation.
Caution should be used when relying on these 3rd party libraries.
3.3. Graylog Collector Sidecar
Another option for log collection is the Graylog Collector Sidecar. The sidecar is a process that runs along a file collector, sending log file contents to a Graylog server.
The Sidecar is a great option for applications where changing log configuration files isn’t possible. And because it reads log files directly from disk, it can also be used to integrate log messages from any platform and programming language.
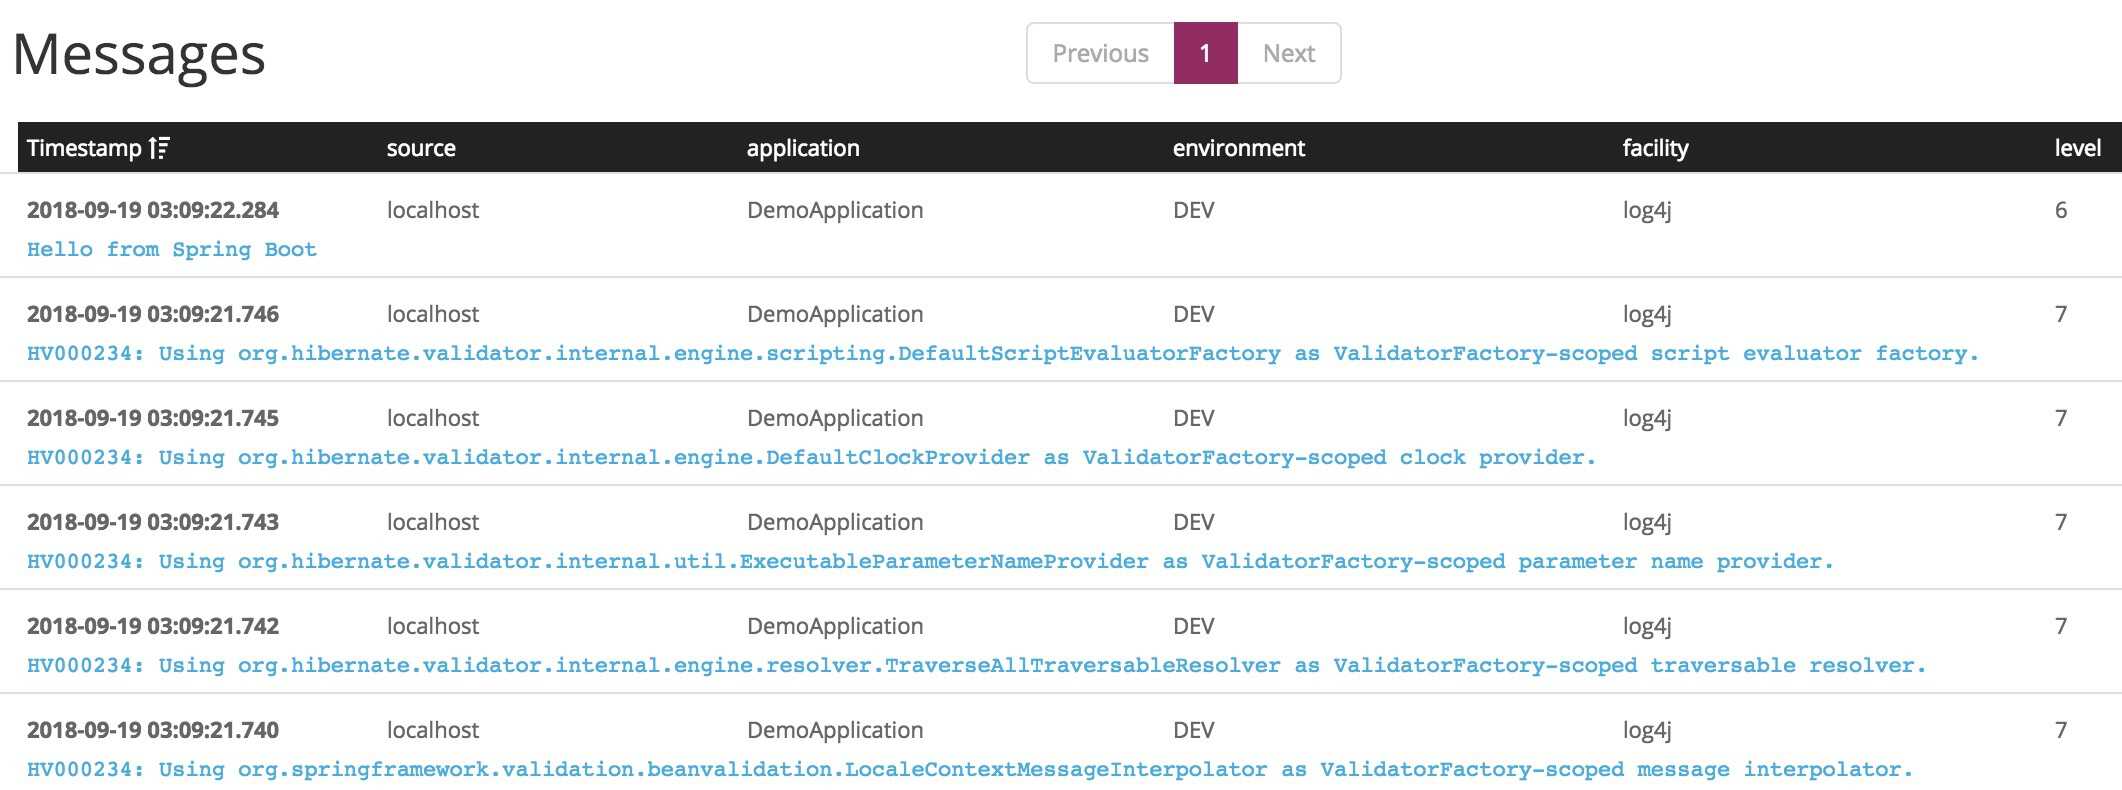
4. Viewing Messages in Graylog
We can use the Graylog dashboard to confirm successful delivery of our log messages. Using the filter source:localhost will show the log messages from our sample log4j config above:
5. Conclusion
Graylog is just one of many log aggregation services. It can quickly search millions of log messages, visualize log data in real-time, and send alerts when certain conditions are true.
Integrating Graylog into a Spring Boot application only requires a few lines of configuration and without any new code.


