1. Introduction
In this article, we will explore how to get geographic location data from an IP address using the MaxMind GeoIP2 Java API with the free GeoLite2 database.
We will also see this in action using a simple Spring MVC Web demo application.
2. Getting Started
To get started, you’ll need to download the GeoIP2 API and GeoLite2 database from MaxMind.
2.1. Maven Dependency
To include the MaxMind GeoIP2 API in your Maven project, add the following to the pom.xml file:
<dependency>
    <groupId>com.maxmind.geoip2</groupId>
    <artifactId>geoip2</artifactId>
    <version>2.8.0</version>
</dependency>
To get the latest version of the API, you can find it on Maven Central.
2.2. Downloading the Database
Next, you’ll need to download the GeoLite2 database. For this tutorial, we are using the binary gzipped version of the GeoLite2 City database.
After you unpack the archive, you’ll have a file named GeoLite2-City.mmdb. This is a database of IP-to-location mappings in the proprietary MaxMind binary format.
3. Using the GeoIP2 Java API
Let’s use the GeoIP2 Java API to fetch location data for a given IP address from the database. First, let’s create a DatabaseReader to query the database:
File database = new File(dbLocation);
DatabaseReader dbReader = new DatabaseReader.Builder(database).build();
Next, let’s use the city() method to obtain the city data for an IP address:
CityResponse response = dbReader.city(ipAddress);
The CityResponse object contains several pieces of information other than just the city name. Here’s a sample JUnit test showing how to open the database, fetch the city information for an IP address, and extract this information from the CityResponse:
@Test
public void givenIP_whenFetchingCity_thenReturnsCityData()
  throws IOException, GeoIp2Exception {
    String ip = "your-ip-address";
    String dbLocation = "your-path-to-mmdb";

    File database = new File(dbLocation);
    DatabaseReader dbReader = new DatabaseReader.Builder(database)
      .build();

    InetAddress ipAddress = InetAddress.getByName(ip);
    CityResponse response = dbReader.city(ipAddress);

    String countryName = response.getCountry().getName();
    String cityName = response.getCity().getName();
    String postal = response.getPostal().getCode();
    String state = response.getLeastSpecificSubdivision().getName();
}
4. Using GeoIP in a Web Application
Let’s look at a sample web application that fetches geolocation data from a user’s public IP address and displays the location on a map.
We will start with a basic Spring Web MVC Application. Then we’ll write a Controller that accepts an IP address in a POST request and returns a JSON response containing city, latitude, and longitude deduced from the GeoIP2 API.
Finally, we’ll write some HTML and JavaScript that will load the user’s public IP address into the form, submit an Ajax POST request to our Controller, and display the result in Google Maps.
4.1. The Response Entity Class
Let’s start by defining the class which will hold the geolocation response:
public class GeoIP {
    private String ipAddress;
    private String city;
    private String latitude;
    private String longitude;
    // constructors, getters and setters...
}
4.2. The Service Class
Now let’s write the service class which fetches the geolocation data using the GeoIP2 Java API and GeoLite2 database:
public class RawDBDemoGeoIPLocationService {
    private DatabaseReader dbReader;

    public RawDBDemoGeoIPLocationService() throws IOException {
        File database = new File("your-mmdb-location");
        dbReader = new DatabaseReader.Builder(database).build();
    }

    public GeoIP getLocation(String ip)
      throws IOException, GeoIp2Exception {
        InetAddress ipAddress = InetAddress.getByName(ip);
        CityResponse response = dbReader.city(ipAddress);

        String cityName = response.getCity().getName();
        String latitude =
          response.getLocation().getLatitude().toString();
        String longitude =
          response.getLocation().getLongitude().toString();
        return new GeoIP(ip, cityName, latitude, longitude);
    }
}
4.3. The Spring Controller
Let’s have a look at the Controller for Spring MVC which sends the “ipAddress” request parameter to our service class to get the geolocation response data:
@RestController
public class GeoIPTestController {
    private RawDBDemoGeoIPLocationService locationService;

    public GeoIPTestController() throws IOException {
        locationService = new RawDBDemoGeoIPLocationService();
    }

    @PostMapping("/GeoIPTest")
    public GeoIP getLocation(
      @RequestParam(value="ipAddress", required=true) String ipAddress
    ) throws Exception {

        GeoIPLocationService<String, GeoIP> locationService
          = new RawDBDemoGeoIPLocationService();
        return locationService.getLocation(ipAddress);
    }
}
Let’s add the front-end code to call our Spring Controller, beginning with an HTML form containing the IP address:
<body>
    <form id="ipForm" action="GeoIPTest" method="POST">
        <input type="text" name = "ipAddress" id = "ip"/>
        <input type="submit" name="submit" value="submit" />
    </form>
    ...
</body>
4.5. Loading the Public IP Address on the Client
Now let’s pre-populate the “ipAddress” text field with the user’s public IP address, using jQuery and the ipify.org JavaScript API:
<script src
   ="https://ajax.googleapis.com/ajax/libs/jquery/3.1.1/jquery.min.js">
</script>

<script type="text/javascript">
    $(document).ready (function () {
        $.get( "https://api.ipify.org?format=json",
          function( data ) {
             $("#ip").val(data.ip) ;
        });
...
</script>
4.6. Submitting the Ajax POST Request
When the form is submitted, we will make an Ajax POST request to the Spring Controller to retrieve the JSON Response with geolocation data:
$( "#ipForm" ).submit(function( event ) {
    event.preventDefault();
    $.ajax({
        url: "GeoIPTest",
        type: "POST",
        contentType:
         "application/x-www-form-urlencoded; charset=UTF-8",
        data: $.param( {ipAddress : $("#ip").val()} ),
        complete: function(data) {},
        success: function(data) {
            $("#status").html(JSON.stringify(data));
            if (data.ipAddress !=null) {
                showLocationOnMap(data);
            }
        },
        error: function(err) {
            $("#status").html("Error:"+JSON.stringify(data));
            },
        });
});
4.7. Sample JSON Response
The JSON response from our Spring Controller will have the following format:
{
    "ipAddress":"your-ip-address",
    "city":"your-city",
    "latitude":"your-latitude",
    "longitude":"your-longitude"
}
4.8. Displaying the Location on Google Maps
To display the location on Google Maps, you’ll need to include the Google Maps API in your HTML code:
<script src="https://maps.googleapis.com/maps/api/js?key=YOUR-API-KEY"
async defer></script>
You can obtain an API Key for Google Maps using the Google Developer Console.
You’ll also need to define an HTML <div> tag to contain the map image:
<div id="map" style="height: 500px; width:100%; position:absolute"></div>
You can use the following JavaScript function to display the coordinates on Google Maps:
function showLocationOnMap (location) {
    var map;
    map = new google.maps.Map(document.getElementById('map'), {
      center: {
        lat: Number(location.latitude),
        lng: Number(location.longitude)},
        zoom: 15
    });
    var marker = new google.maps.Marker({
      position: {
        lat: Number(location.latitude),
        lng: Number(location.longitude)},
        map: map,
        title:
          "Public IP:"+location.ipAddress
            +" @ "+location.city
    });
}
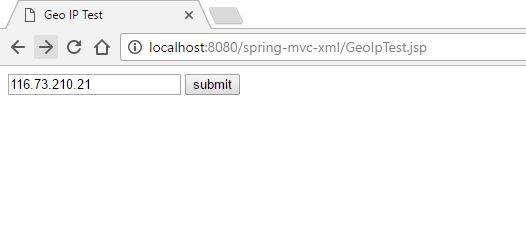
After starting the web application, open the URL for the map page:
http://localhost:8080/spring-mvc-xml/GeoIpTest.jsp
You will see the current public IP address for your connection loaded into the text box:
Note that both GeoIP2 and ipify support IPv4 addresses as well as IPv6 addresses.
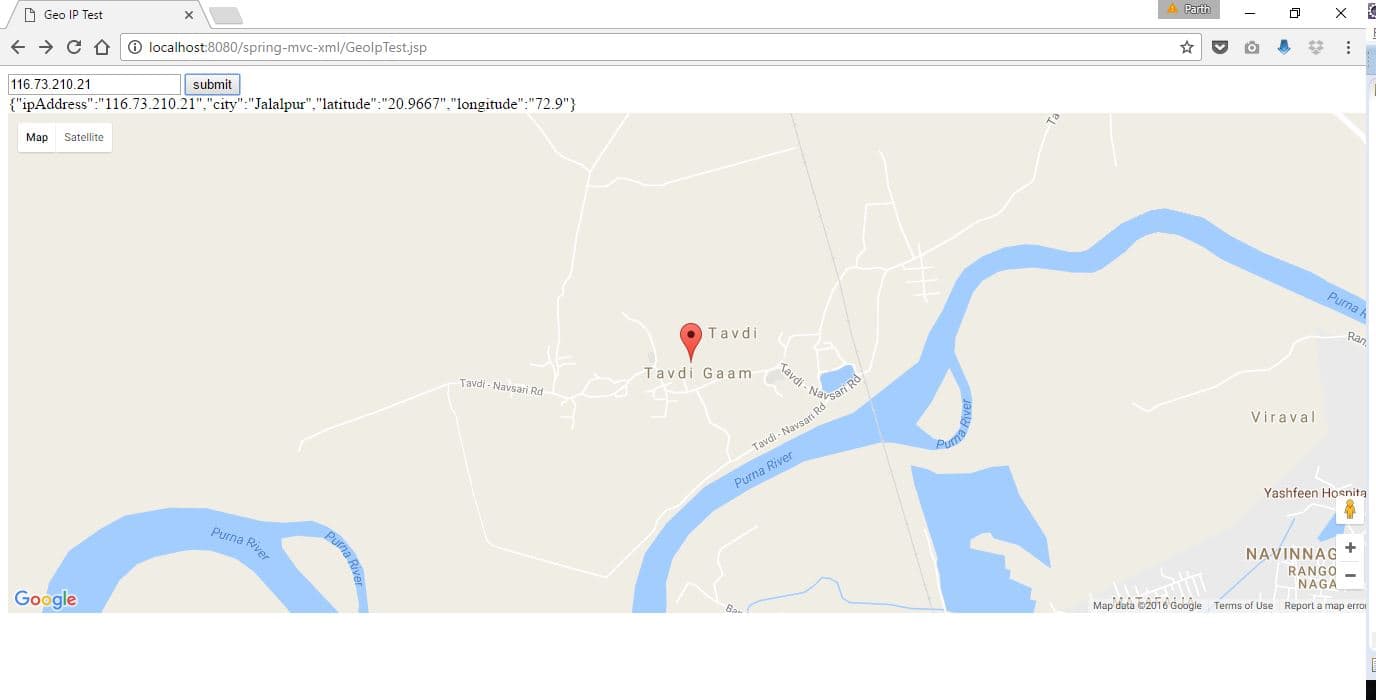
When you submit the form, you’ll see the JSON response text, including the city, latitude, and longitude corresponding to your public IP Address, and below that, you’ll see a Google Map pointing to your location:
5. Conclusion
In this tutorial, we reviewed the usage of the MaxMind GeoIP2 Java API and free MaxMind GeoLite2 City database using a JUnit test.
Then we built a Spring MVC Controller and service to obtain the geolocation data (city, latitude, longitude) from an IP address.
Finally, we built an HTML/JavaScript front end to demonstrate how this feature can be used to display a user’s location on Google Maps.
This product includes GeoLite2 data created by MaxMind, available from http://www.maxmind.com.
The code for this tutorial can be found on the Github site.