

1. Introduction
In this article, we’re going to explore the Fauna distributed database. We’ll see what features it brings to our applications, what we can do with it, and how to interact with it.
NOTE: This article is using a deprecated version of the Fauna Query Language. Refer to Fauna’s Documentation for the latest version of the query language.
2. What Is Fauna?
Fauna is a multi-protocol, multi-model, multi-tenant, distributed, transactional Database as a Service (DBaaS) offering. This sounds complicated, so let’s break it down a bit.
2.1. Database as a Service
A “Database as a Service” means that the database is hosted by a cloud provider, who takes care of all of the infrastructure and maintenance so that we’re left to deal only with our domain-specific details — collections, indices, queries, etc. This helps to remove a lot of the complexity of managing such a system while still benefiting from its features.
2.2. Distributed Transactional Database
Being distributed means that the database is running across multiple servers. This helps to make it more efficient and more fault-tolerant at the same time. If one server fails, then the entire database is still able to continue working correctly.
Being transactional means that the database offers strong guarantees about the validity of the data. Data updates performed within a single transaction either succeed or fail as a whole, without the risk of leaving the data in a partial state.
As a further measure, Fauna offers isolation levels that will ensure that the result of playing multiple transactions across multiple distributed nodes is always correct. This is an important consideration for distributed databases — otherwise, it is possible that different transactions can be played differently on the different nodes and end up with different results.
For example, let’s consider the following transactions applying to the same record:
- Set the value to “15”
- Increment the value by “3”
If they’re played in the order shown, the end result will be “18”. However, if they’re played in the opposite order, the end result will be “15”. This is even more confusing if the result is different on different nodes in the same system, as it means our data will be inconsistent across the nodes.
2.3. Multi-Model Database
A multi-model database means that it allows us to model different types of data in different ways, all within the same database engine and accessible from the same connections.
Internally, Fauna is a document database. This means that it stores each record as a structured document, with an arbitrary shape represented in JSON. This allows Fauna to act as a key-value store — the document simply has one field, value — or as a tabular store — the document has as many fields as are needed but they’re all flat. However, we can also store more complex documents, with nested fields, arrays, and so on:
// Key-Value document
{
  "value": "Baeldung"
}

// Tabular document
{
  "name": "Baeldung",
  "url": "https://www.baeldung.com/"
}

// Structured document
{
  "name": "Baeldung",
  "sites": [
    {
      "id": "cs",
      "name": "Computer Science",
      "url": "https://www.baeldung.com/cs"
    },
    {
      "id": "linux",
      "name": "Linux",
      "url": "https://www.baeldung.com/linux"
    },
    {
      "id": "scala",
      "name": "Scala",
      "url": "https://www.baeldung.com/scala"
    },
    {
      "id": "kotlin",
      "name": "Kotlin",
      "url": "https://www.baeldung.com/kotlin"
    },
  ]
}
On top of this, we also have access to some features that are common in relational databases. Specifically, we can create indexes on our documents to make querying more efficient, apply constraints across multiple collections to ensure that the data remains consistent, and perform queries that span multiple collections in one go.
Fauna’s query engine also has support for graph queries, allowing us to build complex data structures spanning multiple collections and access them all as if they were a single graph of data.
Finally, Fauna has temporal modeling facilities that can allow us to interact with our database at any point in its life. This means that not only can we see all of the changes that have happened to records over time, but we can directly access the data as it was at a given point in time.
2.4. Multi-Tenant Database
A multi-tenant database server means that it supports multiple different databases used by different users. This is very common with database engines used for cloud hosting since it means that one server can support many different customers.
Fauna takes this in a slightly different direction. Instead of different tenants representing different customers within a single installed database engine, Fauna uses tenants to represent different subsets of data for a single customer.
It is possible to create databases that are themselves children of other databases. We can then create credentials for accessing these child databases. However, where Fauna is different is that we can perform read-only queries against data from child databases of the one we’re connected to. However, it isn’t possible to access data in parent or sibling databases.
This allows for us to create child databases for different services within the same parent database, and then have admin users query across all of the data in one go — this can be handy for analytics purposes.
2.5. Multi-Protocol Database
This means that we have multiple different ways to access the same data.
The standard way to access our data is using the Fauna Query Language (FQL) via one of the provided drivers. This gives us access to the full abilities of the database engine, allowing us to access all of the data in any way we need.
Alternatively, Fauna also exposes a GraphQL endpoint that we can use. The advantage of this is that we can use it from any application regardless of the programming language, rather than depending on dedicated drivers for our language. However, not all features are available over this interface. In particular, we’re required to create a GraphQL schema that describes the shape of our data ahead of time, which means that we’re not able to have different records in the same collection that have different shapes.
3. Creating a Fauna Database
Now that we know what Fauna can do for us, let’s actually create a database for us to use.
If we don’t already have an account, we need to create one.
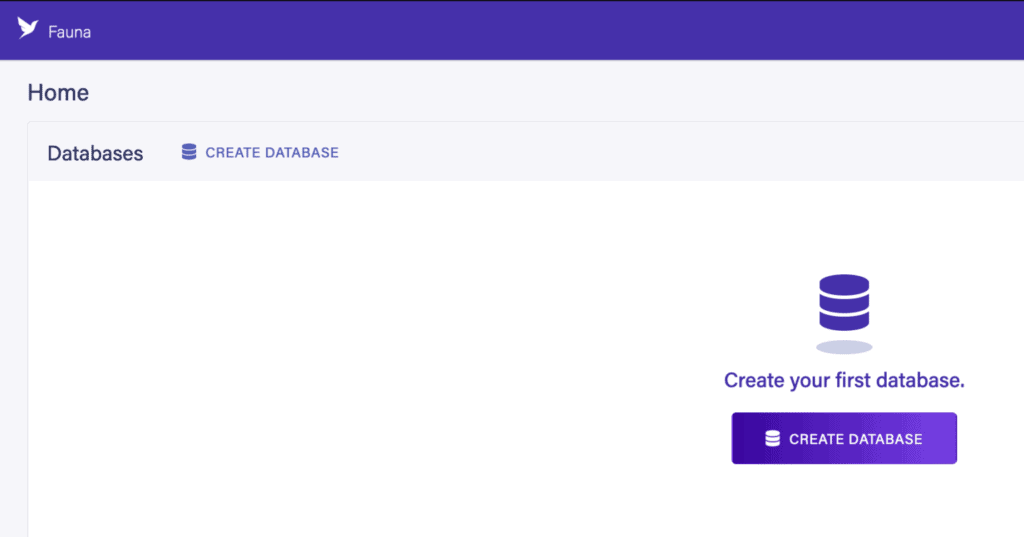
Once we’ve logged in, on the dashboard, we simply click the “Create Database” link:
This then opens up a pane for the name and region of the database. We also have the option of pre-populating the database with some example data to see how it can work, to help us to get used to the system:
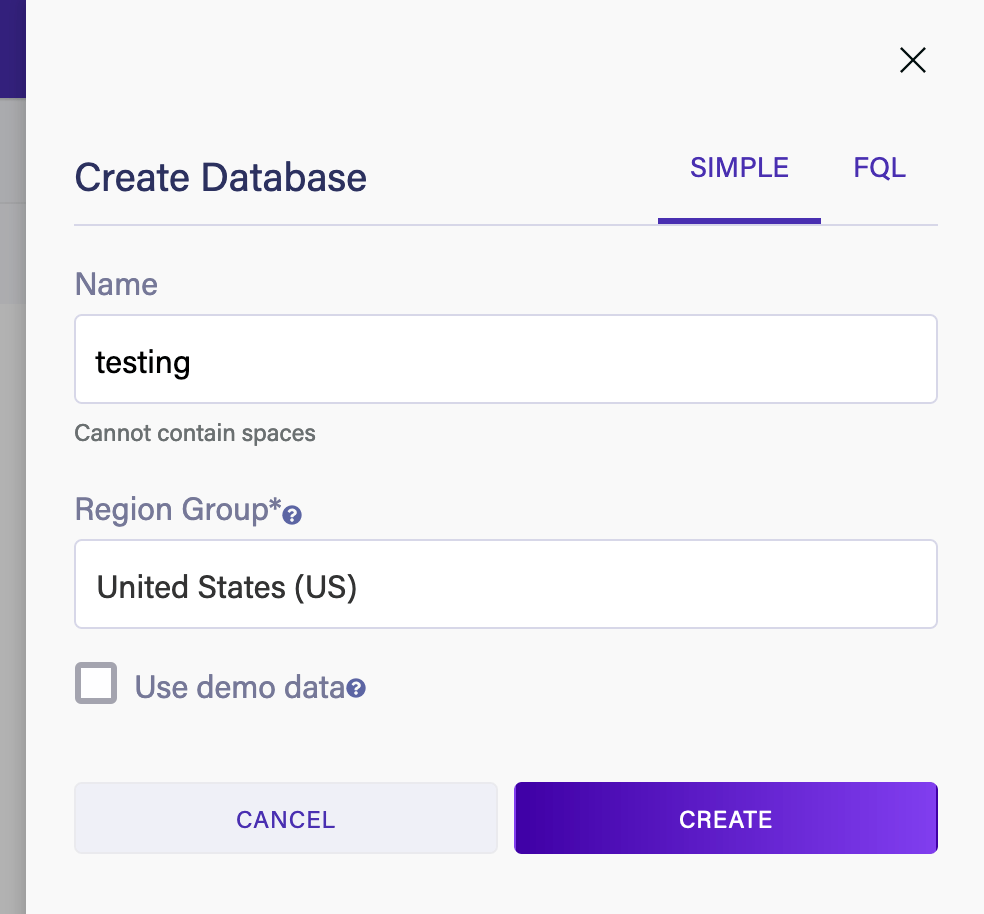
On this screen, the choice for “Region Group” is important, both for the amount that we’ll have to pay for anything past the free limits, but also for the endpoints that we need to use to connect to the database from outside.
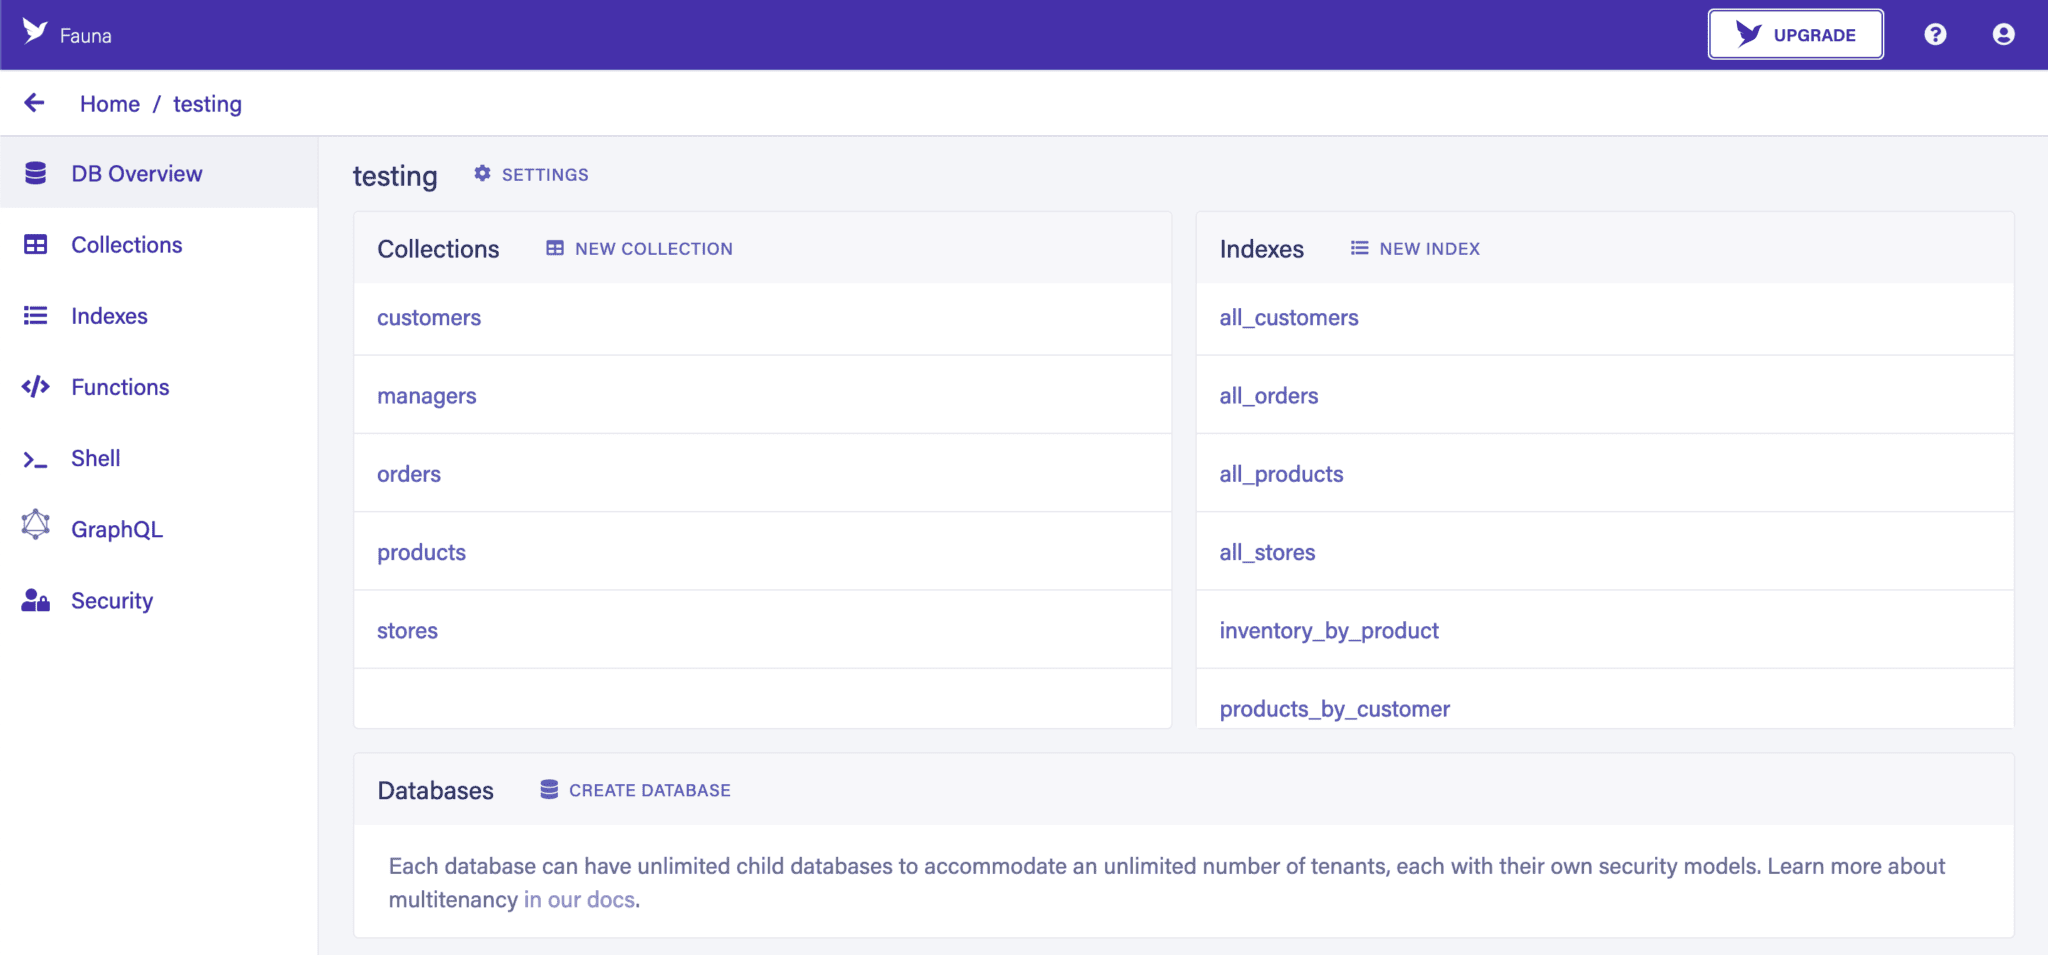
Once we’ve done this, we have a full database that we can use as needed. If we selected the demo data, then it comes complete with some populated collections, indexes, custom functions, and a GraphQL schema. If not, then the database is completely empty and ready for us to create our desired structure:
Finally, in order to connect to the database from outside, we need an authentication key. We can create one from the Security tab on the sidebar:
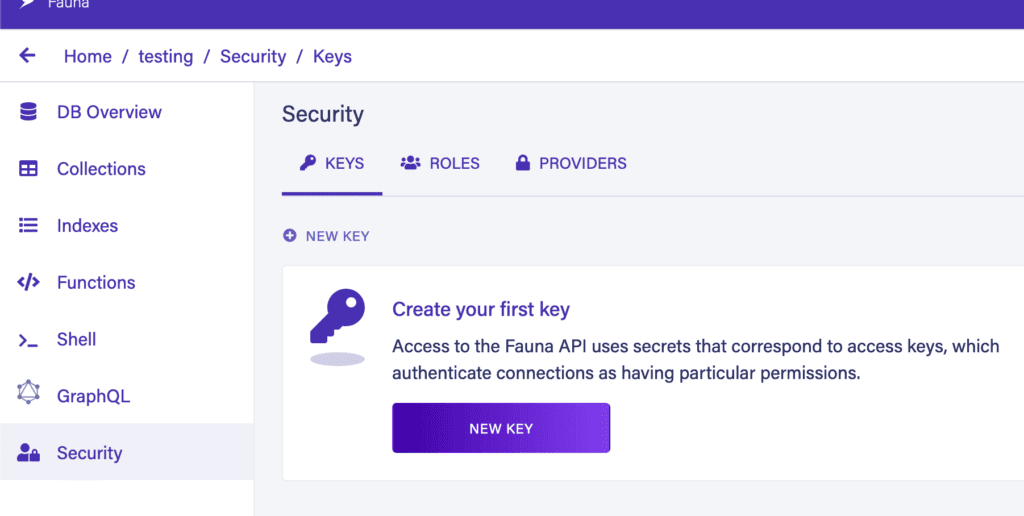
When creating a new key, make sure to copy it down because, for security reasons, there’s no way to get it back again after leaving the screen.
4. Interacting with Fauna
Now that we have a database, we can start working with it.
Fauna offers two distinct ways to read and write data in our database from outside: the FQL drivers and the GraphQL API. We also have access to the Fauna Shell, which allows us to execute arbitrary commands from within the web UI.
4.1. Fauna Shell
The Fauna Shell allows us to execute any commands from within the web UI. We can do this using any of our configured keys — acting exactly the same as if we’d connected from outside with that key — or else as certain special admin connections:
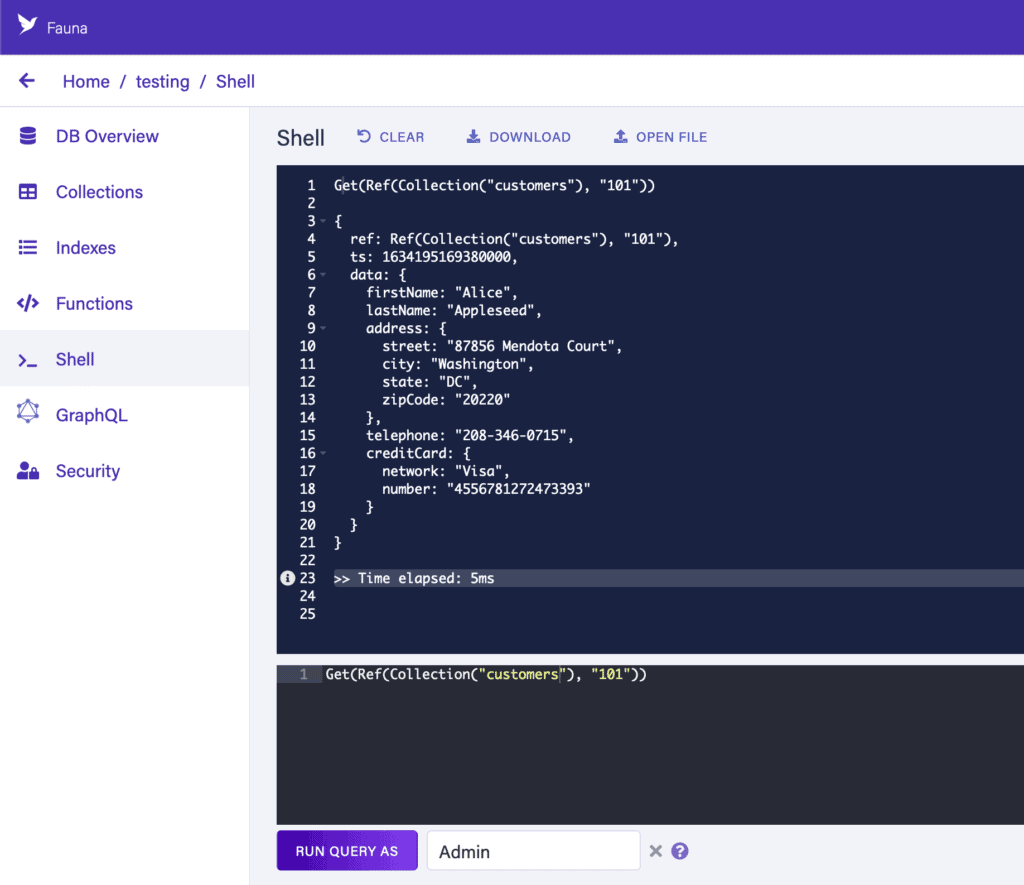
This allows us to explore our data and test out queries that we want to be using from our application in a very low-friction manner.
4.2. Connecting with FQL
If we want to instead connect our application to Fauna and use FQL, we need to use one of the provided drivers — including ones for Java and Scala.
The Java drivers require us to be running on Java 11 or higher.
The first thing we need to do is add in the dependency. If we’re using Maven, we’ll simply add it to our pom.xml file:
<dependency>
    <groupId>com.faunadb</groupId>
    <artifactId>faunadb-java</artifactId>
    <version>4.2.0</version>
    <scope>compile</scope>
</dependency>
We then need to create a client connection that we can use to communicate with the database:
FaunaClient client = FaunaClient.builder()
    .withEndpoint("https://db.us.fauna.com/")
    .withSecret("put-your-authorization-key-here")
    .build();
Note that we’ll need to provide the correct values for the database endpoint — which varies based on the region group that was selected when the database was created — and the secret key that we created earlier.
This client will act as a connection pool, opening new connections to the database as needed for different queries. This means that we can create it once at the start of our application and re-use it as much as we need.
If we have a need to connect with different secrets, this will need to be different clients. For example, if we want to interact with multiple different child databases within the same parent database.
Now that we have a client, we can use it to send queries to the database:
client.query(
    language.Get(language.Ref(language.Collection("customers"), 101))
).get();
4.3. Connecting with GraphQL
Fauna offers a complete GraphQL API for interacting with our database. This can allow us to use the database without any special drivers, needing nothing more than an HTTP client.
In order to use GraphQL support, we need to first create a GraphQL schema. This will define the schema itself and how it maps onto our pre-existing Fauna database constructs — such as collections, indexes, and functions. Once done, any GraphQL-aware client — or even just an HTTP client such as RestTemplate — can be used to call our database.
Note that this will only allow us to interact with the data in our database. If we wish to use any administrative commands — such as creating new collections or indexes — then this requires either an FQL command or else the web admin UI.
Connecting to Fauna via GraphQL requires us to use the correct URL — https://graphql.us.fauna.com/graphql for the US region — and to provide our authentication key as a bearer token within the Authorization header. At this point, we can use it as any normal GraphQL endpoint, by making POST requests to the URL and providing the query or mutation in the body, optionally with any variables to use with them.
5. Using Fauna from Spring
Now that we understand what Fauna is and how to use it, we can see how to integrate it into our Spring applications.
Fauna doesn’t have any native Spring drivers. Instead, we’ll be configuring the normal Java drivers as Spring beans to use within our application.
5.1. Fauna Configuration
Before we can make use of Fauna, we need some configuration. Specifically, we need to know the region that our Fauna database is in — from which we can then derive the appropriate URLs — and we need to know a secret that we can use to connect to the database.
For this, we will add properties for fauna.region and fauna.secret to our application.properties file — or any other supported Spring configuration method:
fauna.region=us
fauna.secret=FaunaSecretHere
Note that we’re defining the Fauna region here instead of the URLs. This allows us to correctly derive the URL for both FQL and GraphQL from the same setting. This avoids the risk that we might configure the two URLs differently.
5.2. FQL Client
If we’re planning on using FQL from our application, we can add a FaunaClient bean to the Spring context. This will involve creating a Spring configuration object to consume the appropriate properties and construct the FaunaClient object:
@Configuration
class FaunaClientConfiguration {
    @Value("https://db.${fauna.region}.fauna.com/")
    private String faunaUrl;

    @Value("${fauna.secret}")
    private String faunaSecret;

    @Bean
    FaunaClient getFaunaClient() throws MalformedURLException {
        return FaunaClient.builder()
            .withEndpoint(faunaUrl)
            .withSecret(faunaSecret)
            .build();
    }
}
This lets us use the FaunaClient directly from anywhere in our application, the same way that we would use JdbcTemplate for access to a JDBC database. We also have the opportunity to wrap this in a higher-level object to work in domain-specific terms if we so wish.
5.3. GraphQL Client
If we’re planning on using GraphQL to access Fauna, there is a little more work involved. There’s no standard client for calling GraphQL APIs. Instead, we’ll use the Spring RestTemplate to make standard HTTP requests to the GraphQL endpoint. The newer WebClient would work equally well if we were building a WebFlux-based application.
To achieve this, we’ll write a class that wraps the RestTemplate and can make appropriate HTTP calls to Fauna:
@Component
public class GraphqlClient {
    @Value("https://graphql.${fauna.region}.fauna.com/graphql")
    private String faunaUrl;

    @Value("${fauna.secret}")
    private String faunaSecret;

    private RestTemplate restTemplate = new RestTemplate();

    public <T> T query(String query, Class<T> cls) {
        return query(query, Collections.emptyMap(), cls);
    }

    public <T, V> T query(String query, V variables, Class<T> cls) {
        var body = Map.of("query", query, "variables", variables);

        var request = RequestEntity.post(faunaUrl)
            .header("Authorization", "Bearer " + faunaSecret)
            .body(body);
        var response = restTemplate.exchange(request, cls);

        return response.getBody();
    }
}
This client allows us to make GraphQL calls to Fauna from other components of our application. We have two methods, one that just takes a GraphQL query string and another that additionally takes some variables to use with it.
They also both take the type to deserialize the query result into. Using this will handle all of the details of talking to Fauna, allowing us to concentrate on our application needs instead.
6. Summary
In this article, we have had a brief introduction to the Fauna database, seeing some of the features that it offers that can make it a highly compelling choice for our next project, as well as seeing how we can interact with it from our application.
Why not explore some of the features we’ve mentioned here in your next project?
