

Mocking is an essential part of unit testing, and the Mockito library makes it easy to write clean and intuitive unit tests for your Java code.
Get started with mocking and improve your application tests using our Mockito guide:
Handling concurrency in an application can be a tricky process with many potential pitfalls. A solid grasp of the fundamentals will go a long way to help minimize these issues.
Get started with understanding multi-threaded applications with our Java Concurrency guide:
Spring 5 added support for reactive programming with the Spring WebFlux module, which has been improved upon ever since. Get started with the Reactor project basics and reactive programming in Spring Boot:
Since its introduction in Java 8, the Stream API has become a staple of Java development. The basic operations like iterating, filtering, mapping sequences of elements are deceptively simple to use.
But these can also be overused and fall into some common pitfalls.
To get a better understanding on how Streams work and how to combine them with other language features, check out our guide to Java Streams:
Explore Spring Boot 3 and Spring 6 in-depth through building a full REST API with the framework:
Yes, Spring Security can be complex, from the more advanced functionality within the Core to the deep OAuth support in the framework.
I built the security material as two full courses - Core and OAuth, to get practical with these more complex scenarios. We explore when and how to use each feature and code through it on the backing project.
You can explore the course here:
Spring Data JPA is a great way to handle the complexity of JPA with the powerful simplicity of Spring Boot.
Get started with Spring Data JPA through the guided reference course:
Refactor Java code safely — and automatically — with OpenRewrite.
Refactoring big codebases by hand is slow, risky, and easy to put off. That’s where OpenRewrite comes in. The open-source framework for large-scale, automated code transformations helps teams modernize safely and consistently.
Each month, the creators and maintainers of OpenRewrite at Moderne run live, hands-on training sessions — one for newcomers and one for experienced users. You’ll see how recipes work, how to apply them across projects, and how to modernize code with confidence.
Join the next session, bring your questions, and learn how to automate the kind of work that usually eats your sprint time.
1. Introduction
Changing the highlight color in Eclipse means customizing how different elements appear in the editor to improve readability and personalize the coding environment. This includes modifying the color used to highlight syntax elements such as keywords, strings, and comments.
It also applies to text selections, repeated occurrences of variables or methods, and matches found during searches. In this tutorial, we’ll demonstrate how to configure these settings in Eclipse.
2. Change Syntax Coloring
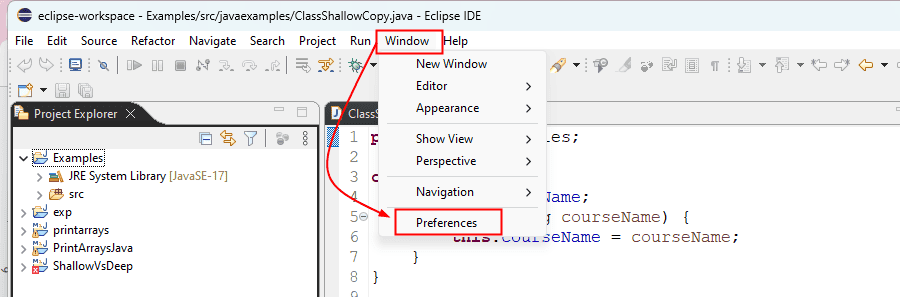
To change code syntax colors in Eclipse, such as the color of keywords, strings, comments, and other elements, we go to Window, then Preferences:
Next, we navigate to the language for which we want to change the highlight colors. For example, for Java, we go to Java > Editor > Syntax Coloring:
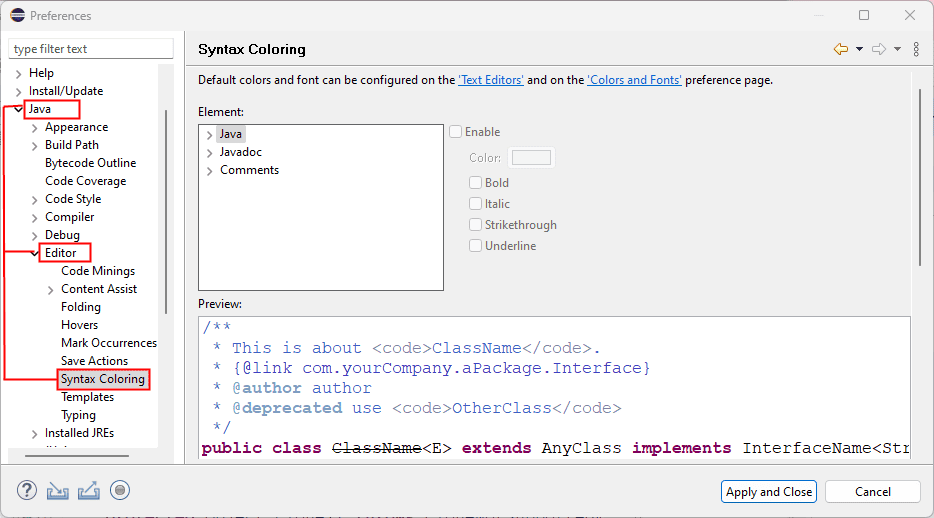
In the Syntax Coloring panel, we see a list of code elements like Keywords, Comments, Strings, Methods, and Classes. We can click any item to select it.
For example, we select Strings, then click the color box on the right to choose a new color. We click OK to confirm the selection:
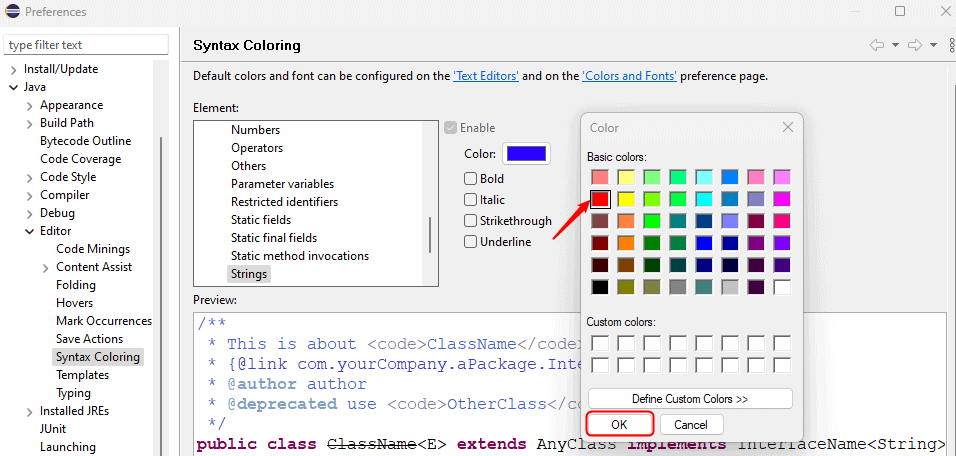
We can also adjust the style, such as Bold, Italic, Strikethrough, or Underline. Finally, we click Apply and Close to save the changes:
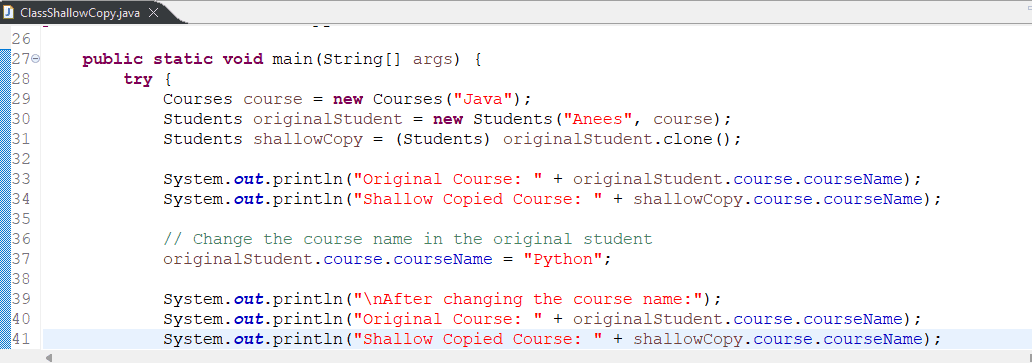
The strings’ color is now updated to the selected setting.
3. Change the Highlight Color of Search Results
If we want to make search results more visible or match our preferred color scheme in Eclipse, we can customize their highlight color. To do this, first, we go to Window > Preferences from the top menu. Then, we navigate to General > Editors > Text Editors > Annotations:
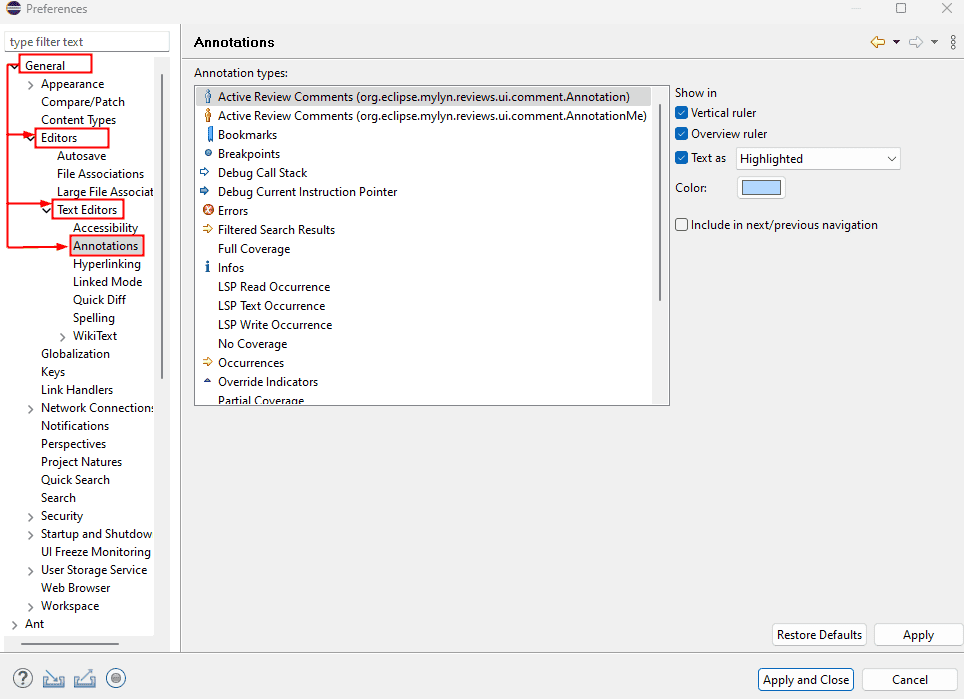
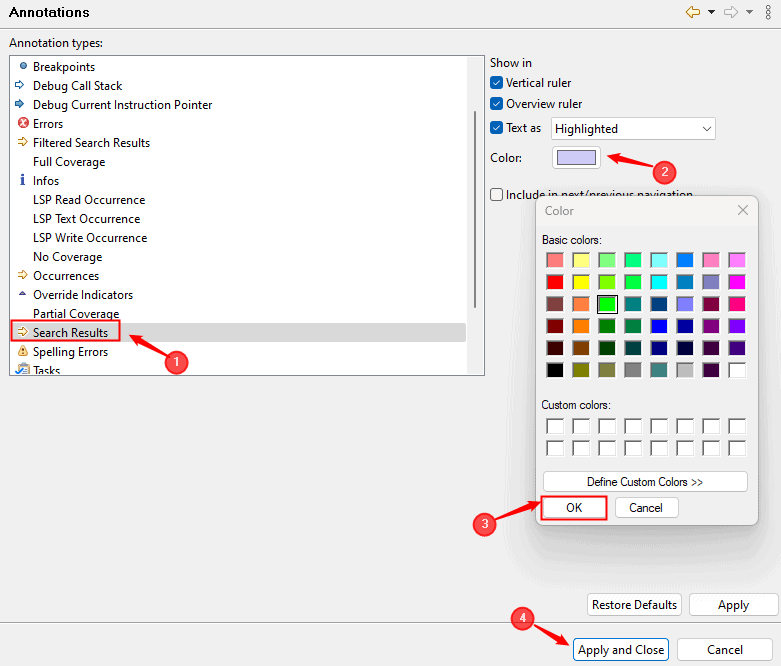
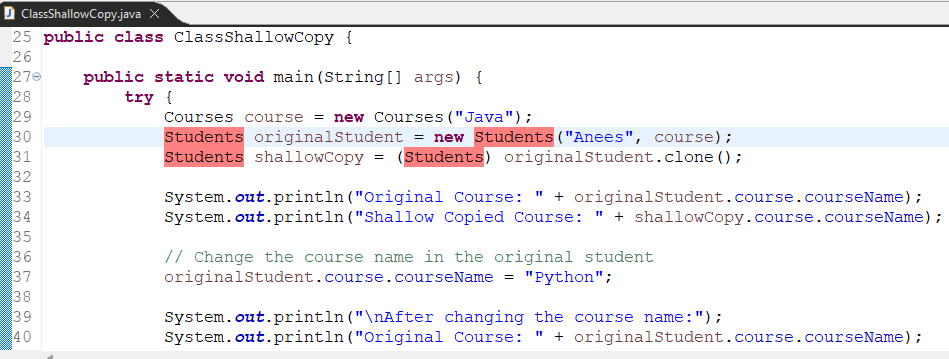
In the list of annotations, we scroll down and find Search Results. After that, we click the color box to choose a new color for the search highlights, then click the OK button to apply the changes:
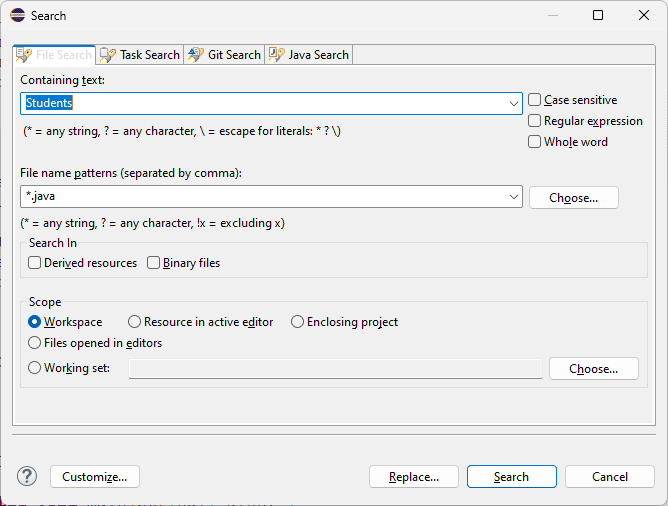
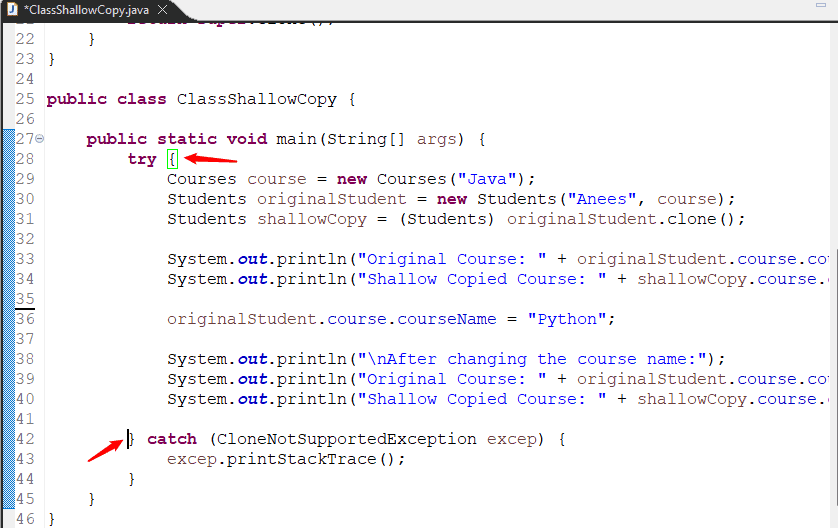
Let’s press Ctrl+H to open the Search dialog, enter the search term, such as Students, and run the search:
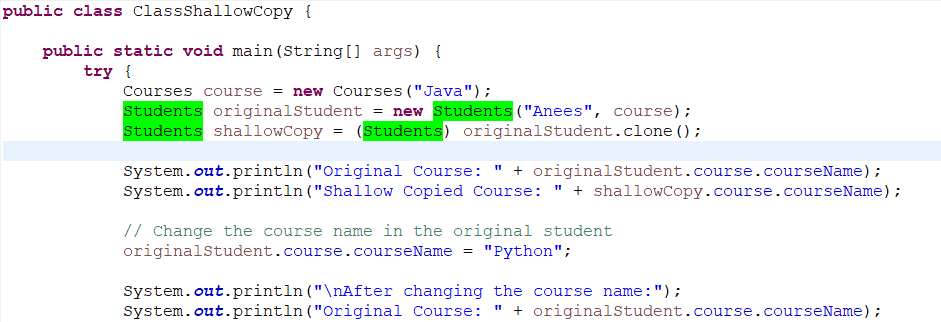
Now, the editor uses the selected color to highlight search results:
4. Change Highlight Color for Mark Occurrences
When we select a variable or any element in the editor, Eclipse automatically highlights all its occurrences. This is known as occurrence highlighting, and we can customize its color to make it more visible or match our preferred theme.
To change the color used for occurrence highlighting, first, we open the Preferences from the Window tab. Then, we navigate to General > Editors > Text Editors > Annotations. In the list of annotations, we select Occurrences, and then click the color box to choose a new highlight color:
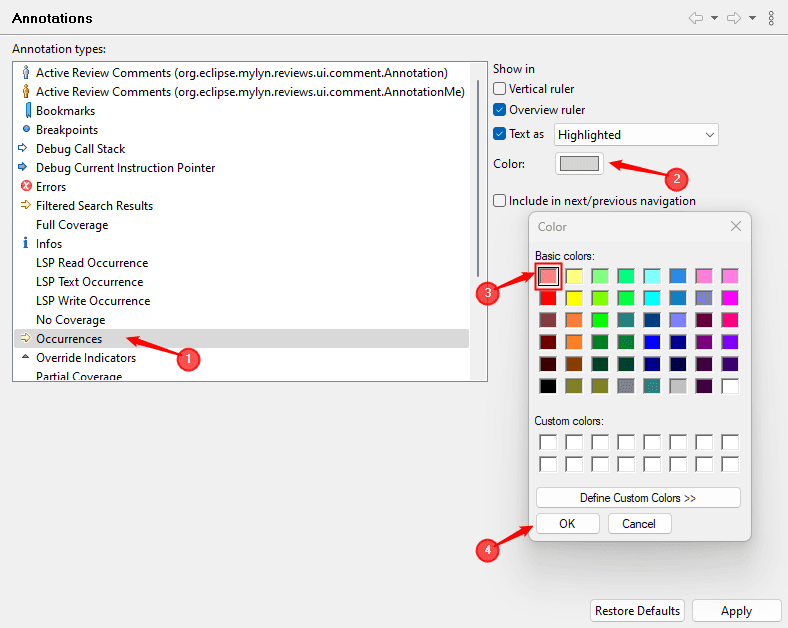
Now, when we select a variable or element in the editor, Eclipse highlights all its matching occurrences using the new color we selected:
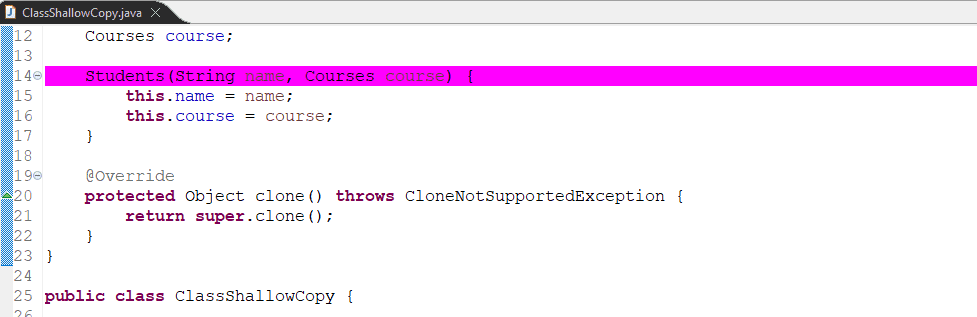
5. Customize Current Line Highlight Color
When we are writing or editing code, Eclipse highlights the line where the cursor is currently placed. This makes it easier to track the active line, especially in large files.
To change the background highlight color for the current line, we navigate to the Preferences menu. Then, we go to General > Editors > Text Editors. In this section, we look for the Current line highlight under the Appearance color options. After this, we click the color box next to it and choose a new color that suits our preference:
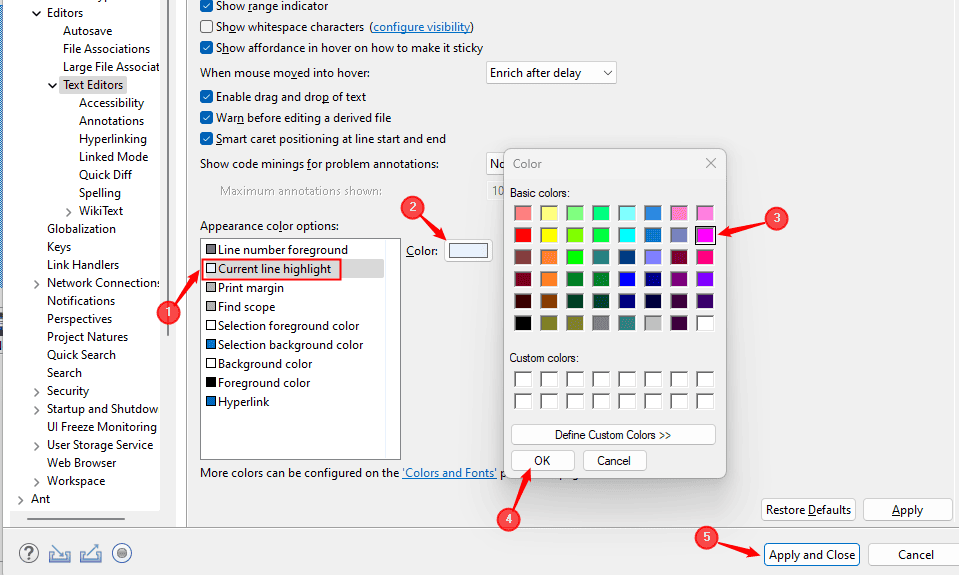
Finally, we click Apply and Close to save the changes. Now, the editor uses the selected color to highlight the current line where our cursor is positioned:
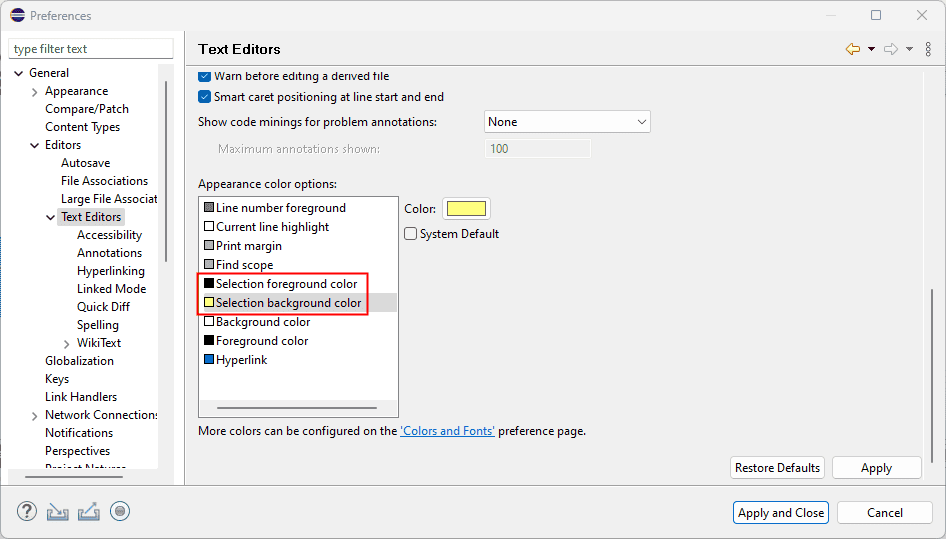
6. Change Text Selection Color
When we select text in the Eclipse editor using the mouse or keyboard, Eclipse highlights the selected portion with a specific background and text color. The default selection colors might not appear very clear or comfortable to look at, depending on the theme we use. To improve visibility, especially when working with light or dark themes, we can customize these selection colors.
To do this, we need to access the Preferences. Next, we can navigate to General > Editors > Text Editors, and under Appearance color options, we find two settings: Selection background and Selection foreground. The background controls the color behind the selected text, while the foreground controls the color of the text itself.
We click the color boxes next to each option to choose the colors that best suit our preferences and ensure good contrast. Once the changes are made, we click Apply and Close to save them:
Now, whenever we select text in the editor, Eclipse uses the updated selection colors, making it easier to read and work with highlighted code:
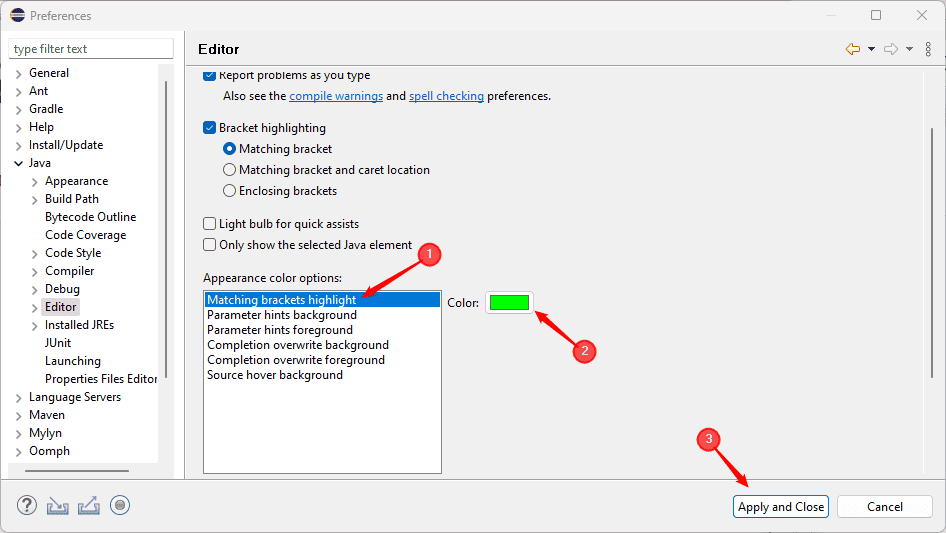
7. Customize Matching Brackets Highlight
When we read or debug code, it becomes easier to understand the structure if we can clearly see which brackets or braces match each other. Eclipse can highlight these matching pairs, which helps us spot errors and makes it easier to work with blocks of code, especially when dealing with nested loops or conditional statements.
To enable this feature, we open the Preferences window, navigate to Java, and then select Editor. Here, we can customize the Matching brackets highlight color:
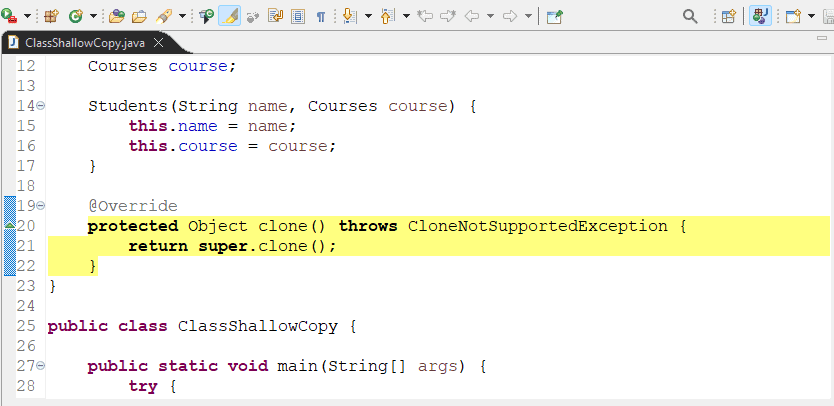
For example, the cursor is currently placed at the closing bracket of the try block, and Eclipse highlights its matching opening bracket in green to show the scope clearly:
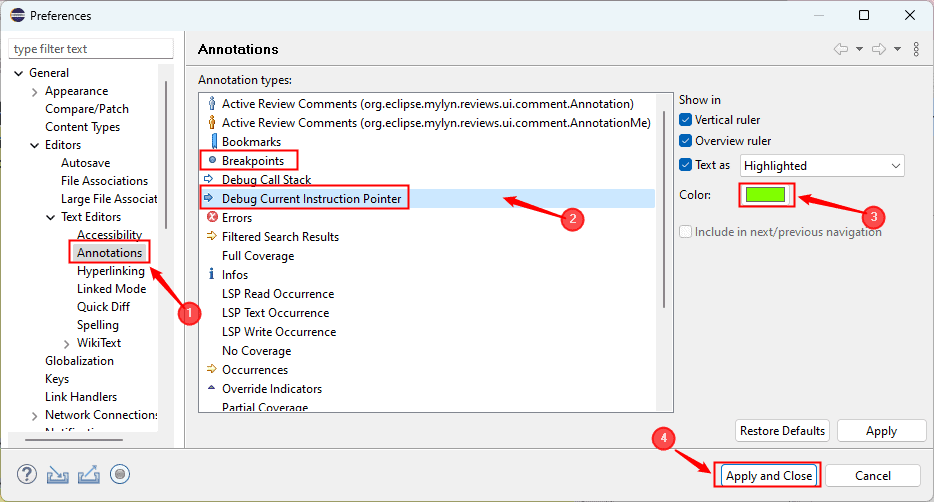
8. Change Debug Highlight Colors
When debugging in Eclipse, it highlights specific lines to show us what is happening in the program. For example, Eclipse highlights lines where we set breakpoints or where the program stops during execution. These highlights help us follow the flow of the program more easily.
To customize these colors, we open the Preferences window. Then we go to General, open Editors, select Text Editors, and click on Annotations. Here, we can change the colors for different debugging elements, such as Breakpoints and Debug Current Instruction Pointer:
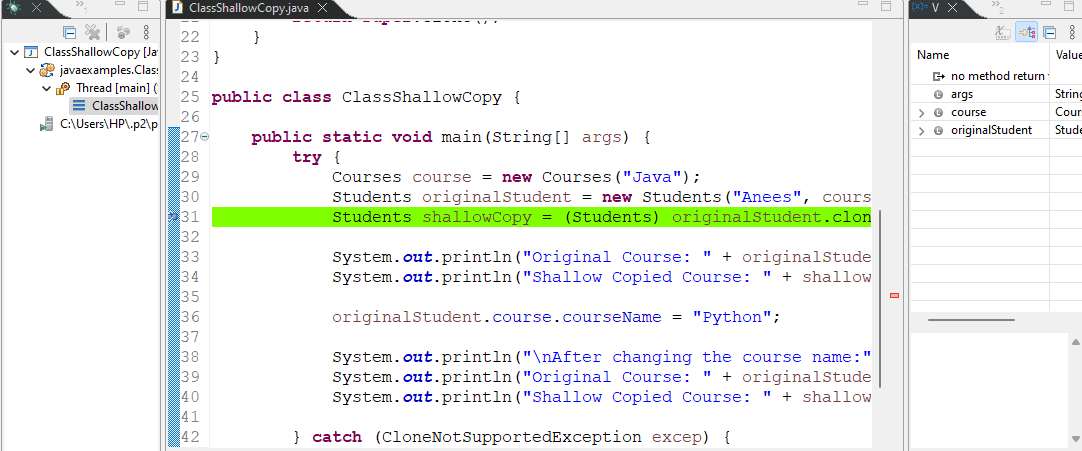
The debugger is paused at a breakpoint, and the line being executed is highlighted in green, showing exactly where the program is currently running:
9. Restore Default Colors
If we change a highlight color and don’t like how it looks, we can easily reset it to the original setting. Whether it’s syntax color, debug highlight color, matching brackets, search result highlight, or some other setting, Eclipse enables us to restore any of these features. We can find a Restore Defaults button at the bottom of most color settings panels in Eclipse:
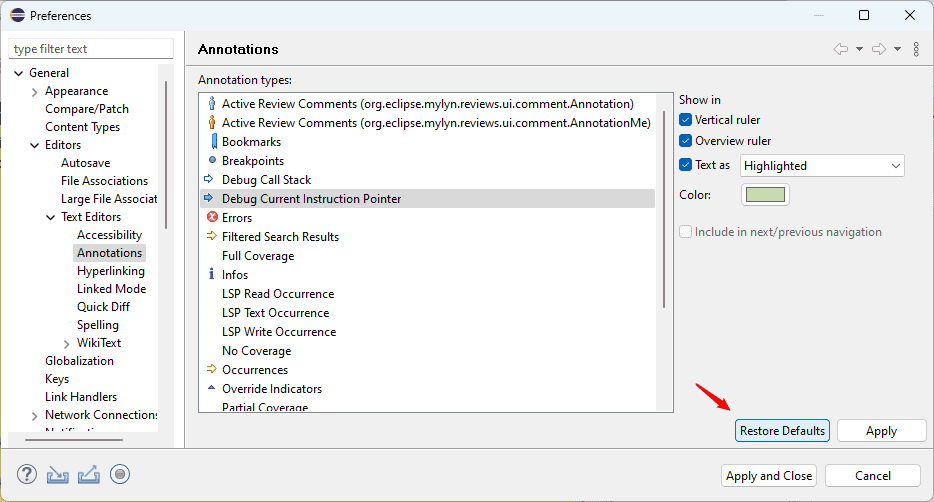
When we click this button, Eclipse resets the selected color option back to its default value.
10. Conclusion
In this article, we explored how to change the highlight color of different elements in Eclipse to make the coding experience more comfortable and visually clear. We explained how to customize syntax colors, search result highlights, text selection colors, matching brackets, and debugging indicators. These settings not only help us personalize the editor but also make it easier to read, navigate, and debug code more efficiently.


