WebSockets with the Play Framework and Akka
Last updated: January 25, 2024


Mocking is an essential part of unit testing, and the Mockito library makes it easy to write clean and intuitive unit tests for your Java code.
Get started with mocking and improve your application tests using our Mockito guide:
Handling concurrency in an application can be a tricky process with many potential pitfalls. A solid grasp of the fundamentals will go a long way to help minimize these issues.
Get started with understanding multi-threaded applications with our Java Concurrency guide:
Spring 5 added support for reactive programming with the Spring WebFlux module, which has been improved upon ever since. Get started with the Reactor project basics and reactive programming in Spring Boot:
Since its introduction in Java 8, the Stream API has become a staple of Java development. The basic operations like iterating, filtering, mapping sequences of elements are deceptively simple to use.
But these can also be overused and fall into some common pitfalls.
To get a better understanding on how Streams work and how to combine them with other language features, check out our guide to Java Streams:
Explore Spring Boot 3 and Spring 6 in-depth through building a full REST API with the framework:
Yes, Spring Security can be complex, from the more advanced functionality within the Core to the deep OAuth support in the framework.
I built the security material as two full courses - Core and OAuth, to get practical with these more complex scenarios. We explore when and how to use each feature and code through it on the backing project.
You can explore the course here:
All Access is finally out, with all of my Spring courses. Learn JUnit is out as well, and Learn Maven is coming fast. And, of course, quite a bit more affordable. Finally.
>> GET THE COURSESpring Data JPA is a great way to handle the complexity of JPA with the powerful simplicity of Spring Boot.
Get started with Spring Data JPA through the guided reference course:
Refactor Java code safely — and automatically — with OpenRewrite.
Refactoring big codebases by hand is slow, risky, and easy to put off. That’s where OpenRewrite comes in. The open-source framework for large-scale, automated code transformations helps teams modernize safely and consistently.
Each month, the creators and maintainers of OpenRewrite at Moderne run live, hands-on training sessions — one for newcomers and one for experienced users. You’ll see how recipes work, how to apply them across projects, and how to modernize code with confidence.
Join the next session, bring your questions, and learn how to automate the kind of work that usually eats your sprint time.
1. Overview
When we wish our web clients to maintain a dialogue with our server, then WebSockets can be a useful solution. WebSockets keep a persistent full-duplex connection. This gives us the capability to send bi-directional messages between our server and client.
In this tutorial, we’re going to learn how to use WebSockets with Akka in the Play Framework.
2. Setup
Let’s set up a simple chat application. The user will send messages to the server, and the server will respond with a message from JSONPlaceholder.
2.1. Setting up the Play Framework Application
We’ll build this application using the Play Framework.
Let’s follow the instructions from Introduction to Play in Java to set up and run a simple Play Framework application.
2.2. Adding the Necessary JavaScript Files
Also, we’ll need to work with JavaScript for client-side scripting. This will enable us to receive new messages pushed from the server. We’ll use the jQuery library for this.
Let’s add jQuery to the bottom of the app/views/index.scala.html file:
<script src="https://code.jquery.com/jquery-3.4.1.min.js"></script>2.3. Setting up Akka
Finally, we’ll use Akka to handle the WebSocket connections on the server-side.
Let’s navigate to the build.sbt file and add the dependencies.
We need to add the akka-actor and akka-testkit dependencies:
libraryDependencies += "com.typesafe.akka" %% "akka-actor" % akkaVersion
libraryDependencies += "com.typesafe.akka" %% "akka-testkit" % akkaVersion
We need these to be able to use and test the Akka Framework code.
Next, we’re going to be using Akka streams. So let’s add the akka-stream dependency:
libraryDependencies += "com.typesafe.akka" %% "akka-stream" % akkaVersionLastly, we need to call a rest endpoint from an Akka actor. For this, we’ll need the akka-http dependency. When we do so, the endpoint will return JSON data which we’ll have to deserialize, so we need to add the akka-http-jackson dependency as well:
libraryDependencies += "com.typesafe.akka" %% "akka-http-jackson" % akkaHttpVersion
libraryDependencies += "com.typesafe.akka" %% "akka-http" % akkaHttpVersion
And now we’re all set. Let’s see how to get WebSockets working!
3. Handling WebSockets With Akka Actors
Play’s WebSocket handling mechanism is built around Akka streams. A WebSocket is modeled as a Flow. So, incoming WebSocket messages are fed into the flow, and messages produced by the flow are sent out to the client.
To handle a WebSocket using an Actor, we’re going to need the Play utility ActorFlow which converts an ActorRef to a flow. This mainly requires some Java code, with a little configuration.
3.1. The WebSocket Controller Method
First, we need a Materializer instance. The Materializer is a factory for stream execution engines.
We need to inject the ActorSystem and the Materializer into the controller app/controllers/HomeController.java:
private ActorSystem actorSystem;
private Materializer materializer;

@Inject
public HomeController(
  ActorSystem actorSystem, Materializer materializer) {
    this.actorSystem = actorSystem;
    this.materializer = materializer;
}
Let’s now add a socket controller method:
public WebSocket socket() {
    return WebSocket.Json
      .acceptOrResult(this::createActorFlow);
}
Here we’re calling the function acceptOrResult that takes the request header and returns a future. The returned future is a flow to handle the WebSocket messages.
We can, instead, reject the request and return a rejection result.
Now, let’s create the flow:
private CompletionStage<F.Either<Result, Flow<JsonNode, JsonNode, ?>>>
  createActorFlow(Http.RequestHeader request) {
    return CompletableFuture.completedFuture(
      F.Either.Right(createFlowForActor()));
}
The F class in Play Framework defines a set of functional programming style helpers. In this case, we are using F.Either.Right to accept the connection and return the flow.
Let’s say we wanted to reject the connection when the client is not authenticated.
For this, we could check if a username is set in the session. And if it’s not, we decline the connection with HTTP 403 Forbidden:
private CompletionStage<F.Either<Result, Flow<JsonNode, JsonNode, ?>>>
  createActorFlow2(Http.RequestHeader request) {
    return CompletableFuture.completedFuture(
      request.session()
      .getOptional("username")
      .map(username ->
        F.Either.<Result, Flow<JsonNode, JsonNode, ?>>Right(
          createFlowForActor()))
      .orElseGet(() -> F.Either.Left(forbidden())));
}
We use F.Either.Left to reject the connection in the same way as we provide a flow with F.Either.Right.
Finally, we link the flow to the actor that will handle the messages:
private Flow<JsonNode, JsonNode, ?> createFlowForActor() {
    return ActorFlow.actorRef(out -> Messenger.props(out),
      actorSystem, materializer);
}
The ActorFlow.actorRef creates a flow that is handled by the Messenger actor.
3.2. The routes File
Now, let’s add the routes definitions for the controller methods in conf/routes:
GET  /                    controllers.HomeController.index(request: Request)
GET  /chat                controllers.HomeController.socket
GET  /chat/with/streams   controllers.HomeController.akkaStreamsSocket
GET  /assets/*file        controllers.Assets.versioned(path="/public", file: Asset)
These route definitions map incoming HTTP requests to controller action methods as explained in Routing in Play Applications in Java.
3.3. The Actor Implementation
The most important part of the actor class is the createReceive method which determines which messages the actor can handle:
@Override
public Receive createReceive() {
    return receiveBuilder()
      .match(JsonNode.class, this::onSendMessage)
      .matchAny(o -> log.error("Received unknown message: {}", o.getClass()))
      .build();
}
The actor will forward all messages matching the JsonNode class to the onSendMessage handler method:
private void onSendMessage(JsonNode jsonNode) {
    RequestDTO requestDTO = MessageConverter.jsonNodeToRequest(jsonNode);
    String message = requestDTO.getMessage().toLowerCase();
    //..
    processMessage(requestDTO);
}
Then the handler will respond to every message using the processMessage method:
private void processMessage(RequestDTO requestDTO) {
    CompletionStage<HttpResponse> responseFuture = getRandomMessage();
    responseFuture.thenCompose(this::consumeHttpResponse)
      .thenAccept(messageDTO ->
        out.tell(MessageConverter.messageToJsonNode(messageDTO), getSelf()));
}
3.4. Consuming Rest API with Akka HTTP
We’ll send HTTP requests to the dummy message generator at JSONPlaceholder Posts. When the response arrives, we send the response to the client by writing it out.
Let’s have a method that calls the endpoint with a random post id:
private CompletionStage<HttpResponse> getRandomMessage() {
    int postId = ThreadLocalRandom.current().nextInt(0, 100);
    return Http.get(getContext().getSystem())
      .singleRequest(HttpRequest.create(
        "https://jsonplaceholder.typicode.com/posts/" + postId));
}
We’re also processing the HttpResponse we get from calling the service in order to get the JSON response:
private CompletionStage<MessageDTO> consumeHttpResponse(
  HttpResponse httpResponse) {
    Materializer materializer =
      Materializer.matFromSystem(getContext().getSystem());
    return Jackson.unmarshaller(MessageDTO.class)
      .unmarshal(httpResponse.entity(), materializer)
      .thenApply(messageDTO -> {
          log.info("Received message: {}", messageDTO);
          discardEntity(httpResponse, materializer);
          return messageDTO;
      });
}
The MessageConverter class is a utility for converting between JsonNode and the DTOs:
public static MessageDTO jsonNodeToMessage(JsonNode jsonNode) {
    ObjectMapper mapper = new ObjectMapper();
    return mapper.convertValue(jsonNode, MessageDTO.class);
}
Next, we need to discard the entity. The discardEntityBytes convenience method serves the purpose of easily discarding the entity if it has no purpose for us.
Let’s see how to discard the bytes:
private void discardEntity(
  HttpResponse httpResponse, Materializer materializer) {
    HttpMessage.DiscardedEntity discarded =
      httpResponse.discardEntityBytes(materializer);
    discarded.completionStage()
      .whenComplete((done, ex) ->
        log.info("Entity discarded completely!"));
}
Now having done the handling of the WebSocket, let’s see how we can set up a client for this using HTML5 WebSockets.
4. Setting up the WebSocket Client
For our client, let’s build a simple web-based chat application.
4.1. The Controller Action
We need to define a controller action that renders the index page. We’ll put this in the controller class app.controllers.HomeController:
public Result index(Http.Request request) {
    String url = routes.HomeController.socket()
      .webSocketURL(request);
    return ok(views.html.index.render(url));
}
4.2. The Template Page
Now, let’s head over to the app/views/ndex.scala.html page and add a container for the received messages and a form to capture a new message:
<div id="messageContent"></div>F
<form>
    <textarea id="messageInput"></textarea>
    <button id="sendButton">Send</button>
</form>
We’ll also need to pass in the URL for the WebSocket controller action by declaring this parameter at the top of the app/views/index.scala.html page:
@(url: String)4.3. WebSocket Event Handlers in JavaScript
And now, we can add the JavaScript to handle the WebSocket events. For simplicity, we’ll add the JavaScript functions at the bottom of the app/views/index.scala.html page.
Let’s declare the event handlers:
var webSocket;
var messageInput;

function init() {
    initWebSocket();
}

function initWebSocket() {
    webSocket = new WebSocket("@url");
    webSocket.onopen = onOpen;
    webSocket.onclose = onClose;
    webSocket.onmessage = onMessage;
    webSocket.onerror = onError;
}
Let’s add the handlers themselves:
function onOpen(evt) {
    writeToScreen("CONNECTED");
}

function onClose(evt) {
    writeToScreen("DISCONNECTED");
}

function onError(evt) {
    writeToScreen("ERROR: " + JSON.stringify(evt));
}

function onMessage(evt) {
    var receivedData = JSON.parse(evt.data);
    appendMessageToView("Server", receivedData.body);
}
Then, to present the output, we’ll use the functions appendMessageToView and writeToScreen:
function appendMessageToView(title, message) {
    $("#messageContent").append("<p>" + title + ": " + message + "</p>");
}

function writeToScreen(message) {
    console.log("New message: ", message);
}
4.4. Running and Testing the Application
We’re ready to test the application, so let’s run it:
cd websockets
sbt run
With the application running, we can chat with the server by visiting http://localhost:9000:
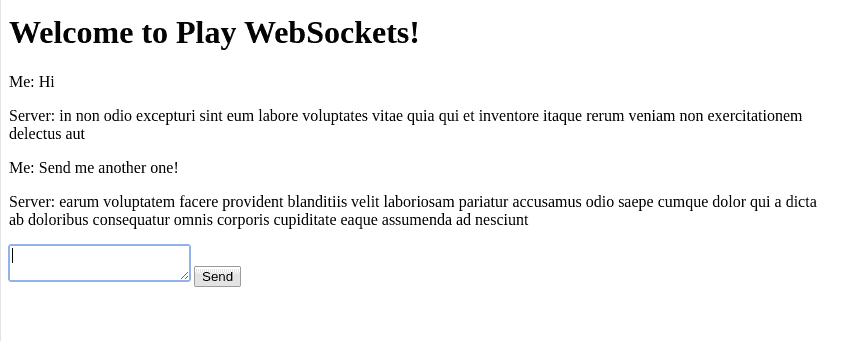
Every time we type a message and hit Send the server will immediately respond with some lorem ipsum from the JSON Placeholder service.
5. Handling WebSockets Directly with Akka Streams
If we are processing a stream of events from a source and sending these to the client, then we can model this around Akka streams.
Let’s see how we can use Akka streams in an example where the server sends messages every two seconds.
We’ll start with the WebSocket action in the HomeController:
public WebSocket akkaStreamsSocket() {
return WebSocket.Json.accept(request -> {
Sink<JsonNode, ?> in = Sink.foreach(System.out::println);
MessageDTO messageDTO =
new MessageDTO("1", "1", "Title", "Test Body");
Source<JsonNode, ?> out = Source.tick(
Duration.ofSeconds(2),
Duration.ofSeconds(2),
MessageConverter.messageToJsonNode(messageDTO)
);
return Flow.fromSinkAndSource(in, out);
});
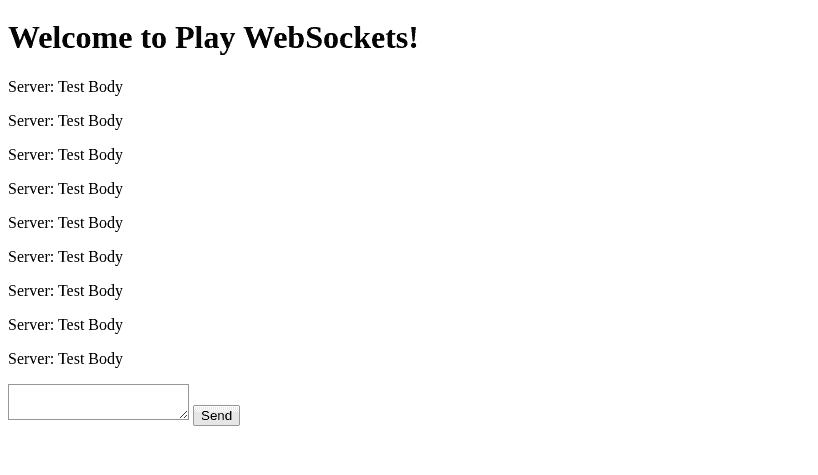
}The Source#tick method takes three parameters. The first is the initial delay before the first tick is processed, and the second is the interval between successive ticks. We’ve set both values to two seconds in the above snippet. The third parameter is an object that should be returned on each tick.
To see this in action, we need to modify the URL in the index action and make it point to the akkaStreamsSocket endpoint:
String url = routes.HomeController.akkaStreamsSocket().webSocketURL(request);And now refreshing the page, we’ll see a new entry every two seconds:
6. Terminating the Actor
At some point, we’ll need to shut down the chat, either through a user request or through a timeout.
6.1. Handling Actor Termination
How do we detect when a WebSocket has been closed?
Play will automatically close the WebSocket when the actor that handles the WebSocket terminates. So we can handle this scenario by implementing the Actor#postStop method:
@Override
public void postStop() throws Exception {
    log.info("Messenger actor stopped at {}",
      OffsetDateTime.now()
      .format(DateTimeFormatter.ISO_OFFSET_DATE_TIME));
}
6.2. Manually Terminating the Actor
Further, if we must stop the actor, we can send a PoisonPill to the actor. In our example application, we should be able to handle a “stop” request.
Let’s see how to do this in the onSendMessage method:
private void onSendMessage(JsonNode jsonNode) {
    RequestDTO requestDTO = MessageConverter.jsonNodeToRequest(jsonNode);
    String message = requestDTO.getMessage().toLowerCase();
    if("stop".equals(message)) {
        MessageDTO messageDTO =
          createMessageDTO("1", "1", "Stop", "Stopping actor");
        out.tell(MessageConverter.messageToJsonNode(messageDTO), getSelf());
        self().tell(PoisonPill.getInstance(), getSelf());
    } else {
        log.info("Actor received. {}", requestDTO);
        processMessage(requestDTO);
    }
}
When we receive a message, we check if it’s a stop request. If it is, we send the PoisonPill. Otherwise, we process the request.
7. Configuration Options
We can configure several options in terms of how the WebSocket should be handled. Let’s look at a few.
7.1. WebSocket Frame Length
WebSocket communication involves the exchange of data frames.
The WebSocket frame length is configurable. We have the option to adjust the frame length to our application requirements.
Configuring a shorter frame length may help reduce denial of service attacks that use long data frames. We can change the frame length for the application by specifying the max length in application.conf:
play.server.websocket.frame.maxLength = 64kWe can also set this configuration option by specifying the max length as a command-line parameter:
sbt -Dwebsocket.frame.maxLength=64k run7.2. Connection Idle Timeout
By default, the actor we use to handle the WebSocket is terminated after one minute. This is because the Play server in which our application is running has a default idle timeout of 60 seconds. This means that all connections that do not receive a request in sixty seconds are closed automatically.
We can change this through configuration options. Let’s head over to our application.conf and change the server to have no idle timeout:
play.server.http.idleTimeout = "infinite"Or we can pass in the option as command-line arguments:
sbt -Dhttp.idleTimeout=infinite runWe can also configure this by specifying devSettings in build.sbt.
Config options specified in build.sbt are only used in development, they will be ignored in production:
PlayKeys.devSettings += "play.server.http.idleTimeout" -> "infinite"If we re-run the application, the actor won’t terminate.
We can change the value to seconds:
PlayKeys.devSettings += "play.server.http.idleTimeout" -> "120 s"We can find out more about the available configuration options in the Play Framework documentation.
8. Conclusion
In this tutorial, we implemented WebSockets in the Play Framework with Akka actors and Akka Streams.
We then went on to look at how to use Akka actors directly and then saw how Akka Streams can be set up to handle the WebSocket connection.
On the client-side, we used JavaScript to handle our WebSocket events.
Finally, we looked at some configuration options that we can use.


