Spring Security for Reactive Applications
Last updated: January 8, 2024


Mocking is an essential part of unit testing, and the Mockito library makes it easy to write clean and intuitive unit tests for your Java code.
Get started with mocking and improve your application tests using our Mockito guide:
Handling concurrency in an application can be a tricky process with many potential pitfalls. A solid grasp of the fundamentals will go a long way to help minimize these issues.
Get started with understanding multi-threaded applications with our Java Concurrency guide:
Spring 5 added support for reactive programming with the Spring WebFlux module, which has been improved upon ever since. Get started with the Reactor project basics and reactive programming in Spring Boot:
Since its introduction in Java 8, the Stream API has become a staple of Java development. The basic operations like iterating, filtering, mapping sequences of elements are deceptively simple to use.
But these can also be overused and fall into some common pitfalls.
To get a better understanding on how Streams work and how to combine them with other language features, check out our guide to Java Streams:
Explore Spring Boot 3 and Spring 6 in-depth through building a full REST API with the framework:
Yes, Spring Security can be complex, from the more advanced functionality within the Core to the deep OAuth support in the framework.
I built the security material as two full courses - Core and OAuth, to get practical with these more complex scenarios. We explore when and how to use each feature and code through it on the backing project.
You can explore the course here:
Spring Data JPA is a great way to handle the complexity of JPA with the powerful simplicity of Spring Boot.
Get started with Spring Data JPA through the guided reference course:
Refactor Java code safely — and automatically — with OpenRewrite.
Refactoring big codebases by hand is slow, risky, and easy to put off. That’s where OpenRewrite comes in. The open-source framework for large-scale, automated code transformations helps teams modernize safely and consistently.
Each month, the creators and maintainers of OpenRewrite at Moderne run live, hands-on training sessions — one for newcomers and one for experienced users. You’ll see how recipes work, how to apply them across projects, and how to modernize code with confidence.
Join the next session, bring your questions, and learn how to automate the kind of work that usually eats your sprint time.
Spring 5 added support for reactive programming with the Spring WebFlux module, which has been improved upon ever since. Get started with the Reactor project basics and reactive programming in Spring Boot:
If you're working on a Spring Security (and especially an OAuth) implementation, definitely have a look at the Learn Spring Security course:
>> LEARN SPRING SECURITY1. Overview
In this article, we’ll explore new features of the Spring Security framework for securing reactive applications. This release is aligned with Spring 6 and Spring Boot 3.
In this article, we won’t go into details about the reactive applications themselves, which is a new feature of the Spring 5 framework. Be sure to check out the article Intro to Reactor Core for more details.
2. Maven Setup
We’ll use Spring Boot starters to bootstrap our project together with all required dependencies.
The basic setup requires a parent declaration, web starter, and security starter dependencies. We’ll also need the Spring Security test framework:
<parent>
    <groupId>org.springframework.boot</groupId>
    <artifactId>spring-boot-starter-parent</artifactId>
    <version>3.3.2</version>
    <relativePath/>
</parent>

<dependencies>
    <dependency>
        <groupId>org.springframework.boot</groupId>
        <artifactId>spring-boot-starter-webflux</artifactId>
    </dependency>
    <dependency>
        <groupId>org.springframework.boot</groupId>
        <artifactId>spring-boot-starter-security</artifactId>
    </dependency>
    <dependency>
        <groupId>org.springframework.security</groupId>
        <artifactId>spring-security-test</artifactId>
        <scope>test</scope>
    </dependency>
</dependencies>
We can check out the current version of the Spring Boot security starter over at Maven Central.
3. Project Setup
Let’s see how to set our project up.
3.1. Bootstrapping the Reactive Application
We won’t use the standard @SpringBootApplication configuration but instead, configure a Netty-based web server. Netty is an asynchronous NIO-based framework that is a good foundation for reactive applications.
The @EnableWebFlux annotation enables the standard Spring Web Reactive configuration for the application:
@ComponentScan(basePackages = {"com.baeldung.security"})
@EnableWebFlux
public class SpringSecurity6Application {

    public static void main(String[] args) {
        try (AnnotationConfigApplicationContext context
          = new AnnotationConfigApplicationContext(SpringSecurity6Application.class)) {
            context.getBean(NettyContext.class).onClose().block();
        }
    }
}
Here, we create a new application context and wait for Netty to shut down by calling the .onClose().block() chain on the Netty context.
After Netty is shut down, the context will be automatically closed using the try-with-resources block.
We’ll also need to create a Netty-based HTTP server, a handler for the HTTP requests, and the adapter between the server and the handler:
@Bean
public NettyContext nettyContext(ApplicationContext context) {
    HttpHandler handler = WebHttpHandlerBuilder
      .applicationContext(context).build();
    ReactorHttpHandlerAdapter adapter
      = new ReactorHttpHandlerAdapter(handler);
    HttpServer httpServer = HttpServer.create("localhost", 8080);
    return httpServer.newHandler(adapter).block();
}
3.2. Spring Security Configuration Class
For our basic Spring Security configuration, we’ll create a configuration class – SecurityConfig.
To enable WebFlux support in Spring Security 6, we only need to specify the @EnableWebFluxSecurity and @Configuration annotations:
@EnableWebFluxSecurity
@Configuration
public class SecurityConfig {
    // ...
}
In Spring Security 6, @Configuration is removed from @EnableWebFluxSecurity and @EnableReactiveMethodSecurity annotations. So, wherever we are using one of these annotations, we need to add the @Configuration annotation.
Now we can take advantage of the class ServerHttpSecurity to build our security configuration.
This class has been a new feature since Spring 5. It’s similar to HttpSecurity builder, but it’s only enabled for WebFlux applications.
The ServerHttpSecurity is already preconfigured with some sane defaults, so we could skip this configuration completely. But for starters, we’ll provide the following minimal config:
@Bean
public SecurityWebFilterChain securityWebFilterChain(
  ServerHttpSecurity http) {
    return http.authorizeExchange(exchanges -> exchanges
      .anyExchange().authenticated())
      .build();
}
Also, we’ll need a user details service. Spring Security provides us with a convenient mock user builder and an in-memory implementation of the user details service:
@Bean
public MapReactiveUserDetailsService userDetailsService() {
    UserDetails user = User
      .withUsername("user")
      .password(passwordEncoder().encode("password"))
      .roles("USER")
      .build();
    return new MapReactiveUserDetailsService(user);
}
Since we’re in reactive land, the user details service should also be reactive. If we check out the ReactiveUserDetailsService interface, we’ll see that its findByUsername method actually returns a Mono publisher:
public interface ReactiveUserDetailsService {

    Mono<UserDetails> findByUsername(String username);
}
Now we can run our application and observe a regular HTTP basic authentication form.
4. Styled Login Form
A small but striking improvement since Spring Security 5 is a new styled login form that uses the Bootstrap 4 CSS framework. The stylesheets in the login form link to CDN, so we’ll only see the improvement when connected to the Internet.
To use the new login form, let’s add the corresponding formLogin() builder method to the ServerHttpSecurity builder:
public SecurityWebFilterChain securityWebFilterChain(
  ServerHttpSecurity http) {
    return http.authorizeExchange(exchanges -> exchanges
      .anyExchange().authenticated())
      .formLogin(formLogin -> formLogin
        .loginPage("/login"))
      .build();
}
If we now open the main page of the application, we’ll see that it looks much better than the default form we’re used to since previous versions of Spring Security:
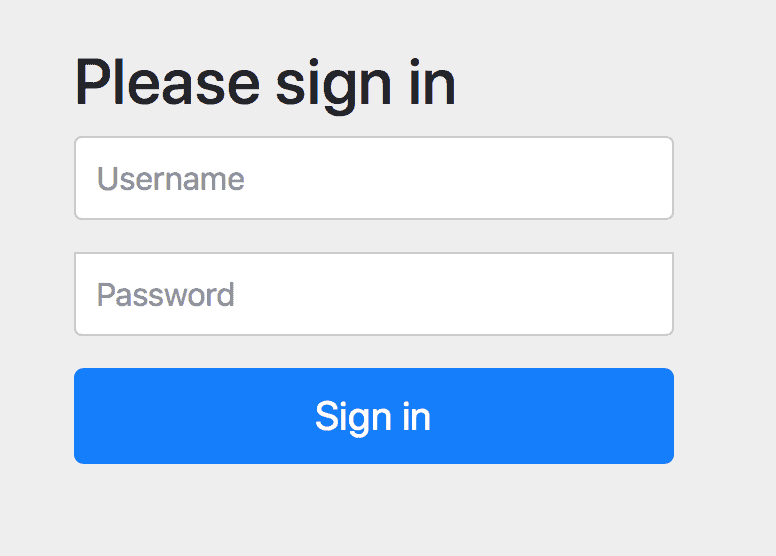
Note that this is not a production-ready form, but it’s a good bootstrap of our application.
If we now log in and then go to the http://localhost:8080/logout URL, we’ll see the logout confirmation form, which is also styled.
5. Reactive Controller Security
To see something behind the authentication form, let’s implement a simple reactive controller that greets the user:
@RestController
public class GreetingController {

    @GetMapping("/")
    public Mono<String> greet(Mono<Principal> principal) {
        return principal
          .map(Principal::getName)
          .map(name -> String.format("Hello, %s", name));
    }

}
After logging in, we’ll see the greeting. Let’s add another reactive handler that would be accessible by admin only:
@GetMapping("/admin")
public Mono<String> greetAdmin(Mono<Principal> principal) {
    return principal
      .map(Principal::getName)
      .map(name -> String.format("Admin access: %s", name));
}
Now let’s create a second user with the role ADMIN in our user details service:
UserDetails admin = User.withDefaultPasswordEncoder()
  .username("admin")
  .password("password")
  .roles("ADMIN")
  .build();
We can now add a matcher rule for the admin URL that requires the user to have the ROLE_ADMIN authority.
Note that we have to put matchers before the .anyExchange() chain call. This call applies to all other URLs which were not yet covered by other matchers:
return http.authorizeExchange(exchanges -> exchanges
  .pathMatchers("/admin").hasAuthority("ROLE_ADMIN")
  .anyExchange().authenticated())
  .formLogin(formLogin -> formLogin
    .loginPage("/login"))
  .csrf(csrf -> csrf.disable())
  .build();
If we now log in with the user or admin, we’ll see that they both observe the initial greeting, as we’ve made it accessible for all authenticated users.
But only the admin user can go to the http://localhost:8080/admin URL and see her greeting.
6. Reactive Method Security
We’ve seen how we can secure the URLs, but what about methods?
To enable method-based security for reactive methods, we only need to add the @EnableReactiveMethodSecurity and @Configuration annotations to our SecurityConfig class:
@EnableWebFluxSecurity
@Configuration
@EnableReactiveMethodSecurity
public class SecurityConfig {
    // ...
}
Now let’s create a reactive greeting service with the following content:
@Service
public class GreetingService {

    public Mono<String> greet() {
        return Mono.just("Hello from service!");
    }
}
We can inject it into the controller, go to http://localhost:8080/greetingService, and see that it actually works:
@RestController
public class GreetingController {

    private GreetingService greetingService

    // constructor...

    @GetMapping("/greetingService")
    public Mono<String> greetingService() {
        return greetingService.greet();
    }

}
But if we now add the @PreAuthorize annotation on the service method with the ADMIN role, then the greet service URL won’t be accessible to a regular user:
@Service
public class GreetingService {

    @PreAuthorize("hasRole('ADMIN')")
    public Mono<String> greet() {
        // ...
    }
}
7. Mocking Users in Tests
Let’s check out how easy it is to test our reactive Spring application.
First, we’ll create a test with an injected application context:
@ContextConfiguration(classes = SpringSecurity6Application.class)
public class SecurityTest {

    @Autowired
    ApplicationContext context;

    // ...
}
Now we’ll set up a simple reactive web test client, which is a feature of the Spring 5 test framework:
@Before
public void setup() {
    this.webTestClient = WebTestClient
      .bindToApplicationContext(this.context)
      .configureClient()
      .build();
}
This allows us to quickly check that the unauthorized user is redirected from the main page of our application to the login page:
@Test
void whenNoCredentials_thenRedirectToLogin() {
    webTestClient.get()
      .uri("/")
      .exchange()
      .expectStatus().is3xxRedirection();
}
If we now add the @WithMockUser annotation to a test method, we can provide an authenticated user for this method.
The login and password of this user would be user and password respectively, and the role is USER. This, of course, can all be configured with the @WithMockUser annotation parameters.
Now we can check that the authorized user sees the greeting:
@Test
@WithMockUser
void whenHasCredentials_thenSeesGreeting() {
    webTestClient.get()
      .uri("/")
      .exchange()
      .expectStatus().isOk()
      .expectBody(String.class).isEqualTo("Hello, user");
}
The @WithMockUser annotation has been available since Spring Security 4. However, this was also updated in Spring Security 5 to cover reactive endpoints and methods.
8. Conclusion
In this tutorial, we’ve discovered new features of Spring Security, especially in the reactive programming area.


