

Mocking is an essential part of unit testing, and the Mockito library makes it easy to write clean and intuitive unit tests for your Java code.
Get started with mocking and improve your application tests using our Mockito guide:
Handling concurrency in an application can be a tricky process with many potential pitfalls. A solid grasp of the fundamentals will go a long way to help minimize these issues.
Get started with understanding multi-threaded applications with our Java Concurrency guide:
Spring 5 added support for reactive programming with the Spring WebFlux module, which has been improved upon ever since. Get started with the Reactor project basics and reactive programming in Spring Boot:
Since its introduction in Java 8, the Stream API has become a staple of Java development. The basic operations like iterating, filtering, mapping sequences of elements are deceptively simple to use.
But these can also be overused and fall into some common pitfalls.
To get a better understanding on how Streams work and how to combine them with other language features, check out our guide to Java Streams:
Explore Spring Boot 3 and Spring 6 in-depth through building a full REST API with the framework:
Yes, Spring Security can be complex, from the more advanced functionality within the Core to the deep OAuth support in the framework.
I built the security material as two full courses - Core and OAuth, to get practical with these more complex scenarios. We explore when and how to use each feature and code through it on the backing project.
You can explore the course here:
Spring Data JPA is a great way to handle the complexity of JPA with the powerful simplicity of Spring Boot.
Get started with Spring Data JPA through the guided reference course:
Refactor Java code safely — and automatically — with OpenRewrite.
Refactoring big codebases by hand is slow, risky, and easy to put off. That’s where OpenRewrite comes in. The open-source framework for large-scale, automated code transformations helps teams modernize safely and consistently.
Each month, the creators and maintainers of OpenRewrite at Moderne run live, hands-on training sessions — one for newcomers and one for experienced users. You’ll see how recipes work, how to apply them across projects, and how to modernize code with confidence.
Join the next session, bring your questions, and learn how to automate the kind of work that usually eats your sprint time.
Yes, we're now running our only Summer Sale. All Courses are 30% off until 20th July, 2026:
Yes, we're now running our only Summer Sale. All Courses are 30% off until 20th July, 2026:
1. Overview
In this article, we’ll focus on using Mustache templates for producing HTML content in Spring Boot applications.
It’s a logic-less template engine for creating dynamic content, which is popular due to its simplicity.
If you want to discover the basics, check our introduction to Mustache article.
2. Maven Dependency
To be able to use Mustache along with Spring Boot, we need to add the dedicated Spring Boot starter to our pom.xml:
<dependency>
    <groupId>org.springframework.boot</groupId>
    <artifactId>spring-boot-starter-mustache</artifactId>
</dependency>
<dependency>
    <groupId>org.springframework.boot</groupId>
    <artifactId>spring-boot-starter-web</artifactId>
</dependency>
In addition, we need the spring-boot-starter-web dependency.
3. Creating Templates
Let’s show an example and create a simple MVC application using Spring-Boot that will serve articles on a web page.
Let’s write the first template for the article contents:
<div class="starter-template">
    {{#articles}}
    <h1>{{title}}</h1>
    <h3>{{publishDate}}</h3>
    <h3>{{author}}</h3>
    <p>{{body}}</p>
    {{/articles}}
</div>
We’ll save this HTML file, say article.html, and refer it in our index.html:
<div class="container">
    {{>layout/article}}
</div>
Here, the layout is a sub-directory, and the article is the file name for the template file.
Note that the default mustache template file extension is now .mustache. We can override this configuration with a property:
spring.mustache.suffix:.html4. Controller
Now let’s write the controller for serving articles:
@GetMapping("/article")
public ModelAndView displayArticle(Map<String, Object> model) {

    List<Article> articles = IntStream.range(0, 10)
      .mapToObj(i -> generateArticle("Article Title " + i))
      .collect(Collectors.toList());

    model.put("articles", articles);

    return new ModelAndView("index", model);
}
The controller returns a list of articles to be rendered on the page. In the article template, the tag articles starting with # and ending in /, takes care of the list.
This will iterate over the model passed and render each element separately just like in an HTML table:
{{#articles}}...{{/articles}}
The generateArticle() method creates an Article instance with some random data.
Note that the keys in the Article Model, returned by the controller, should be same as that of the article template tags.
Now, let’s test our application:
@Test
public void givenIndexPage_whenContainsArticle_thenTrue() {

    ResponseEntity<String> entity
      = this.restTemplate.getForEntity("/article", String.class);

    assertEquals(entity.getStatusCode(), HttpStatus.OK));
    assertTrue(entity.getBody()
      .contains("Article Title 0"));
}
We can also test the application by deploying it with:
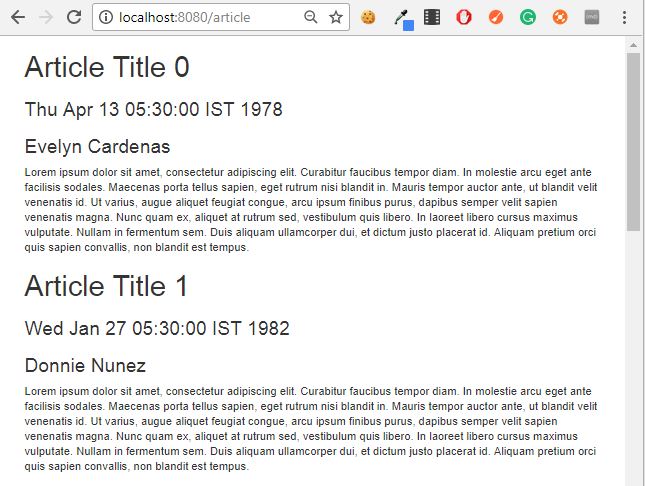
mvn spring-boot:runOnce deployed, we can hit localhost:8080/article, and we’ll get our articles listed:
5. Handling Default Values
In a Mustache environment, if we do not provide a value for a placeholder, the MustacheException will be thrown with a message “No method or field with name ”variable-name …”.
In order to avoid such errors it’s better to provide a default global value to all placeholders:
@Bean
public Mustache.Compiler mustacheCompiler(
  Mustache.TemplateLoader templateLoader,
  Environment environment) {

    MustacheEnvironmentCollector collector
      = new MustacheEnvironmentCollector();
    collector.setEnvironment(environment);

    return Mustache.compiler()
      .defaultValue("Some Default Value")
      .withLoader(templateLoader)
      .withCollector(collector);
}
6. Mustache With Spring MVC
Now, let’s discuss how to integrate with Spring MVC if we decide not to use Spring Boot. First, let’s add the dependency:
<dependency>
    <groupId>com.github.sps.mustache</groupId>
    <artifactId>mustache-spring-view</artifactId>
    <version>1.4</version>
</dependency>
The latest version can be found here.
Next, we need to configure MustacheViewResolver instead of Spring’s InternalResourceViewResolver:
@Bean
public ViewResolver getViewResolver(ResourceLoader resourceLoader) {
    MustacheViewResolver mustacheViewResolver
      = new MustacheViewResolver();
    mustacheViewResolver.setPrefix("/WEB-INF/views/");
    mustacheViewResolver.setSuffix("..mustache");
    mustacheViewResolver.setCache(false);
    MustacheTemplateLoader mustacheTemplateLoader
      = new MustacheTemplateLoader();
    mustacheTemplateLoader.setResourceLoader(resourceLoader);
    mustacheViewResolver.setTemplateLoader(mustacheTemplateLoader);
    return mustacheViewResolver;
}
We just need to configure the suffix, where our templates are stored, prefix the extension of our templates, and the templateLoader, which will be responsible for loading templates.
7. Conclusion
In this quick tutorial, we looked at using Mustache templates with Spring Boot, rendering a collection of elements in the UI and also providing default values to variables to avoid errors.
Finally, we discussed how to integrate it with Spring, using MustacheViewResolver.


