Check if a User Is Logged-in With Servlets and JSP
Last updated: January 8, 2024


Mocking is an essential part of unit testing, and the Mockito library makes it easy to write clean and intuitive unit tests for your Java code.
Get started with mocking and improve your application tests using our Mockito guide:
Handling concurrency in an application can be a tricky process with many potential pitfalls. A solid grasp of the fundamentals will go a long way to help minimize these issues.
Get started with understanding multi-threaded applications with our Java Concurrency guide:
Spring 5 added support for reactive programming with the Spring WebFlux module, which has been improved upon ever since. Get started with the Reactor project basics and reactive programming in Spring Boot:
Since its introduction in Java 8, the Stream API has become a staple of Java development. The basic operations like iterating, filtering, mapping sequences of elements are deceptively simple to use.
But these can also be overused and fall into some common pitfalls.
To get a better understanding on how Streams work and how to combine them with other language features, check out our guide to Java Streams:
Explore Spring Boot 3 and Spring 6 in-depth through building a full REST API with the framework:
Yes, Spring Security can be complex, from the more advanced functionality within the Core to the deep OAuth support in the framework.
I built the security material as two full courses - Core and OAuth, to get practical with these more complex scenarios. We explore when and how to use each feature and code through it on the backing project.
You can explore the course here:
Spring Data JPA is a great way to handle the complexity of JPA with the powerful simplicity of Spring Boot.
Get started with Spring Data JPA through the guided reference course:
Refactor Java code safely — and automatically — with OpenRewrite.
Refactoring big codebases by hand is slow, risky, and easy to put off. That’s where OpenRewrite comes in. The open-source framework for large-scale, automated code transformations helps teams modernize safely and consistently.
Each month, the creators and maintainers of OpenRewrite at Moderne run live, hands-on training sessions — one for newcomers and one for experienced users. You’ll see how recipes work, how to apply them across projects, and how to modernize code with confidence.
Join the next session, bring your questions, and learn how to automate the kind of work that usually eats your sprint time.
1. Overview
In this tutorial, we’ll learn how to check a user’s login and ensure that the user has filled the login form with valid credentials and started a session. However, we’ll do this without using Spring Security and using only JSPs and servlets. Consequently, we’ll need a servlet container that can support it, like Tomcat 9.
By the end, we’ll have a good understanding of how things work under the hood.
2. Persistence Strategy
Firstly, we need users. To keep it simple, we’ll use a preloaded map. Let’s define it along with our User:
public class User {
    static HashMap<String, User> DB = new HashMap<>();
    static {
        DB.put("user", new User("user", "pass"));
        // ...
    }

    private String name;
    private String password;

    // getters and setters
}
3. Filtering Requests
We’ll start by creating a filter to check sessionless requests, blocking direct access to our servlets:
@WebFilter("/*")
public class UserCheckFilter implements Filter {

    public void doFilter(ServletRequest req, ServletResponse res, FilterChain chain) {
        // ...
        request.setAttribute("origin", request.getRequestURI());

        if (!request.getRequestURI().contains("login") && request.getSession(false) == null) {
            forward(request, response, "/login.jsp");
            return;
        }

        chain.doFilter(request, response);
    }
}
Here, by defining “/*” as our URL pattern on the @WebFilter, all requests will pass through our filter first. Then, if there’s no session yet, we redirect the request to our login page, storing the origin for later use. Finally, we return early, preventing our servlet from processing without a proper session.
4. Creating a Login Form With JSP
To build our login form, we’ll need to import the core Taglib from JSTL. Also, let’s set our session attribute to “false” in our page directive. As a result, a new session is not created automatically, and we can have full control:
<%@ page session="false"%>
<%@ taglib uri="http://java.sun.com/jstl/core_rt" prefix="c"%>

<form action="login" method="POST">
    ...
</form>
Then, inside our form, we’ll have a hidden input to save the origin:
<input type="hidden" name="origin" value="${origin}">Next, we’ll include a conditional element to output errors:
<c:if test="${not empty error}">
    * error: ${error}
</c:if>
Finally, let’s add some input tags so the user can enter and submit the credentials:
<input type="text" name="name">
<input type="password" name="password">
<input type="submit">
5. Setting up Our Login Servlet
In our servlet, we’ll forward the request to our login form if it’s a GET. And most importantly, we validate the login if it’s a POST:
@WebServlet("/login")
public class UserCheckLoginServlet extends HttpServlet {
    // ...
}
So, in our doGet() method, we’ll just redirect to our login JSP, passing the origin forward:
protected void doGet(HttpServletRequest request, HttpServletResponse response) {
    String referer = (String) request.getAttribute("origin");
    request.setAttribute("origin", referer);
    forward(request, response, "/login.jsp");
}
In our doPost(), we validate credentials and create a session, passing the User object forward and redirecting to origin:
protected void doPost(HttpServletRequest request, HttpServletResponse response) {
    String key = request.getParameter("name");
    String pass = request.getParameter("password");

    User user = User.DB.get(key);
    if (!user.getPassword().equals(pass)) {
        request.setAttribute("error", "invalid login");
        forward(request, response, "/login.jsp");
        return;
    }

    HttpSession session = request.getSession();
    session.setAttribute("user", user);

    response.sendRedirect(request.getParameter("origin"));
}
In case of invalid credentials, we set a message in our error variable. Otherwise, we update the session with our User object.
6. Checking Login Info
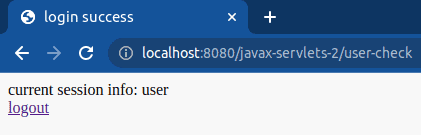
Finally, let’s create our home page. It just shows session information and has a logout link:
<body>
    current session info: ${user.name}

    <a href="logout">logout</a>
</body>
All that our home servlet does is forward the User to the home page:
@WebServlet("/home")
public class UserCheckServlet extends HttpServlet {

    protected void doGet(HttpServletRequest request, HttpServletResponse response) {
        User user = (User) session.getAttribute("user");
        request.setAttribute("user", user);

        forward(request, response, "/home.jsp");
    }
}
And this is how it looks:
7. Logging Out
To log out, we simply invalidate the current session and redirect home. After that, our UserCheckFilter will detect a sessionless request and redirect us back to the login page, restarting the process:
@WebServlet("/logout")
public class UserCheckLogoutServlet extends HttpServlet {

    protected void doGet(HttpServletRequest request, HttpServletResponse response) {
        request.getSession().invalidate();

        response.sendRedirect("./");
    }
}
8. Conclusion
In this article, we went through the creation of a full login cycle. We saw how we now have full control over access to our servlets, using a single filter. In short, with this approach, we can always be sure that there’s a valid session where we need one. Similarly, we could expand that mechanism to implement finer access control.


