Learn through the super-clean Baeldung Pro experience:
>> Membership and Baeldung Pro.
No ads, dark-mode and 6 months free of IntelliJ Idea Ultimate to start with.
Last updated: March 18, 2024

Learn through the super-clean Baeldung Pro experience:
>> Membership and Baeldung Pro.
No ads, dark-mode and 6 months free of IntelliJ Idea Ultimate to start with.
When we develop Scala applications, a good IDE can significantly improve the quality of our code. IntelliJ IDEA, with the Scala plug-in, gives us an excellent base for developing robust applications. In this article, we will discuss how to set up IntelliJ, primarily with SBT, so that we can keep it happy while leaving enough resources for running our application.
We should be aware that setting up IntelliJ for use with Scala takes a bit of work. If done correctly, it will save us from difficulty later on.
The configuration options and techniques discussed in this article are relevant to both IntelliJ IDEA Community Edition and IntelliJ Ultimate.
The installation of IntelliJ itself, regardless of what OS we are running, is easy and discussed in this companion Baeldung article, Basic IntelliJ Configuration.
However, we’re not quite ready to jump in and start writing Scala code. Let’s take a look at what else we need to set up to do that.
Scala requires the use of JDK 1.8 or higher. We have a couple of options available:
This is an area that is largely of personal preference. However, we should be aware that if we need to use a version of the JDK more recent than 1.8, we need to be more careful about which versions of are supported. See the official JDK Compatibility page for more information.
Our goal is to set up IntelliJ to use SBT for two key reasons:
We’ll be focusing on SBT since it’s the most popular build tool in the Scala community and is well-supported by IntelliJ.
We should use the “Create New Project” option when we are creating a project from scratch. In practice, we won’t use this option often, but it’s good to know how it works:

Clicking on “Create New Project” takes us through a “wizard” that prompts us through the process of creating a project. Since we are focusing on SBT-based projects, the important considerations are:
Here is what the form looks like when completed:
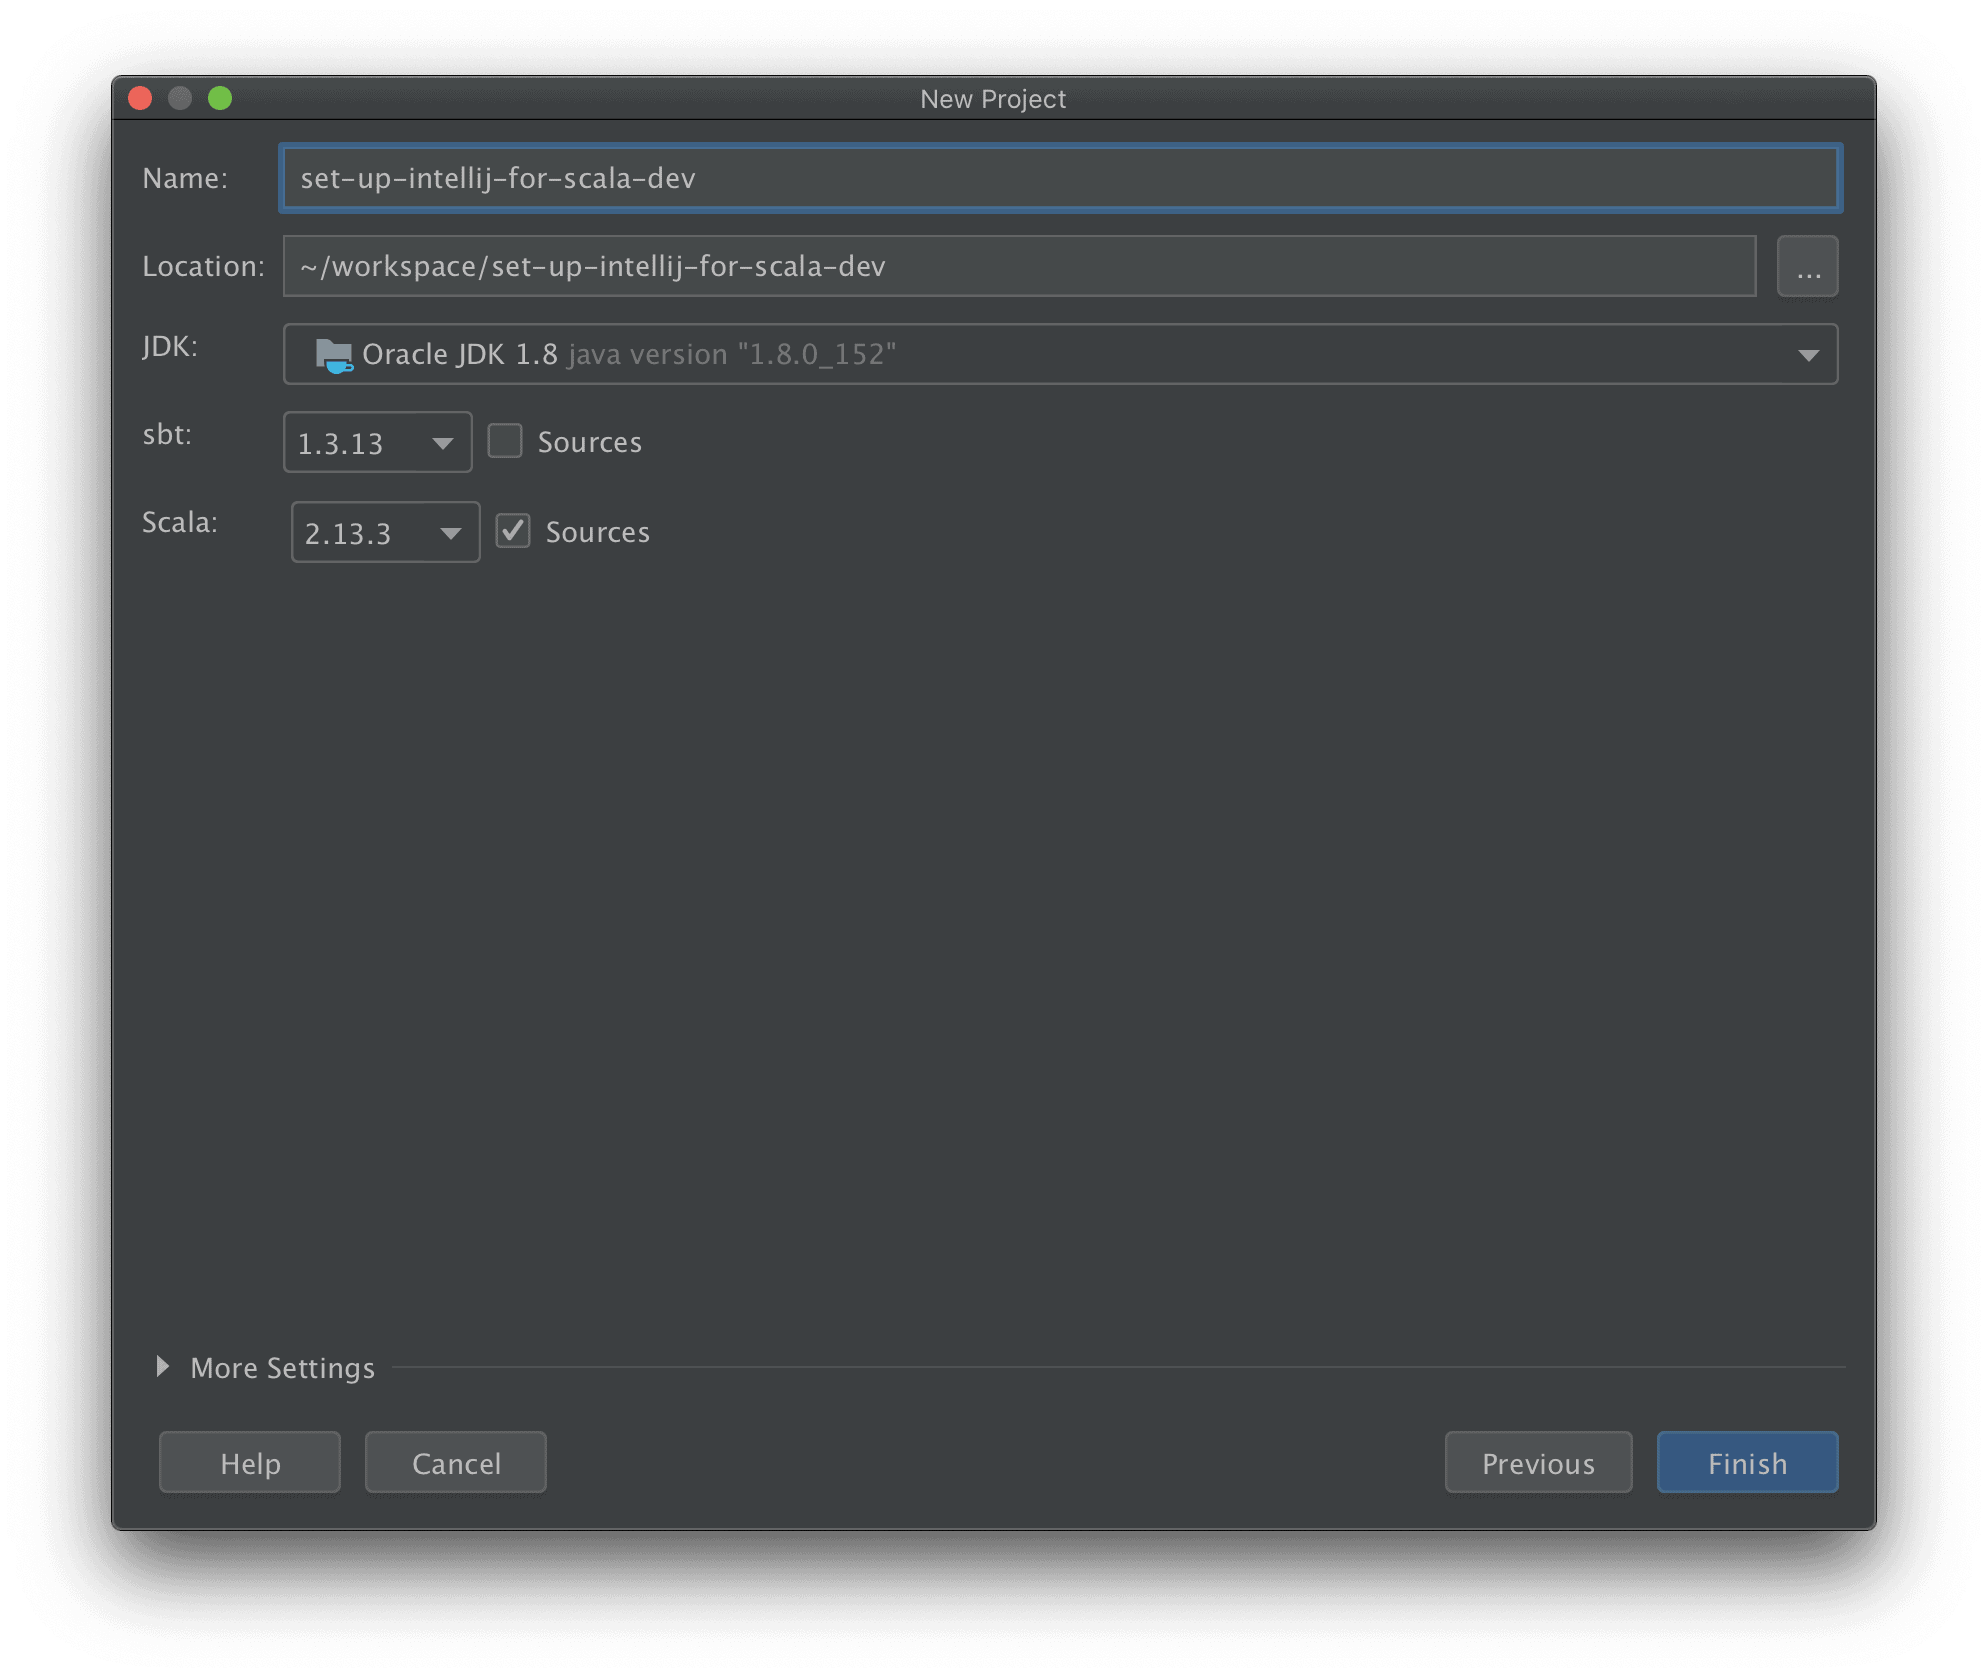
Clicking on “Finish” will create the project along with the basic Scala project directory structure.
This, however, does not set up the project entirely.
By default, IntelliJ will build Scala programs using its own build process. However, this is not exactly what we want because we need to make sure that we use SBT.
To enable that, we need to go into our project preferences and specify that behavior.
Open the preferences panel (this will vary from OS to OS, but it can always be accessed via IntelliJ’s top-level menu) and search for “sbt”. We should see a panel like this:
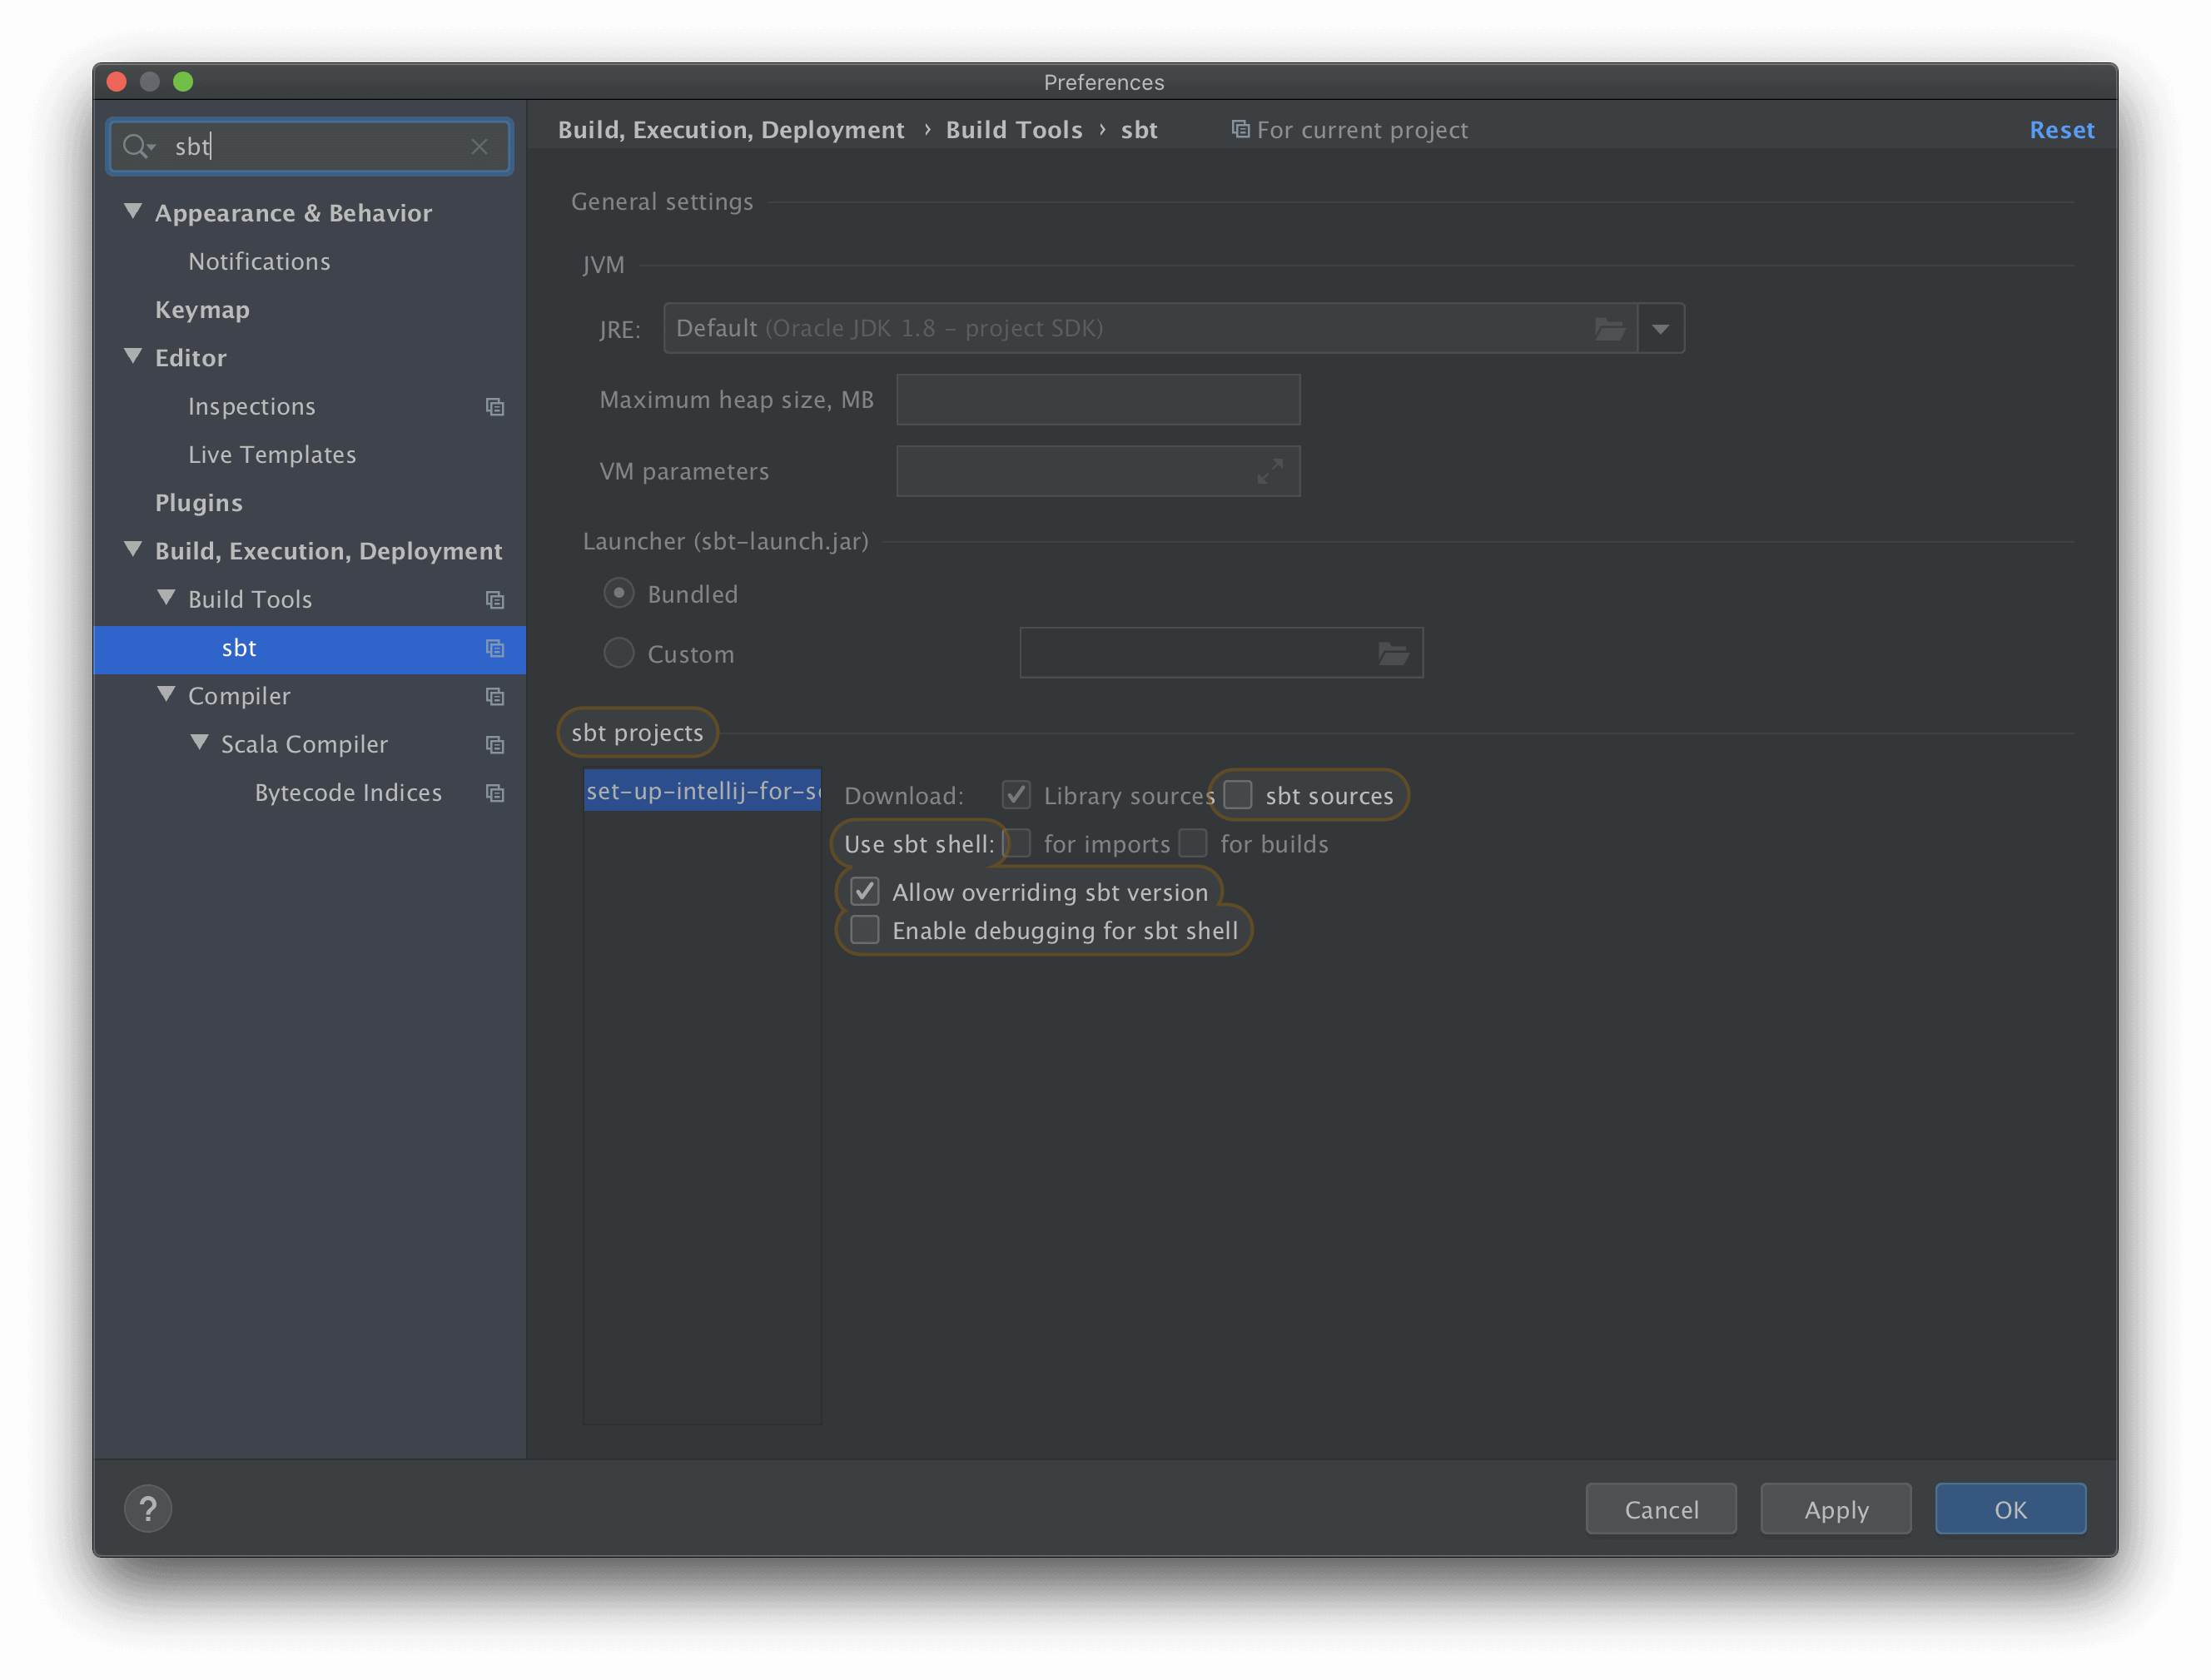
Note checkboxes next to the label, “Use sbt shell”. Enable “for imports” and “for builds” and then click “OK”. This will cause IntelliJ to run an instance of SBT to both build and to manage project dependencies.
Now, when we click the build icon (the button with the ? image), we should see IntelliJ start an instance of SBT to build the project in the “sbt terminal” window.
These two options are mostly the same. In the case of “Open or Import”, we set up the project from a directory that already exists on our computer.
With “Get From Version Control”, we are prompted to create a project that has been pushed to a remote repository. In the latter case, IntelliJ will guide us through specifying where our project should be set up. This is a situation that will come up in team development.
In either case, IntelliJ “knows” that projects that have a build.sbt file in the project’s root directory can be imported using SBT. Again, we must go into preferences and enable the “Use sbt shell” settings, as described in the previous section.
We have bootstrapped our project into IntelliJ, but we are not entirely done, especially if we are working on a large project.
When we run programs under the control of SBT, it provides an automatic recompile or “hot load” feature. However, relying on this feature can be challenging when working with large applications. The reason for this is the amount of memory that the Scala compiler needs for large codebases.
Let’s see how we can optimize our memory usage for this use case.
Again, if we go back to the SBT configuration panel, we see there is a field where we can specify the maximum amount of memory that it can use:
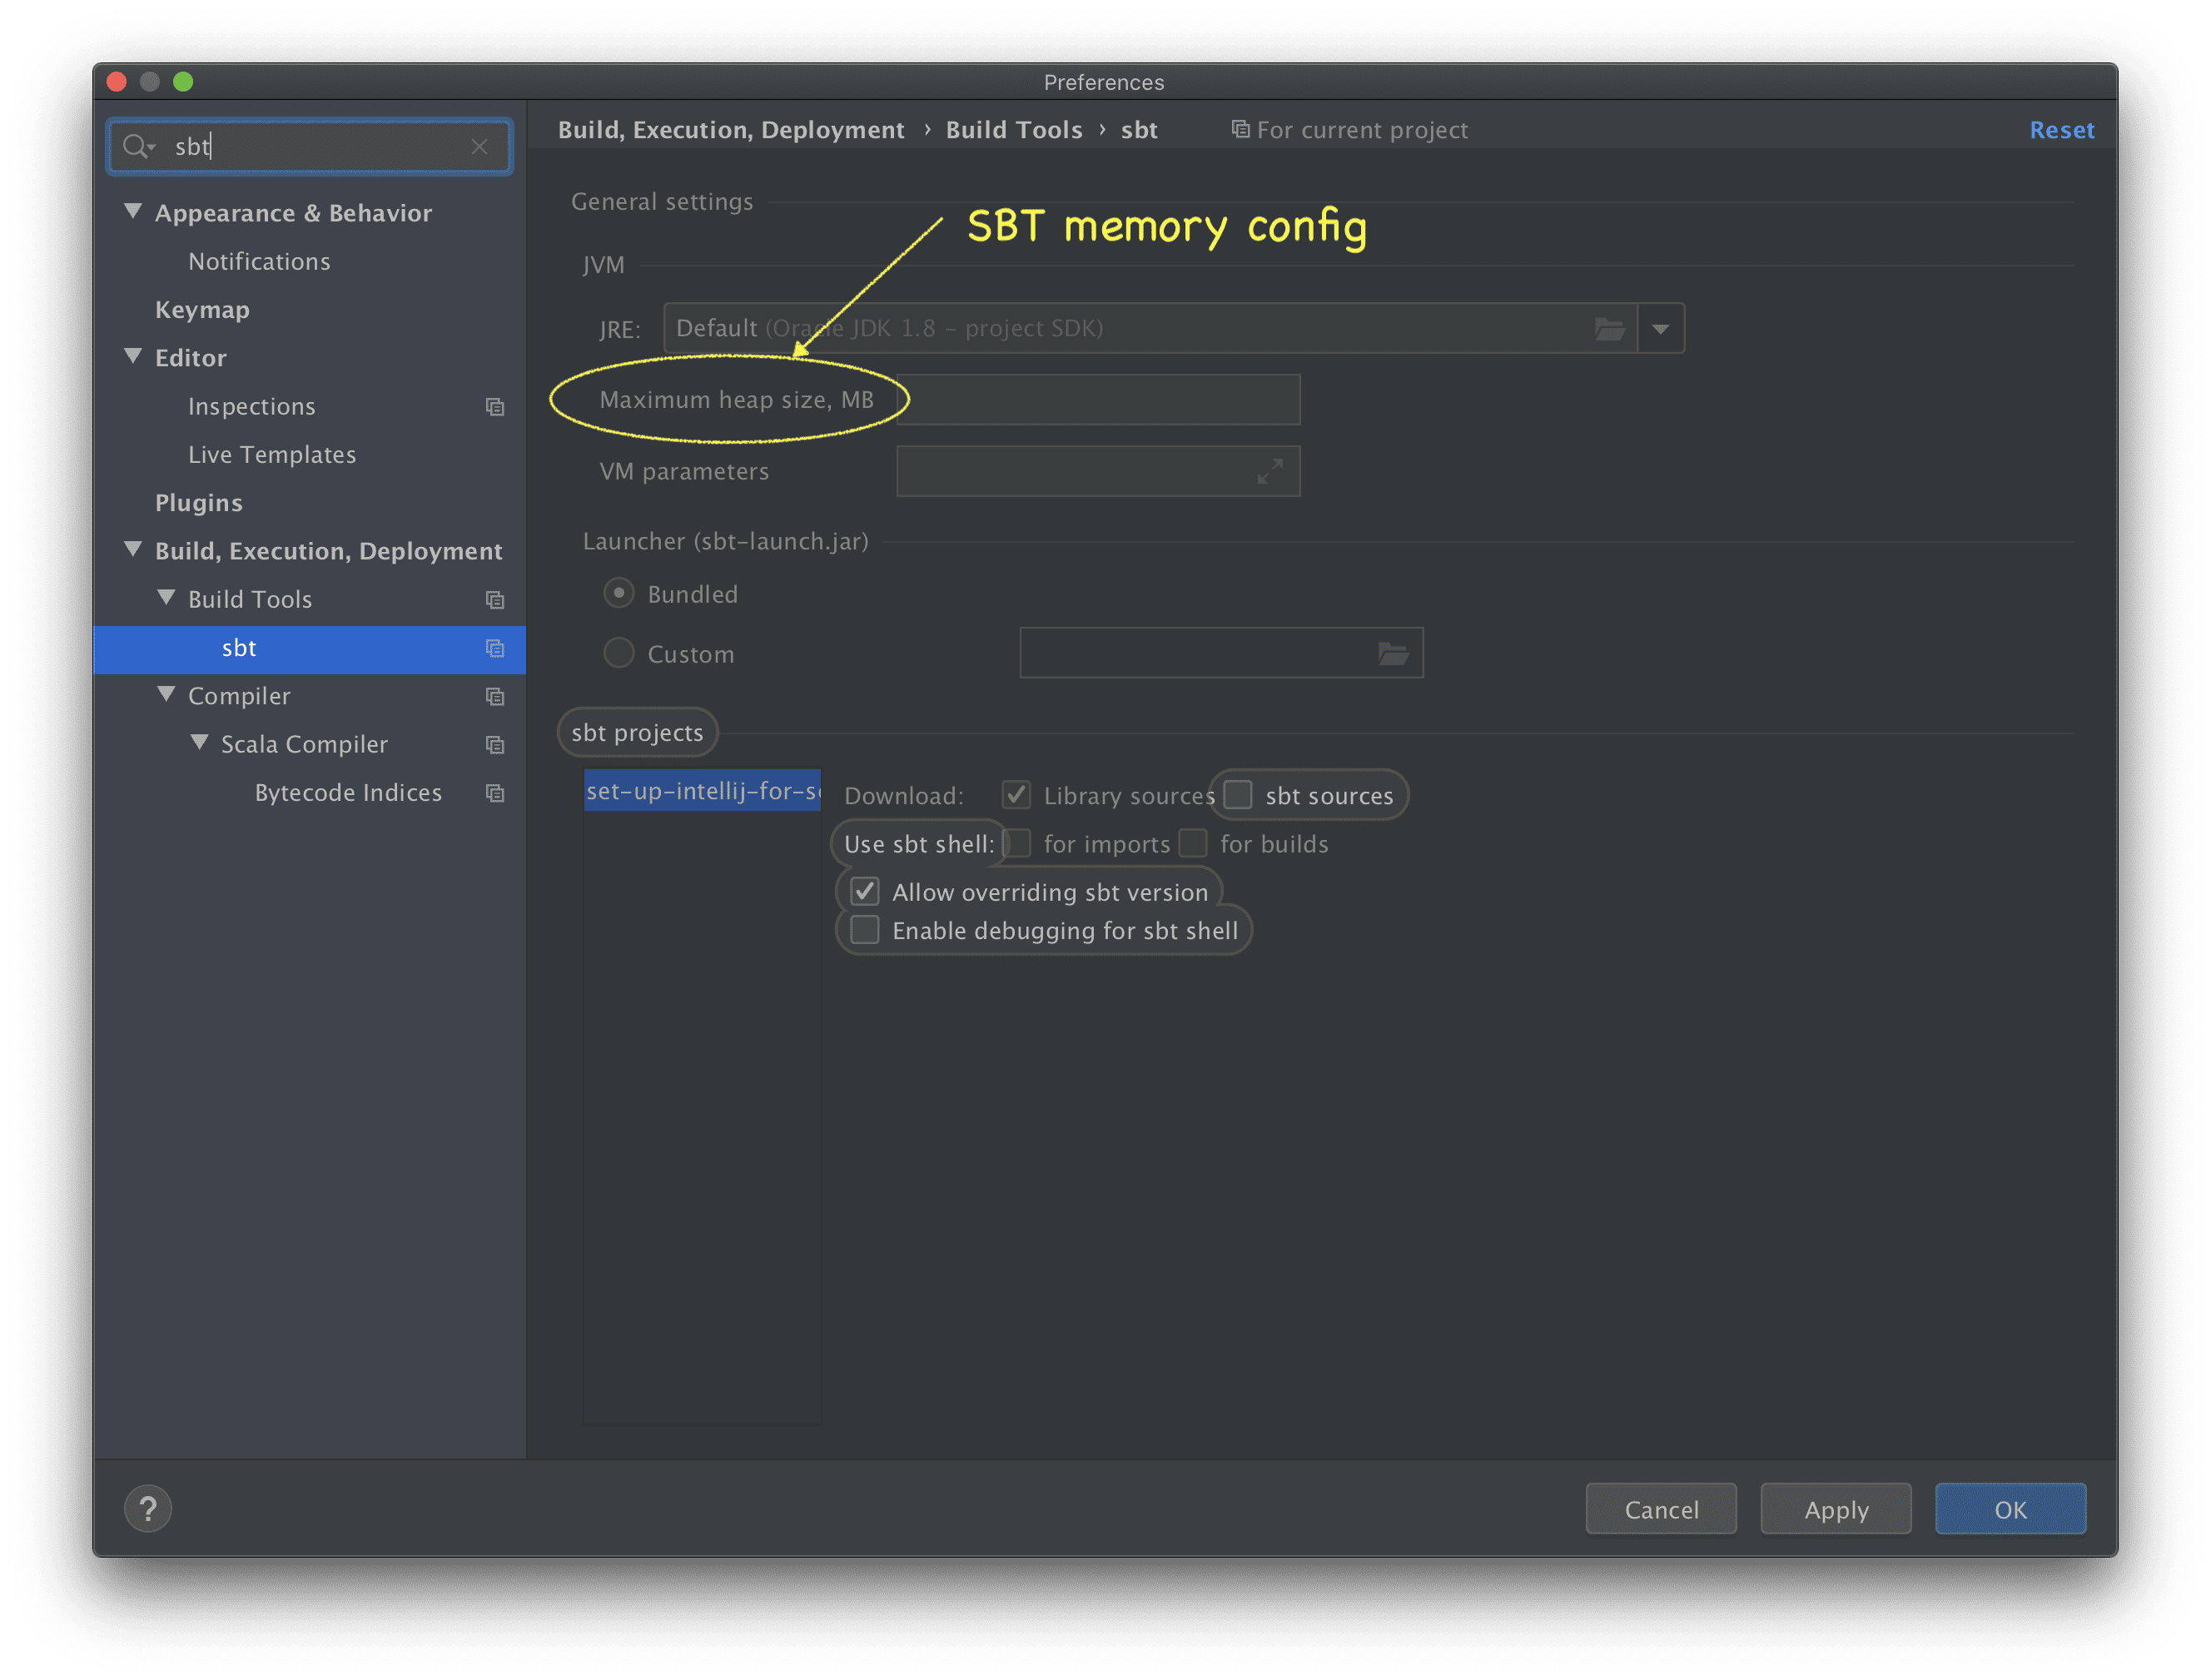
Raising this limit will significantly improve the performance of the Scala compiler. For example, if we need to give 8GB of memory to it, specify this as 8192.
In particular, whenever we need to recompile our application from scratch, we should use SBT to do this.
We can give it a large amount of memory if required, and then, when we run the application, we can specify a more reasonable amount of memory. If we are really strapped for memory on our computer, we can even kill the SBT process by simply clicking the red box on the left-hand side of IntelliJ’s “sbt terminal: window.
We can run a Scala application from SBT by executing the “run” command. However, if we have given SBT a lot of memory, this may restrict the amount of memory available to our application. To get around this issue, we can create a “Run Configuration” for our application.
The easiest way to create a run configuration for our application is to go to its main entry point and click the green double arrow, as shown in this figure:

We can then go to run configuration, also highlighted, and set the amount of memory for it.
Click on “SampleApp” (or whatever the name of our application is) and choose “Edit Configurations…”. Select “SampleApp” and we can set the VM options for our app. Unlike the megabytes setting for SBT, these are standard JVM settings. If we need a 4GB heap, we specify it as -Xmx4GB.
This value does not have to be the same as the amount of memory specified for SBT in the previous step. This allows us to set a memory size, which is smaller, for example.
The one downside of this approach is that if we are not using a framework such as Play that supports hot re-loading in development mode, we will have to manually restart our application each time we change it. If we use the “run ~” command in sbt, we get hot re-loading, potentially at the cost of using more memory.
In this article, we showed the basics of setting up IntelliJ for Scala development using SBT. We also looked at how we can optimize the amount of memory by separating our build and run configurations.