

Mocking is an essential part of unit testing, and the Mockito library makes it easy to write clean and intuitive unit tests for your Java code.
Get started with mocking and improve your application tests using our Mockito guide:
Handling concurrency in an application can be a tricky process with many potential pitfalls. A solid grasp of the fundamentals will go a long way to help minimize these issues.
Get started with understanding multi-threaded applications with our Java Concurrency guide:
Spring 5 added support for reactive programming with the Spring WebFlux module, which has been improved upon ever since. Get started with the Reactor project basics and reactive programming in Spring Boot:
Since its introduction in Java 8, the Stream API has become a staple of Java development. The basic operations like iterating, filtering, mapping sequences of elements are deceptively simple to use.
But these can also be overused and fall into some common pitfalls.
To get a better understanding on how Streams work and how to combine them with other language features, check out our guide to Java Streams:
Explore Spring Boot 3 and Spring 6 in-depth through building a full REST API with the framework:
Yes, Spring Security can be complex, from the more advanced functionality within the Core to the deep OAuth support in the framework.
I built the security material as two full courses - Core and OAuth, to get practical with these more complex scenarios. We explore when and how to use each feature and code through it on the backing project.
You can explore the course here:
Spring Data JPA is a great way to handle the complexity of JPA with the powerful simplicity of Spring Boot.
Get started with Spring Data JPA through the guided reference course:
Refactor Java code safely — and automatically — with OpenRewrite.
Refactoring big codebases by hand is slow, risky, and easy to put off. That’s where OpenRewrite comes in. The open-source framework for large-scale, automated code transformations helps teams modernize safely and consistently.
Each month, the creators and maintainers of OpenRewrite at Moderne run live, hands-on training sessions — one for newcomers and one for experienced users. You’ll see how recipes work, how to apply them across projects, and how to modernize code with confidence.
Join the next session, bring your questions, and learn how to automate the kind of work that usually eats your sprint time.
1. Overview
Load testing is a critical part of the software development life cycle (SDLC) for modern enterprise applications. In this tutorial, we’ll use Postman collections to perform a simple load testing activity.
2. Setup
We can download and install the desktop client that’s compatible with our system’s operating system. Alternatively, we can create a free Postman account and access the web client.
Now, let’s create a new collection called “Google Apps – Load Testing” by importing a few sample HTTP requests available in Postman’s Collection Format v2.1:
{
  "info": {
    "_postman_id": "ddbb5536-b6ad-4247-a715-52a5d518b648",
    "name": "Google Apps - Load Testing",
    "schema": "https://schema.getpostman.com/json/collection/v2.1.0/collection.json"
  },
  "item": [
    {
      "name": "Get Google",
      "event": [
        {
          "listen": "test",
          "script": {
            "exec": [
              ""
            ],
            "type": "text/javascript"
          }
        }
      ],
      "request": {
        "method": "GET",
        "header": [],
        "url": {
          "raw": "https://www.google.com",
          "protocol": "https",
          "host": [
            "www",
            "google",
            "com"
          ]
        }
      },
      "response": []
    },
    {
      "name": "Get Youtube",
      "event": [
        {
          "listen": "test",
          "script": {
            "exec": [
              ""
            ],
            "type": "text/javascript"
          }
        }
      ],
      "request": {
        "method": "GET",
        "header": [],
        "url": {
          "raw": "https://www.youtube.com/",
          "protocol": "https",
          "host": [
            "www",
            "youtube",
            "com"
          ],
          "path": [
            ""
          ]
        }
      },
      "response": []
    },
    {
      "name": "Get Google Translate",
      "event": [
        {
          "listen": "test",
          "script": {
            "exec": [
              ""
            ],
            "type": "text/javascript"
          }
        }
      ],
      "request": {
        "method": "GET",
        "header": [],
        "url": {
          "raw": "https://translate.google.com/",
          "protocol": "https",
          "host": [
            "translate",
            "google",
            "com"
          ],
          "path": [
            ""
          ]
        }
      },
      "response": []
    }
  ]
}
We should use the “Raw text” option while importing the data:

That’s it! We just need to follow through with the import task by clicking on the Continue action, and we’ll have our test collection ready within Postman.
3. Using Postman Collection Runner
In this section, we’ll explore how we can use Postman’s Collection Runner to execute the API requests in the “Google Apps – Load Testing” collection and perform basic load testing.
3.1. Basic Configuration
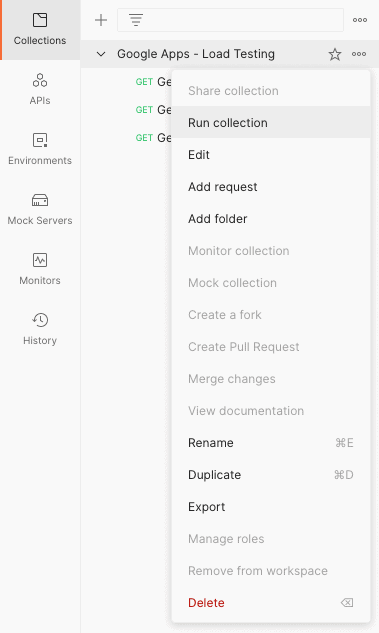
We can launch the Collection Runner with a right-click over the collection:
In the Runner mode, let’s configure the run by specifying the order of execution, number of iterations, and delay between consecutive API hits:
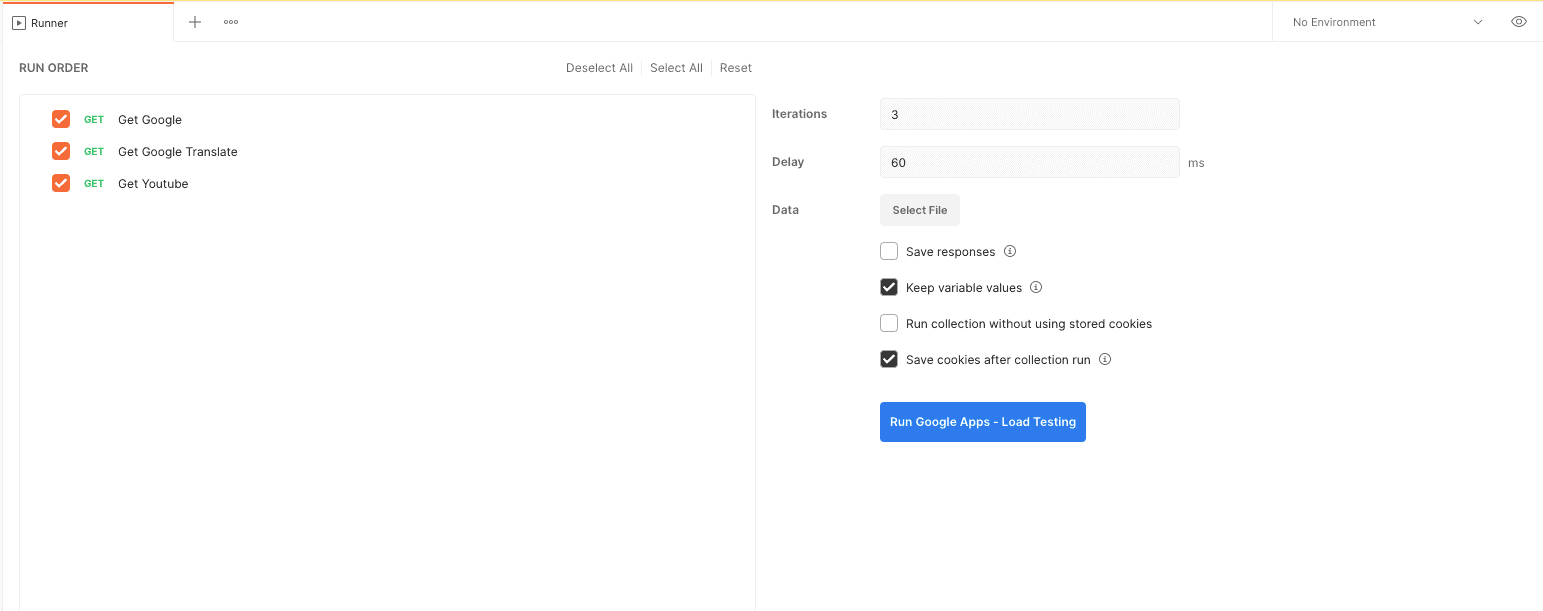
Next, let’s click on “Run Google Apps – Load Testing” to start the basic load testing of the API requests within the collection:
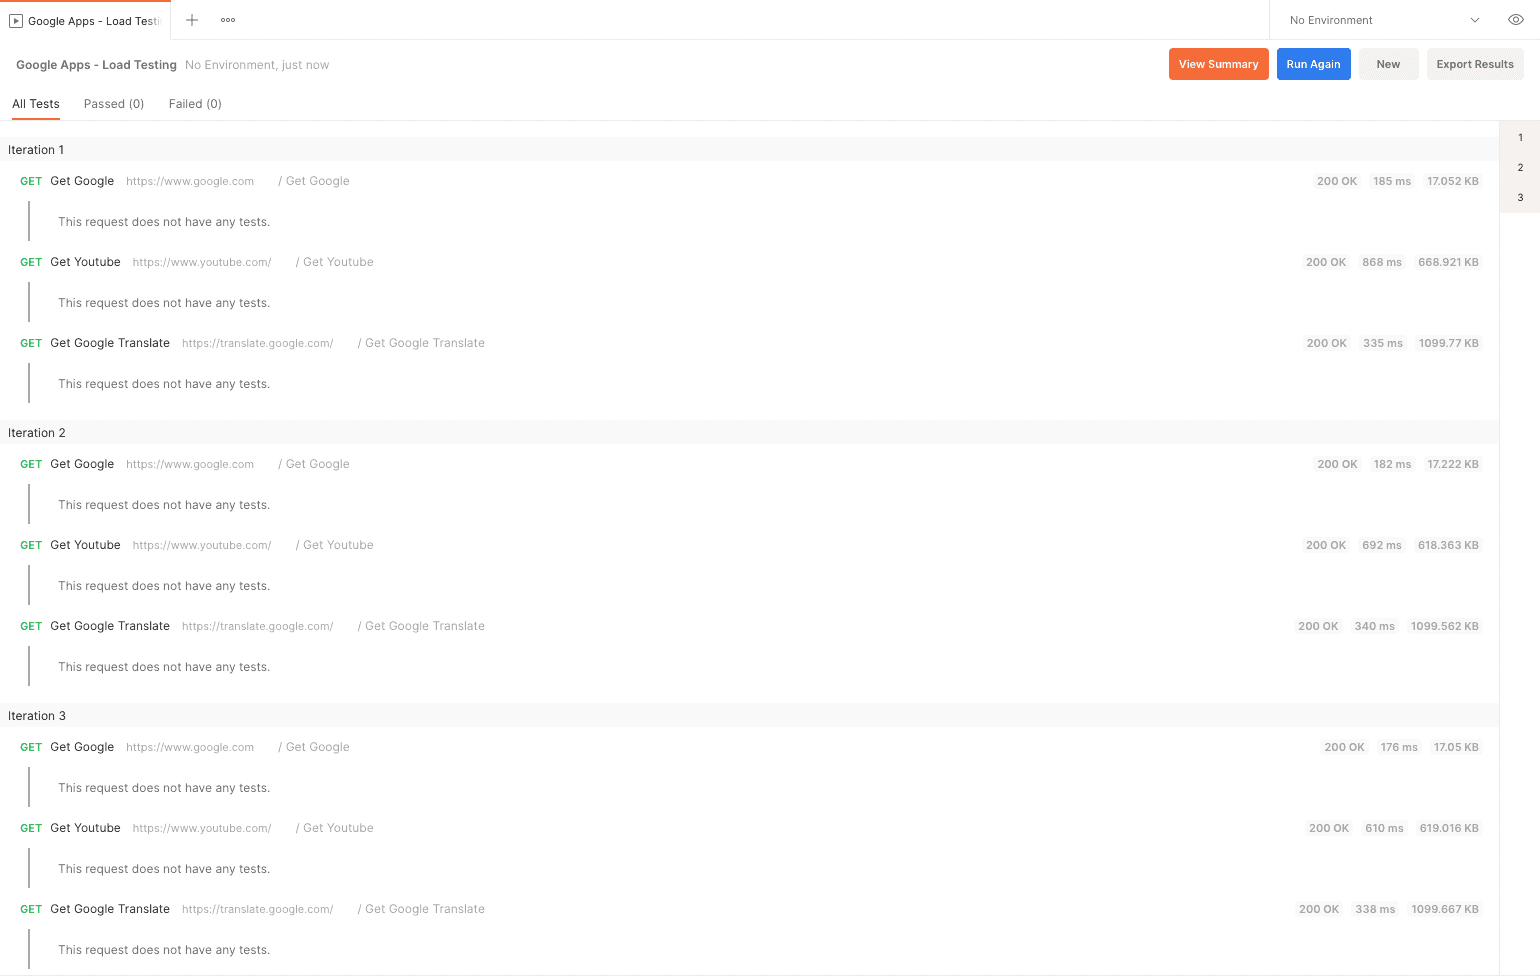
As the runner executes the API requests, we can see live results for each API hit spanned over multiple iterations.
3.2. Advanced Configuration Using Test Scripts
Using the Postman GUI, we were able to control the order of execution for the APIs. However, we can gain finer control over the execution flow by using the Test Scripts feature of Postman.
Let’s say we want to include the “Google Translate” API in the workflow only if hits to “Google API” are returning with an HTTP 200 status code. Otherwise, we want to directly hit the “Youtube API”:

We’ll start by adding a simple conditional statement in the Tests section for the “Get Google” request:
if (pm.response.code == 200) {
    postman.setNextRequest("Get Google Translate");
}
else {
    postman.setNextRequest("Get Youtube");
}
Next, we’ll set “Get Youtube” as the subsequent request to be executed after “Get Google Translate”:
postman.setNextRequest("Get Youtube");Moreover, we know that “Get Youtube” is the last request in the flow, so we’ll set the next request after it as null:
postman.setNextRequest(null);Finally, let’s see the complete collection with test scripts:
{
  "info": {
    "_postman_id": "ddbb5536-b6ad-4247-a715-52a5d518b648",
    "name": "Google Apps - Load Testing",
    "schema": "https://schema.getpostman.com/json/collection/v2.1.0/collection.json"
  },
  "item": [
    {
      "name": "Get Google",
      "event": [
        {
          "listen": "test",
          "script": {
            "exec": [
              "if (pm.response.code == 200) {",
              "  postman.setNextRequest(\"Get Google Translate\");",
              "}",
              "else {",
              "  postman.setNextRequest(\"Get Youtube\");",
              "}"
            ],
            "type": "text/javascript"
          }
        }
      ],
      "request": {
        "method": "GET",
        "header": [],
        "url": {
          "raw": "https://www.google.com",
          "protocol": "https",
          "host": [
            "www",
            "google",
            "com"
          ]
        }
      },
      "response": []
    },
    {
      "name": "Get Youtube",
      "event": [
        {
          "listen": "test",
          "script": {
            "exec": [
              "postman.setNextRequest(null);"
            ],
            "type": "text/javascript"
          }
        }
      ],
      "request": {
        "method": "GET",
        "header": [],
        "url": {
          "raw": "https://www.youtube.com/",
          "protocol": "https",
          "host": [
            "www",
            "youtube",
            "com"
          ],
          "path": [
            ""
          ]
        }
      },
      "response": []
    },
    {
      "name": "Get Google Translate",
      "event": [
        {
          "listen": "test",
          "script": {
            "exec": [
              "postman.setNextRequest(\"Get Youtube\");"
            ],
            "type": "text/javascript"
          }
        }
      ],
      "request": {
        "method": "GET",
        "header": [],
        "url": {
          "raw": "https://translate.google.com/",
          "protocol": "https",
          "host": [
            "translate",
            "google",
            "com"
          ],
          "path": [
            ""
          ]
        }
      },
      "response": []
    }
  ]
}
Like earlier, we can use the Collection Runner to execute this custom flow.
4. Using Newman Runner
We can use the Newman CLI utility to run a Postman collection through the command line. Taking this approach opens up wider opportunities for automation.
Let’s use it to run two iterations of the custom flow for our existing collection:
newman run -n2 "Custom Flow Google Apps - Load Testing.postman_collection.json"Once all the iterations are over, we’d get a statistics summary where we can see the average response time of the requests:
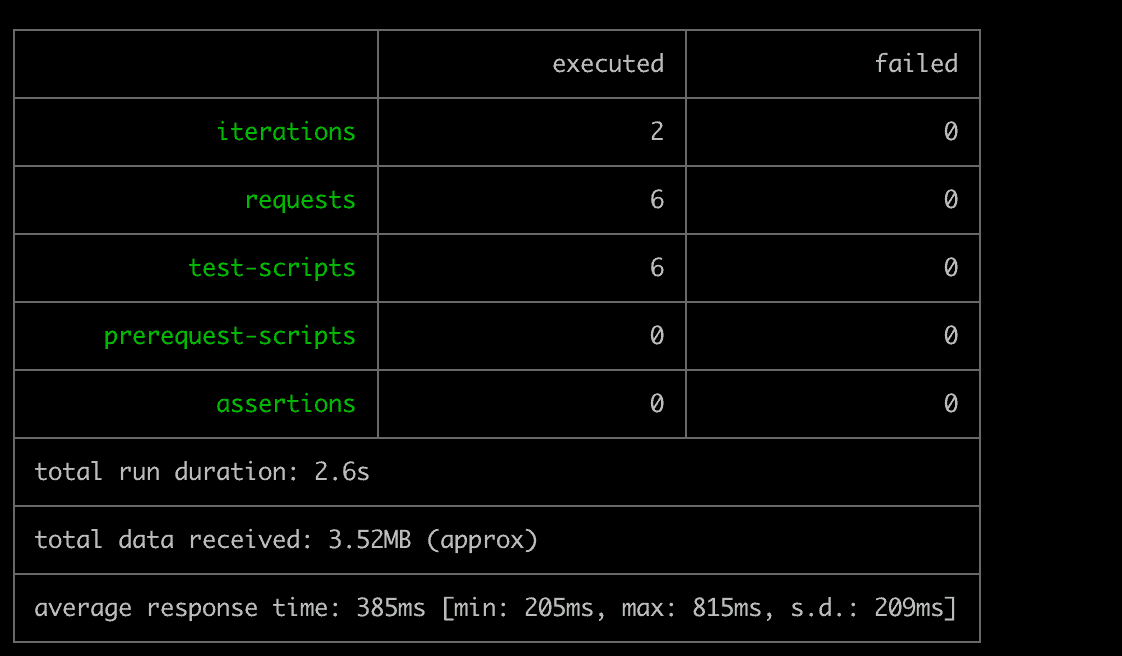
We must note that we’re deliberately using lower values for our demonstration as most modern services have a rate-limiting and request-blocking logic that will start blocking our requests for higher values or duration.
5. Using Grafana K6
Postman is the easiest way to formulate the request collection and execution flow. However, while using Postman or Newman, we’re invoking the requests one after the other sequentially.
In a practical scenario, we need to test our systems for requests that are coming from multiple users at the same time. For such a use case, we can use Grafana’s k6 utility.
First, we need to convert our existing Postman collection to a k6 compatible format. We can use the postman-to-k6 library for this milestone:
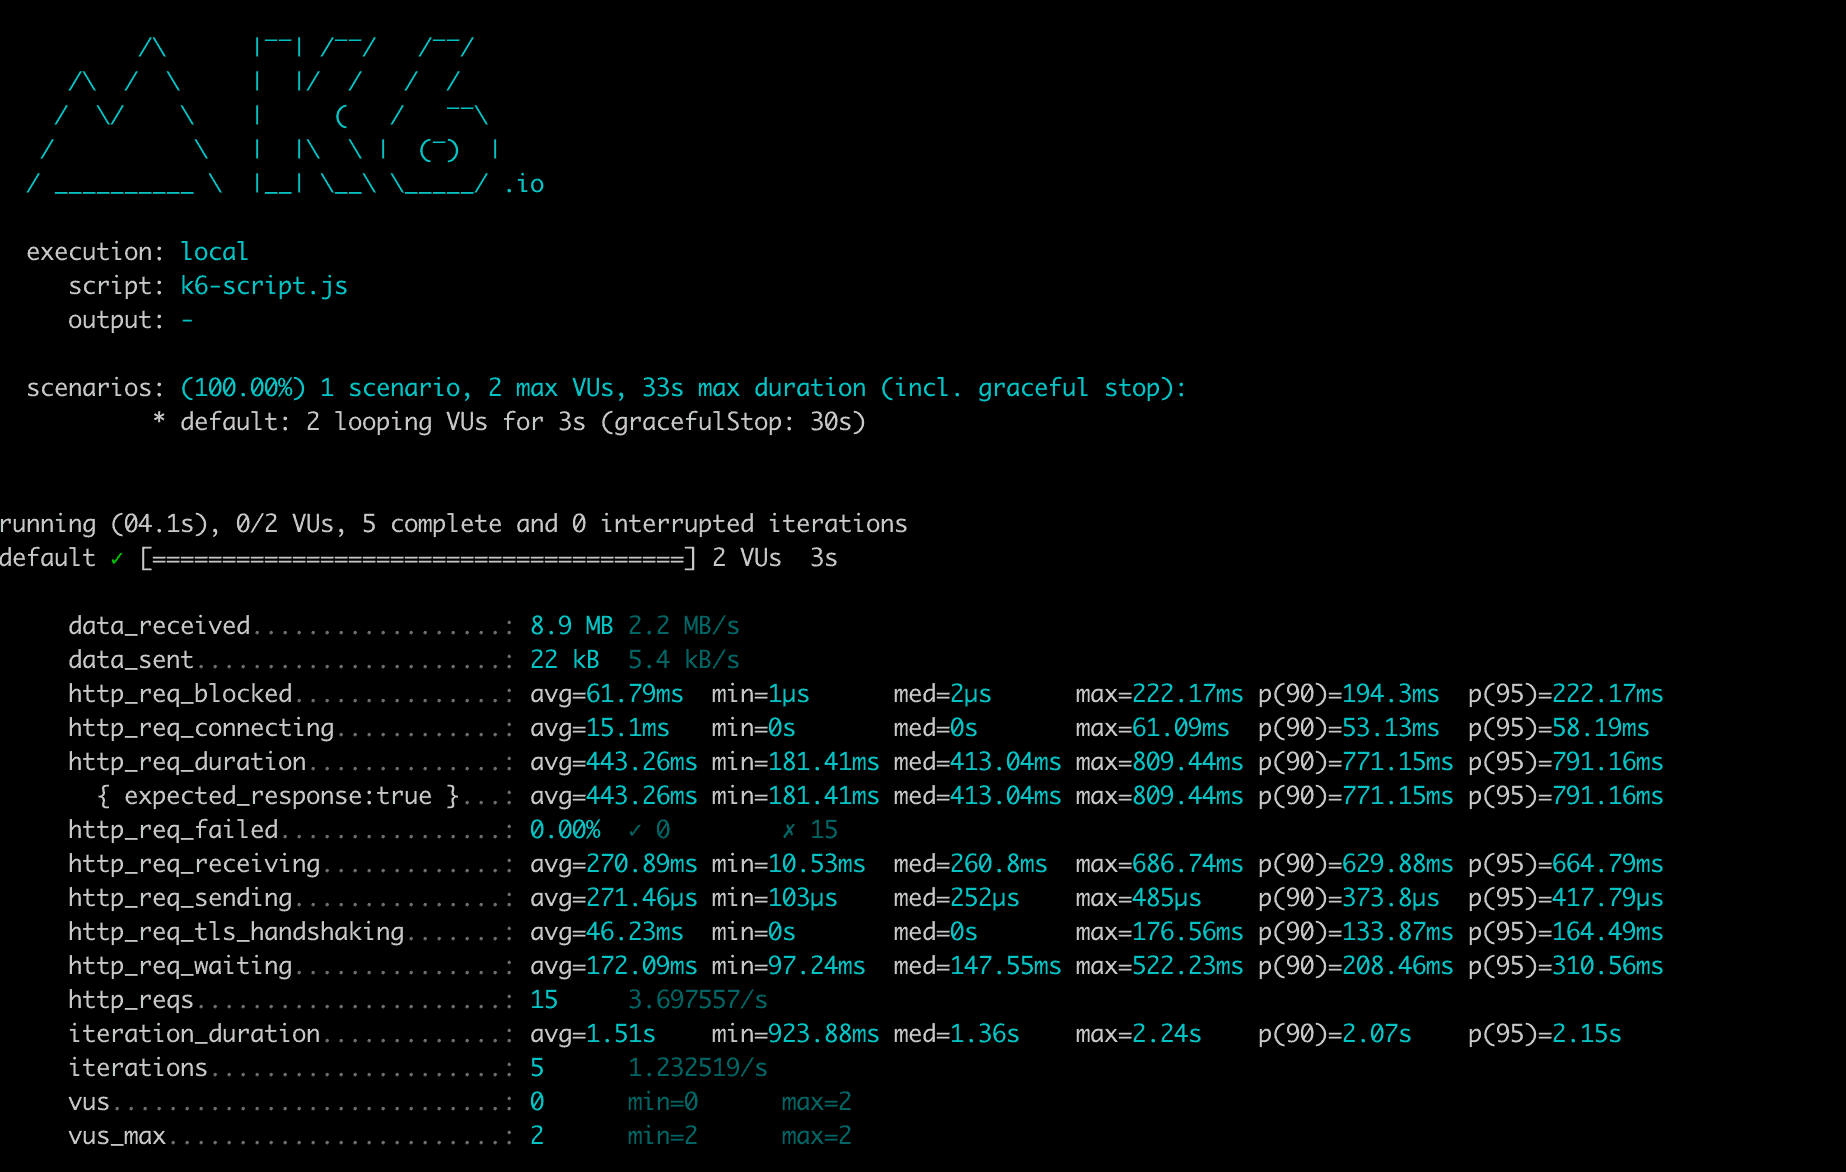
postman-to-k6 "Google Apps - Load Testing.json" -o k6-script.jsNext, let’s do a live run for three seconds with two virtual users:
k6 run --duration 3s --vus 2 k6-script.jsOn completion, we get a detailed statistics report showing metrics such as average response time, number of iterations, and many others:
6. Conclusion
In this tutorial, we leveraged Postman collections to do basic load testing using the GUI and the Newman runner. Additionally, we learned about the k6 utility that can be used to do advanced load testing of the requests in a Postman collection.


