


Learn through the super-clean Baeldung Pro experience:
>> Membership and Baeldung Pro.
No ads, dark-mode and 6 months free of IntelliJ Idea Ultimate to start with.
Last updated: March 26, 2025
Learn through the super-clean Baeldung Pro experience:
>> Membership and Baeldung Pro.
No ads, dark-mode and 6 months free of IntelliJ Idea Ultimate to start with.
Amazon Elastic Cloud Compute (EC2) is a fundamental service offered by Amazon Web Service (AWS) that provides scalable computing resources in the form of virtual servers (instances) that run applications.
GitHub Actions is a CI/CD platform that enables software development workflow automation directly in a GitHub repository. It creates a pipeline where code changes are automatically built, tested, and deployed to a live environment, i.e., an EC2 instance.
There are different methods for deploying directly to AWS EC2 using GitHub Actions:
In this tutorial, we’ll cover EC2 instance configuration, SSH key management, workflow creation, and best practices for ensuring secure and reliable deployments.
Before deploying any application, we set up an environment in both GitHub and AWS.
To host the code to be deployed, let’s create a repository named github-actions-ec2 using the GitHub GUI:
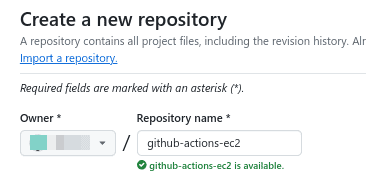
Then, we clone the repository to a local machine with git installed:
$ git clone https://github.com/<username>/github-actions-ec2.gitUsing the terminal, let’s navigate to the cloned project path and create a .github/workflows directory:
$ cd github-actions-ec2
$ mkdir -p .github/workflows
The workflows directory stores the workflow definitions for GitHub actions to recognize them.
Now, we create a deploy.yml file in the workflows directory to use throughout this tutorial:
$ touch .github/workflows/deploy.ymlAs an example, let’s construct a simple NodeJS-Express application.
To begin, we create a directory named simple-web-server in the project and navigate into it:
$ mkdir -p github-actions-ec2/simple-web-server/
$ cd simple-web-server
Next, let’s initialize npm and install the express package:
$ npm init -y
$ npm install express
Then, we compile a server.js file that builds a Web server that runs on port 3000:
$ cat simple-web-server/server.js
const express = require('express');
const app = express();
const port = process.env.PORT || 3000;

app.get('/', (req, res) => {
  res.send('Hello World! This server is running on Node.js with Express.');
});

app.get('/info', (req, res) => {
  res.json({
    name: 'Simple Web Server',
    version: '1.0.0',
    uptime: process.uptime()
  });
});

app.listen(port, () => {
  console.log(`Server running at http://localhost:${port}`);
});
By default, the package.json file is created on initialization. Let’s update the scripts section to include a start script:
$ cat simple-web-server/package.json
{
  "name": "simple-web-server",
  "version": "1.0.0",
  "description": "",
  "main": "server.js",
  "scripts": {
    "test": "echo \"Error: no test specified\" && exit 1",
    "start": "node server.js"
  },
  ...
Additionally, let’s create a .gitignore file at the root of the project and include the node_modules path:
$ cat .gitignore
simple-web-server/node_modules/
Before pushing the code, let’s run the server locally via the npm start command:
$ npm start

> [email protected] start
> node server.js

Server running at http://localhost:3000
Using a browser, we can access the server through localhost on port 3000:

Now, let’s commit and push the changes to the remote repository:
$ git add .
$ git commit -m "NodeJS-Express Application"
$ git push
Hence, we’ve completed the GitHub setup for the deployment.
Of course, we also set up an AWS EC2 instance to test the deployment workflows.
To that end, let’s create an instance named github-actions-ec2-instance:

Next, we select the Ubuntu AMI and use t2-micro as the instance type:
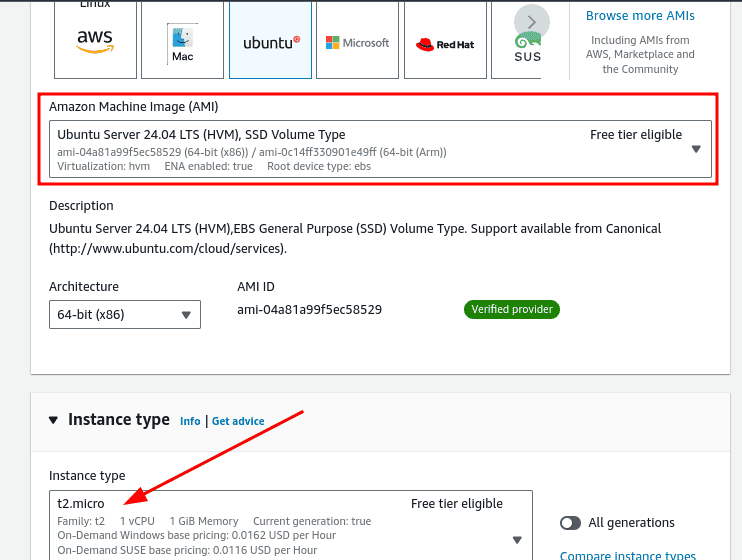
As expected, we also create a key pair to enable SSH access to the instance. The key pair should be of RSA type and .pem format:
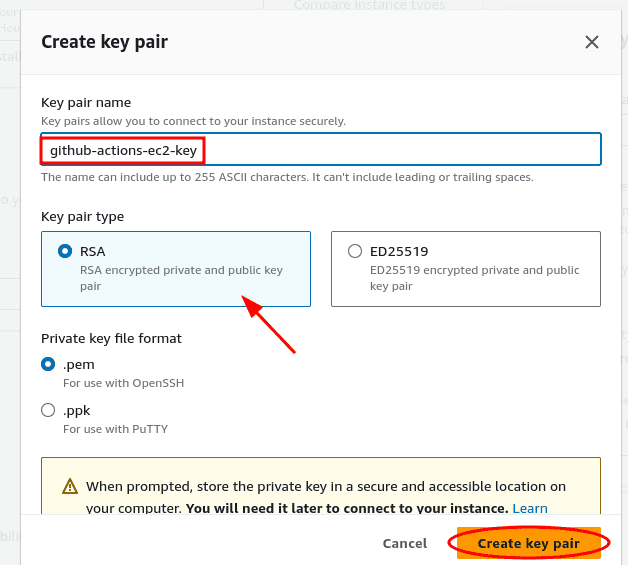
After creating the key pair, we download the key file, github-actions-ec2.key, to the local machine.
Let’s edit the network settings and create a security group named github-actions-ec2-sg. This security group should allow SSH and TCP traffic on ports 22 and 3000, respectively:

We can now launch the instance and confirm it’s running from the Instances dashboard:
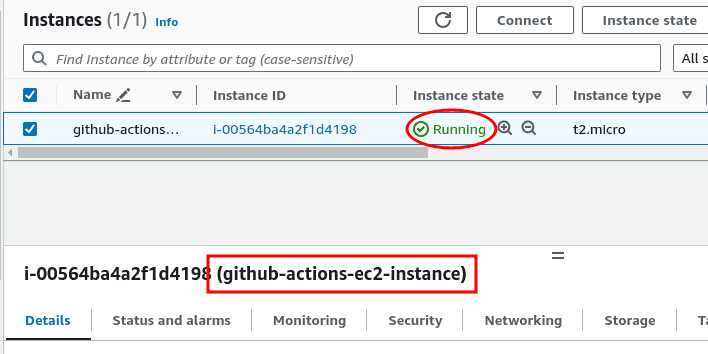
Hence, we’ve successfully created an EC2 instance to deploy the NodeJS express application. For each deployment method we explore, we delete older instances and create new ones with the same configurations above.
In this section, we create a continuous deployment pipeline for the NodeJS application using GitHub Actions and SSH. Deploying via SSH involves securely connecting to the EC2 instance and executing commands remotely.
In particular, GitHub Actions uses a private key, stored as a repository secret, to securely connect via SSH and deploy the code.
GitHub secrets are encrypted environment variables that can be created in a repository or organization to securely store sensitive information, such as API keys, passwords, or SSH private keys.
We can access secrets using the secrets context in GitHub Actions. However, we store the EC2 instance’s hostname, username, and private key as secrets for this use case.
We can find the hostname and username on the cloud console. Most times, the default username is ubuntu since we’re using the Ubuntu AMI:

In this case, the hostname is the public DNS name of the instance:

Now, let’s add the above details as secrets in the deployment repository.
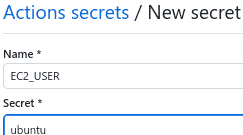
First, let’s store the username as EC2_USER:
After that, we store the hostname as EC2_HOST:

Then, we copy the content of the github-ec2-instance-key.pem downloaded earlier and store it as EC2_PRIVATE_KEY:

This way, we’ve created the necessary secret variables.
In the deploy.yml file, let’s add the workflow for the SSH deployment:
name: Deploy to EC2

on:
  push:
    branches: [ main ]

jobs:
  deploy:
    runs-on: ubuntu-latest
    steps:
    - uses: actions/checkout@v2

    - name: Deploy to EC2
      env:
        PRIVATE_KEY: ${{ secrets.EC2_PRIVATE_KEY }}
        HOST: ${{ secrets.EC2_HOST }}
        USER: ${{ secrets.EC2_USER }}
      run: |
        echo "$PRIVATE_KEY" > github-ec2.pem && chmod 600 github-ec2.pem
        ssh -o StrictHostKeyChecking=no -i github-ec2.pem ${USER}@${HOST} '
        echo "Current directory: $(pwd)"
        echo "Listing home directory:"
        ls -la ~

        echo "Installing Node.js..."
        if ! command -v nvm &> /dev/null; then
          curl -o- https://raw.githubusercontent.com/nvm-sh/nvm/v0.39.5/install.sh | bash
          export NVM_DIR="$HOME/.nvm"
          [ -s "$NVM_DIR/nvm.sh" ] && \. "$NVM_DIR/nvm.sh"  # This loads nvm
        fi
        nvm install node

        echo "Installing PM2..."
        if ! command -v pm2 &> /dev/null; then
        npm install -g pm2
        fi

        REPO_URL="https://github.com/afkzoro/github-aws-ec2.git"
        BRANCH="main"
        REPO_DIR="$HOME/github-aws-ec2"

        if [ -d "$REPO_DIR/.git" ]; then
          cd "$REPO_DIR"
          git pull origin "$BRANCH"
        else
          git clone "$REPO_URL" "$REPO_DIR"
          cd "$REPO_DIR"
        fi

        cd "$REPO_DIR/simple-web-server"
        npm install

        cd ~/github-aws-ec2/simple-web-server
        git pull origin main
        npm install

        echo "Starting/restarting application..."
        pm2 restart server.js || pm2 start server.js
        '
As shown above, the GitHub Action workflow automates the deployment of the Node.js application.
Firstly, the deployment process begins by checking out the code from the repository. Then, using SSH, it connects to the EC2 instance using a private key stored securely as a GitHub secret.
Once connected, the workflow performs several crucial steps:
So, let’s push the changes we made:
$ git add .
$ git commit -m "Deploy Node.js application to EC2"
$ git push
The GitHub workflow is designed to trigger on push. By checking the Actions tab, we can see a deploy workflow run named after the commit message in progress or completed:

As shown above, the workflow runs successfully.
Furthermore, we can test the deployment by accessing the EC2 instance’s IP address using a curl request or a Web browser. In the browser, we can visit the site on port 3000:

Also, we can use the CLI via the curl command:
$ curl <ec2_ip_addr>:3000
Hello Baeldung! This server is running on Node.js with Express. v1
Hence, we’ve successfully deployed directly to EC2 via SSH.
The easingthemes/ssh-deploy action is a GitHub action designed to deploy a GitHub project to a server automatically. It uses SSH and rsync to transfer files from the GitHub repository to the specified server.
Furthermore, the above process is done in three steps:
In fact, the deployment is automatic; we don’t need to specify which files to transfer manually.
The easingthemes/ssh-deploy action passes configuration values as environment variables in the workflow file. Let’s understand the configuration values:
| Variable | Description | Required/Optional |
|---|---|---|
| SSH_PRIVATE_KEY | Private key part of an SSH key pair. Generated in PEM format. | Required |
| REMOTE_HOST | The remote host domain name or IP address. | Required |
| REMOTE_USER | The username for the remote server. | It is required |
| REMOTE_PORT | The remote SSH port. Defaults to port 22 | Optional |
| ARGS | Initial/required rsync flags for deployment. | Optional |
| SOURCE | The source directory. The path relative to $GITHUB_WORKSPACE | Optional |
| TARGET | The target directory on the remote server. | Optional |
| EXCLUDE | Paths to exclude from the deployment, separated by commas. | Optional |
| SCRIPT_BEFORE | Scripts to run on the host machine before rsync. Single or multiline commands. | Optional |
| SCRIPT_BEFORE_REQUIRED | If set to true, the job will fail if SCRIPT_BEFORE fails | Optional |
| SCRIPT_AFTER | Scripts to run on the host machine after rsync. | Optional |
| SCRIPT_AFTER_REQUIRED | If set to true, the job will fail if SCRIPT_AFTER fails | Optional |
| SSH_CMD_ARGS | List of SSH arguments, prefixed with the -o option and separated by commas | Optional |
As shown above, this table summarizes the critical configuration variables for deploying via rsync over SSH, including optional scripts and SSH arguments to customize the deployment process.
For this workflow, let’s store several variables as GitHub secrets:
Let’s create a REMOTE_TARGET secret and set it to ~/simple-web-server:

Afterward, we update the deploy.yml file with the new workflow:
name: Node CI

on: [push]

jobs:
  build-and-deploy:

    runs-on: ubuntu-latest

    steps:
    - uses: actions/checkout@v3

    - name: Deploy to Server
      uses: easingthemes/ssh-deploy@main
      with:
          SSH_PRIVATE_KEY: ${{ secrets.SSH_PRIVATE_KEY }}
          ARGS: "-rlgoDzvc -i --delete"
          SOURCE: "simple-web-server/"
          REMOTE_HOST: ${{ secrets.REMOTE_HOST }}
          REMOTE_USER: ${{ secrets.REMOTE_USER }}
          TARGET: ${{ secrets.REMOTE_TARGET }}
          EXCLUDE: "/dist/, /node_modules/"
          SCRIPT_BEFORE: |
            whoami
            ls -al
            mkdir -p ${{ secrets.REMOTE_TARGET }}
          SCRIPT_AFTER: |
            cd ${{ secrets.REMOTE_TARGET }}
            ls -al

            echo "Installing Node.js..."
            if ! command -v nvm &> /dev/null; then
              curl -o- https://raw.githubusercontent.com/nvm-sh/nvm/v0.39.5/install.sh | bash
              export NVM_DIR="$HOME/.nvm"
              [ -s "$NVM_DIR/nvm.sh" ] && \. "$NVM_DIR/nvm.sh"  # This loads nvm
            fi
            nvm install node

            echo "Installing PM2..."
            if ! command -v pm2 &> /dev/null; then
            npm install -g pm2
            fi

            npm install

            echo "Starting/restarting application..."
            pm2 restart server.js || pm2 start server.js
The workflow specifically uses the easingthemes/ssh-deploy@main action to perform the deployment over SSH using rsync. It connects to the remote server via SSH, authenticated by a private key (SSH_PRIVATE_KEY) stored securely in GitHub Secrets.
The rsync options provided handle file synchronization, preserve permissions, and delete files on the server that are no longer present in the source directory. Additionally, the workflow excludes specific directories (/dist/ and /node_modules/) from the deployment process to avoid transferring unnecessary files.
Before the rsync process starts, the workflow runs a pre-deployment script (SCRIPT_BEFORE), which creates the target directory. Then, after the deployment, the workflow runs a post-deployment script (SCRIPT_AFTER) that sets up the server environment.
Now, let’s push the workflow:
$ git add .
$ git commit -m "Deploy to EC2 using easingthemes/ssh-deploy"
$ git push
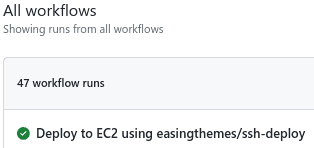
Then, checking the Actions tab, we see a successful workflow run named after the commit message above:
As seen previously, we can check if the deployment was successful using the IP address of the instance in a Web browser or through the curl command.
Thus, we’ve successfully deployed to EC2 using the easingthemes/ssh-deploy action.
In this article, we’ve demonstrated how to deploy directly to AWS using GitHub Actions.
As an example, we deployed a NodeJS-Express application. In particular, we explored two methods: SSH and easingthemes/ssh-deploy action.
In summary, using GitHub Actions not only saves time and reduces the potential for human error in the deployment process, but it also provides a solid foundation for scaling and improving our deployment strategies.