

Mocking is an essential part of unit testing, and the Mockito library makes it easy to write clean and intuitive unit tests for your Java code.
Get started with mocking and improve your application tests using our Mockito guide:
Handling concurrency in an application can be a tricky process with many potential pitfalls. A solid grasp of the fundamentals will go a long way to help minimize these issues.
Get started with understanding multi-threaded applications with our Java Concurrency guide:
Spring 5 added support for reactive programming with the Spring WebFlux module, which has been improved upon ever since. Get started with the Reactor project basics and reactive programming in Spring Boot:
Since its introduction in Java 8, the Stream API has become a staple of Java development. The basic operations like iterating, filtering, mapping sequences of elements are deceptively simple to use.
But these can also be overused and fall into some common pitfalls.
To get a better understanding on how Streams work and how to combine them with other language features, check out our guide to Java Streams:
Explore Spring Boot 3 and Spring 6 in-depth through building a full REST API with the framework:
Yes, Spring Security can be complex, from the more advanced functionality within the Core to the deep OAuth support in the framework.
I built the security material as two full courses - Core and OAuth, to get practical with these more complex scenarios. We explore when and how to use each feature and code through it on the backing project.
You can explore the course here:
All Access is finally out, with all of my Spring courses. Learn JUnit is out as well, and Learn Maven is coming fast. And, of course, quite a bit more affordable. Finally.
>> GET THE COURSESpring Data JPA is a great way to handle the complexity of JPA with the powerful simplicity of Spring Boot.
Get started with Spring Data JPA through the guided reference course:
Refactor Java code safely — and automatically — with OpenRewrite.
Refactoring big codebases by hand is slow, risky, and easy to put off. That’s where OpenRewrite comes in. The open-source framework for large-scale, automated code transformations helps teams modernize safely and consistently.
Each month, the creators and maintainers of OpenRewrite at Moderne run live, hands-on training sessions — one for newcomers and one for experienced users. You’ll see how recipes work, how to apply them across projects, and how to modernize code with confidence.
Join the next session, bring your questions, and learn how to automate the kind of work that usually eats your sprint time.
1. Overview
Nowadays, there are many JEE based frameworks like Spring, Play, and Grails available for web application development.
We may have our reasons to choose one of them over the others. However, our choice also depends on the use case and the problem we’re trying to solve.
In this introductory tutorial, we’ll explore the Ninja web framework and create a simple web application. At the same time, we’ll examine a few of the basic features that it provides.
2. Ninja
Ninja is a full-stack, yet lightweight, web framework that utilizes existing Java libraries to get the work done.
Having features from HTML to JSON rendering, persistence to testing, it is a one-stop solution for building scalable web applications.
It follows the convention-over-configuration paradigm and categorizes the code in packages like models, controllers, and services.
Ninja uses popular Java libraries for key features like Jackson for JSON/XML rendering, Guice for dependency management, Hibernate for persistence, and Flyway for database migrations.
For rapid development, it offers SuperDevMode for hot reloading of the code. So, it allows us to see the changes instantly in the development environment.
3. Setup
Ninja requires a standard set of tools to create a web application:
- Java 1.8 or later
- Maven 3 or later
- IDE (Eclipse or IntelliJ)
We’ll use a Maven archetype to set up the Ninja project quickly. It’ll prompt us to provide a group id, an artifact id, and a version number, followed by a project name:
mvn archetype:generate -DarchetypeGroupId=org.ninjaframework \
  -DarchetypeArtifactId=ninja-servlet-archetype-simple
Or, for an existing Maven project, we can add the latest ninja-core dependency to the pom.xml:
<dependency>
    <groupId>org.ninjaframework</groupId>
    <artifactId>ninja-core</artifactId>
    <version>6.5.0</version>
</dependency>
Then, we’ll run the Maven command to compile the files for the first time:
mvn clean installLast, let’s run the app using a Ninja-provided Maven command:
mvn ninja:runVoila! Our application is started and will be accessible at localhost:8080:
4. Project Structure
Let’s take a look at the Maven-like project structure created by Ninja:
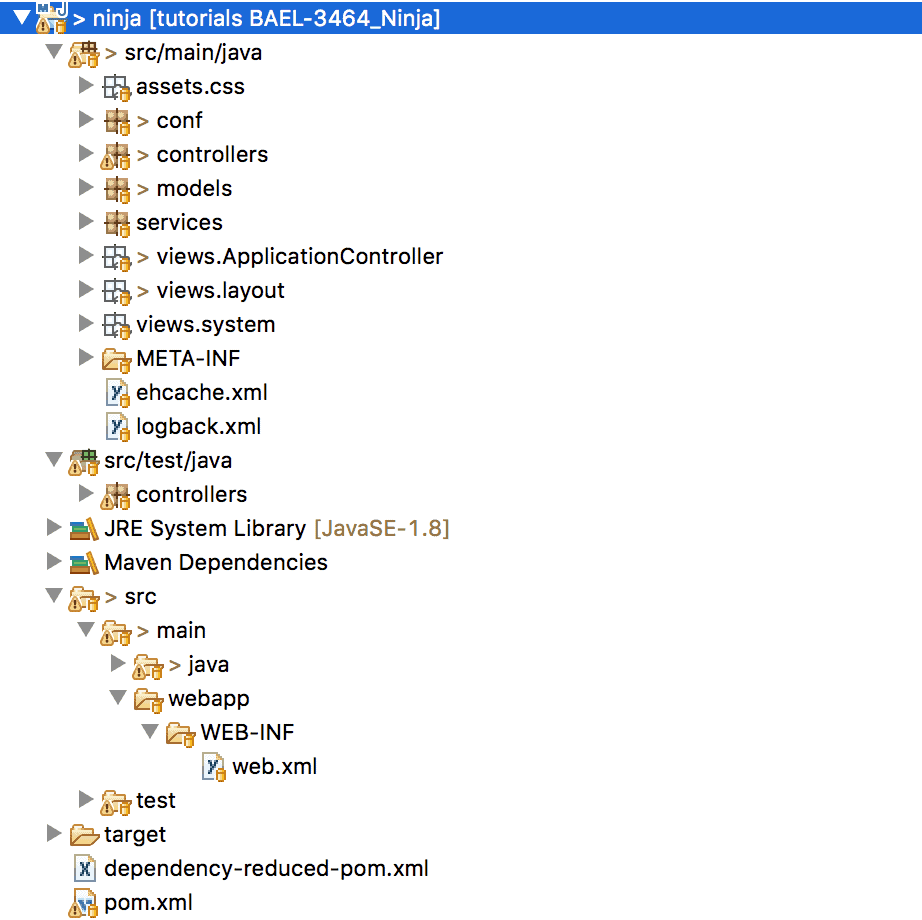 The framework creates a few packages based on conventions.
The Java classes are categorized under conf, controllers, models, and services directories in src/main/java.
Likewise, src/test/java holds the corresponding unit test classes.
The views directory under src/main/java contains the HTML files. And, the src/main/java/assets directory contains resources like images, stylesheets, and JavaScript files.
5. Controller
We’re all set to discuss a few basic features of the framework. A controller is a class that receives a request and returns the response with specific results.
First, let’s discuss a few conventions to follow:
- Create a class in the controllers package and suffix the name with Controller
- A method serving the request must return the object of the Result class
Let’s create the ApplicationController class with a simple method to render the HTML:
@Singleton
public class ApplicationController {
    public Result index() {
        return Results.html();
    }
}
Here, the index method will render an HTML by calling the html method of the Results class. The Result object holds everything that is required to render the content like response code, headers, and cookies.
Note: Guice’s @Singleton annotation allows only one instance of the controller throughout the app.
6. View
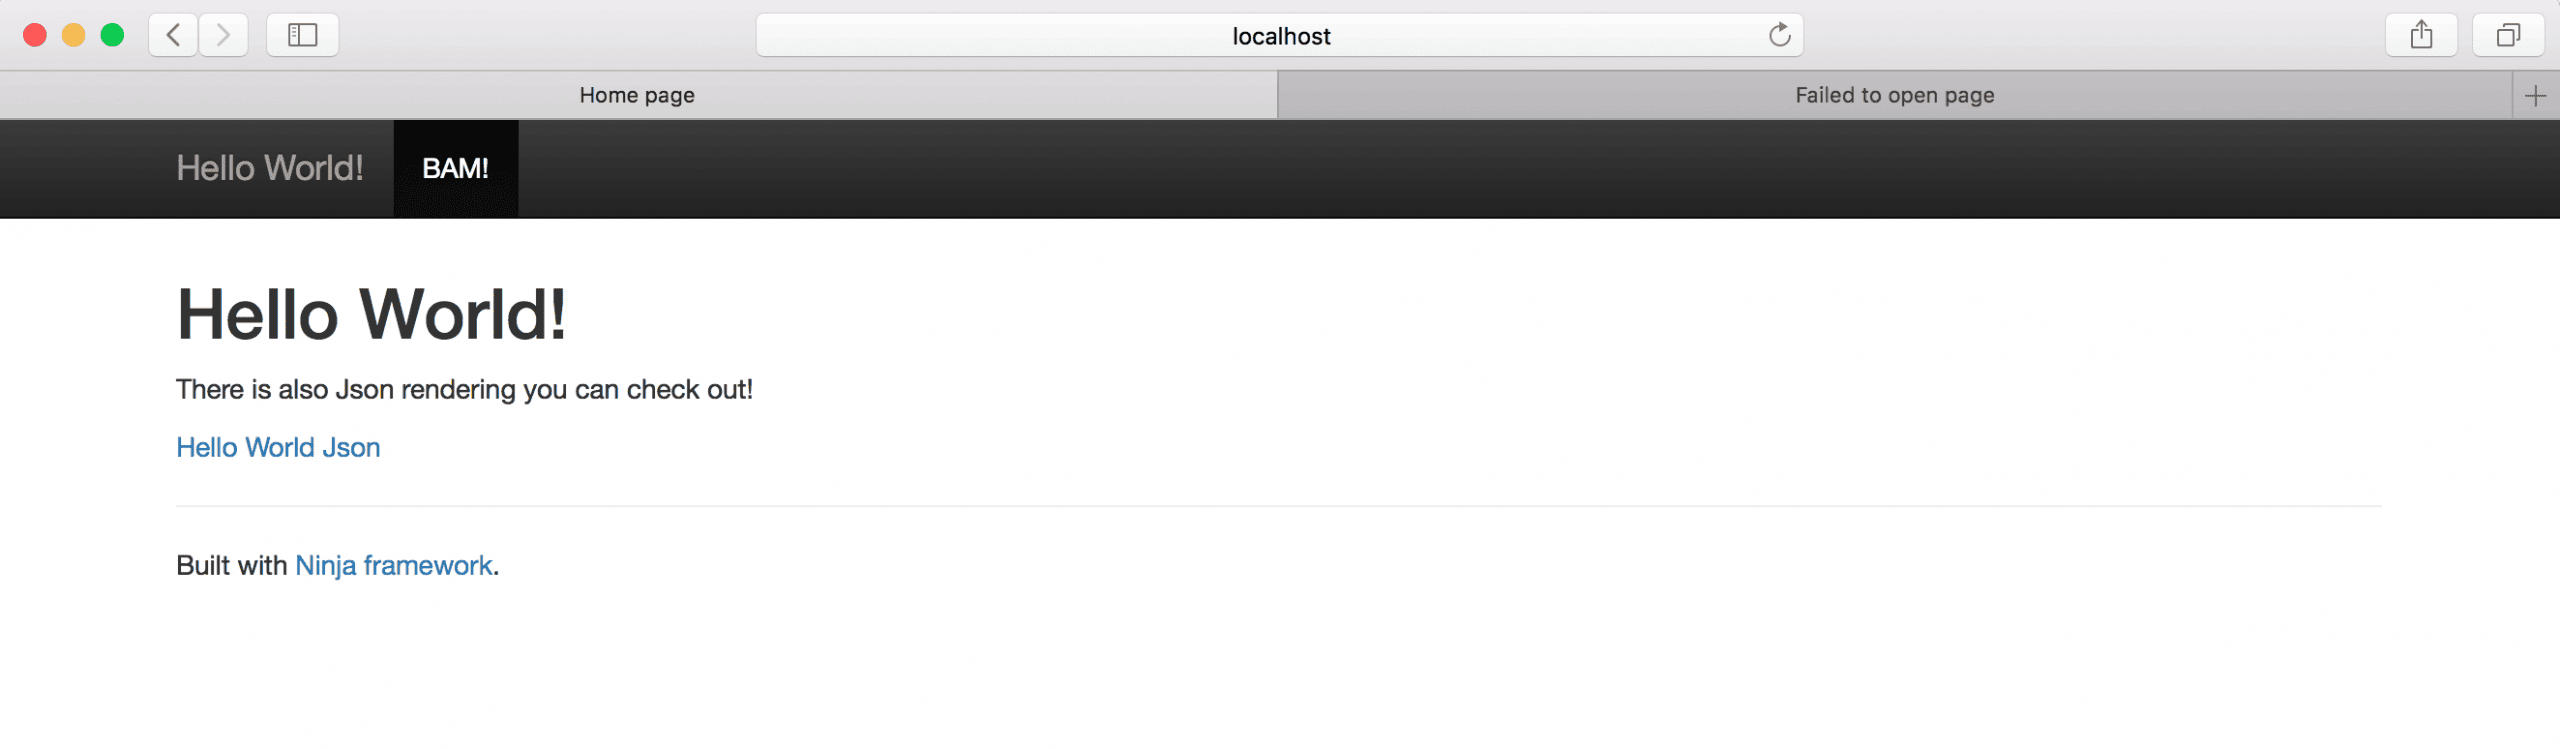
For the index method, Ninja will look for the HTML file – index.ftl.html under the views/ApplicationController directory.
Ninja uses the Freemarker template engine for HTML rendering. So, all the files under views should have the .ftl.html extension.
Let’s create the index.ftl.html file for the index method:
<html>
<head>
    <title>Ninja: Index</title>
</head>
<body>
    <h1>${i18n("helloMsg")}</h1>
    <a href="/userJson">User Json</a>
</body>
</html>
Here, we’ve used the Ninja-provided i18n tag to get the helloMsg property from the message.properties file. We’ll discuss this further in the internationalization section later on.
7. Route
Next, we’ll define the route for the request to reach the index method.
Ninja uses the Routes class in the conf package to map a URL to a particular method of the controller.
Let’s add a route to access the index method of the ApplicationController:
public class Routes implements ApplicationRoutes {
    @Override
    public void init(Router router) {
        router.GET().route("/index").with(ApplicationController::index);
    }
}
That’s it! We’re all set to access the index page at localhost:8080/index:

8. JSON Rendering
As already discussed, Ninja uses Jackson for JSON rendering. To render JSON content, we can use the json method of the Results class.
Let’s add the userJson method in the ApplicationController class and render the content of a simple HashMap in JSON:
public Result userJson() {
    HashMap<String, String> userMap = new HashMap<>();
    userMap.put("name", "Norman Lewis");
    userMap.put("email", "[email protected]");
    return Results.json().render(user);
}
Then, we’ll add the required routing to access the userJson:
router.GET().route("/userJson").with(ApplicationController::userJson);Now, we can render JSON using localhost:8080/userJson:

9. Service
We can create a service to keep the business logic separate from the controller and inject our service wherever required.
First, let’s create a simple UserService interface to define the abstraction:
public interface UserService {
    HashMap<String, String> getUserMap();
}
Then, we’ll implement the UserService interface in the UserServiceImpl class and override the getUserMap method:
public class UserServiceImpl implements UserService {
    @Override
    public HashMap<String, String> getUserMap() {
        HashMap<String, String> userMap = new HashMap<>();
        userMap.put("name", "Norman Lewis");
        userMap.put("email", "[email protected]");
        return userMap;
    }
}
Then, we’ll bind the UserService interface with the UserServiceImpl class using Ninja’s dependency injection feature provided by Guice.
Let’s add the binding in the Module class available in the conf package:
@Singleton
public class Module extends AbstractModule {
    protected void configure() {
        bind(UserService.class).to(UserServiceImpl.class);
    }
}
Last, we’ll inject the UserService dependency in the ApplicationController class using the @Inject annotation:
public class ApplicationController {
    @Inject
    UserService userService;

    // ...
}
Thus, we’re all set to use the UserService‘s getUserMap method in the ApplicationController:
public Result userJson() {
HashMap<String, String> userMap = userService.getUserMap();
return Results.json().render(userMap);
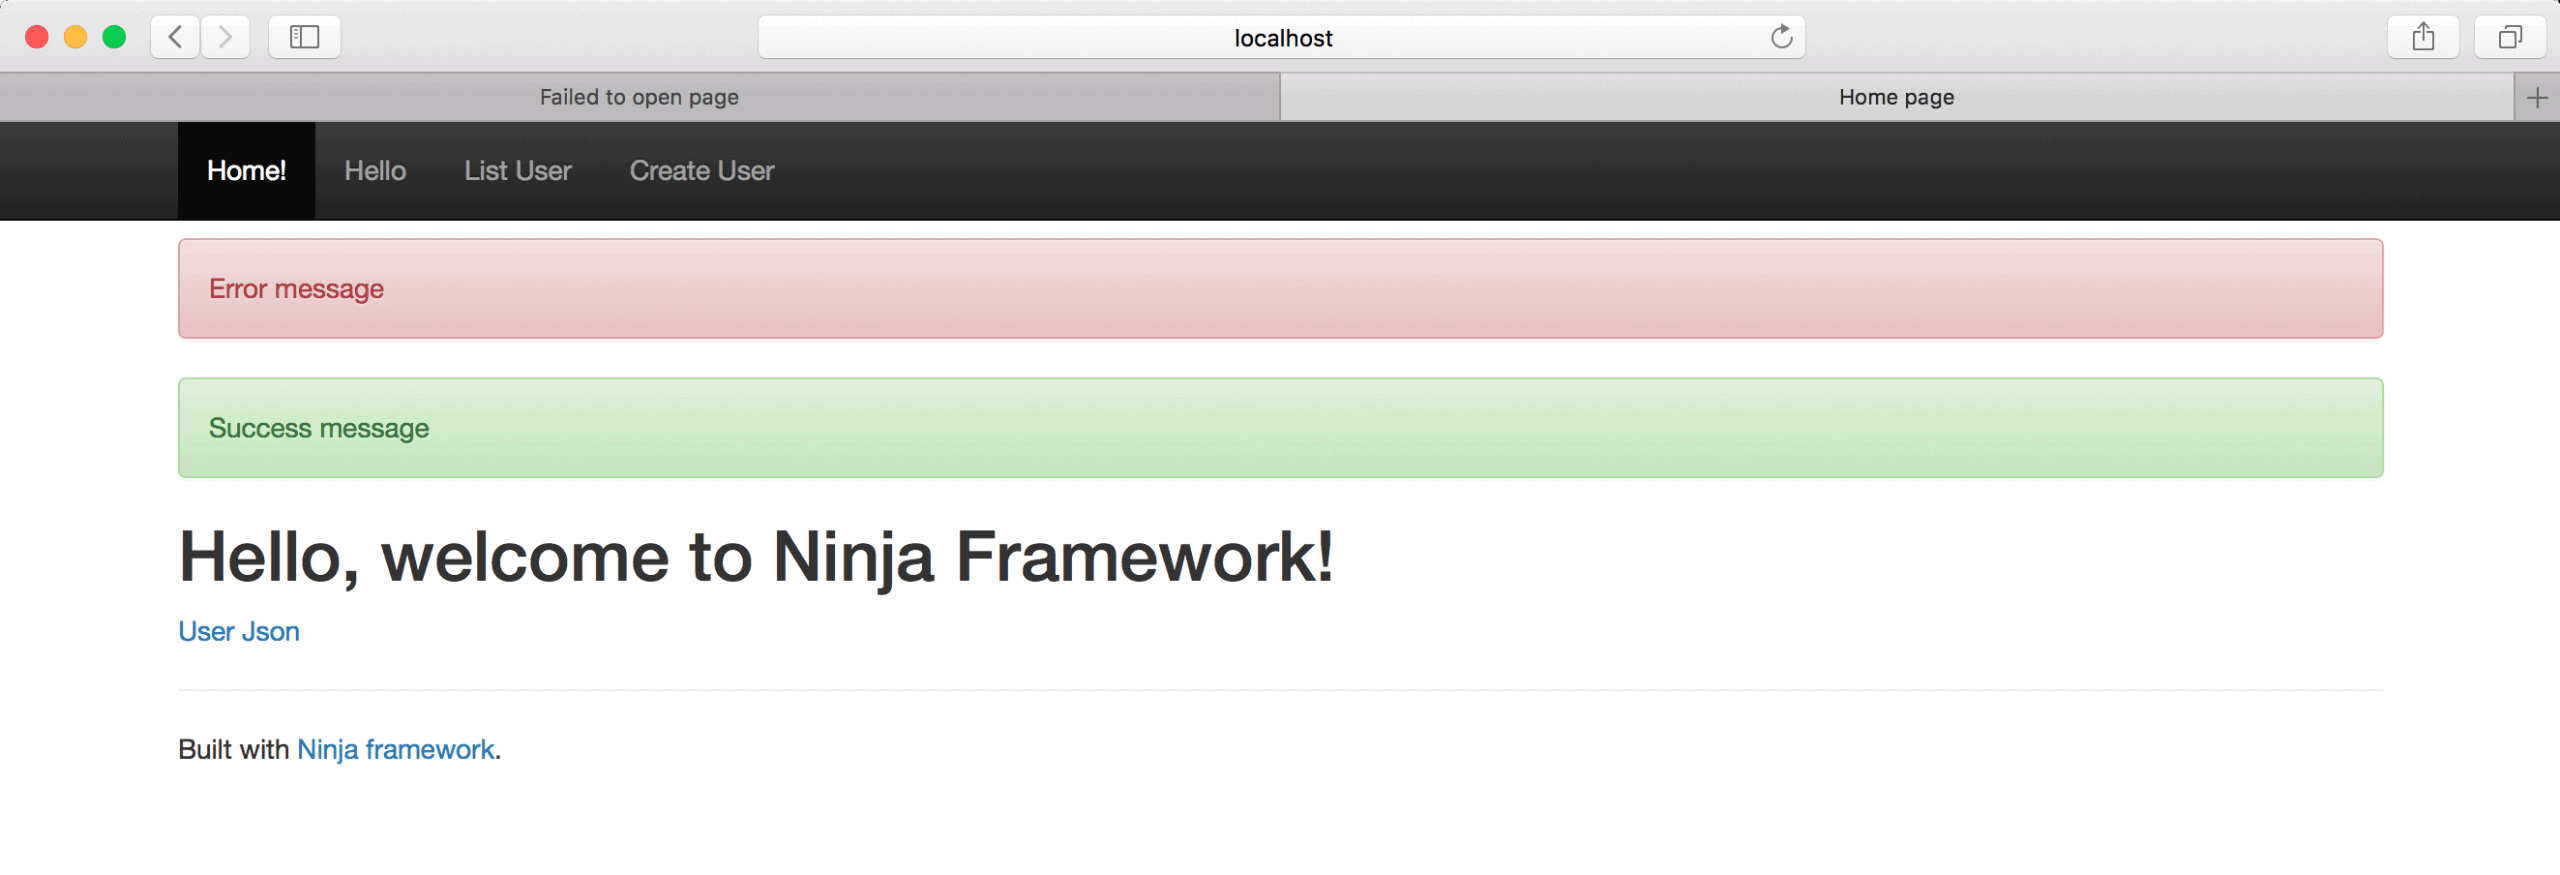
}10. Flash Scope
Ninja provides a simple yet efficient way to handle success and error messages from requests through its feature called Flash Scope.
To use it in the controller, we’ll add the FlashScope argument to the method:
public Result showFlashMsg(FlashScope flashScope) {
    flashScope.success("Success message");
    flashScope.error("Error message");
    return Results.redirect("/home");
}
Note: The redirect method of the Results class redirects the target to the provided URL.
Then, we’ll add a routing /flash to the showFlashMsg method and modify the view to show the flash messages:
<#if (flash.error)??>
    <div class="alert alert-danger">
        ${flash.error}
    </div>
</#if>
<#if (flash.success)??>
    <div class="alert alert-success">
        ${flash.success}
    </div>
</#if>
Now, we can see the FlashScope in action at localhost:8080/flash:
11. Internationalization
Ninja provides a built-in internationalization feature that is easy to configure.
First, we’ll define the list of supported languages in the application.conf file:
application.languages=fr,enThen, we’ll create the default properties file – messages.properties for English – with key-value pairs for messages:
header.home=Home!
helloMsg=Hello, welcome to Ninja Framework!
Similarly, we can add the language code in the file name for a language-specific properties file — for instance, message_fr.properties file for French:
header.home=Accueil!
helloMsg=Bonjour, bienvenue dans Ninja Framework!
Once the configurations are ready, we can easily enable internationalization in the ApplicationController class.
We’ve got two ways, either by using the Lang class or the Messages class:
@Singleton
public class ApplicationController {
    @Inject
    Lang lang;

    @Inject
    Messages msg;

    // ...
}
Then, using the Lang class, we can set the language of the result:
Result result = Results.html();
lang.setLanguage("fr", result);
Similarly, using the Messages class, we can get a language-specific message:
Optional<String> language = Optional.of("fr");
String helloMsg = msg.get("helloMsg", language).get();
12. Persistence
Ninja supports JPA 2.0 and utilizes Hibernate to enable persistence in the web application. Also, it offers built-in H2 database support for rapid development.
12.1. Model
We require an Entity class to connect with a table in the database. For this, Ninja follows the convention of looking for the entity classes in the models package. So, we’ll create the User entity class there:
@Entity
public class User {
    @Id
    @GeneratedValue(strategy=GenerationType.AUTO)
    Long id;
    public String firstName;
    public String email;
}
Then, we’ll configure Hibernate and set the details for the database connection.
12.2. Configuration
For Hibernate configuration, Ninja expects the persistence.xml file to be in the src/main/java/META-INF directory:
<?xml version="1.0" encoding="UTF-8"?>
<persistence xmlns="http://java.sun.com/xml/ns/persistence"
  xmlns:xsi="http://www.w3.org/2001/XMLSchema-instance"
  xsi:schemaLocation="http://java.sun.com/xml/ns/persistence/persistence_2_0.xsd"
  version="2.0">

    <!-- Database settings for development -->
    <persistence-unit name="dev_unit"
      transaction-type="RESOURCE_LOCAL">
        <provider>org.hibernate.jpa.HibernatePersistenceProvider</provider>
        <properties>
            <property name="hibernate.connection.driver_class" value="org.h2.Driver" />
            <property name="hibernate.dialect" value="org.hibernate.dialect.H2Dialect" />
            <property name="hibernate.show_sql" value="true" />
            <property name="hibernate.format_sql" value="true" />
            <property name="hibernate.hbm2ddl.auto" value="update" />
            <property name="hibernate.connection.autocommit" value="true" />
        </properties>
    </persistence-unit>
</persistence>
Then, we’ll add the database connection details to application.conf:
ninja.jpa.persistence_unit_name=dev_unit
db.connection.url=jdbc:h2:./devDb
db.connection.username=sa
db.connection.password=
12.3. EntityManager
Last, we’ll inject the instance of the EntityManager in the ApplicationController using Guice’s Provider class:
public class ApplicationController {
    @Inject
    Provider<EntityManager> entityManagerProvider;

    // ...
}
So, we’re ready to use the EntityManager to persist the User object:
@Transactional
public Result insertUser(User user) {
    EntityManager entityManager = entityManagerProvider.get();
    entityManager.persist(user);
    entityManager.flush();
    return Results.redirect("/home");
}
Similarly, we can use the EntityManager to read the User object from the DB:
@UnitOfWork
public Result fetchUsers() {
    EntityManager entityManager = entityManagerProvider.get();
    Query q = entityManager.createQuery("SELECT x FROM User x");
    List<User> users = (List<User>) q.getResultList();
    return Results.json().render(users);
}
Here, Ninja’s @UnitOfWork annotation will handle everything about the database connections without dealing with transactions. Hence, it can prove handy for read-only queries, where we usually don’t require transactions.
13. Validation
Ninja provides built-in support for bean validations by following the JSR303 specifications.
Let’s examine the feature by annotating a property in the User entity with the @NotNull annotation:
public class User {
    // ...

    @NotNull
    public String firstName;
}
Then, we’ll modify the already discussed insertUser method in the ApplicationController to enable the validation:
@Transactional
public Result insertUser(FlashScope flashScope, @JSR303Validation User user, Validation validation) {
    if (validation.getViolations().size() > 0) {
        flashScope.error("Validation Error: User can't be created");
    } else {
        EntityManager entityManager = entitiyManagerProvider.get();
        entityManager.persist(user);
        entityManager.flush();
        flashScope.success("User '" + user + "' is created successfully");
    }
    return Results.redirect("/home");
}
We’ve used Ninja’s @JSR303Validation annotation to enable the validation of the User object. Then, we’ve added the Validation argument to work with validations through methods like hasViolations, getViolations, and addViolation.
Last, the FlashScope object is used to show the validation error on the screen.
Note: Ninja follows the JSR303 specifications for bean validations. However, the JSR380 specification (Bean Validation 2.0) is the new standard.
14. Conclusion
In this article, we explored the Ninja web framework — a full-stack framework that provides handy features using popular Java libraries.
To begin with, we created a simple web application using controllers, models, and services. Then, we enabled JPA support in the app for persistence.
At the same time, we saw a few basic features like Routes, JSON rendering, Internationalization, and Flash Scopes.
Last, we explored the validation support provided by the framework.


