

Learn through the super-clean Baeldung Pro experience:
>> Membership and Baeldung Pro.
No ads, dark-mode and 6 months free of IntelliJ Idea Ultimate to start with.
Learn through the super-clean Baeldung Pro experience:
>> Membership and Baeldung Pro.
No ads, dark-mode and 6 months free of IntelliJ Idea Ultimate to start with.
In this tutorial, we’re going to explore the Genie engine, which Netflix developed for submitting jobs to clusters in an abstract way.
Basic knowledge about big data processing, for example with Hadoop and Spark, is recommended for this tutorial.
Let’s imagine we have many users who need to submit various tasks to a cloud containing a big number of Hadoop clusters of different sizes. While some clusters are created to process data at specific times, others are centered around shutting down services to free up resources. Users, thus, would run into the problem of finding the right cluster for their job.
Assuming many users don’t even want to create clusters or know about the configuration, this could be a real issue. How about providing a way for users to simply submit their jobs and get the results back without having to deal with infrastructure setup?
Netflix built Genie as a distributed engine to exactly solve the aforementioned problems. An engine that provides unified RESTful APIs for submitting jobs autonomously. Genie separates launching jobs from the configuration which allows the scaling of clusters flexibly.
However, Genie doesn’t scale clusters itself – it simply fulfills user tasks by starting their jobs on a cluster that matches their job needs.
Scheduling is not something Genie was built for either. The main purpose is job management on a single job level.
For workflow scheduling, other tools like Apache Oozie should be used. In fact, Netflix states clearly that:
Genie is not a workflow scheduler, such as Oozie. Genie’s unit of execution is a single Hadoop, Hive or Pig job. Genie doesn’t schedule or run workflows — in fact, we use an enterprise scheduler (UC4) at Netflix to run our ETL.
Nevertheless, Genie offers APIs for managing resources like clusters, applications, and commands. After registering the resources, users can discover these and start submitting their jobs.
Finally, it’s worth noting that Genie is an open-source project tailored more or less to the specific needs of Netflix. It plays an important part in Netflix’s rapidly changing cloud environment and integrates with Netflix’s technology stack.
Now, let’s see Genie in action to gain a better understanding of how we can use it to submit jobs. As an introduction, we’ll be working our way through the Genie demo available on GitHub.
This example requires:
First of all, we have to take care of setting up our clusters using Docker Compose by downloading docker-compose.yml to a folder of our choice. For this, let’s create a new directory named demoDir. The compose file defines five services that we’re going to explore one by one.
First, let’s take a look at the Genie server which will run in a container named genie_demo_app_3.3.9 that maps port 8080 to Genie UI:
genie:
    image: netflixoss/genie-app:3.3.9
    ports:
      - "8080:8080"
    depends_on:
      - genie-hadoop-prod
      - genie-hadoop-test
      - genie-apache
    tty: true
    container_name: genie_demo_app_3.3.9
The second service is genie_demo_apache_3.3.9 which is used for downloading files required by the demo:
genie-apache:
    image: netflixoss/genie-demo-apache:3.3.9
    tty: true
    container_name: genie_demo_apache_3.3.9
The Genie client comes next, which contains example scripts for submitting jobs using Genie. Its container name is genie_demo_client_3.3.9:
genie-client:
    image: netflixoss/genie-demo-client:3.3.9
    depends_on:
      - genie
    tty: true
    container_name: genie_demo_client_3.3.9
Our production (SLA) Hadoop cluster is next. This service will receive our submitted jobs. The cluster resource manager maps to port 8088 whereas the history server gets 19888.
We’ll make a small adjustment here and map the named and data nodes to port 19070 and 19075 respectively:
genie-hadoop-prod:
    image: sequenceiq/hadoop-docker:2.7.1
    command: /bin/bash -c "/usr/local/hadoop/sbin/mr-jobhistory-daemon.sh start historyserver
               && /etc/bootstrap.sh -bash"
    ports:
      - "19888:19888"
      - "19070:50070"
      - "19075:50075"
      - "8088:8088"
    tty: true
    container_name: genie_demo_hadoop_prod_3.3.9
Finally, let’s explore the test Hadoop container representing the test cluster. Similarly to the production cluster, it’s assigned the ports 8089 (resource manager), 19889 (history server), 19071 (named node) and 19076 (data node):
genie-hadoop-test:
    image: sequenceiq/hadoop-docker:2.7.1
    command: /bin/bash -c "/usr/local/hadoop/sbin/mr-jobhistory-daemon.sh start historyserver
               && /etc/bootstrap.sh -bash"
    ports:
      - "19889:19888"
      - "19071:50070"
      - "19076:50075"
      - "8089:8088"
    tty: true
    container_name: genie_demo_hadoop_test_3.3.9
Let’s start the above-mentioned containers by running docker-compose from demoDir. This will take longer to execute when running for the first time as it has to download the demo images:
cd demoDir
docker-compose up -d
We can verify the cluster is up and ready by checking:
Now, after the demo containers are running, we can log in to the client container using a docker exec command:
docker exec -it genie_demo_client_3.3.9 /bin/bashNow inside the client container, we execute an init script to prepare the clusters to accept our jobs:
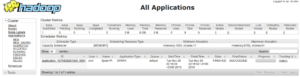
./init_demo.pyIf the demo runs successfully, the Genie UI will show data in the clusters, commands and application tabs.
As another example, let’s submit a Spark job to calculate the first 10 decimal digits of π. We can submit the job to either test or SLA by passing the corresponding literal as an argument to the script:
./run_spark_submit_job.py sla 2.0.1
./run_spark_submit_job.py test 2.0.1
From the Jobs tab in Genie UI, we can click the folder icon in each job description to navigate to its output folder. From there, on a successful finish, we can find the calculated value under stdout.

The Hadoop resource manager UI displays cluster jobs as well.
Finally, we exit the client container, stop and remove all demo containers by running:
docker-compose downThe images will still be available on disk, and we can start the demo containers again at any time.
In this tutorial, we’ve introduced Genie, a job management tool developed by Netflix.
We then ran through a demo, which gave us a practical example of how we can use Genie in real-life scenarios.
As always, the code example is on GitHub.