

Mocking is an essential part of unit testing, and the Mockito library makes it easy to write clean and intuitive unit tests for your Java code.
Get started with mocking and improve your application tests using our Mockito guide:
Handling concurrency in an application can be a tricky process with many potential pitfalls. A solid grasp of the fundamentals will go a long way to help minimize these issues.
Get started with understanding multi-threaded applications with our Java Concurrency guide:
Spring 5 added support for reactive programming with the Spring WebFlux module, which has been improved upon ever since. Get started with the Reactor project basics and reactive programming in Spring Boot:
Since its introduction in Java 8, the Stream API has become a staple of Java development. The basic operations like iterating, filtering, mapping sequences of elements are deceptively simple to use.
But these can also be overused and fall into some common pitfalls.
To get a better understanding on how Streams work and how to combine them with other language features, check out our guide to Java Streams:
Explore Spring Boot 3 and Spring 6 in-depth through building a full REST API with the framework:
Yes, Spring Security can be complex, from the more advanced functionality within the Core to the deep OAuth support in the framework.
I built the security material as two full courses - Core and OAuth, to get practical with these more complex scenarios. We explore when and how to use each feature and code through it on the backing project.
You can explore the course here:
Spring Data JPA is a great way to handle the complexity of JPA with the powerful simplicity of Spring Boot.
Get started with Spring Data JPA through the guided reference course:
Refactor Java code safely — and automatically — with OpenRewrite.
Refactoring big codebases by hand is slow, risky, and easy to put off. That’s where OpenRewrite comes in. The open-source framework for large-scale, automated code transformations helps teams modernize safely and consistently.
Each month, the creators and maintainers of OpenRewrite at Moderne run live, hands-on training sessions — one for newcomers and one for experienced users. You’ll see how recipes work, how to apply them across projects, and how to modernize code with confidence.
Join the next session, bring your questions, and learn how to automate the kind of work that usually eats your sprint time.
Yes, we're now running our only Summer Sale. All Courses are 30% off until 20th July, 2026:
Yes, we're now running our only Summer Sale. All Courses are 30% off until 20th July, 2026:
1. Introduction
MinIO is a high-performance object storage system. It is designed to be an alternative to cloud-native storage systems. In fact, its API is fully compatible with Amazon S3.
In this tutorial, we’ll get a quick introduction to working with MinIO.
2. About MinIO
MinIO was designed from the beginning to be a fully compatible alternative to Amazon’s S3 storage API. They claim to be the most compatible S3 alternative while also providing comparable performance and scalability.
MinIO also provides a variety of deployment options. It can run as a native application on most popular architectures and can also be deployed as a containerized application using Docker or Kubernetes.
Additionally, MinIO is open-source software. Organizations are free to use it under the terms of the AGPLv3 license. Just beware that this option comes with no support aside from online documentation and the MinIO user community. For larger enterprises, paid subscriptions with dedicated support are also available.
Because of its S3 API compatibility, ability to run in a variety of deployments, and open-source nature, MinIO is a great tool for development and testing, as well as DevOps scenarios.
2.1. How Object Storage Works
The concept of object storage is similar to that of a standard Unix file system, but instead of directories and files, we use buckets and objects.
Buckets can be nested into a hierarchy just like directories, and objects can be thought of as just a collection of bytes. Those collections can be arbitrary byte arrays or normal files like images, PDFs, and more.
An example object storage system might look like:
/
/images/
  imge1.png
  image2.jpg
/videos/
  video1.mp4
/users/
  /john.doe/
    3rd quarter revenue report.docx
And just like directories and files, buckets and objects can have permissions. This allows fine-grained access control over data, especially in large organizations with many users.
3. Installing MinIO
As mentioned earlier, MinIO is available for just about every platform. There are standalone installers for Windows, Linux, and MacOS. For development and testing purposes, however, the easiest way to get started is by using the containerized distribution.
Let’s run a standalone MinIO server as a container:
$ docker run -p 9000:9000 -p 9001:9001 \
  quay.io/minio/minio server /data --console-address ":9001"
While the containerized deployment is perfectly fine for evaluating MinIO, there are some limitations to be aware of.
Specifically, some advanced features such as versioning, object locking, and bucket replication will not work. These features require the distributed deployment of MinIO, which is not available in a single-server deployment.
4. Working with MinIO
There are a number of different ways to interact with the MinIO server and manage buckets and objects. Below, we will take a look at them all.
4.1. The MinIO Client
The MinIO client provides identical commands to Unix file management commands, such as cp and ls, but is designed for both local and remote storage systems. It’s fully compatible with AWS S3, and its syntax mimics that of the AWS client tool.
The first step to using the MinIO client is to configure it to communicate with a cloud storage system. Let’s point it to the containerized deployment above:
$ mc alias set docker_minio http://127.0.0.1:9000 minioadmin minioadminThis command creates an alias to a containerized deployment of MinIO, which is available on localhost, port 9000. The default access key and secret key are both minioadmin in this deployment.
We can verify the connection using the admin sub-command:
$ mc admin info docker_minio

   127.0.0.1:9000
   Uptime: 3 minutes
   Version: 2023-05-04T21:44:30Z
   Network: 1/1 OK
   Drives: 1/1 OK
   Pool: 1

Pools:
   1st, Erasure sets: 1, Drives per erasure set: 1

1 drive online, 0 drives offline
Now, we can start doing basic operations such as creating buckets and objects. Many of the MinIO client sub-commands mimic familiar Unix commands:
- cp: Copy a file or object between file systems.
- ls: List files or objects in a bucket.
- mb: Create a bucket (similar to mkdir on Linux).
- mv: Move/relocate a file or object from one file system to another.
- rb: Remove a bucket (similar to rmdir on Linux).
- rm: Remove a file or object.
Most of these sub-commands work on both local file systems and cloud storage. For example, we can use the following command sequence to create new a new bucket, copy a file into that bucket, move the object between buckets, then remove a bucket:
$ mc mb user1
$ mc cp ~/Resume.pdf user1
$ mc mb user2
$ mc cp user1/Resume.pdf user2
$ mc rb user1
$ mc ls user2
[2023-05-15 21:39:10 MDT]     491K Resume.pdf
4.2. The MinIO Console
Another way to manage data in a MinIO deployment is with the web-based admin console. With the containerized deployment, we start by opening the address http://127.0.0.1:9001 in a web browser. We log in using the default credentials of minioadmin / minioadmin.
From there, we can create our first bucket:
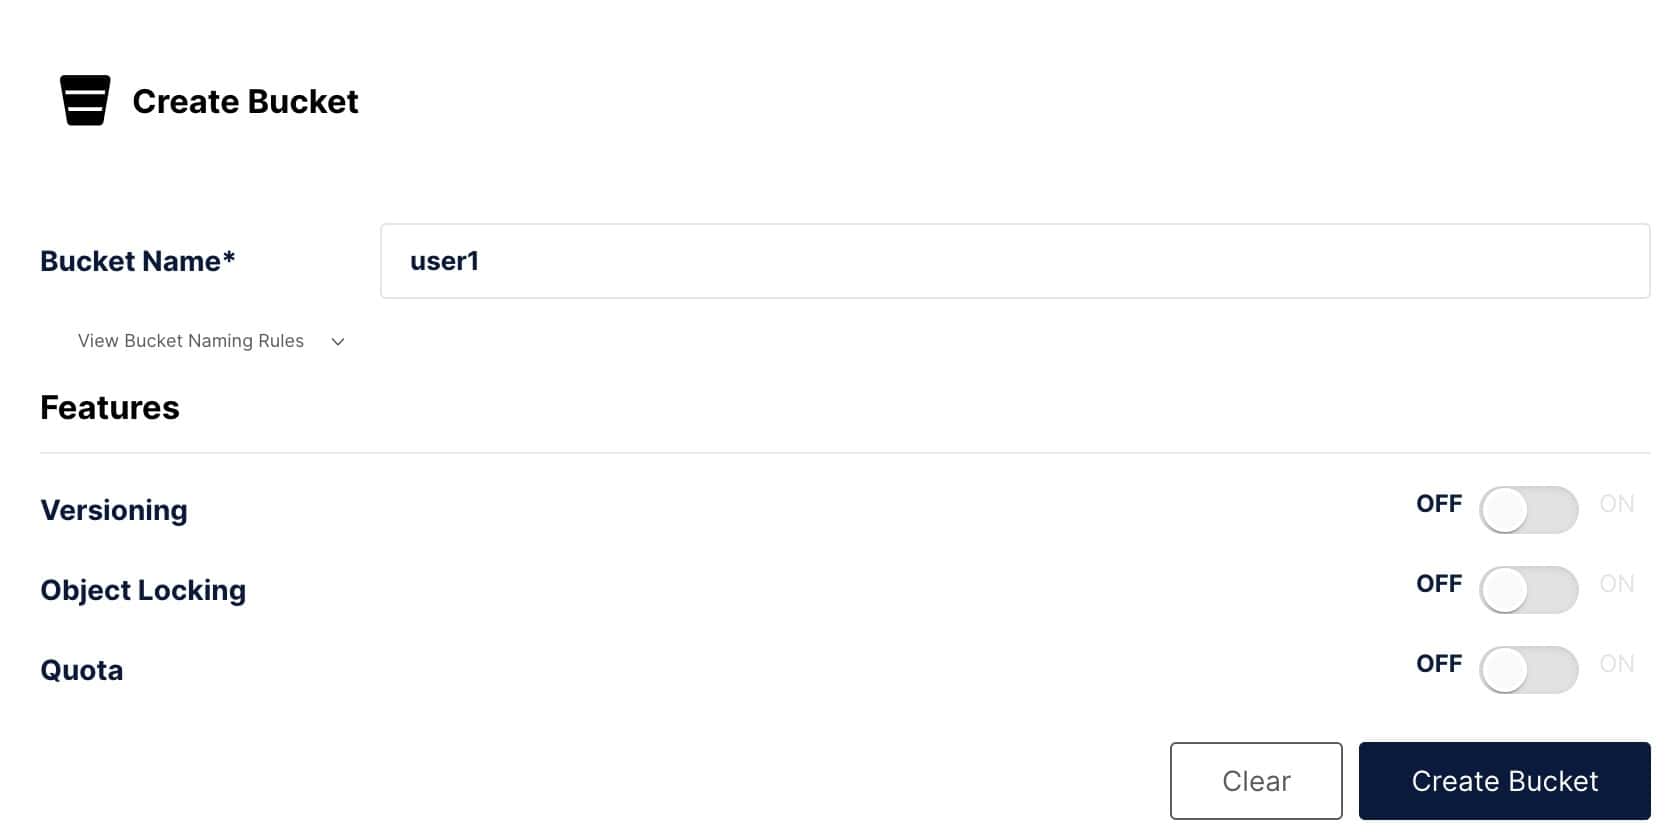
Recall that not all options, such as versioning, will be applicable to our containerized deployment.
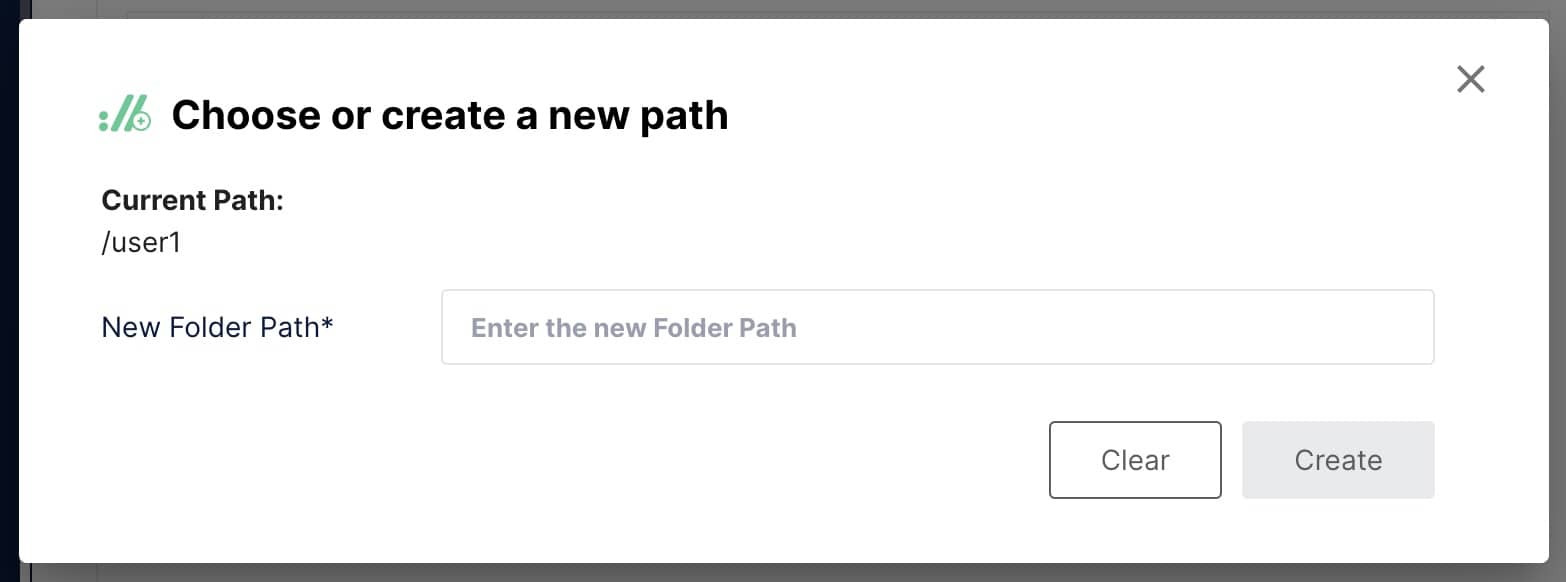
Now, we can navigate to Object Browser and click on our new bucket. On this screen, we have several options. First, we can create child buckets using the Create new path button:
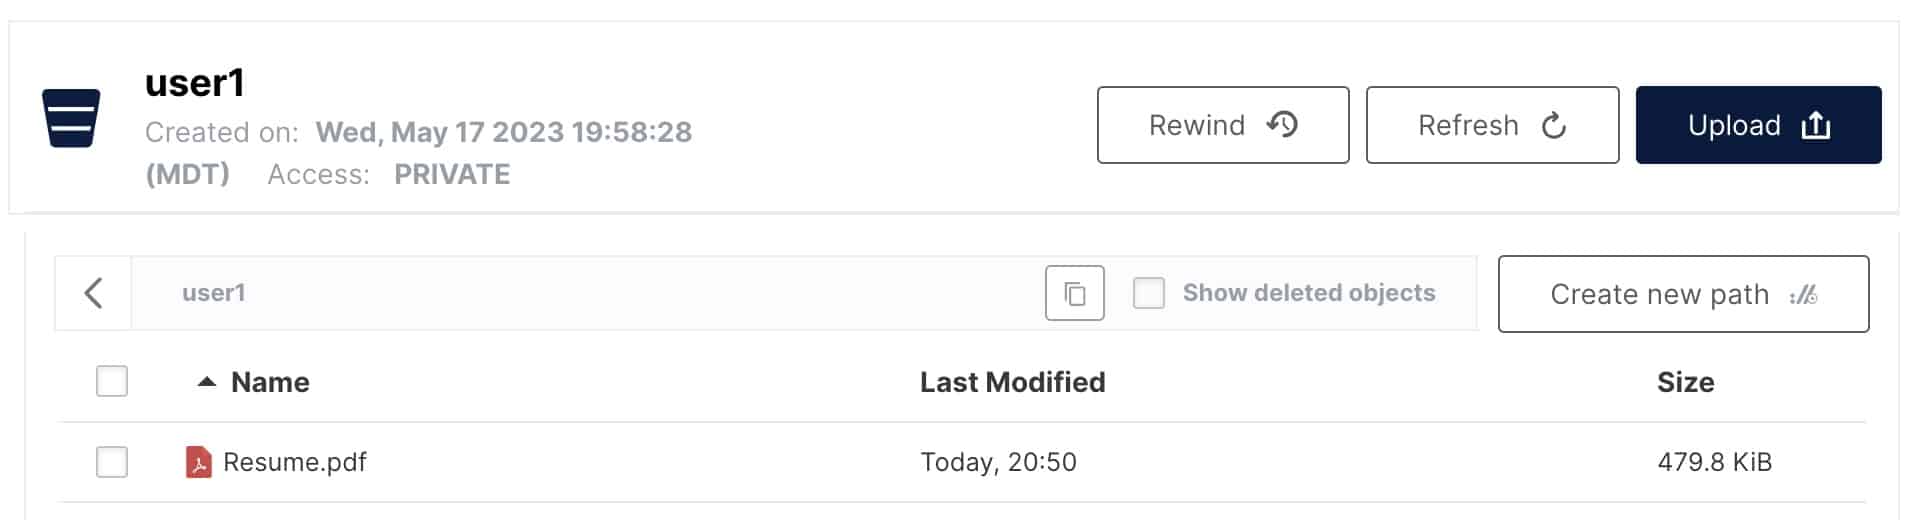
We can also upload files as new objects inside the bucket:
In general, the MinIO admin console’s functionality is equivalent to that of the command-line client. However, it does have some minor differences.
First, moving objects between buckets is not possible with the client like it is with the command-line client.
Additionally, the command-line client also has a number of sub-commands that do not exist in the admin console. For example, the diff, du, and pipe sub-commands all mimic standard Unix commands and do not have an equivalent in the admin console.
4.3. The MinIO Java SDK
The final way to work with MinIO we’ll look at is using the Java SDK. To start, we include the required dependency in our application:
<dependency>
    <groupId>io.minio</groupId>
    <artifactId>minio</artifactId>
    <version>8.5.2</version>
</dependency>
The first step to using the Java SDK is to create a client instance:
MinioClient minioClient =
  MinioClient.builder()
    .endpoint("http://127.0.0.1:9000")
    .credentials("minioadmin", "minioadmin")
    .build();
This client can perform all of the same actions we saw previously with the command-line tool and admin console. For example, we can create a bucket:
minioClient.makeBucket(
  MakeBucketArgs
    .builder()
    .bucket("user1")
    .build());
And then, we can upload a file as an object into that bucket:
minioClient.putObject(PutObjectArgs
  .builder()
  .bucket("user1")
  .object("Resume.pdf")
  .stream(new FileInputStream("/tmp/Resume.pdf")
  .build());
Finally, let’s see how to get an object from a bucket:
try (InputStream stream =
  minioClient.getObject(GetObjectArgs
    .builder()
    .bucket("user2")
    .object("Resume.pdf")
    .build())) {
    // Read the stream
}
This is just a small sample of the Java SDK. And remember, because MinIO is fully S3-compliant, the same code can be used with Amazon S3.
5. Conclusion
In this article, we’ve seen a brief introduction to MinIO, an object storage engine with full S3 compatibility. While it is a production-grade object storage system, it also fits other use cases. Because it’s open source, can be deployed anywhere, and is fully S3 compliant, it’s a great alternative for development and testing environments.


