

Learn through the super-clean Baeldung Pro experience:
>> Membership and Baeldung Pro.
No ads, dark-mode and 6 months free of IntelliJ Idea Ultimate to start with.
Learn through the super-clean Baeldung Pro experience:
>> Membership and Baeldung Pro.
No ads, dark-mode and 6 months free of IntelliJ Idea Ultimate to start with.
The High-Efficiency Image Container (HEIC) format has been the default for iPhone and iPad photos since iOS 11 in 2017. Compared to JPEG, it uses half the space for the same quality.
In this tutorial, we’ll see how to view HEIC images in Linux. Some solutions require the installation of additional tools or conversion to JPEG format before viewing them, while others avoid this.
All our examples refer to Linux Mint 21 Cinnamon Edition, based on Ubuntu 22.04 and iOS 16.
In the mobile app world, sharing a photo usually means copying it from one app to another. In Apple devices, however, this copy is identical to the original HEIC in some cases, while it’s converted to JPEG in others. These seem to be arbitrary choices by Apple or, alternatively, technical constraints that are unclear to the end user.
So, let’s see which cases iOS converts HEIC photos to JPEG. Also, we’ll perform the same conversion with a Linux CLI utility.
When we connect an iPhone to a Linux or Windows computer via USB cable, iOS exposes its Gallery in JPEG format into the DCIM folder. However, it’s a different story on the Mac, which doesn’t show such a directory.
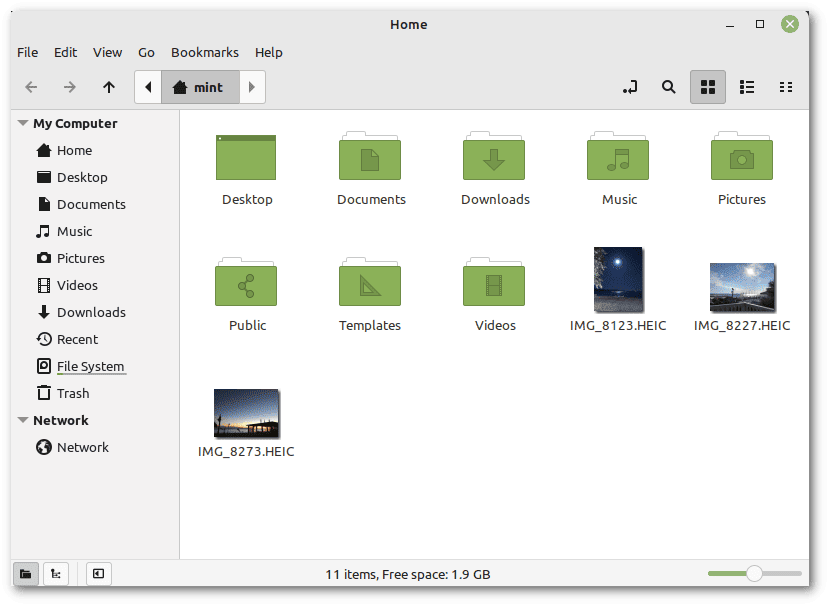
So, Nemo, Cinnamon’s default file manager, shows HEIC images as if they were JPEGs:
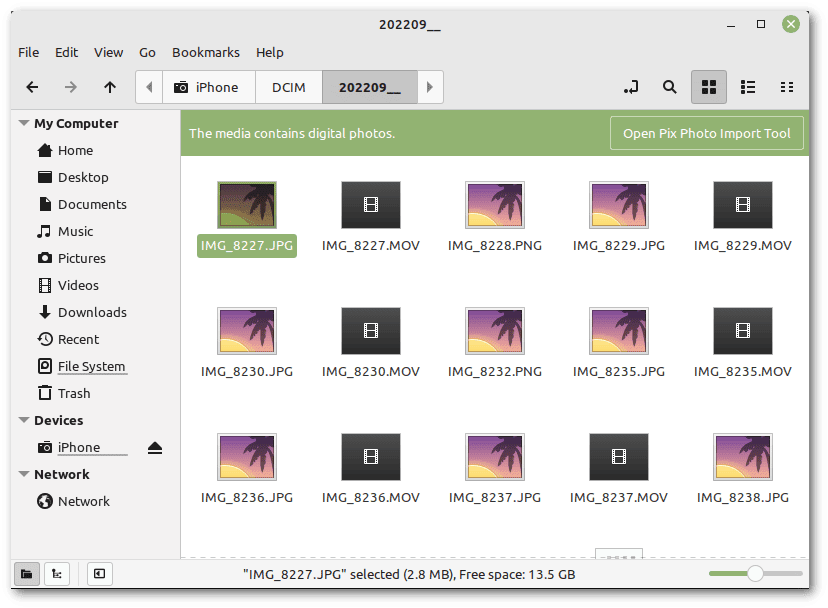 In this case, the selected image IMG_8227.JPG (2.8 MB) corresponds to IMG_8227.HEIC (1.2 MB), which is converted on the fly from HEIC to JPEG. The MOV files above are so-called “live photos,” which are short QuickTime videos.
By default, there aren’t thumbnails. However, it’s enough to click the “Open Pix Photo Import Tool” button in the upper right corner to see them.
Another simple conversion solution is sharing images from the Gallery to an email app (iOS’s Mail, Gmail, Protonmail, and others). In fact, iOS transforms HEICs into JPEGs attachments for a new email.
The Files app shares photos in the format they are stored. However, we can use the Export menu to convert any HEIC image to JPEG or PNG:
 This solution, however, is quite unwieldy because it requires several manual steps for each photo.
iCloud Drive doesn’t convert HEIC photos. Worse, it doesn’t display them in any browser.
On the other hand, Google Drive displays HEIC images within any browser. Unfortunately, however, HEICs are in their original format when downloaded. The only trick is finding the JPEG preview URLs in the browser developer tools. This is a very inconvenient and limited approach.
The simplest solution is Dropbox. It allows us to open a HEIC image into a browser and then right-click to save it as a JPEG at the original resolution. Sadly, it’s possible to do this only one photo at a time.
The package libheif-examples provides heif-convert, which converts HEIC/HEIF images to different image formats:
$ sudo apt install libheif-examplesAs test files, we have IMG_8123.HEIC, IMG_8227.HEIC and IMG_8273.HEIC. To convert them to JPEG, a for loop is enough:
$ for i in *.HEIC; do heif-convert "$i" "${i%.HEIC}.jpg"; done
File contains 1 images
Written to IMG_8123.jpg
File contains 1 images
Written to IMG_8227.jpg
File contains 1 images
Written to IMG_8273.jpg
Luckily, the information associated with our images isn’t lost. In fact, heif-convert copies the metadata and details from the source HEIC into the JPEG:
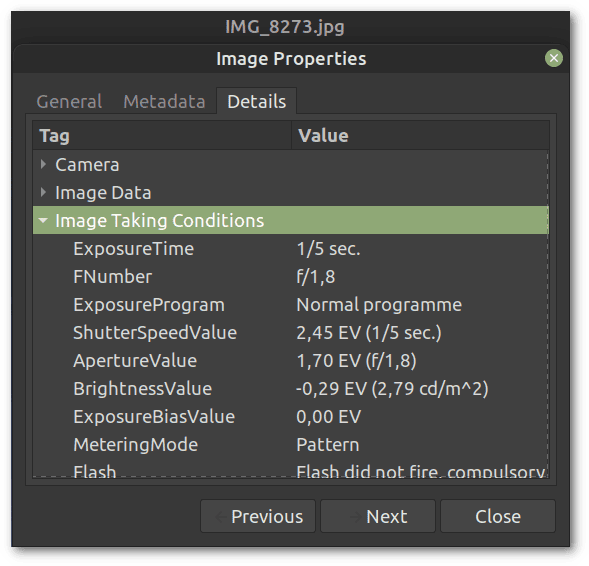 We got this information from Xviewer. We could also have obtained it with the command identify -verbose IMG_8273.jpg.
Our starting point is that when trying to double-click a HEIC file in Nemo, we get an unknown file type warning.
Xviewer is the default image viewer of Linux Mint Cinnamon Edition. It’s based on GNOME’s gdk-pixbuf library, also used by Eye of GNOME, GPicView, PCMan File Manager, Nemo File Manager, and other applications.
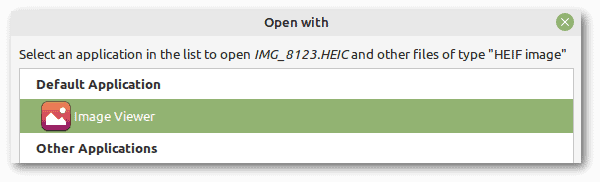
All it takes is to install the heif-gdk-pixbuf package to enable HEIC support in all these programs:
$ sudo apt install heif-gdk-pixbufAfter that, we need to select the default application. In this case, Image Viewer is the (fairly anonymous) way Linux Mint refers to Xviewer:
 As of now, we also have thumbnails. However, to make sure that Nemo generates previews for all HEIC images, we need to log out and then log in or restart the computer:
 Moreover, Xviewer can save HEIC images in other formats such as JPEG or PNG. The only limitation is that we can do it only one file at a time.
As of 2019, Linux Mint no longer supplies GIMP preinstalled. It’s an advanced image editor that, as of version 2.10, supports HEIC without needing additional libraries beyond the default ones.
Let’s install it:
$ sudo apt install gimpThen, let’s open one of our example images:
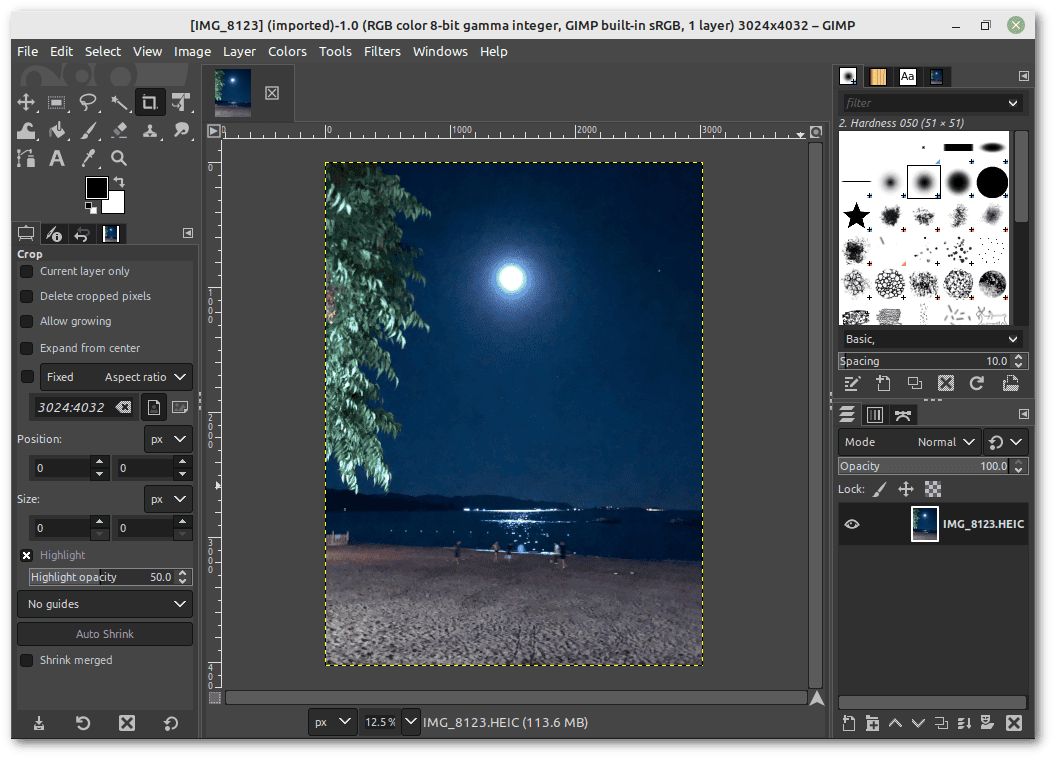 The result is that of a professional editor, great for retouching our HEIC photos or exporting them in other formats.
In this article, we looked at various solutions to view HEIC photos in Linux. However, let’s remember that HEIC is still a format from the Apple world, so its Linux support may be buggy or incomplete.
For example, Xviewer doesn’t show the metadata of HEIC files but only of JPEGs. Another issue is that some versions of heif-convert have a bug with image orientation. These flaws will probably be fixed in future releases of the libraries and programs.
In our tests, automatic conversion from HEIC to JPEG with a USB connection is the most practical solution to keep our photos in the best-supported format.
Incidentally, iOS has an option to save photos internally as JPEG instead of HEIC, in case maximum compatibility is our goal.