

Yes, we're now running our only Summer Sale. All Courses are 30% off until 20th July, 2026:
What Is Unlock Keyring and How to Fix It
Last updated: October 15, 2025
Learn through the super-clean Baeldung Pro experience:
>> Membership and Baeldung Pro.
No ads, dark-mode and 6 months free of IntelliJ Idea Ultimate to start with.
1. Overview
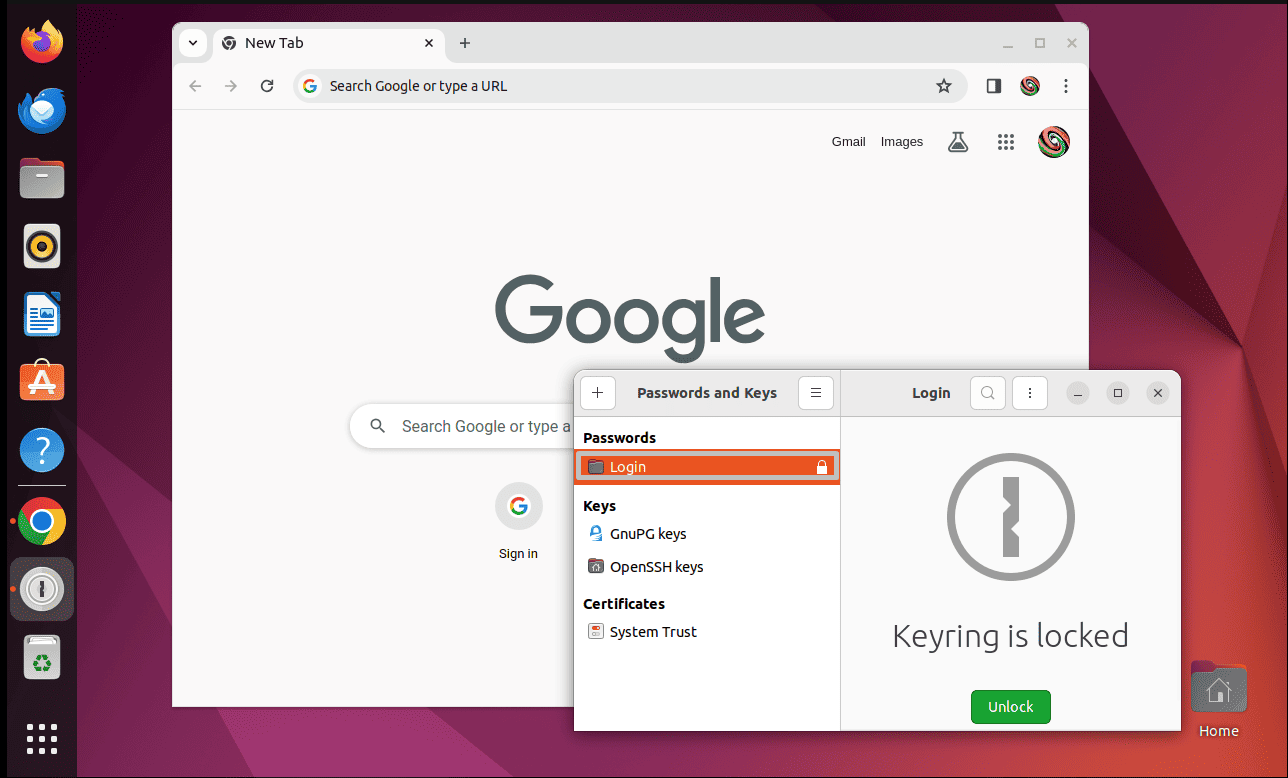
We often encounter an annoying message related to unlocking the keyring while opening our favorite applications like Chrome in Linux. Although many of us consider it an error, it’s actually a security feature.
In this tutorial, we’ll discuss keyring and why we encounter the message login key did not get unlocked, along with fixes.
Specifically, we’re using GNOME keyring in Ubuntu 22.04 for demonstration purposes. However, the provided fixes will work for all distributions using GNOME.
2. What Is Keyring in Linux?
Keyring is a Linux security feature that stores passwords, SSH keys, GPG keys, and certificates in encrypted form. It uses the account’s login password as its password to unlock by default. Therefore, we don’t need to unlock the keyring explicitly, as it automatically unlocks at login using the account’s password.
The keyring feature runs automatically in the background once the system starts. Overall, it ensures that no unauthorized person can access the important keys and passwords.
There are two types of keyrings in Linux: kernel keyring and user keyring. The kernel keyring is used and managed by the kernel to store system-wide keys. However, the user keyring allows users to store their passwords, keys, and information. Users can even group their passwords and manage them using a GUI application.
We can manage user keyrings in KDE by using the KDE Wallet application. On the other hand, we can use the default Seahorse application (Passwords and Keys) to manage the GNOME user keyring.
Let’s now discuss where we can locate the user keyring files in our GNOME system, which are present either in the ~/.local/share/keyrings/ or ~/.gnome2/keyrings directory, depending upon the distro and its version.
3. Why Do We Encounter Unlock Keyring Message Prompts?
As we discussed earlier, we don’t need to unlock the keyring in Linux explicitly. Nonetheless, some of us keep encountering the Authentication Required: The login keyring did not get unlocked when you logged into your computer message all of a sudden. This potentially occurs because we’ve enabled the Automatic Login settings for our system, which prevents the keyring from unlocking at login: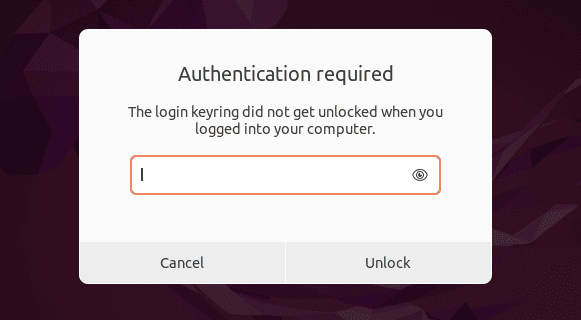 In simple terms, our system prompts us to enter the user account’s password to unlock the keyring when it unlocks without the password. This happens when we open an application for the first time in each session whose password is saved in the keyring which ensures that only authorized persons are accessing these applications on our system.
We often get irritated by this prompt and consider it a bug and want to get rid of it. Although, we’re aware now that it’s a security feature but we can still eliminate this prompt using different ways.
Let’s discuss various issues users might have with this prompt and their solutions.
4. How to Change the Password of Keyring?
Some users might decide to keep this security feature as it is, but they may find themselves unable to unlock their keyring using their account’s password.
This problem arises when they’ve recently changed their account’s login password. Yet, the keyring feature continues to use the old login password as its password. To resolve this problem, users can either unlock the keyring using their old password or change the keyring password. However, if some users can’t recall their previous they can create a new keyring.
4.1. Change Keyring Password
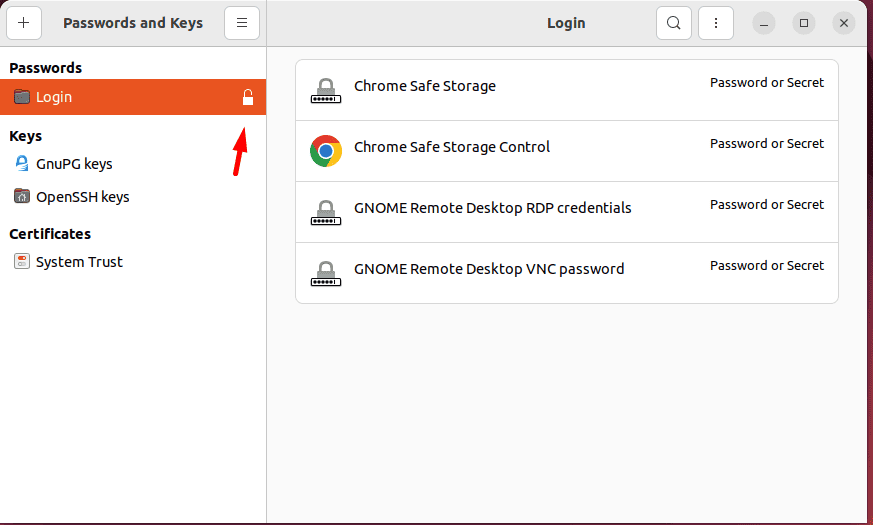
To change our keyring password, search and open the Passwords and Keys application:
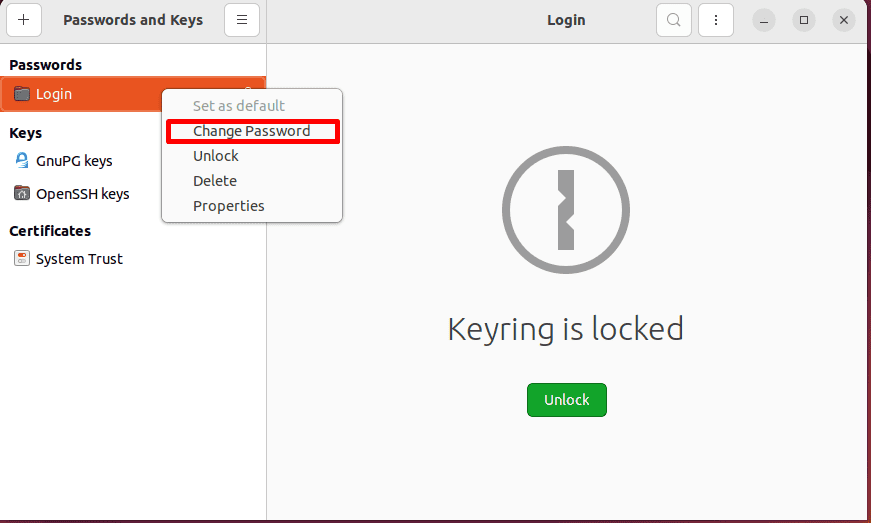
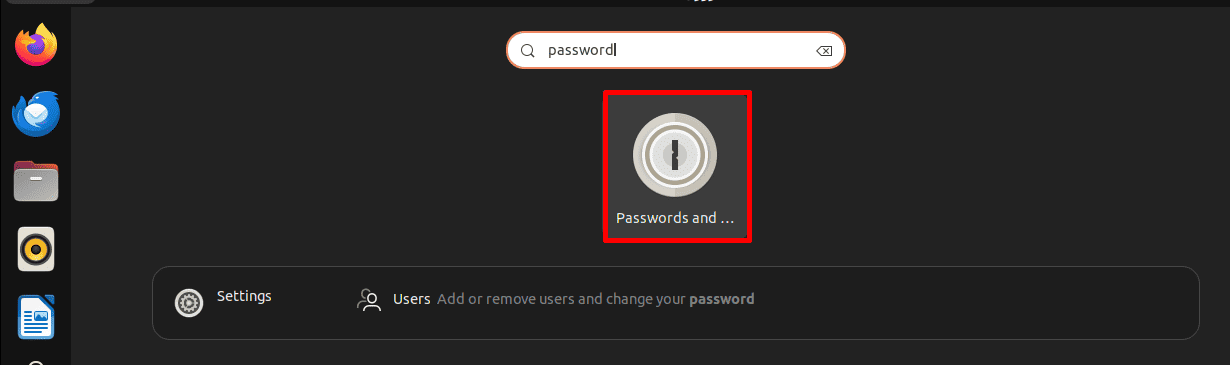 Then, right-click on the Login directory option under the Passwords section to open a list. From the drop-down list, click on the Change Password option:
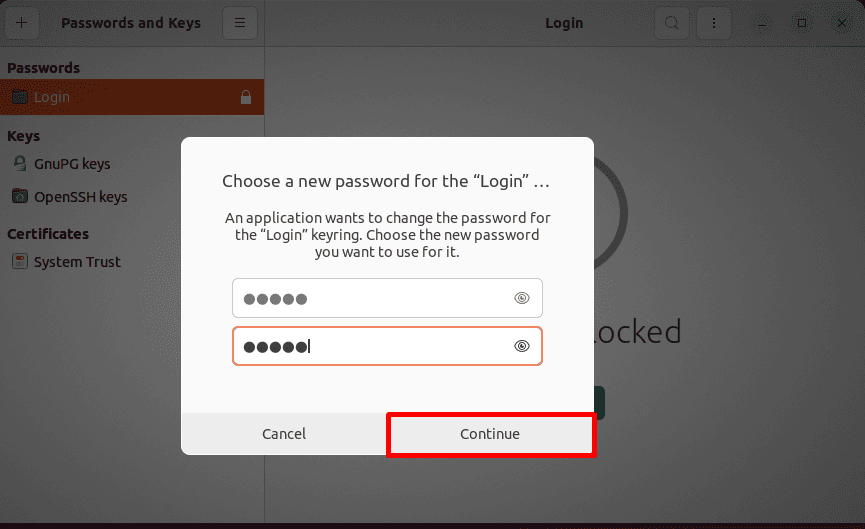
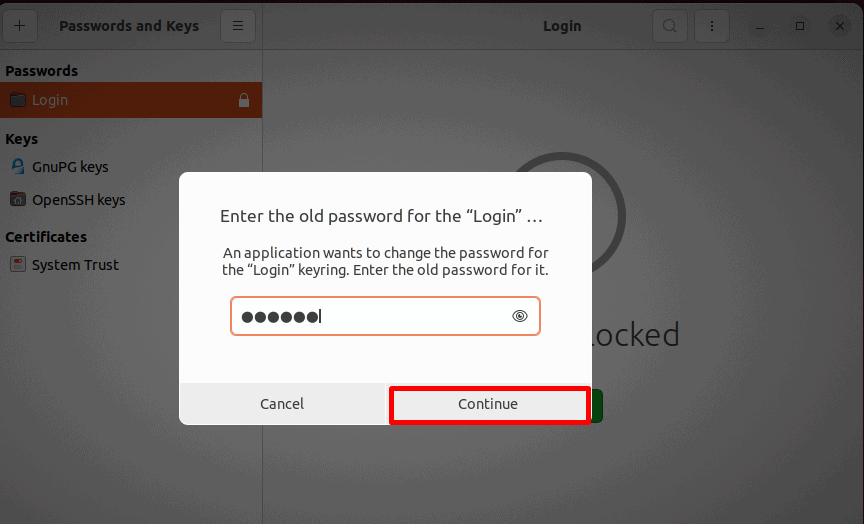
 Next, enter the old login password of our user account and click on the Continue button:
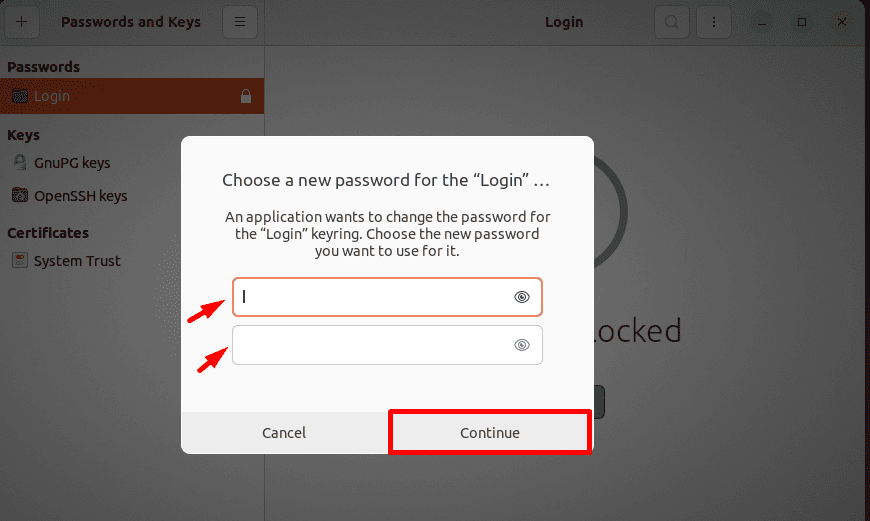
 Next, provide a new password for our keyring which can be the same as our account’s new login password. Then, we click on the Continue button:
Finally, our keyring password is changed successfully. Now, we can use this new password to unlock our keyring.
4.2. Create a New Keyring
In case we forget our previous login password, we can back up our user keyring files and create a new keyring.
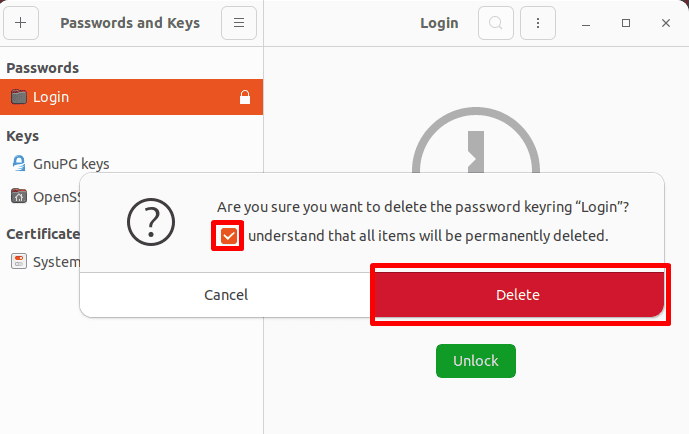
To do so, we backup our user keyring files – specifically the Login directory. Then, we open the Passwords and Keys application and right-click on the Login option to open a list.
From the list, we click on the Delete option. This action will prompt a new window where we check the box and click on the Delete button:
After deleting the Login keyring, press the + (plus) icon located on the top left of the window and select the Password Keyring option:
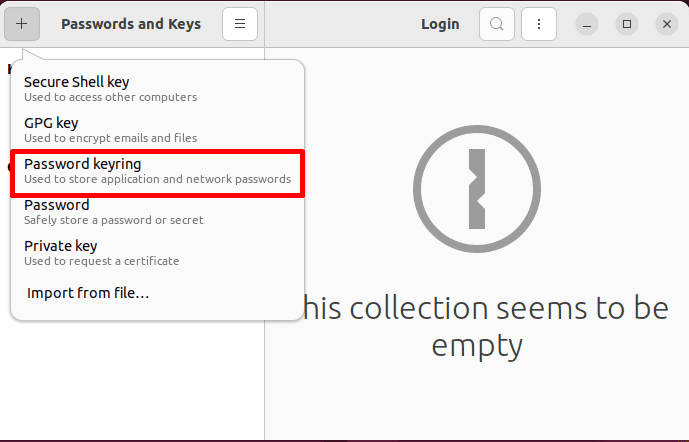
Here, we provide the name for our new keyring which will store our passwords. Then, press the Add button:

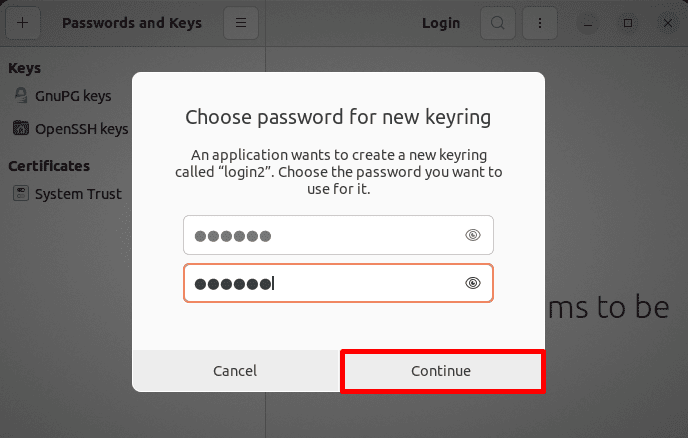
Next, set the password for our new keyring:
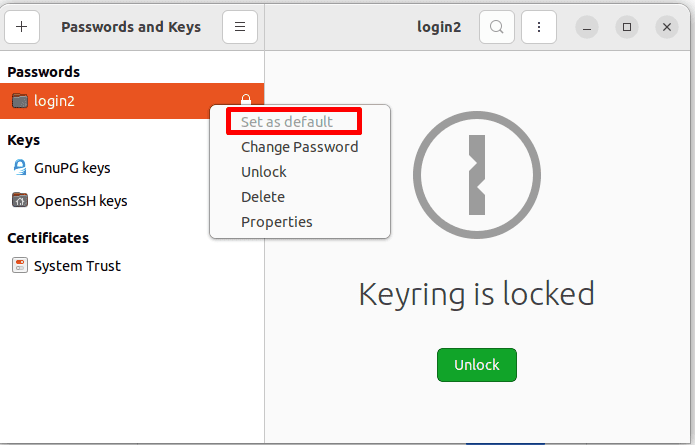
Afterwards, right-click on the new keyring and choose Set as default option:
To locate this new keyring directory, we can open the terminal and navigate to the ~/.local/share/keyrings/ directory.
In this directory, we can execute the ls command to see our new keyring directory:
$ cd ~/.local/share/keyrings/
$ ls
If we can’t locate our keyring in the ~/.local/share/keyrings/ directory, then we can navigate to the ~/.gnome2/keyrings directory:

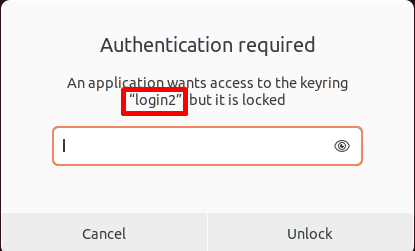
Finally, we’ll encounter the Unlock Keyring message demanding the password of our newly created default keyring:
Now, this keyring will save all our new passwords.
5. How to Disable Keyring?
The above-provided solutions will resolve issues with incorrect or forgotten keyring passwords. However, the Unlock Keyring message will continue to prompt whenever we open any application that requires the keyring feature. If we wish, we can disable the keyring feature by removing its password.
We must be aware that disabling this feature can raise security concerns as anyone can now perform some administrative tasks and open applications storing personal data.
To disable a keyring, we open the Passwords and Keys application and right-click on our desired (Login) keyring directory.
Now, from the drop-down list, we select the Change Password option:
Next, enter our keyring password and press the Continue button to proceed:
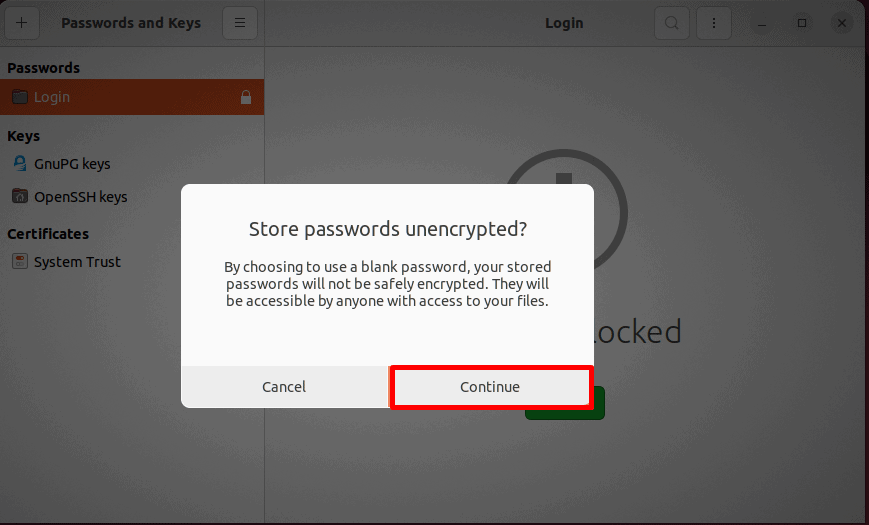
Then, simply leave the new password blank and press the Continue button. By leaving the password blank, we disable the keyring feature:
Afterward, we’ll encounter a prompt message displaying that now our passwords will be stored unencrypted (plain text). Here, we click on the Continue button:
Now, we won’t get the Unlock Keyring message. To verify this, let’s lock our keyring and try to access Google Chrome:
Finally, the keyring feature is disabled.
6. Turn off the Automatic Login Setting
What if we wish to keep this security feature but don’t want to encounter this Unlock Keyring message? In such a scenario, we can disable the Automatic Login feature.
By doing this, we’ll have to provide our user account password at login and our keyring will automatically unlock. This solution is easy, obvious, and effective as well.
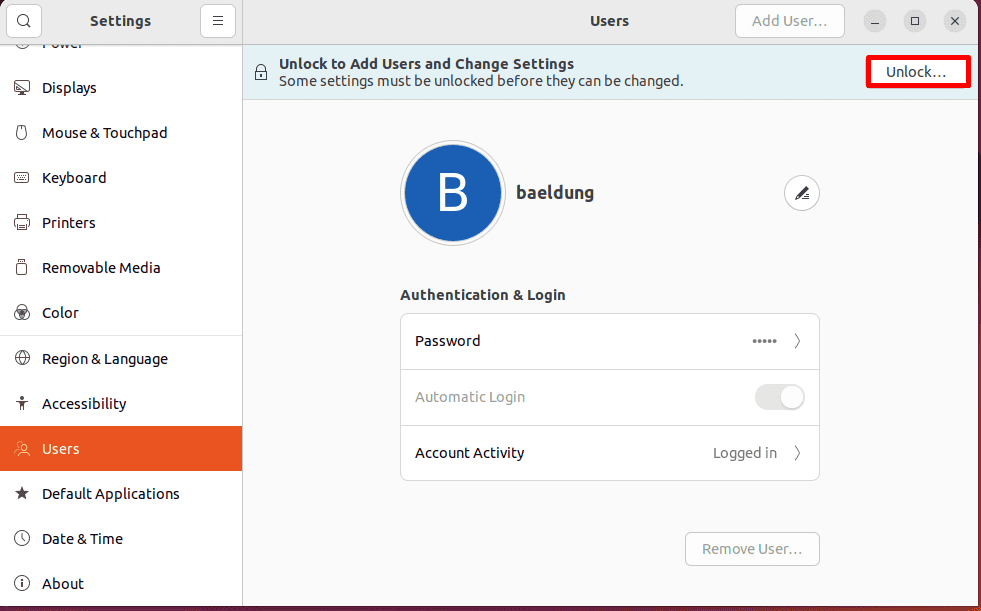
Let’s open Settings, and navigate to Users settings. Then, click on the Unlock button located in the top-right position:
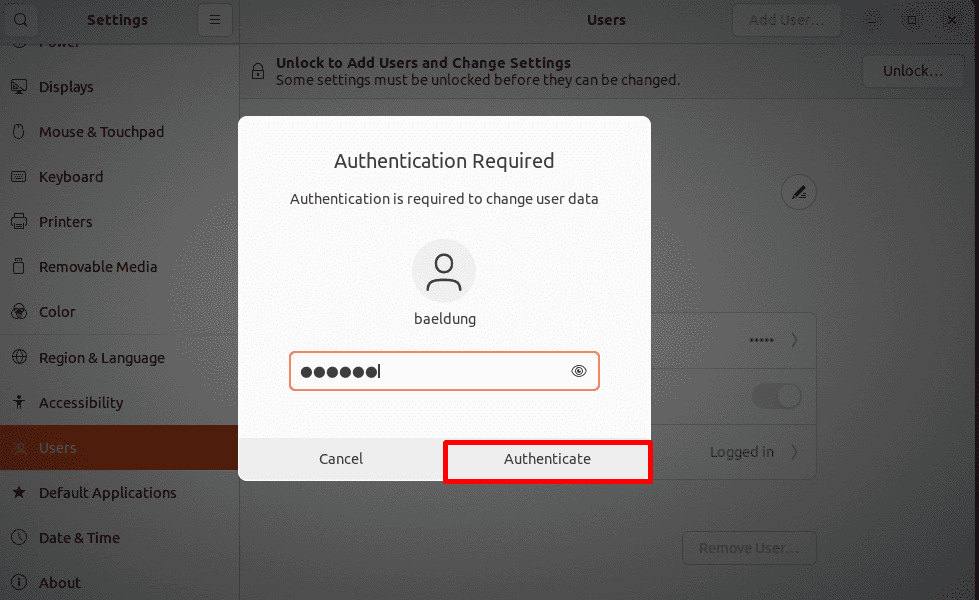
Now, enter our user account password and press the Authenticate button:
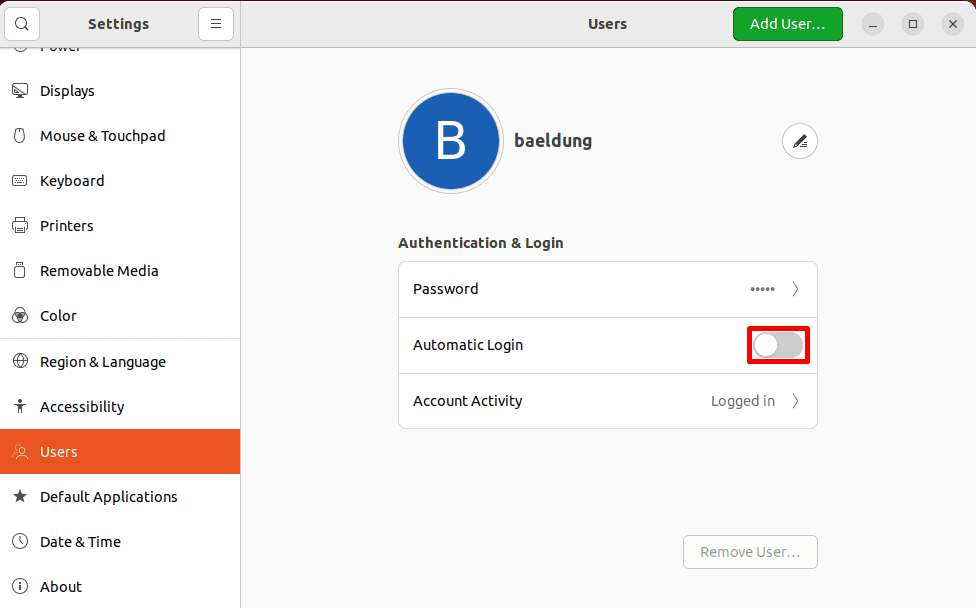
Next, disable the Automatic Login setting:
Let’s verify if this solution works. For this purpose, we’ll restart our system and open the Passwords and Keys application. Here, we can view our Login keyring is unlocked:
This way, we’ve successfully fixed the Unlock Keyring message!
7. Conclusion
In Linux, the keyring is a security feature that allows us to store passwords, certificates, and keys in encrypted form. Many users consider the Unlock Keyring message a bug and want to get rid of it.
We can disable the Automatic Login setting or disable the keyring password to eliminate this message.
However, if we want to benefit from this security feature but are unable to unlock it with our user account password, we can try unlocking it using the old account password or changing the keyring password.