
Learn through the super-clean Baeldung Pro experience:
>> Membership and Baeldung Pro.
No ads, dark-mode and 6 months free of IntelliJ Idea Ultimate to start with.
Learn through the super-clean Baeldung Pro experience:
>> Membership and Baeldung Pro.
No ads, dark-mode and 6 months free of IntelliJ Idea Ultimate to start with.
Syntax highlighting is a welcome feature of any text editor we use for coding. It allows us to navigate the code more easily to make our work more effective. We can use it not only when working with programming languages, but also with markup languages such as XML or LaTeX or data serialization ones, such as JSON or YAML.
In this tutorial, we’ll learn about code highlighting in two popular editors, text-based Nano and graphical Gedit.
It’s simple. All we need to do is to open a file with Nano. It’ll automatically detect the file content and apply suitable rules. Let’s check it on a Bash script file, which plots a histogram, plotxy:
$ nano plotxy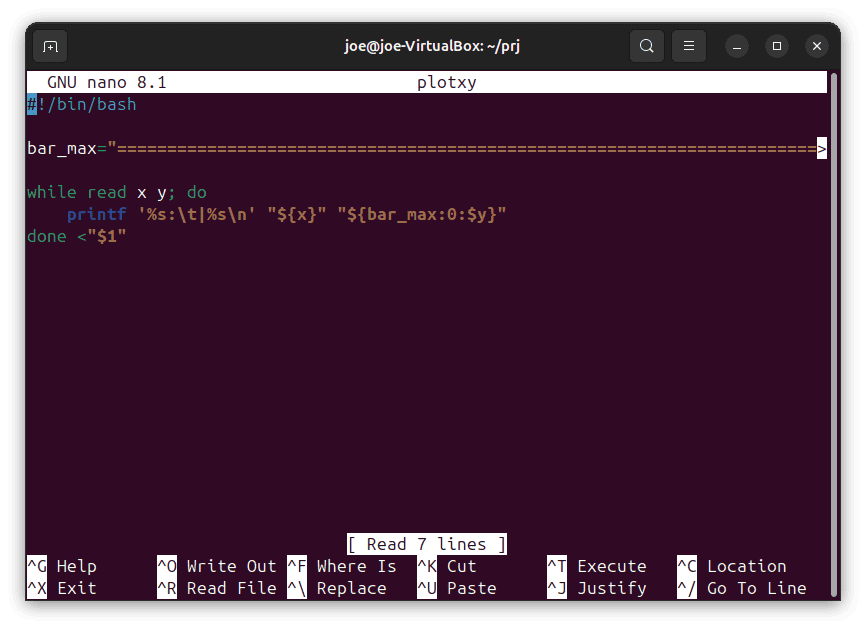
If unsatisfied with this choice, we can force a particular set of highlight rules with the -Y (–syntax) option. Let’s choose Java:
$ nano -Yjava unknown_source_file
$ nano --syntax=java unknown_source_file
Finally, we can switch off syntax highlighting by passing none with this option:
$nano -Ynone unknown_source_fileWith the default configuration, we can find the coloring rules in nanorc files named after the target language. They are located in the /usr/share/nano folder:
$ ls *nanorc
asm.nanorc        go.nanorc          markdown.nanorc  ruby.nanorc
autoconf.nanorc   groff.nanorc       nanohelp.nanorc  rust.nanorc
awk.nanorc        guile.nanorc       nanorc.nanorc    sh.nanorc
changelog.nanorc  haskell.nanorc     nftables.nanorc  sql.nanorc
cmake.nanorc      html.nanorc        objc.nanorc      tcl.nanorc
c.nanorc          java.nanorc        ocaml.nanorc     texinfo.nanorc
css.nanorc        javascript.nanorc  patch.nanorc     tex.nanorc
debian.nanorc     json.nanorc        perl.nanorc      xml.nanorc
default.nanorc    lua.nanorc         php.nanorc       yaml.nanorc
elisp.nanorc      makefile.nanorc    po.nanorc
email.nanorc man.nanorc python.nanorcNano comes with its default, system-wide configuration. Its location may vary depending on the Linux distribution. As we’ll use Ubuntu, the configuration is in the /etc/nanorc file. We can extend or modify this by providing custom nanorc files.
If we need more information about this file and its syntax, we should use the man command:
$ man nanorcWe can put the user-specific or custom configuration files in one of three places:
If we can’t find any of these files we should create one ourselves.
Nano configuration contains highlight rules for many languages, divided into sections by the syntax keyword. The file type is identified by its name, first line, or with the help of a magic database. Nano uses regex expressions to parse this information.
First, we follow the syntax keyword by the name. It’s the name we pass with the -Y option. Next, we should provide a regex expression to identify the language based on the file name. Let’s look at a Java example:
syntax java "\.java$"We simply state that all files with the ‘java’ extension will use the java syntax rules. However, sometimes it’s not sufficient. For example, a Bash script doesn’t need an extension, making the type guess difficult. In such a case, we can define the pattern to parse the first line of the file with the header keyword.
The last resort is the magic keyword, which uses the magic database to determine the file type, in the way the file command does. So, we can identify the Bash script by the ‘Bourne-Again’ token in file output.
Files with syntax definitions are loaded into the nanorc file with the include keyword. Note, that the default /etc/nanorc configuration file doesn’t include files from the extra subfolder of the /usr/share/nano:
$ tree /usr/share/nano
.
├── asm.nanorc
# ...
├── extra
│   ├── ada.nanorc
│   ├── fortran.nanorc
│   ├── haskell.nanorc
│   ├── povray.nanorc
│   └── spec.nanorc
# ...
└── yaml.nanorc
So, if we want to highlight an Ada source file, let’s edit our local .nanorc file:
$ nano ~/.nanorcThen, we add the /usr/share/nano/ada.nanorc file to the configuration:
include /usr/share/nano/extra/ada.nanorcLet’s assume we want to disable coloring for a language, e.g. Java. As we don’t want to use the -Ynone option for all Java files, let’s overwrite the rule in the user’s .nanorc file:
$ nano ~/.nanorcThen let’s add syntax java and coloring rule – any text will be printed in white:
syntax "java" "\.java$"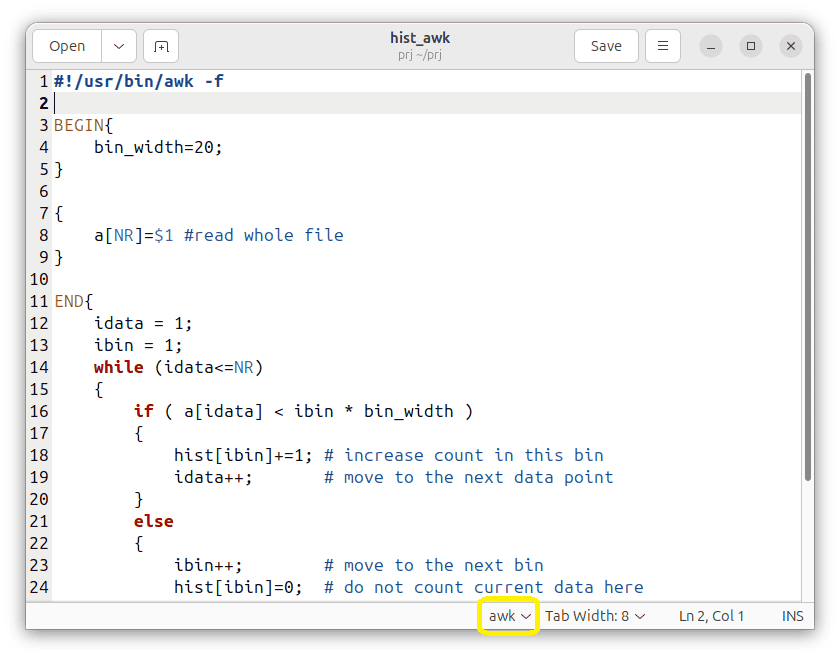
color white "^.*$"Gedit is a graphical, non-formatting text editor. As Nano, Gedit automatically detects the file type and selects appropriate highlighting. So, let’s open a histogram plotting hist_awk script written in AWK. We can check the highlight mode on the Gedit status bar:
After clicking the widget, a list of available languages appears and allows us to select one:

If we change the Gedit’s guess, the editor will remember our selection for that particular file.
The other way to set the highlighting is to navigate to the ‘View’ menu. Afterward, we should choose the ‘Highlight Mode …’ entry:

Finally, we arrive at the selection panel again:

Gedit uses an extension of GtkSourceView, a GNOME library to display and edit multiline text. The highlight rules are stored in XML files. The file language is guessed by parsing the file name and examining its MIME type.
Since version 45 of Gedit, we can find system-wide language definitions in the /usr/share/libgedit-gtksourceview-300/languages-spec folder. Similarly, we should put our custom language definitions in the ~/.local/share/libgedit-gtksourceview-300/language-specs/ directory.
In this tutorial, we learned how syntax highlighting works in Nano and Gedit. Both editors could automatically detect the source file language, and then apply adequate coloring rules.
We investigated Nano’s configuration more thoroughly. Finally, we prepared an example of disabling coloring for a given file type.
For Gedit, we ran through a pictorial guide and learned where to find its highlight patterns.