

Learn through the super-clean Baeldung Pro experience:
>> Membership and Baeldung Pro.
No ads, dark-mode and 6 months free of IntelliJ Idea Ultimate to start with.
Learn through the super-clean Baeldung Pro experience:
>> Membership and Baeldung Pro.
No ads, dark-mode and 6 months free of IntelliJ Idea Ultimate to start with.
In this short tutorial, we’ll explore how to add a vertical split in a region in a GNU screen session.
The ability to add a vertical split in a screen region was added in 4.0.1. We can verify our screen version at the command prompt with this:
$ screen -vNow, let’s go through a few different ways to add a vertical split.
First, let’s start a screen session in a Linux terminal window:
$ screenNow, let’s add a vertical split using the following key bindings:
CTRL+a CTRL+|Note the second character is a pipe character. Our current region is now split into two.
We can also split using the colon prompt. First, let’s bring up the colon prompt by typing:
CTRL+a CTRL+:Now, at the prompt, to split the region, we can type:
:split -vWe now have a vertically split region:
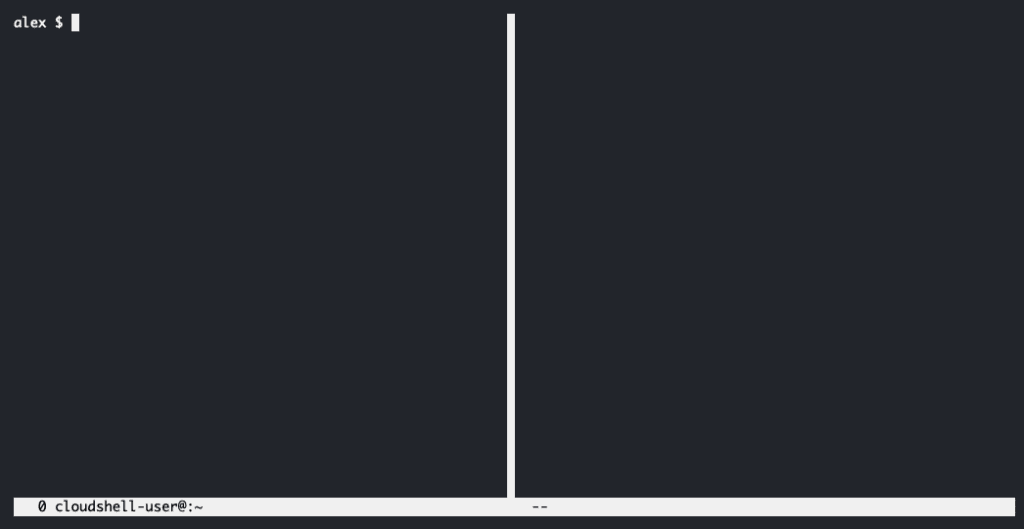
The new region does not have anything in it yet.
Now that we have two regions, we can move to the other region by typing:
CTRL+a TABNote there is no prompt in the new region, so we need to activate it. Let’s type the following to create a new prompt:
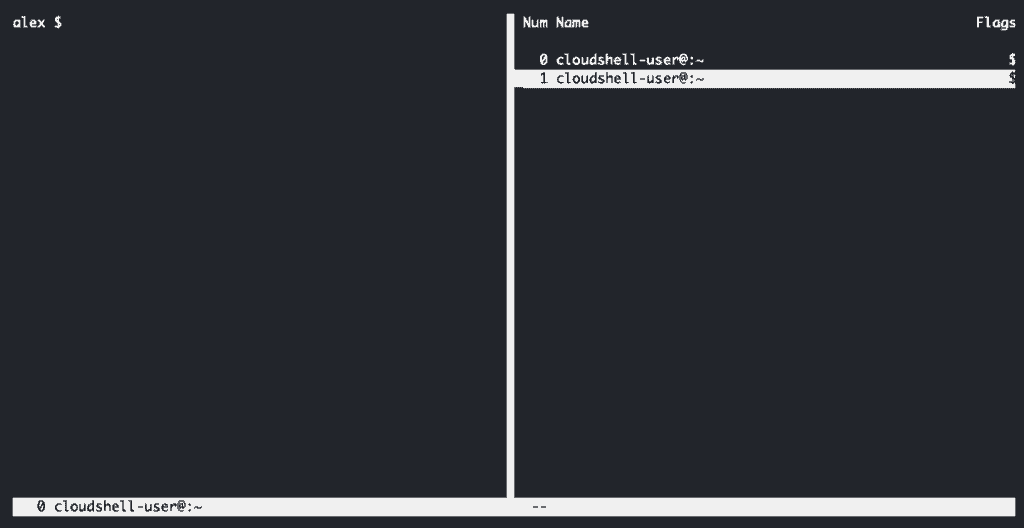
CTRL+a cNow, we have two screen regions, each with their own command prompt. We can see the list by typing:
CTRL+a "The display should show both windows, e.g.:
To solidify the concept of a new region, let’s switch back to the original prompt in the new region by typing:
CTRL+0Now let’s type some command, e.g.:
$ lsThis should now show up in both our left and right regions since both regions are showing the same screen window:

We can remove our split region by typing:
CTRL+a XNow, we should be in our original full-terminal region. While this command closes the region, any screen windows we created while in that region will still exist. Let’s double-check this by listing our windows with CTRL+a “:
Num Name                                          Flags
0 cloudshell-user@:~                                  $
1 cloudshell-user@:~                                  $
In order to actually kill a window, we can use:
CTRL+a kWe can also set up some default vertical splitting by adding commands to our .screenrc file. In the user home directory, let’s create or open the .screenrc file using vi:
cd ~ && vi .screenrcNow, let’s add commands to split the window into two regions and activate the second region. Type i to enter insert mode and then add:
split -vNow let’s save our .screenrc file and exit vi:
:wqNow, next time we start screen at the command line, we will have two regions split vertically.
In this article, we walked through how to set up vertically split regions in GNU.