

Learn through the super-clean Baeldung Pro experience:
>> Membership and Baeldung Pro.
No ads, dark-mode and 6 months free of IntelliJ Idea Ultimate to start with.
Last updated: March 18, 2024
Learn through the super-clean Baeldung Pro experience:
>> Membership and Baeldung Pro.
No ads, dark-mode and 6 months free of IntelliJ Idea Ultimate to start with.
As system administrators, it’s important to be able to quickly locate and manage files on a Linux system. Undoubtedly, this is crucial, especially when troubleshooting or managing large numbers of files. Although we can search for files without indexing, setting up search indexing allows us to quickly search and locate files.
In this tutorial, we’ll learn about using find, locate and recoll to find files. We’ll also learn how to set up search indexing using locate and recoll.
The find command is a built-in Linux utility to search and locate files. We can combine the find command with different commands to perform other operations on the files. Using find returns all the files that have the specified search keyword.
In particular, the find command works in real-time. However, it searches the actual file system by navigating through all the directories and searching each file individually to find a match. This results in the command making a lot of I/O calls.
Additionally, the command is slow because it has to search the entire file system, although the results are always up to date because there’s no need for a database.
The find command uses the following syntax:
$ find [where to search] [-options] [what to find]It’s important to realize that when using find, we need to specify the directory where find needs to start to search for files.
We can search for files using find:
$ find . -name test
./test
./test/test
We use find to search for files and directories with the name test. The period tells the command to start searching for the files in the current directory.
In the same way, we can specify the directory where find can search files:
$ find /home/john/documents/test  -name *.txt
/home/john/documents/test/file1.txt
The command searches for all files with a .txt extension in the specified directory.
Additionally, we can specify by adding the -type f option that find should only search for files:
$ find . -type f -name test
./test/test
On the contrary, we can add -type d to tell find to only search for directories:
$ find . -type d -name test
./test
As previously stated, find searches the actual filesystem, and this slows its search speed.
In Linux, we can use the locate command to quickly find files by using the filename. The command scans the available database or databases for matches and displays the results.
The updatebd command builds the databases.
The locate command is fast because it scans the database instead of searching in the actual filesystem. It also updates once a day by default, although we can manually update it. The database needs to be updated for files that have been recently updated, otherwise the locate command won’t be able to locate them.
Let’s run the command to install locate on Debian systems using apt:
$ sudo apt install mlocate Alternatively, we use yum command for Red Hat Enterprise Linux:
$ sudo yum install mlocateAfter a successful installation, we need to rebuild the database and update it with files that have been added or deleted recently:
$ sudo updatedbNotably, running the updatedb utility to update the database requires sudo privileges. By default, the database automatically updates once every day.
We search for files using the locate command by specifying the filename we are looking for:
$ locate names.txt
/home/john/names.txt
The command looks for the file name we have specified and returns all the paths that have a match. Moreover, locate searches the entire filesystem by using the database. This means we don’t need to be in a specific location or specify the path for the file when searching.
We can also enable locate to perform a case-insensitive search by adding the -i option:
$ locate -i names.txt
/home/john/names.txt
/home/john/Names.txt
/home/john/Downloads/city-names-usa.txt
Although this returns all files with the specified file name, disregarding the case-sensitivity, it may also return files that include the specified file in their name.
Furthermore, we can tell the locate command to get the first n results of matching entries by using the -n option:
$ locate "*.txt" -n 3
/home/john/names.txt
/home/john/Books.txt
/home/john/Downloads/files.txt
This displays the first three matching files that have the .txt extension.
Recoll is an open-source desktop application that’s used to search for files in Linux. Recoll indexes the documents before we can start searching for them. It’s based on Xapian, a powerful and highly adaptable toolkit used by developers to easily add indexing and search capabilities to their own applications.
Let’s run the command to install Recoll:
$ sudo apt-get install recollWe should be able to see the Recoll application on our system:

Before we start searching for files using Recoll, we need to index the files. Indexing builds a database of the files on the system. This improves the search speed because Recoll searches for the files in the database instead of the actual file system.
When we open Recoll for the first time, we are prompted to create an index:
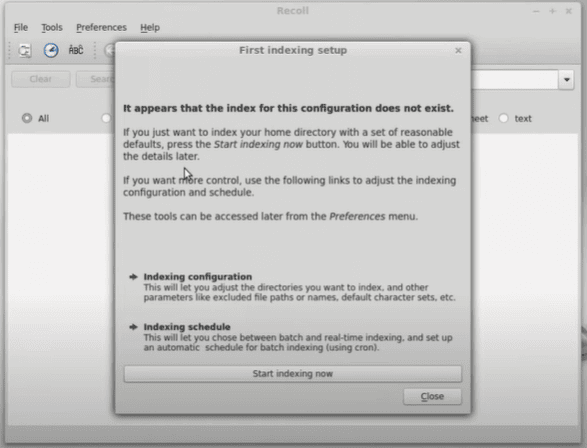
By default, indexing only indexes the files in the home directory. However, we can add more configurations for indexing by selecting Indexing configuration, although the default settings work well for most people.
Recoll takes time to index files depending on the size of the home directory.
After successfully indexing files in our home directory, we can start searching for files:
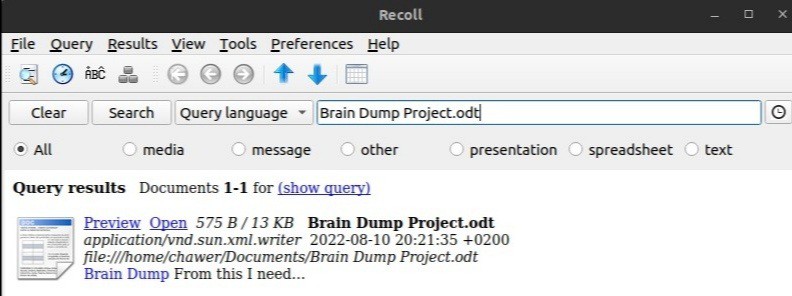
We search for a file named Brain Dump Project.odt and Recoll displays the matching search result. Additionally, Recoll has preview and open capabilities for our search results.
In this article, we learned about how to use find, locate, and recoll to search for files in Linux. We also looked at setting up search indexing using locate and recoll.