

Learn through the super-clean Baeldung Pro experience:
>> Membership and Baeldung Pro.
No ads, dark-mode and 6 months free of IntelliJ Idea Ultimate to start with.
Learn through the super-clean Baeldung Pro experience:
>> Membership and Baeldung Pro.
No ads, dark-mode and 6 months free of IntelliJ Idea Ultimate to start with.
Spending long times in front of the screen can be a really awful experience that leads to eye strain and other vision issues. It’s especially bad if we’re working in a low-light environment. Luckily, we can remedy this issue to some extent by adjusting the screen color temperature.
In this article, we’ll learn how to modify the color temperature in Linux. We’ll make use of Redshift, GNOME’s Night Light, and KDE’s Night Color.
Redshift adjusts the color temperature of the screen according to our surroundings. We can use Redshift if the window manager of our choice, like i3, doesn’t have this option. Typically, we run Redshift as a background process that reads from our custom config file.
It’s available in almost all official package repositories under its canonical name, redshift:
# Debian and derivatives
$ sudo apt install -y redshift

# Fedora and RHEL
$ sudo dnf install -y redshift

# openSUSE and derivatives
$ sudo zypper install --non-interactive redshift

# Arch Linux and derivatives
$ sudo pacman -Syu --noconfirm redshift
Once installed, let’s verify it:
$ redshift -V
redshift 1.12We can instantly set the color temperature:
$ redshift -P -O 5000The -P option resets gamma adjustments before adjusting the temperature. The -O option specifies the temperature, which is an integer between 1000 and 25000. The lower the value, the warmer the temperature.
In addition, Redshift can also change the color temperature according to our location. It employs several techniques to obtain the location of the device. If it fails, we’ll have to set the temperature manually, as we saw earlier.
Usually, we pass it the latitude and longitude of a location, respectively:
$ redshift -l 33.72:73.04We can obtain the latitude and longitude for our location from GeoNames.
We invoke the command every time we reboot the machine. So, it would be more convenient if we autostart the process on boot. For that reason, we simply create a desktop entry in ~/.config/autostart:
[Desktop Entry]
Type=Application
Exec=/usr/bin/redshift redshift -l 33.72:73.04  -P -O 5000
Hidden=true
NoDisplay=false
X-GNOME-Autostart-enabled=true
Name=Redshift
Next, we make the file executable:
$ chmod +x ~/.config/autostart/redshift.desktopThat’s it! It starts every time we log in.
Alternatively, we can make this process more sleek by having a config file. Redshift provides the -c option, which reads the config from a file.
Conventionally, we put the file in the ~/.config directory:
$ mkdir -p ~/.config/redshift && vim ~/.config/redshift/redshift.confNext, we put the required options in this file:
[redshift]
temp-day=6000
temp-night=5000
fade=1
location-provider=manual

[manual]
lat=34.7
lon=72.3
Next, we’ll adjust the desktop entry to read the file instead:
...
Exec=/usr/bin/redshift -c ~/.config/redshift/redshift.conf
...On some desktop environments like GNOME and KDE, this feature is available out of the box. Usually, it’s called night shift, night light, or night color.
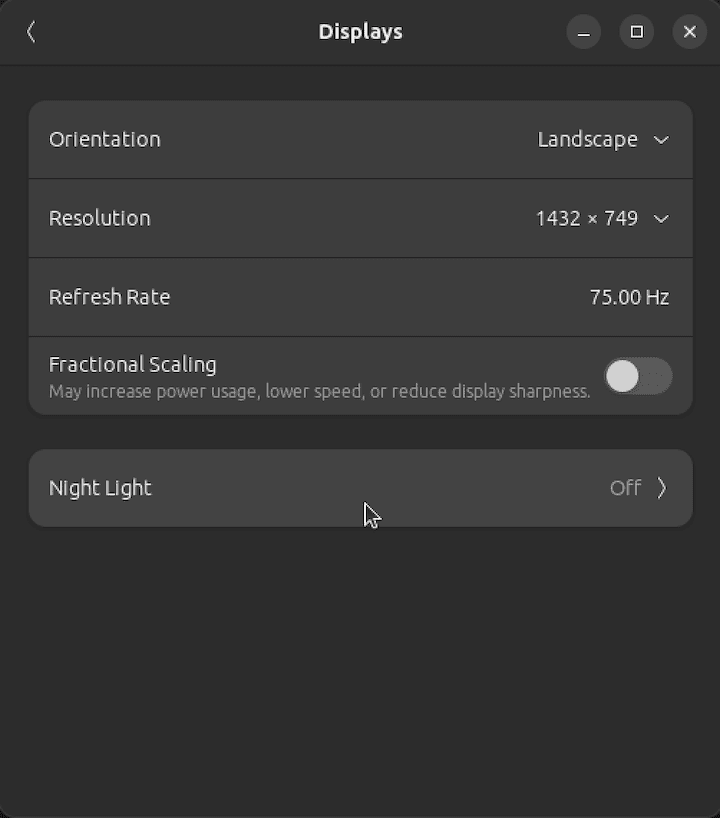
In GNOME Settings, we can navigate to Displays → Night Light:
In the Night Light panel, we can adjust the settings accordingly:
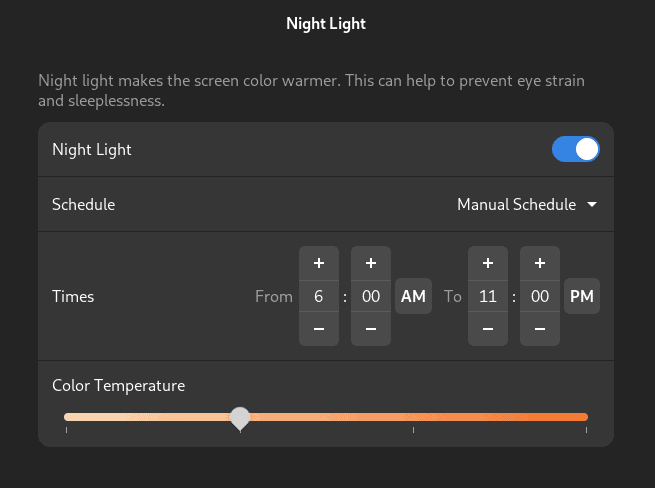
Additionally, we can also set a schedule to toggle Night Light.
Similarly, we can turn it on from the Display settings in KDE. It’s labeled as Night Color:
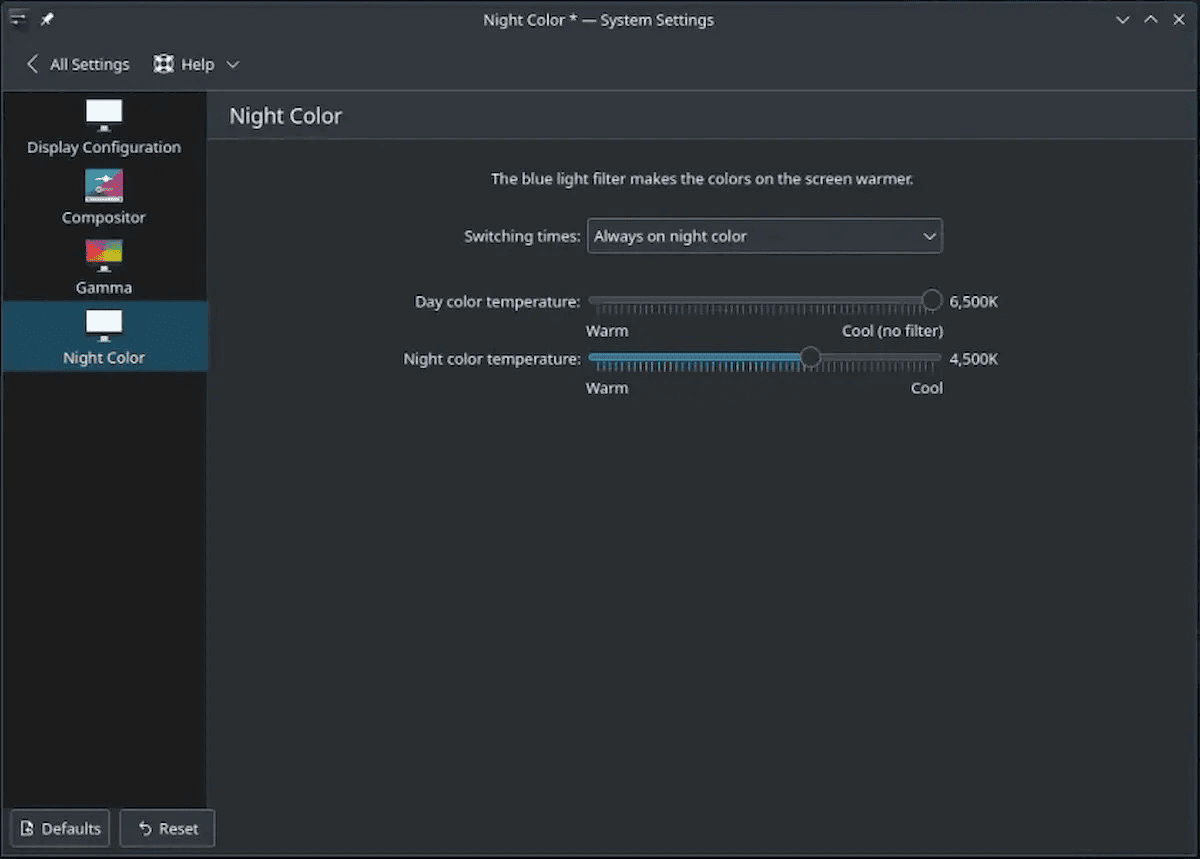
Currently, there are no settings to toggle this option based on a set schedule.
In this tutorial, we learned how to adjust the color temperature of the screen in Linux. For that purpose, we discussed the Redshift tool as well as the built-in implementation of the feature in GNOME and KDE.