

Learn through the super-clean Baeldung Pro experience:
>> Membership and Baeldung Pro.
No ads, dark-mode and 6 months free of IntelliJ Idea Ultimate to start with.
Learn through the super-clean Baeldung Pro experience:
>> Membership and Baeldung Pro.
No ads, dark-mode and 6 months free of IntelliJ Idea Ultimate to start with.
PDF files are known for their portability when it comes to viewing. Specifically, PDF files always maintain a consistent page layout and typeset across different devices.
Although PDF files cannot be easily edited like a Word document, a PDF file can be annotated to enrich the document. For example, one can sign a PDF document by inserting a signature image file into a page on the PDF document.
In this tutorial, we’ll look at how to add a separate image file into a PDF file using the different GUI tools in Linux.
There are different ways we can sign a PDF document. One such way is to scan our signature as an image file and then add the signature image into a PDF document.
Specifically, we want the image to be inserted into an area of an existing page of a PDF document instead of inserting the image as a new page in the PDF document. For adding an image as a new page, we can use PDF merge solutions.
To demonstrate the different methods for adding images into a PDF document, we’ll first get a simple PDF file with a dedicated area for signature:
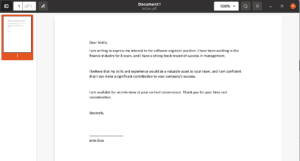
The goal is to place a small PNG image of our signature on a blank space for signature in the document:

For the purpose of this tutorial, we’ll only look at graphical user interface (GUI) tools for solving our problem.
Xournal is a cross-platform, open-source, and free software for note-taking and sketching using a stylus. Besides note-taking and sketching, the Xournal also supports annotating an existing PDF document. For example, highlighting text, adding notes, and inserting images.
Xournal distributes the program in various formats, such as Snap, Flatpak, and distro native packages. For this tutorial, we’ll install the program using the Flatpak package.
To install, we can use the flatpak install command:
$ flatpak install flathub com.github.xournalpp.xournalppOnce the command is completed, we can start the program using the flatpak run command:
$ flatpak run com.github.xournalpp.xournalppThe first thing we have to do is to import the PDF file onto the Xournal program. To do that, first press on the File button on the top menu bar, and then select Annotate PDF.
Then, on the file explorer window, we navigate to our PDF files and double-click to import the PDF file:
With the PDF imported, we can insert the signature image file. To do that, select the Tool button on the top menu bar and press Image. Then, navigate to the location of the image on our system and double-click to insert it into the PDF file.
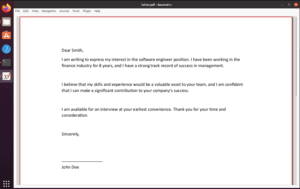
When the image is inserted, the size and location will be at the default location:
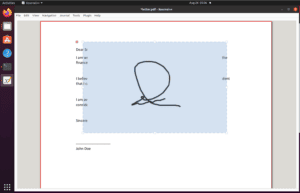
Using the cursor, we can resize and move the image to the desired location.
Finally, to save the document, we can select File -> Export as PDF on the top menu bar. This option will write the PDF into a separate file instead of overwriting the initial PDF file.
Scribus is a free and open-source desktop publishing software. In contrast to Xournal, Scribus is not for usual word processing purposes. Instead, Scribus is designed for preparing documents’ layouts and images to be printed by professional printing equipment.
Nevertheless, Scribus can handle simple PDF annotations, just like Xournal.
Scribus is available in different formats, such as Snap and Flatpak. For the purpose of this tutorial, we’ll install it using flatpak install and start the program using flatpak run:
$ flatpak install flathub net.scribus.Scribus
$ flatpak run net.scribus.ScribusBy default, the Scribus program opens with a dialogue. In the dialogue, there are several tabs for creating or loading documents.
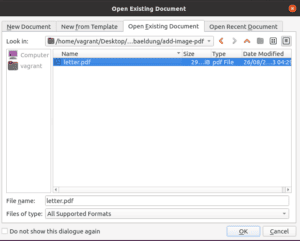
To import an existing PDF file, we’ll choose Open Existing Document and navigate to our PDF file to import it:
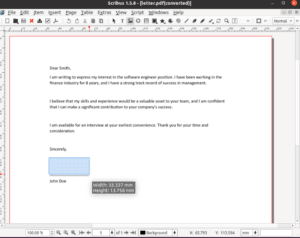
Before we insert the image file, we’ll have to draw an image frame on our document. This image frame will decide where to place the inserted image and how much of the image to show.
To draw an image frame, select Insert and then Image Frame on the menu bar. Our cursor will change to a plus sign with an image icon. Press and drag to draw the image frame at the signature area on the document:
Once we’ve drawn the frame, we can insert the image into the frame. Right-click on the frame, and select Content -> Get Image:
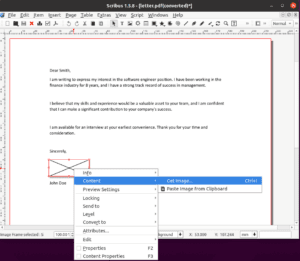
A file explorer dialogue will pop up, and we’ll need to navigate to the image file location and double-click on the file.
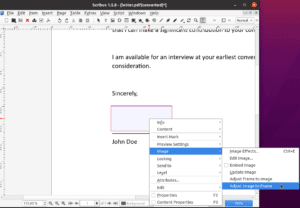
If the image is not showing up on the frame, it’s because the image is outside of the frame. To fit the image to the frame, right-click on the frame and select Image -> Adjust Image to Frame:
Finally, we can export our changes as PDF by selecting File -> Export -> Save as PDF to persist our changes.
In this tutorial, we’ve looked at the problem of inserting an image into an existing PDF file. Then, we looked at two different tools, the Xournal and LibreOffice programs.
Both the Xournal and LibreOffice software are free and open source. Besides that, they support basic PDF annotation, and in our case, the insertion of images onto an existing PDF file. Generally, the process is to first import the PDF file, insert the image, and export the document as PDF.
For our specific problem, there are not many differences between the two different tools. Therefore, we can choose either one to get the job done.