

Learn through the super-clean Baeldung Pro experience:
>> Membership and Baeldung Pro.
No ads, dark-mode and 6 months free of IntelliJ Idea Ultimate to start with.
Last updated: October 29, 2024
Learn through the super-clean Baeldung Pro experience:
>> Membership and Baeldung Pro.
No ads, dark-mode and 6 months free of IntelliJ Idea Ultimate to start with.
In this tutorial, we’ll look at forwarding traffic through an OpenVPN tunnel using iptables. First, we’ll configure the VPN tunnel. Then, we’ll configure network rules to direct specific or all traffic through the VPN interface. This is crucial for routing internet traffic or certain subnets securely through a VPN connection. This setup secures outgoing traffic, protects privacy, and allows devices on the local network to use the VPN connection without needing individual configurations.
OpenVPN is an open-source software application that allows the creation of secure virtual private networks (VPNs). It provides encrypted connections over the internet, ensuring that data transmitted between devices or networks remains private and secure. OpenVPN supports site-to-site and remote access configurations, making it a versatile tool for creating secure links between remote computers, mobile devices, or entire networks. Additionally, it runs on a server-client model. We can configure OpenVPN via a graphical user interface (GUI) or a terminal.
We can use the GUI to configure and connect to OpenVPN. To begin, we need to install the OpenVPN plugin for Network Manager, which will allow us to manage VPN connections through the GUI:
$ sudo apt install network-manager-openvpn-gnomeWe’ve installed the network-manager-openvpn-gnome to integrate OpenVPN functionality into the Network Manager GUI on Linux systems that use a GNOME desktop environment. This package allows users to easily configure, manage, and connect to OpenVPN networks through a graphical interface, without relying on the command line. Let’s open Settings and look for Network Settings:
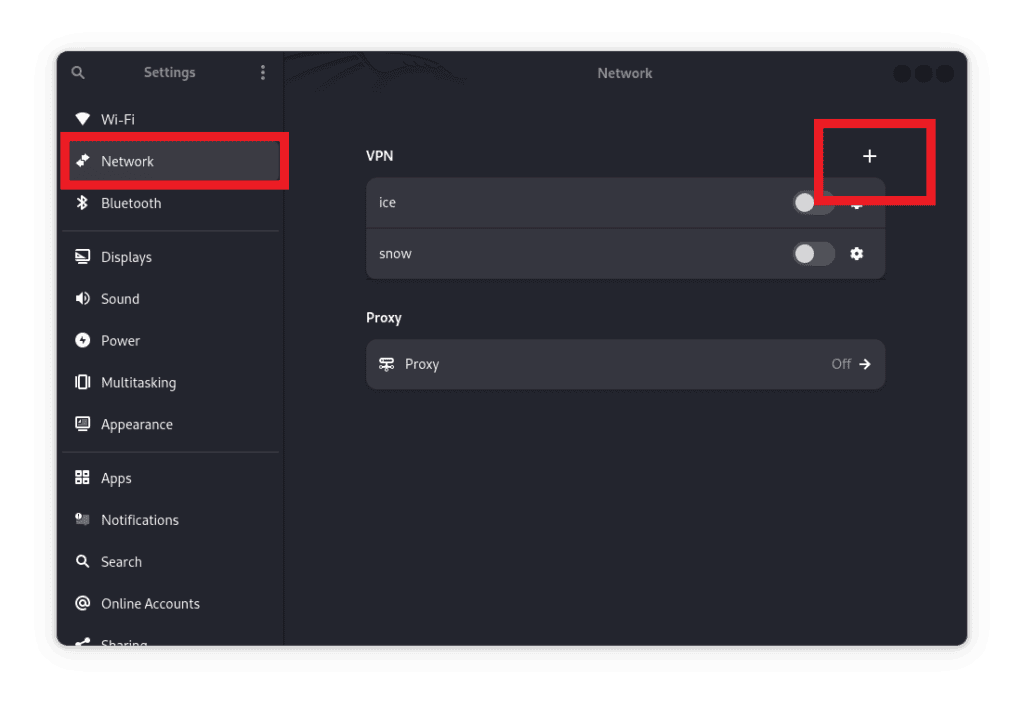
Next, let’s navigate to VPN and click + to add a new VPN connection. Let’s scroll as we look for the option that allows us to import configurations from a file:

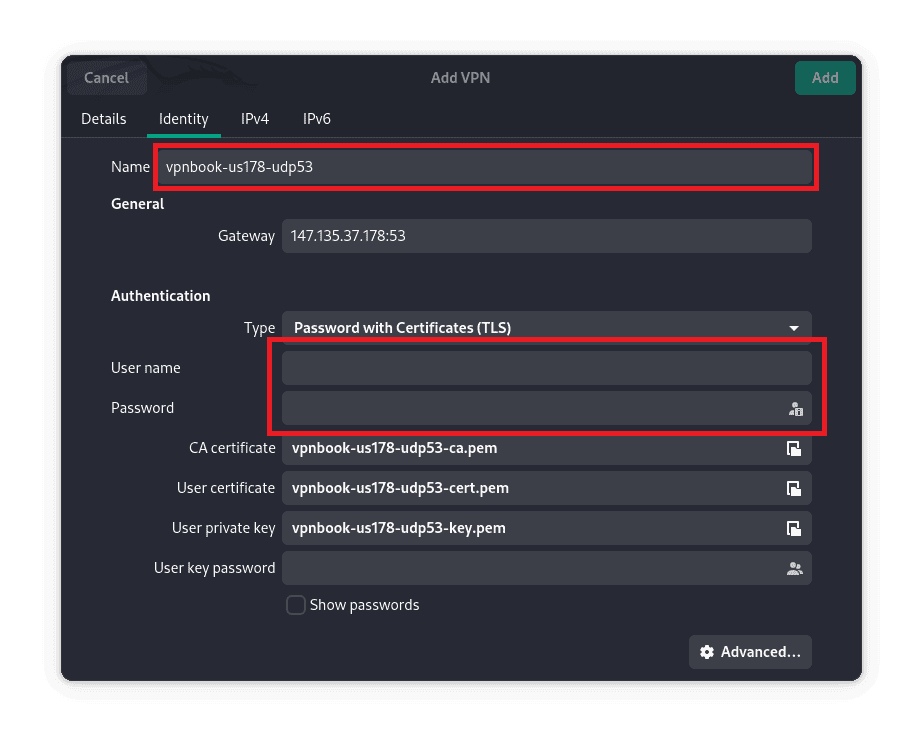
Once we have chosen ‘Import from file’, we can select the .ovpn configuration file we have downloaded from our preferred VPN provider. For this example, we’ll use VPNbook:

Next, let’s enter the VPN username and password, then save the connection. We can also rename the file to any name of our choice:
We can give it any name of our choice. This is to make it easier to identify the VPN we’re using in case we have multiple of them set up:
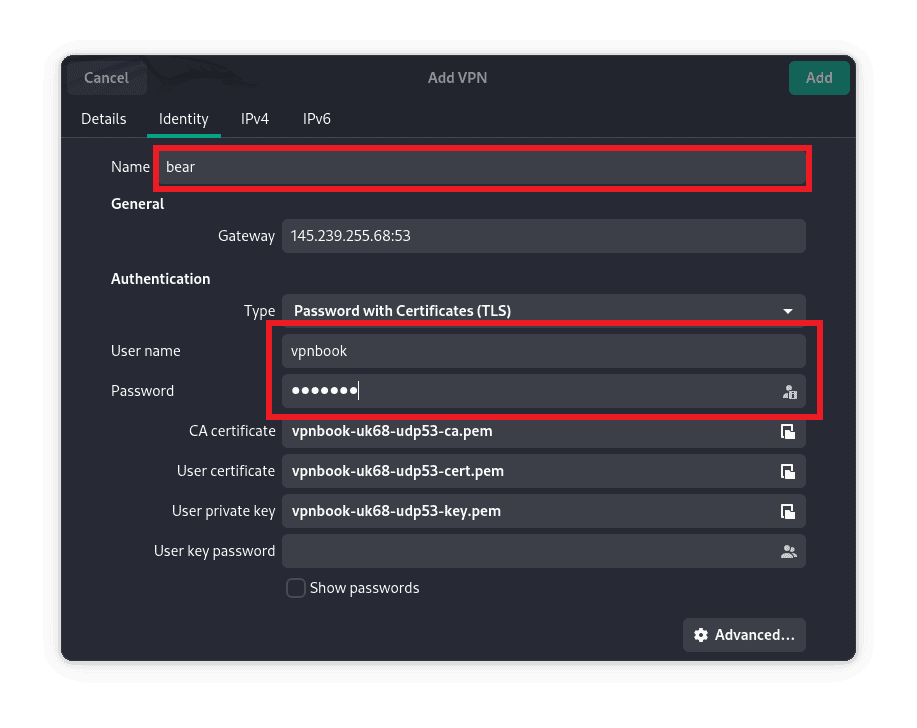
Once, we’ve renamed it, let’s save the configurations by clicking on the top right button labeled add:

The VPN we’ve created has been added to the list of available VPNs:
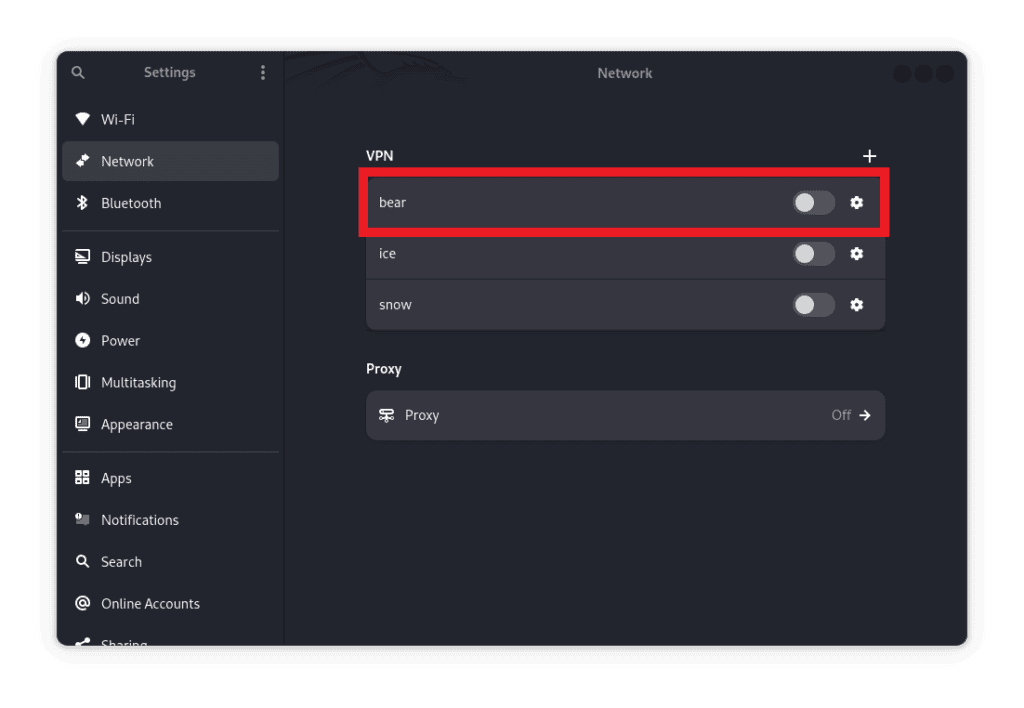
Now, let’s enable it by activating the toggle button:

Lastly, let’s verify if the VPN is up:
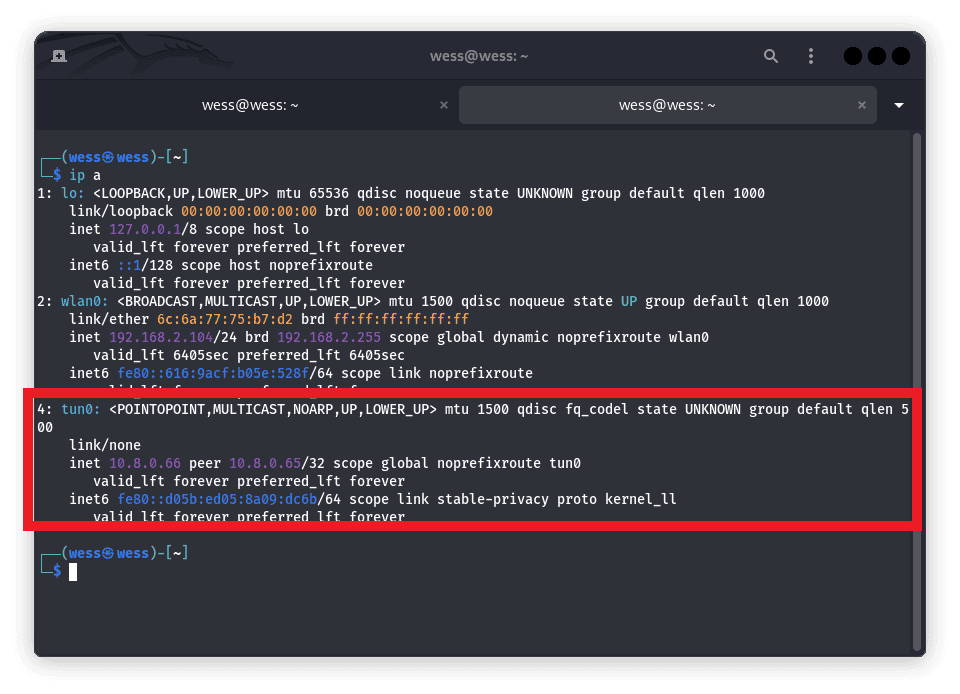
From the image above, we’ve run the ‘ip a’ command which lists all the available interfaces. We can see a new interface named tun0 which is the VPN interface and it’s up.
Let’s install and run OpenVPN through the terminal. Firstly, let’s install the following packages:
$ sudo apt update
$ sudo apt install openvpn
Let’s download the VPN configuration files from our chosen VPN provider. For this example, we’ll use the If we use OpenVPN configuration files from VPNbook, and extract them into a known directory. For this section, we’ll use the ones we downloaded earlier. Let’s create a directory to store our OpenVPN configuration files:
$ sudo mkdir /etc/openvpn
$ sudo mv ~/Downloads/vpn/* /etc/openvpn/
Each of the .ovpn files contains all the necessary server information we need. We only need to provide login credentials. VPNBook, for instance, offers public login credentials that are updated regularly. To make our work easier, we can create a text file with the login information and reference it in the configuration:
$ sudo vi /etc/openvpn/pass.txt
username
password
Now, let’s edit the .ovpn configuration file to point to this credentials file by adding the following line:
$ auth-user-pass /etc/openvpn/pass.txtNow, let’s start the OpenVPN service by running the following command:
$ sudo openvpn --config /etc/openvpn/vpnbook-us178-udp53.ovpnOnce we’ve run this command, our interface should be up. We can verify it using the ip command.
To forward traffic to an OpenVPN tunnel using iptables, we’ll need to configure the appropriate iptables rules. This ensures that traffic from the VPN clients can reach the internal network or the internet, depending on our use case. Since we’ve configured our OpenVPN and it’s running, let’s set up IP forwarding.
IP forwarding is a process where a computer or network device, such as a router, forwards data packets from one network to another. It enables a device to act as a gateway or intermediary between different networks, allowing communication between them. This process is essential for enabling devices on one network to send data to devices on a different network. We’ll set up iptables to handle the forwarding of packets between the VPN network and other networks (e.g., internal networks or the internet). Firstly, let’s enable IP forwarding, it’s disabled by default. This will temporarily enable it till the next boot:
$ echo 1 > /proc/sys/net/ipv4/ip_forwardLet’s update the following line in the /etc/sysctl and save these settings.conf file. This makes the change persistent even after reboot:
$ net.ipv4.ip_forward=1Then, let’s apply the changes:
$ sysctl -pBy adding one to this file, we’re telling the Linux kernel to enable IP forwarding, allowing the system to route packets between different network interfaces.
Now, let’s create iptables rules to handle the traffic from the VPN clients. Firstly, let’s create a rule to allow VPN clients to access the internet or other networks by masquerading their traffic. This ensures that outgoing traffic from VPN clients appears as if it is coming from the VPN server’s external IP address:
$ iptables -t nat -A POSTROUTING -s 10.8.0.0/24 -o eth0 -j MASQUERADEThese flags perform the following actions:
Next, we’ll allow forwarding between the VPN interface (tun0) and other available networks. This rule ensures VPN clients forward traffic through the proper interface.
$ iptables -A FORWARD -i tun0 -o eth0 -j ACCEPTThe following options stand for:
Following, let’s allow traffic from the internal network to reach the VPN clients. This is useful when we have internal resources (e.g., web servers) that VPN clients need to access.
$ iptables -A FORWARD -i eth0 -o tun0 -m state --state RELATED,ESTABLISHED -j ACCEPTThe flags above perform the following functions:
For added security, we can drop any invalid traffic that does not match our established forwarding rules:
$ iptables -A FORWARD -m state --state INVALID -j DROPThe “-m state –state INVALID” matches invalid packets while “-j DROP” immediately drops the packets. Lastly, let’s save the iptables rules:
$ iptables-save > /etc/iptables/rules.v4In this tutorial, we looked at how to configure OpenVPN and forward traffic. We also discussed how using iptables, the above configuration allows traffic from VPN clients to be forwarded to various networks. Additionally, we looked at how each rule plays a specific role in ensuring traffic is routed correctly, with NAT and forwarding rules in place to handle traffic flow securely and seamlessly.