

Learn through the super-clean Baeldung Pro experience:
>> Membership and Baeldung Pro.
No ads, dark-mode and 6 months free of IntelliJ Idea Ultimate to start with.
Learn through the super-clean Baeldung Pro experience:
>> Membership and Baeldung Pro.
No ads, dark-mode and 6 months free of IntelliJ Idea Ultimate to start with.
Nagios is an open-source solution that monitors network applications, services, and vital network devices. Further, it identifies faults and promptly notifies users upon detecting suspicious activities. Notably, it ensures that notifications are dispatched once devices or services resume functioning.
It works on a Server/Agent architecture. In particular, the server hosting Nagios (core) utilizes plugins to communicate with remote hosts through agents such as the Nagios Remote Plugin Executor. Moreover, the user interface visually represents the final reports generated from the logs.
In this tutorial, we’ll install and configure Nagios to monitor host resources via Nagios’ web interface. Additionally, we’ll set up the Nagios Remote Plugin Executor (NRPE) to monitor their resources. Notably, we’ll be using Kali Linux for illustrations. Nevertheless, the same process will work in other Linux distros.
We first obtain and install some required packages on the Linux system to install Nagios successfully. Additionally, ensuring that the system is up-to-date is a good practice before installing.
First, let’s start by updating the system to fetch the latest package information from all configured sources:
$ sudo apt updateThe update subcommand fetches the latest package information from all configured sources.
Next, we install the necessary packages required for setting up Nagios:
$ sudo apt install wget unzip curl openssl build-essential libgd-dev libssl-dev libapache2-mod-php php-gd php apache2 -yThe command installs the essential packages required for setting up Nagios, including tools such as wget, unzip, and curl, along with necessary libraries and Apache modules.
Further, we download the Nagios Core setup files from the official release site. We use the wget command to download the latest version of Nagios Core:
$ wget https://github.com/NagiosEnterprises/nagioscore/releases/download/nagios-4.5.1/nagios-4.5.1.tar.gzThe command installs the latest version available for Nagios on the Nagios Core release site. As of the time of writing this article, the version is nagios-4.5.1.
Let’s use the tar command to extract the downloaded files:
$ sudo tar -zxvf nagios-4.5.1.tar.gz

nagios-4.5.1/
nagios-4.5.1/.gitignore
nagios-4.5.1/.travis.yml
nagios-4.5.1/CONTRIBUTING.md
nagios-4.5.1/Changelog
nagios-4.5.1/INSTALLING
nagios-4.5.1/LEGAL
nagios-4.5.1/LICENSE
...
This command extracts the downloaded Nagios Core files and prepares them for installation.
With the files extracted, we navigate to the setup directory and execute the Nagios Core configure script to prepare for installation:
$ cd nagios-4.5.1
$ sudo ./configure
...
 General Options:
 -------------------------
        Nagios executable:  nagios
        Nagios user/group:  nagios,nagios
       Command user/group:  nagios,nagios
             Event Broker:  yes
        Install ${prefix}:  /usr/local/nagios
    Install ${includedir}:  /usr/local/nagios/include/nagios
                Lock file:  /run/nagios.lock
   Check the result directory:  /usr/local/nagios/var/spool/checkresults
           Init directory:  /lib/systemd/system
  Apache conf.d directory:  /etc/apache2/sites-available
             Mail program:  /usr/bin/mail
                  Host OS:  linux-gnu
          IOBroker Method:  epoll

 Web Interface Options:
 ------------------------
                 HTML URL:  http://localhost/nagios/
                  CGI URL:  http://localhost/nagios/cgi-bin/
 Traceroute (used by WAP):  /usr/sbin/traceroute


Review the options above for accuracy.  If they look okay,
type 'make all' to compile the main program and CGIs.
This script configures Nagios Core according to the system’s specifications, setting the stage for installation.
Furthermore, let’s proceed to compile the main program and CGI and install each of them.
First, we use the make command to compile Nagios Core:
$ sudo make allThe command compiles the main program and CGIs of Nagios Core, preparing them for installation.
Next, we install the necessary groups and users for Nagios:
$ sudo make install-groups-users

groupadd -r nagios
useradd -g nagios nagios
This ensures appropriate groups and users are set up on the system to run Nagios.
Further, let’s add the Apache user (www-data) to the Nagios group we created:
$ sudo usermod -a -G nagios www-dataNow, let’s install Nagios Core:
$ sudo make install
...
You can continue with installing Nagios as follows (type 'make'
without any arguments for a list of all possible options):

  make install-init
     - This installs the init script in /lib/systemd/system

  make install-commandmode
     - This installs and configures permissions on the
       directory for holding the external command file

  make install-config
     - This installs sample config files in /usr/local/nagios/etc

make[1]: Leaving directory '/home/kali/nagios-4.5.1'
The command installs Nagios Core components on the system, making them accessible for monitoring purposes.
Next, we install the Nagios initialization script:
$ sudo make install-init
/usr/bin/install -c -m 755 -d -o root -g root /lib/systemd/system
/usr/bin/install -c -m 755 -o root -g root startup/default-service /lib/systemd/system/nagios.service
The command ensures Nagios starts automatically upon system boot.
Additionally, let’s install command mode for Nagios:
$ sudo make install-commandmode
/usr/bin/install -c -m 775 -o nagios -g nagios -d /usr/local/nagios/var/rw
chmod g+s /usr/local/nagios/var/rw

*** External command directory configured ***
The command allows Nagios to carry out monitoring effectively.
Furthermore, let’s also install the configuration files for Nagios:
$ sudo make install-config
/usr/bin/install -c -m 775 -o nagios -g nagios -d /usr/local/nagios/etc
/usr/bin/install -c -m 775 -o nagios -g nagios -d /usr/local/nagios/etc/objects
...
Again, let’s install Apache configuration files for Nagios:
$ sudo make install-webconf
/usr/bin/install -c -m 644 sample-config/httpd.conf /etc/apache2/sites-available/nagios.conf
if [ 1 -eq 1 ]; then \
        ln -s /etc/apache2/sites-available/nagios.conf /etc/apache2/sites-enabled/nagios.conf; \
fi

*** Nagios/Apache conf file installed ***
The command configures Apache to work seamlessly with Nagios, enabling access to the Nagios web interface.
Further, we enable various Apache modules required for Nagios to function correctly:
$ sudo a2enmod rewrite
$ sudo a2enmod cgi
$ sudo systemctl restart apache2
Enabling these modules and restarting Apache ensures that Nagios can utilize the required functionalities.
Finally, let’s create a Nagios admin user and set the password:
$ sudo htpasswd -c /usr/local/nagios/etc/htpasswd.users admin

New password:
Re-type new password:
Adding password for user admin
We’re prompted to enter a new password for the admin user. Afterward, the admin user is created with the provided password. Further, the user is granted administrative access to the Nagios web interface.
Now, let’s install Nagios Plugins to enhance its monitoring capabilities.
Firstly, we download the Nagios Core plugin. Further, to obtain the latest plugins, let’s visit the plugins download page and download the desired version with the wget command:
$ cd ~/
$ wget https://nagios-plugins.org/download/nagios-plugins-2.4.9.tar.gz
Next, let’s use the tar command to extract the downloaded files:
$ sudo tar -zxvf nagios-plugins-2.4.9.tar.gz
[sudo] password for kali:
nagios-plugins-2.4.9/
nagios-plugins-2.4.9/build-aux/
nagios-plugins-2.4.9/build-aux/compile
nagios-plugins-2.4.9/build-aux/config.guess
nagios-plugins-2.4.9/build-aux/config.rpath
nagios-plugins-2.4.9/build-aux/config.sub
nagios-plugins-2.4.9/build-aux/install-sh
nagios-plugins-2.4.9/build-aux/ltmain.sh
...
This command extracts the downloaded Nagios Core Plugins files and prepares them for installation.
Further, we configure and compile the Nagios Core plugins.
Let’s navigate to the extracted plugins’ directory and execute the plugin configure script with appropriate options:
$ cd nagios-plugins-2.4.9
$ sudo ./configure --with-nagios-user=nagios --with-nagios-group=nagios

checking for a BSD-compatible install... /usr/bin/install -c
checking whether the build environment is sane... yes
checking for a thread-safe mkdir -p... /usr/bin/mkdir -p
checking for gawk... gawk
checking whether make sets $(MAKE)... yes
checking whether make supports nested variables... yes
checking whether to enable maintainer-specific portions of Makefiles... yes
checking build system type... x86_64-pc-linux-gnu
checking host system type... x86_64-pc-linux-gnu
...
Then, we use the make command to compile the Nagios Core plugins:
$ sudo make
...
make[2]: Leaving directory '/home/kali/nagios-plugins-2.4.9/plugins-root'
Making all in po
make[2]: Entering directory '/home/kali/nagios-plugins-2.4.9/po'
make[2]: Nothing to be done for 'all'.
make[2]: Leaving directory '/home/kali/nagios-plugins-2.4.9/po'
make[2]: Entering directory '/home/kali/nagios-plugins-2.4.9'
make[2]: Leaving directory '/home/kali/nagios-plugins-2.4.9'
make[1]: Leaving directory '/home/kali/nagios-plugins-2.4.9'Finally, let’s install the compiled plugins onto the system:
$ sudo make install

Making install in gl
make[1]: Entering directory '/home/kali/nagios-plugins-2.4.9/gl'
make  install-recursive
make[2]: Entering directory '/home/kali/nagios-plugins-2.4.9/gl'
make[3]: Entering directory '/home/kali/nagios-plugins-2.4.9/gl'
make[4]: Entering directory '/home/kali/nagios-plugins-2.4.9/gl'
...
Now, the plugins for Nagios are successfully installed. Nevertheless, we need one more plugin to monitor remote servers.
Now, let’s install the check_nrpe plugin on the Nagios server. The check_nrpe plugin enables communication between the Nagios server and remote host via NRPE (Nagios Remote Plugin Executor).
Firstly, we need to obtain the latest stable release of NRPE.
Let’s navigate to the GitHub page to find the download URL and then download it to the home directory using curl:
$ cd ~
$ curl -L -O https://github.com/NagiosEnterprises/nrpe/releases/download/nrpe-4.1.0/nrpe-4.1.0.tar.gz
Once downloaded, we extract the NRPE archive:
$ tar zxf nrpe-4.1.0.tar.gz
This command extracts the downloaded Nagios check_nrpe Plugins files and prepares them for installation.
Next, we navigate to the extracted NRPE directory and configured the check_nrpe plugin:
$ cd nrpe-3.2.1
$ ./configure
checking for a BSD-compatible install... /usr/bin/install -c
checking what the operating system is ... linux
...
Once configured, we proceed to build and install the check_nrpe plugin:
$ make check_nrpe
$ sudo make install-plugin
...
make[1]: Entering directory '/home/kali/nrpe-4.1.0/src'
/usr/bin/install -c -m 755 -d /usr/local/nagios/bin
/usr/bin/install -c -m 755 ../uninstall /usr/local/nagios/bin/nrpe-uninstall
/usr/bin/install -c -m 775 -o nagios -g nagios -d /usr/local/nagios/libexec
/usr/bin/install -c -m 775 -o nagios -g nagios -d /usr/local/nagios/libexec
/usr/bin/install -c -m 775 -o nagios -g nagios check_nrpe /usr/local/nagios/libexec
make[1]: Leaving directory '/home/kali/nrpe-4.1.0/src'
This has successfully installed the check_nrpe plugin in the Nagios server.
Furthermore, let’s configure the Nagios server.
Let’s perform the initial Nagios configuration, which involves editing configuration files. To clarify, This is performed once on the Nagios server.
Firstly, we open the main Nagios configuration file with a text editor:
$ sudo nano /usr/local/nagios/etc/nagios.cfgNext, we find the line in the file and uncomment this line by deleting the # character from the front of the line:
#cfg_dir=/usr/local/nagios/etc/serversThen, we save and close the file.
Further, let’s create a directory to store the configuration file for each server that will be monitored:
$ sudo mkdir /usr/local/nagios/etc/serversNext, we open the contacts configuration with a text editor:
$ sudo nano /usr/local/nagios/etc/objects/contacts.cfgThen, we find the email directive and replace its value with our email address:
define contact {

    contact_name            nagiosadmin             ; Short name of user
    use                     generic-contact         ; Inherit default values from a generic-contact template (defined>
    alias                   Nagios Admin            ; Full name of the user
    email                   [email protected] ; <<***** CHANGE THIS TO YOUR EMAIL ADDRESS ******
}
Afterwards, we save and close the text editor.
Finally, we add a new command to the Nagios configuration to use the check_nrpe command in Nagios service definitions.
We open the /usr/local/nagios/etc/objects/commands.cfg file:
$ sudo nano /usr/local/nagios/etc/objects/commands.cfg
Then, we add the following to the end of the file to define a new command called check_nrpe:
define command{
    command_name check_nrpe
    command_line $USER1$/check_nrpe -H $HOSTADDRESS$ -c $ARG1$
}
This defines the name and specifies the command-line options to execute the plugin.
Then, we start the Nagios and enable it to start when the server boots:
$ sudo systemctl start nagios
Finally, to confirm nagios is running successfully, we use the systemctl to check the status:
$ systemctl status nagios

● nagios.service - Nagios Core 4.5.1
     Loaded: loaded (/usr/lib/systemd/system/nagios.service; disabled; preset: disabled)
     Active: active (running) since Fri 2024-04-05 07:48:20 EDT; 58s ago
       Docs: https://www.nagios.org/documentation
    Process: 1489981 ExecStartPre=/usr/local/nagios/bin/nagios -v /usr/local/nagios/etc/nagios.cfg (code=exited, st>
    Process: 1489982 ExecStart=/usr/local/nagios/bin/nagios -d /usr/local/nagios/etc/nagios.cfg (code=exited, statu>
   Main PID: 1489984 (nagios)
...
Nagios is now running.
Now, we open a browser and go to the Nagios server by visiting http://localhost/nagios:
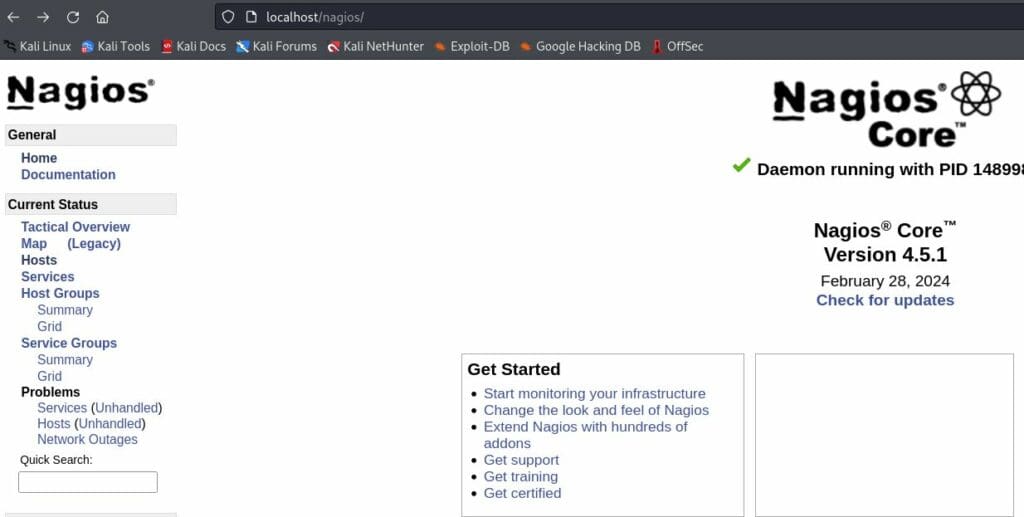
It prompts for login credentials. Then, we use admin for the username and the password we created earlier for the user.
After authentication, we see the default Nagios home page.
In this article, we looked at the step-by-step process of installing, configuring, and setting up Nagios for network monitoring on a Linux system. Additionally, we also configured various plugins for efficient deployment and configuration. With Nagios’s user-friendly interface and robust functionality, it is an invaluable tool for maintaining the health and security of network infrastructures.