

Yes, we're now running our only Summer Sale. All Courses are 30% off until 20th July, 2026:
How to Move Every File That Is Not a Directory
Last updated: March 18, 2024
Learn through the super-clean Baeldung Pro experience:
>> Membership and Baeldung Pro.
No ads, dark-mode and 6 months free of IntelliJ Idea Ultimate to start with.
1. Overview
In Linux, moving files is common for system administrators. For instance, we might do this during reorganizing or cleaning up the computer filesystem. However, sometimes it might be necessary only to move files while excluding directories. This task requires a delicate approach so that we can move these files safely and efficiently.
In this tutorial, we’ll discuss the different ways to move every file that’s not a directory.
2. Moving Every File That’s Not a Directory
The Linux operating system treats everything as a file, directories included. However, when we mention files in this article, it means the normal ones defined by the various file extensions. Meanwhile, the directories are simply containers that hold these regular files and other directories. Here, we explore a few commands that will show us how to move files while excluding the directories present.
First, we’ll start by reviewing how to move files in Linux using the mv command. It allows us to transfer one or more files from one location to another. While executing this command, we’re required to specify both the source and destination files:
$ mv baeldung.txt destination_folder/In this example, we’ll move the baeldung.txt file from our current directory to the destination_folder directory. If the destination directory is absent, we get an error instead:
$ mv baeldung.txt destination_folder/
mv: cannot move 'baeldung.txt' to 'destination_folder/': Not a directory
This error appears because we included a / after our destination name in the command. Thus, without the /, the mv command renames the source file baeldung.txt to destination_folder.
2.1. Combining mv With the find Command
Since we now have an idea of how to move files, let’s discuss moving them while ignoring the present directories. For this, we need the find command to search for the files. Also, it provides the option to define specific criteria for the search. In this case, the criteria for our search will be to isolate the regular files from the directories.
First, we change to the desired directory:
$ cd ~/DocumentsIn this example, the cd command enables us to change our current working directory to Documents.
Once we’re in the desired directory, we can proceed to move the files:
$ find . -type f -exec mv {} /destination_folder/ \;Let’s have a look at these parameters:
- . – declares the current working directory as the starting point for the search
- -type f – specifies that we want to search for only the regular files
- -exec mv {} /destination_folder/ \; – ensures the mv command is executed for each file found. {} is replaced by the filename while /path is the placeholder for where to move our files to. Finally, \; indicates the end of the exec statement.
Now, we can move all files to the destination_folder directory, including files in the subdirectories.
What’s more, it’s possible to move only files in the current directory and ignore those in subdirectories. To achieve this, we simply have to add the -maxdepth 1 option. This allows us to exclude files in the subdirectories during the move.
2.2. Combining mv With the ls Command
The ls command helps us display the contents of our current working directory:
$ ls
 dir_1   dir_2   file_1.txt   file_2.txt  'file 3.txt'
By default, it lists all the files and subdirectories present.
However, in our case, we require to ignore any directories present. That’s why we need the grep command to search for files in the output of the ls command:
$ ls -p | grep -v /
file_1.txt
file_2.txt
file 3.txt
The -p option instructs ls to append / to all directories. This helps to differentiate the files from the directories. Later, the grep command uses this output as an argument during filtering. Here, the -v option tells grep to show anything from the output that doesn’t match the / pattern.
Now, it’s time to move these files to a different location:
$ mv $(ls -p | grep -v /) dir_2/
mv: cannot stat 'file': No such file or directory
mv: cannot stat '3.txt': No such file or directory
This command moves all the other files except those containing spaces in their file names. We can overcome this by updating our command:
$ default_ifs="$IFS"; IFS=$'\n'; mv $(ls -p | grep -v /) dir_2/; IFS="$default_ifs";
In Bash, the $IFS (Internal Field Separator) variable stores the delimiter that the shell uses to split words. By default, it contains the space, tab, and newline characters. In our situation, the output from $(ls -p | grep -v /) needs to be split based on the newline character:
- default_ifs=”$IFS” – saves the default $IFS value to default_ifs
- ; – separates one command from another
- IFS=$’\n’ – updates the $IFS value to newline
- $(ls -p | grep -v /) – fetches the file names in the current working directory and passes them as an argument to the mv command
- dir_2/ – declares the directory to move our files to
- IFS=”$default_ifs” – restores $IFS to its default value
Let’s confirm that the move was successful:
$ ls
dir_1  dir_2
As is evident, only directories are now visible. So, the files are now located in the dir_2 directory:
$ ls dir_2/
 file_1.txt   file_2.txt  'file 3.txt'
Importantly, this approach moves files in the working directory only and doesn’t include those in subdirectories.
2.3. Using the Graphical User Interface
Working with the Graphical User Interface (GUI) is very straightforward. It’s a convenient approach for beginners since it allows them to interact with the system through components e.g., icons.
So, to only move files and not directories, we must first change to this desired directory using the Linux file manager. It’s an interface that allows us to manage our files and directories.
Now, most desktop environments usually favor a particular file manager as their default. For instance, the GNOME desktop environment favors Nautilus as its default. Here, we’ll cover the instructions for GNOME.
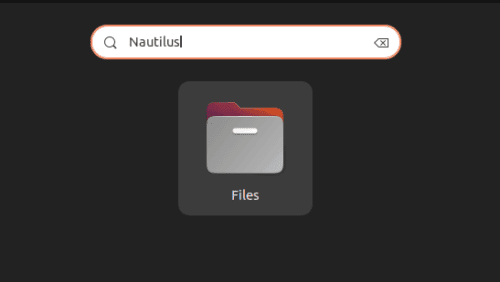
To begin, we can click on Activities, type in Nautilus and press Enter. Alternatively, we can click on the icon instead:
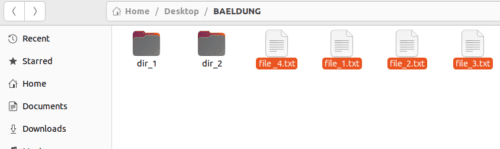
Once the file manager opens, we navigate to the desired directory. Here, we click on the first file we’d like to move. Next, we press down on the CTRL key. Then, we proceed to click on all the other files we’d also like to move while still pressing down on the CTRL key. Now, we’ve been able to select all the files to move. Alternatively, holding down the CTRL + A selects all the files at once. However, directories are also selected in this process. Therefore, we need to unselect them by clicking on the directories one at a time. This needs to be done while pressing down on the CTRL key:
At this point, we right-click on the mouse and select Cut from the menu displayed. Alternatively, pressing the CTRL + X keys works the same. Afterward, we navigate to the directory we’d like to move our files to. Here, we perform a right-click and choose the PASTE option to move the files here. Alternatively, pressing the CTRL + V keys works similarly.
3. Conclusion
In this article, we explored ways to move every file that’s not a directory. First, we discussed using the mv, find, and ls commands from the terminal. Also, we discussed using the graphical user interface.