

Learn through the super-clean Baeldung Pro experience:
>> Membership and Baeldung Pro.
No ads, dark-mode and 6 months free of IntelliJ Idea Ultimate to start with.
Last updated: March 18, 2024
Learn through the super-clean Baeldung Pro experience:
>> Membership and Baeldung Pro.
No ads, dark-mode and 6 months free of IntelliJ Idea Ultimate to start with.
In this tutorial, we’ll discuss two methods part of the ImageMagick software suite in Linux to split images vertically: convert, and mogrify.
ImageMagick is a powerful software suite designed for manipulating and editing images in Linux. It provides a command-line interface as well as libraries for various programming languages, enabling users to perform a wide range of image-processing operations.
The primary usage of ImageMagick revolves around image manipulation and conversion. It offers a comprehensive set of tools for resizing, cropping, rotating, and flipping images. Furthermore, it supports many image formats and allows seamless conversion between them. ImageMagick also provides advanced features such as color correction, image composition, and morphological operations.
ImageMagick is highly useful for batch-processing tasks, allowing users to apply the same set of operations to multiple images simultaneously. Additionally, it can automate repetitive image processing tasks, generate thumbnails, create animations, and optimize images for web usage.
In order to install it, first, we need to open a terminal in Linux. We can use the sudo command to install ImageMagick in Linux:
$ sudo apt-get install imagemagickTo split an image vertically using ImageMagick in Linux, we can use the convert command-line tool. The main usage of the convert command is to convert, manipulate, and transform images. Additionally, it allows users to perform operations such as resizing, cropping, rotating, applying filters, and changing formats.
Now, to split an image, let’s navigate to the directory where the original image is located:

We can use the cd command to change directories. For example, if our image is in the Documents directory, we must navigate to the correct directory to access the image:
$ cd DocumentsUnder the convert command, there’re two popular options to split images: crop and chop. Let’s discuss them.
Let’s split the image vertically stored in the Documents directory using the convert command:
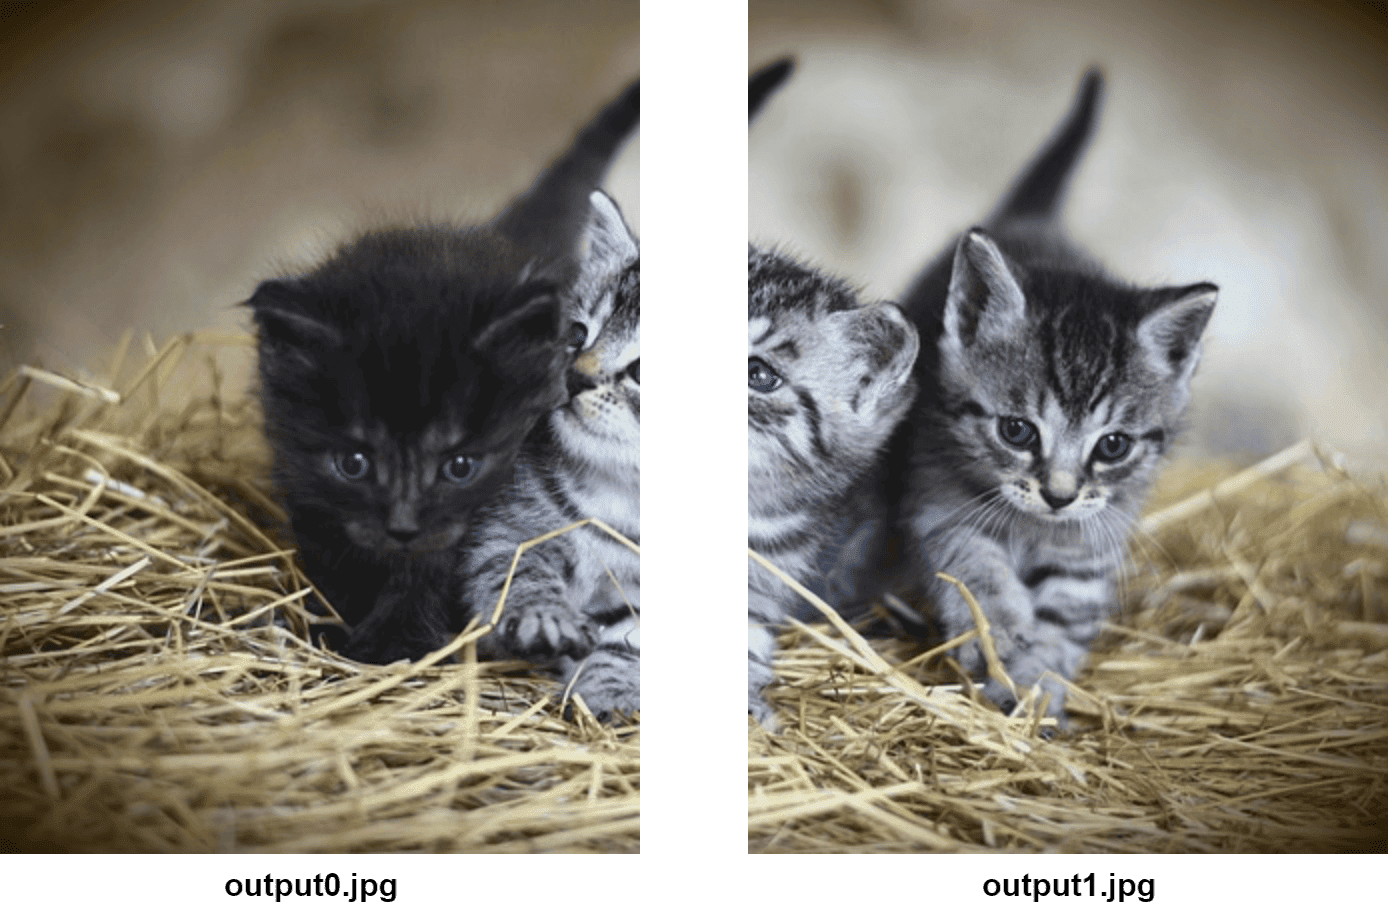
$ convert input.jpg -crop 50%x100% +repage output%d.jpgFirst, we must replace input.jpg with the name of our original image. Additionally, we can set the desired output filenames by replacing output%d.jpg. The -crop 50%x100% option splits the image vertically into two equal parts. We can adjust the percentage to change the splitting ratio according to our needs.
After running the command, it’ll generate two output files labeled output0.jpg and output1.jpg. Each output file will contain an equal portion of the original image:
Similar to the crop option, we can also use the chop option to split images vertically using the convert command:
$ convert input.jpg -gravity east -chop 50%x0 output.jpgHere, the -gravity east option aligns the chopping point to the right edge of the image. Furthermore, the -chop 50%x0 option chops off 50% of the image’s width, effectively splitting it vertically into two equal parts. Now let’s chop only 30% of the original image:
$ convert input.jpg -gravity east -chop 30%x0 output.jpgThe original image will be reduced in size by 30% after this command is executed. The remaining 70% of the image is produced as output:

An alternative to the convert command, we can use the mogrify command to split images vertically. The primary usage of the mogrify command in ImageMagick is to modify and transform images in bulk. It allows users to apply various operations, such as resizing, cropping, rotating, and applying filters. Additionally, it’s useful for batch processing and making consistent changes to a set of images.
First, we open a terminal in Linux and navigate to the directory where the image is located. Furthermore, we split the image vertically using the mogrify command with the -crop option:
$ mogrify -crop N%x100% +repage input.jpgThe unique feature of the mogrify command is that the +repage option removes extra space or border around the cropped region. Hence, it ensures that the resulting image contains only the cropped portion. Additionally, we can also use the -chop option instead of the -crop option.
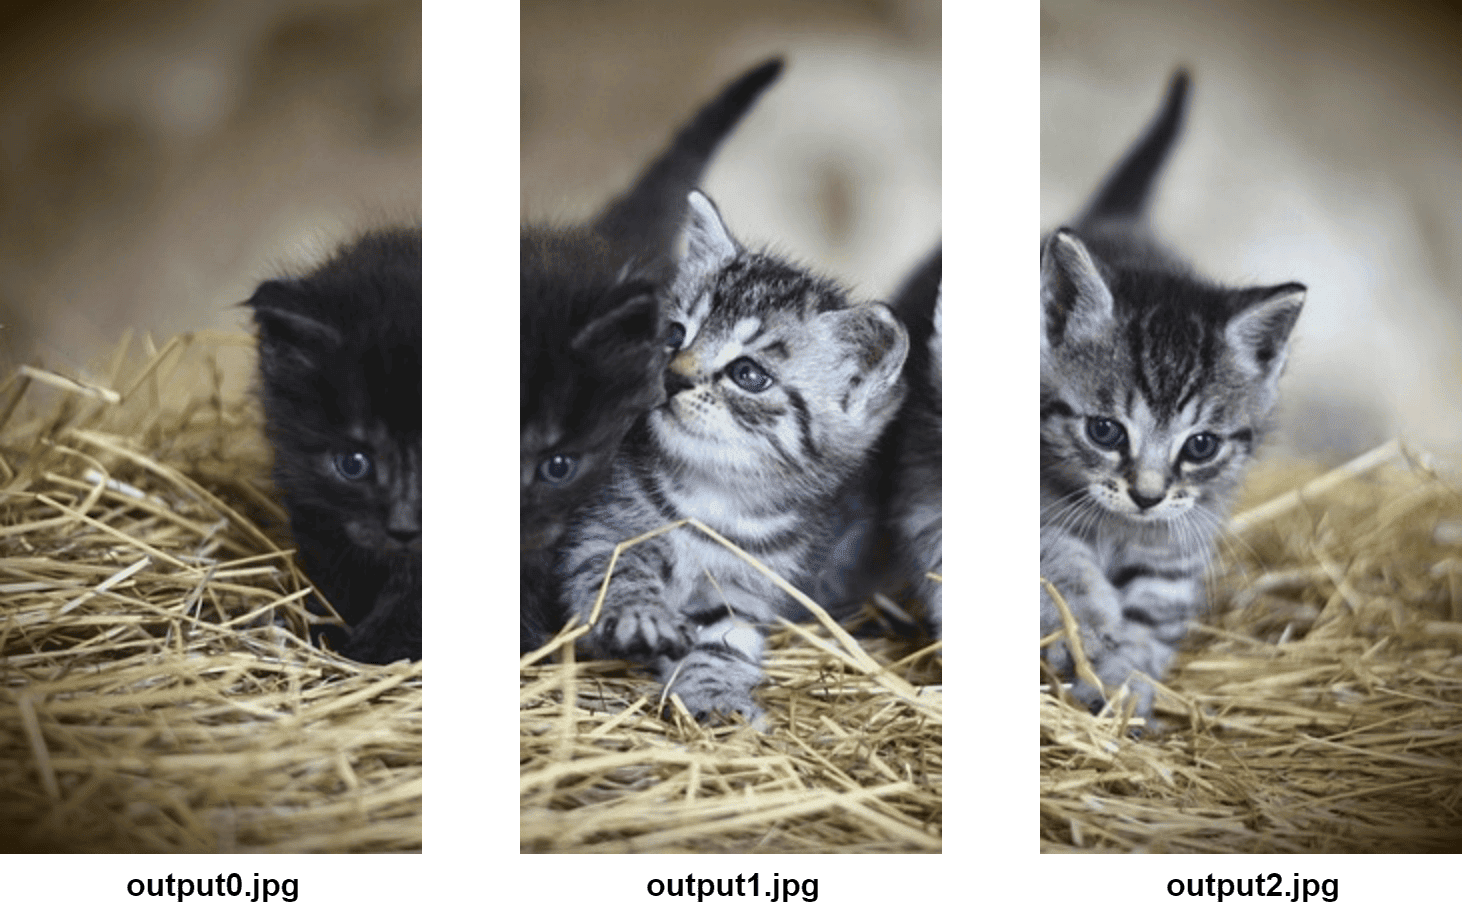
When we split the original image, we can control the number of output images generated using N. For example, if we set N = 25, we’ll get four output images, each having 25% of the original image. Let’s set N = 33 and run the mogrify command:
$ mogrify -crop 33%x100% +repage input.jpgIn this case, we’ll get three images each having 33% of the original image:
In this article, we discussed two methods part of the ImageMagick software suite in Linux to split images vertically: convert, and mogrify.
When splitting images vertically in Linux, the convert command creates separate output images for each vertical split. On the other hand, the mogrify command modifies the original image directly, dividing it into multiple vertical sections.