

Yes, we're now running our only Summer Sale. All Courses are 30% off until 20th July, 2026:
Learn through the super-clean Baeldung Pro experience:
>> Membership and Baeldung Pro.
No ads, dark-mode and 6 months free of IntelliJ Idea Ultimate to start with.
1. Introduction
A bootable USB is an essential tool for installing, running, or repairing an operating system without relying on an internal hard drive. It allows users to install Windows, Linux, or other OS distributions quickly and efficiently. Additionally, it serves as a portable solution for carrying an entire operating system.
A bootable USB is also valuable for system recovery, as it can be used to troubleshoot, repair, or recover lost data from a malfunctioning system. Compared to traditional installation methods using CDs or DVDs, USB drives offer faster data transfer speeds, greater reliability, and ease of use.
In this tutorial, we’ll explore how to create a bootable USB with a Linux operating system. First, we’ll start by downloading the Ubuntu operating system. After that, we’ll download software named Rufus to make the USB bootable. Lastly, we’ll make the necessary changes in the environment to ensure the USB functions as a live operating system.
2. Downloading Ubuntu
We’ll begin by first downloading the Ubuntu operating system from the official Ubuntu website:

Once on the website, we’ll click the Download Ubuntu drop-down button and select Download Ubuntu Desktop:
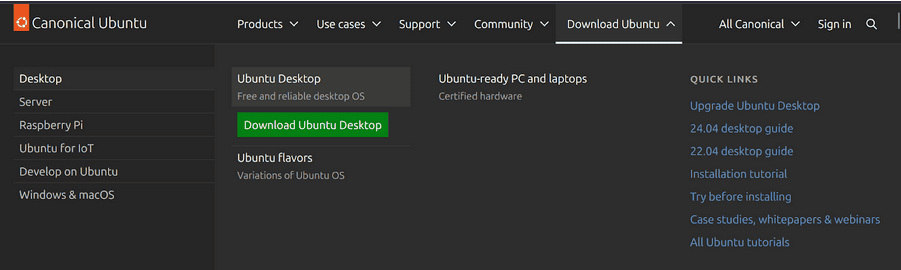
Next, we’ll be directed to a page where different versions of Ubuntu are available. From there, we’ll download the latest version of Ubuntu:

Now, we click on the Download button, and the system will start downloading Ubuntu.
Once the download is complete, we move on to the next step by setting up Rufus.
3. Installing Rufus
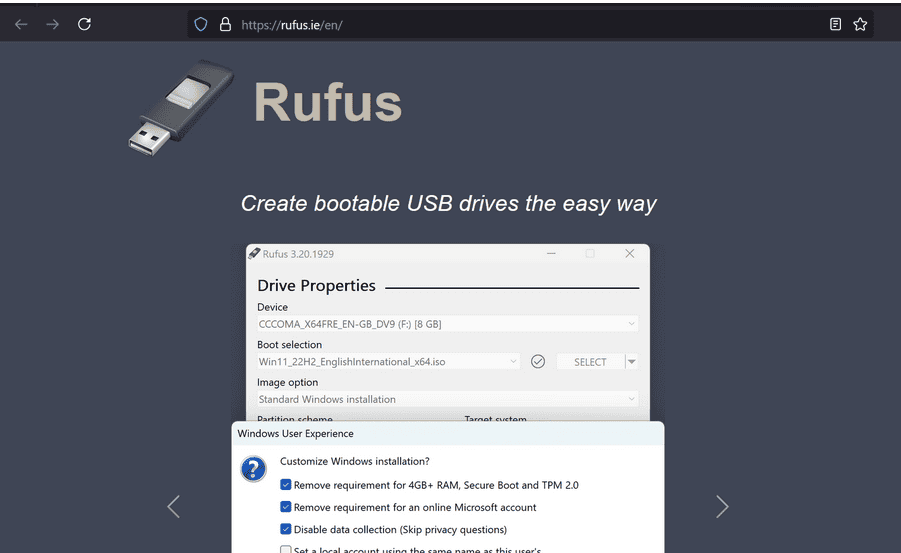
Let’s download the software that will assist us in making the USB bootable. To achieve this, we’ll download Rufus from the official Rufus website. We should see an interface like the one shown below:
Then, we scroll down until we find the options to download Rufus. From the available options, we select the first Standard version:

Once selected, the software will start downloading onto our system. After the download is complete, we install and run Rufus. We’ll see an interface similar to this:
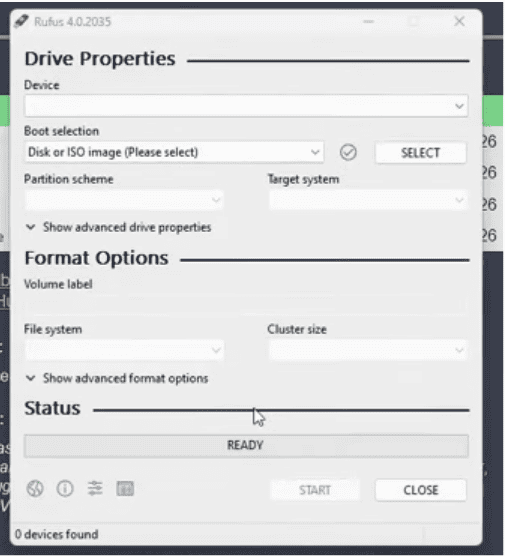
We then go to the Device section and select our USB. Before proceeding, we must ensure the USB doesn’t contain important data as it’ll be formatted during the process. Additionally, the USB should have at least 8 GB of storage to make it live.
After selecting the USB, we’ll move to the Boot Selection section and choose the Ubuntu operating system from there. Then, we’ll click the Start button. Rufus will begin the process by formatting the USB. Subsequently, it’ll create a bootable operating system on the USB.
4. Setting up the Environment
Next, we’ll boot from the USB drive. To do this, we need to restart the system. As the system restarts, we’ll continuously press the appropriate function key to access the BIOS. The key varies by manufacturer, but it’s usually Esc or F2.
Once inside the BIOS, we’ll select the option to boot from USB. The computer will then boot the operating system from the USB drive.
After Ubuntu boots up, we’ll see a graphical interface similar to the one below:
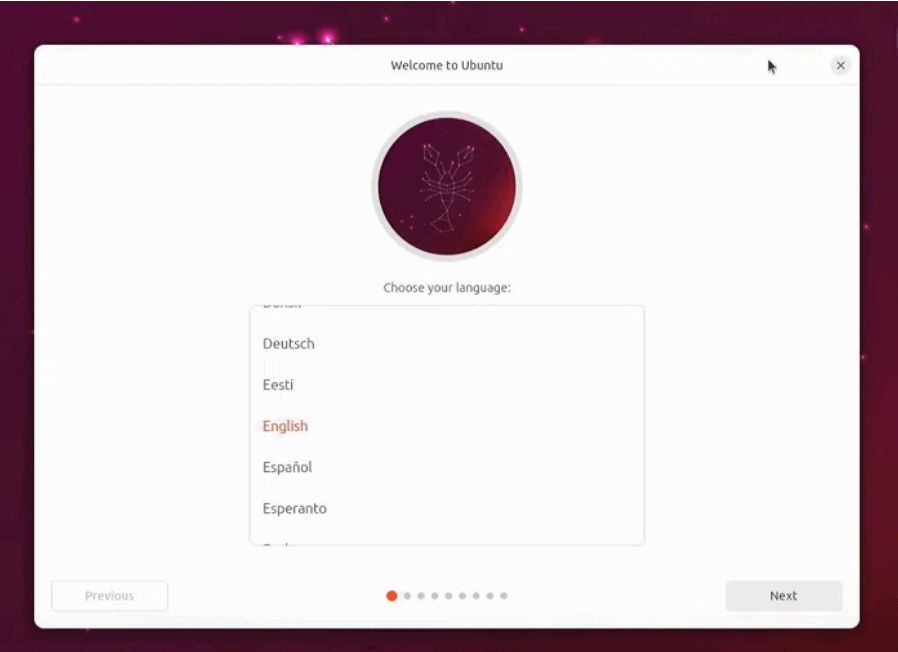
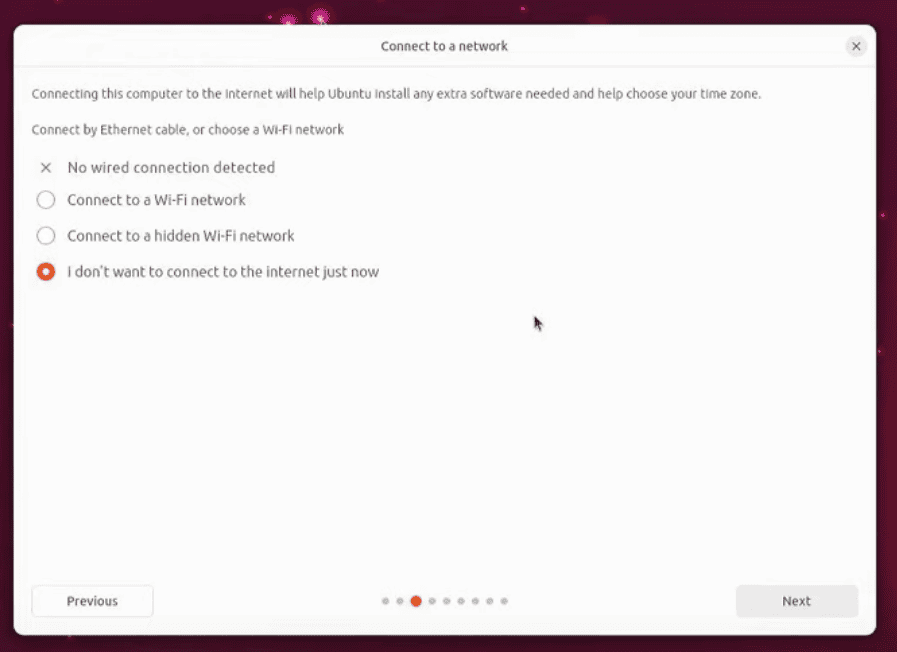
At this stage, we’ll select our preferred language and click Next. On the following page, we’ll choose not to connect to the internet:
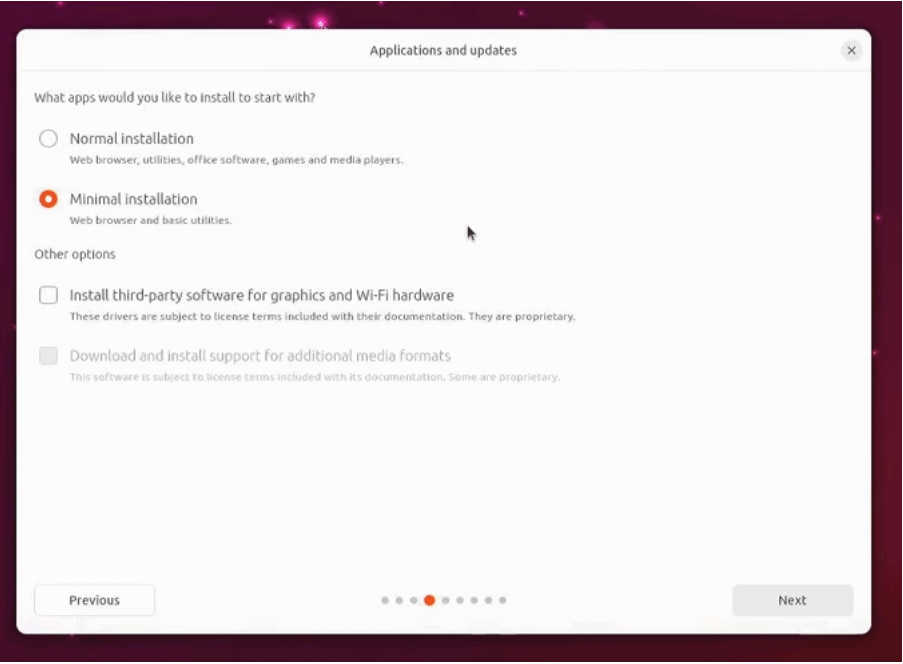
Then, we’ll click Next again and select Minimal Installation to speed up the process. We can also choose the full installation option, but it’ll take significantly more time compared to the minimal installation:
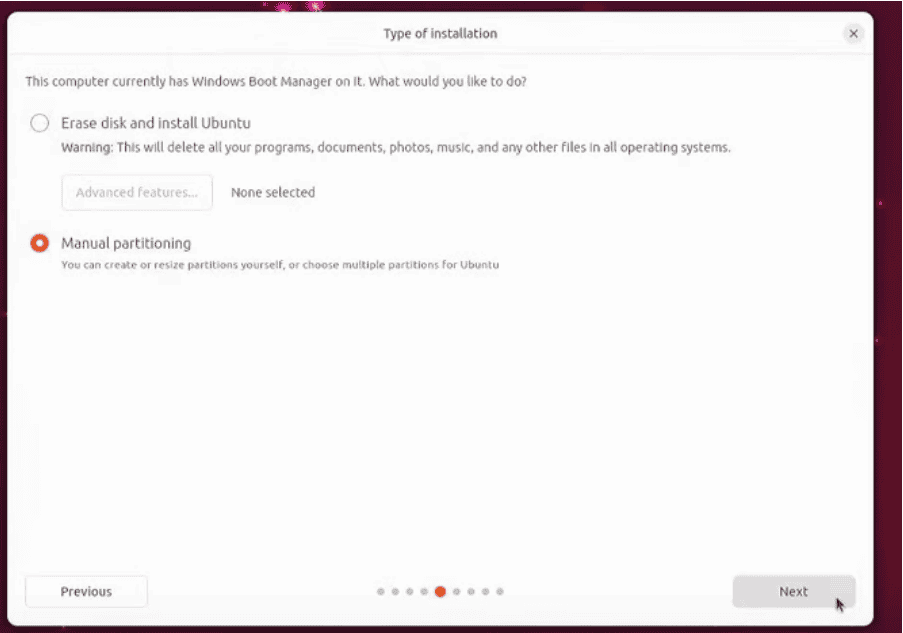
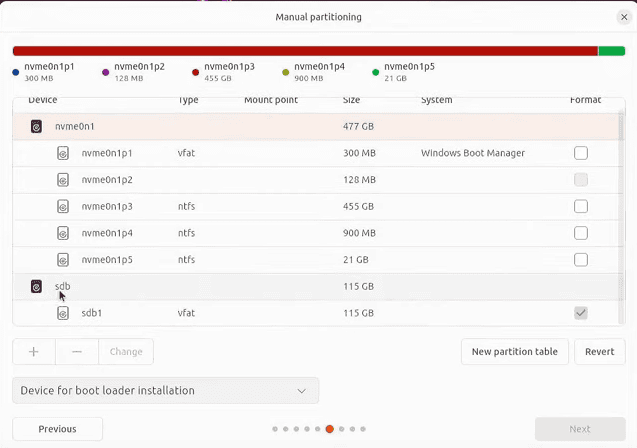
We then proceed to the partitioning section, which is crucial when installing Ubuntu. Here, we’ll select Manual Partitioning to manually choose the device where we want to install Ubuntu and configure partitions according to our preference:
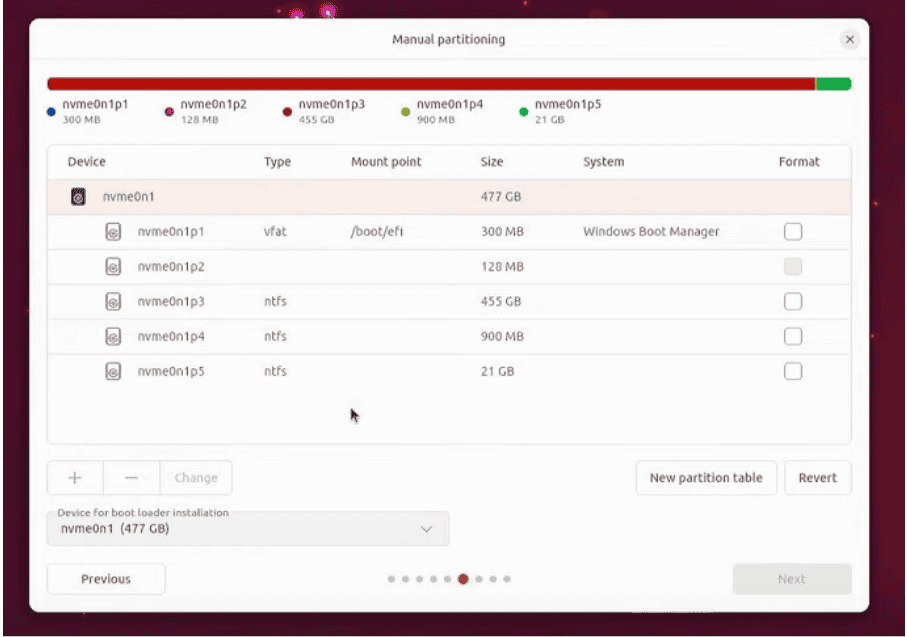
On the next screen, we see a list of available storage devices:
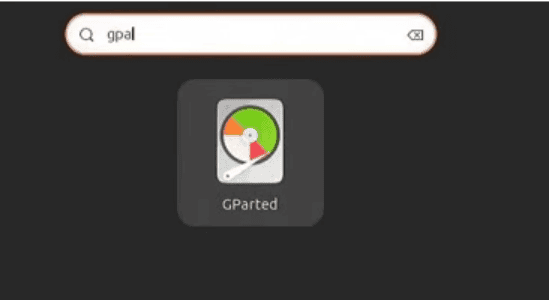
If the USB device isn’t visible, there’s no need to panic. We can open the Activities panel and then type gparted. Next, we’ll select the GParted application and open it:
Once GParted is open, we select the USB drive, unmount it, and then close the application:

Afterward, we return to the storage device selection page and click the Revert button.
The USB should now be visible. We then select the USB, and it’ll automatically create a first partition.
5. Creating a Live USB
Moving forward, we select the second partition of the USB device and click the + button to add it. In the partitioning options, we’ll use all available space and select / (root directory) as the mount point:

Next, we click OK. The system will then display a quick summary of the installation process:
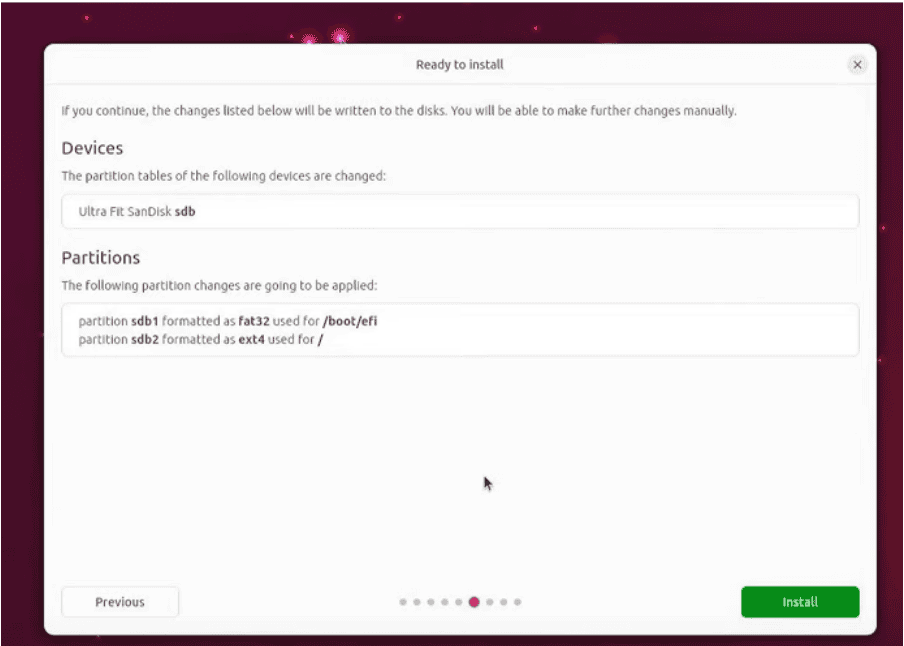
Subsequently, we then click on Install, after which we’ll be prompted to select our timezone:
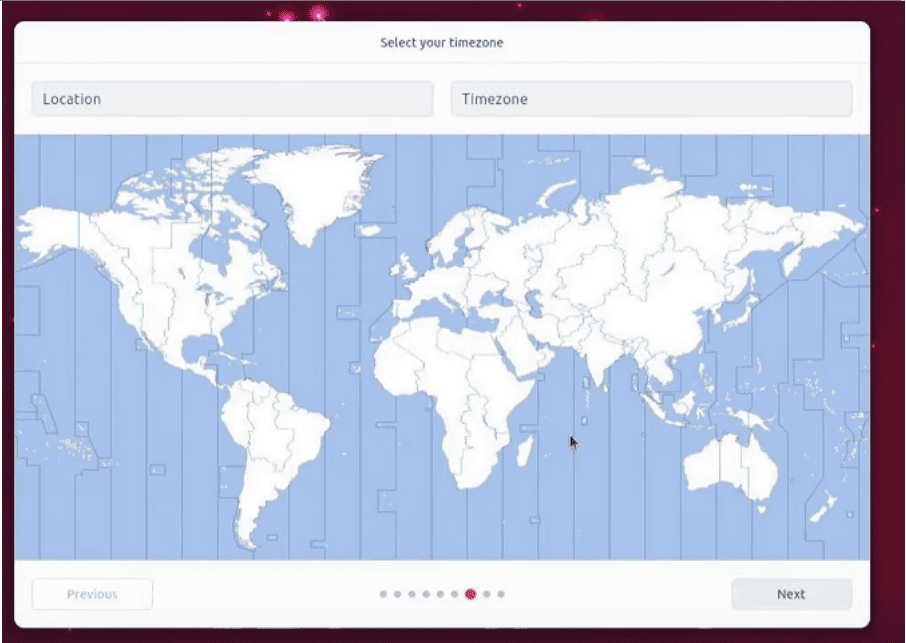
After selecting the timezone, we’ll set the credentials for the operating system:

Then, we’ll be given an option to choose between a Light or Dark theme. We can select whichever we prefer.
After completing all these steps, Ubuntu will finally be installed:
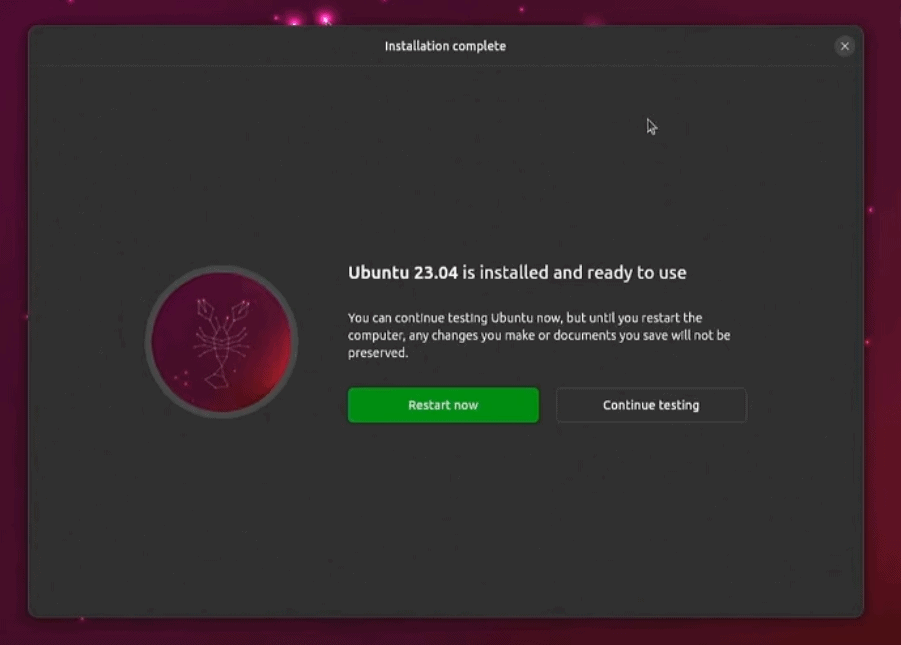
Now, we can click Restart Now to check if our Ubuntu Live USB is functioning correctly.
After restarting, we should see Ubuntu running live from the USB drive:
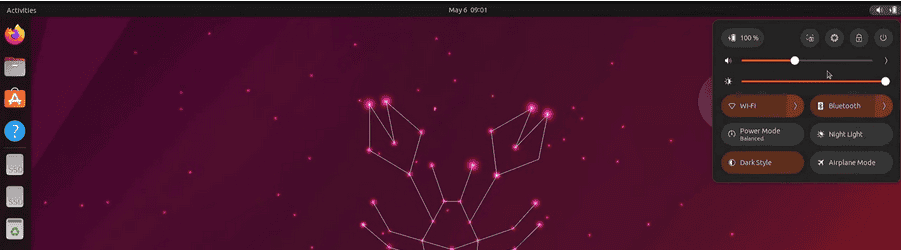
Now, our Ubuntu Live USB is ready. It can be booted on any computer, allowing us to carry our operating system in our pocket.
6. Conclusion
In this article, we explored how to create a bootable USB with a Linux operating system.
Initially, we started by downloading the Ubuntu operating system. After that, we downloaded software named Rufus to make the USB bootable and install the operating system on it. Finally, we made the necessary changes in the environment to ensure the USB functions as a live operating system.