

Learn through the super-clean Baeldung Pro experience:
>> Membership and Baeldung Pro.
No ads, dark-mode and 6 months free of IntelliJ Idea Ultimate to start with.
Last updated: March 18, 2024
Learn through the super-clean Baeldung Pro experience:
>> Membership and Baeldung Pro.
No ads, dark-mode and 6 months free of IntelliJ Idea Ultimate to start with.
In this tutorial, we’ll discuss how to connect to a hidden wireless access point using Network Manager. There are lots of tools and wrappers written on top of Network Manager, but our main focus will be on using the nmcli utility.
Finally, we’ll also go over the nmtui tool, which is a terminal-based front-end for nmcli.
nmcli is a command-line front-end to Network Manager. We can use nmcli to manage our connections in an easier way as compared to manually configuring network configuration files.
By default, it comes pre-installed with most distributions as part of the Network Manager package. However, if the distribution is using some other network management tool, then we can easily install it from the package repository under its canonical name network-manager.
On Ubuntu derivatives, we can use apt:
$ sudo apt install network-managerSimilarly, on Fedora derivatives, we can use dnf:
$ sudo dnf install network-managerOnce installed, let’s verify it:
$ nmcli --version
nmcli tool, version 1.42.4Let’s see the general usage syntax for adding connections using nmcli:
$ nmcli c add type <network type> con-name <connection name> ifname <inteface> ssid <ssid>Let’s break it down:
In our case, the network type would be “wifi” and the interface would be the interface for our wireless card. We can easily get our interface name by issuing the ifconfig command.
Alternatively, we can also type nmcli to see a detailed list of our network interfaces:
$ nmcli
wlp61s0:
        "Intel 8265 / 8275"
        wifi (iwlwifi), 20:79:18:BD:97:32, hw, mtu 1500
        ip4 default
...
In addition to that, we can also use nmcli to get the list of available SSIDs in real-time:
$ nmcli dev wifi
IN-USE  BSSID              SSID             MODE   CHAN  RATE        SIGNAL  BA>
        00:27:19:28:B2:F4  Tplink           Infra  6     54 Mbit/s   72      ▂▄>
        E0:28:61:E6:6C:10  SAK75            Infra  10    270 Mbit/s  39      ▂▄>
        18:52:82:F5:53:D5  PTCL-BB          Infra  2     130 Mbit/s  35      ▂▄>
However, the SSID of the hidden wireless access points wouldn’t show in the list because a hidden network doesn’t broadcast its SSID. For that reason, we need to get the SSID from the Wi-Fi router’s control panel. Once we have our interface name and SSID, we can use the above command to add the hidden Wi-Fi network:
$ nmcli c add type wifi con-name home-wifi ifname wlp61s0 ssid z
Connection 'home-wifi' (0dfc98e2-be00-480c-bf1f-674b9b3403d8) successfully added.After the network is added, we can add credentials for the network. However, before we set the credentials, we should know the type of the credentials. We can get this information from the control panel of our router. Of course, the process would differ for different routers, so we can check our router’s manual for the instructions.
Once we have the password key type, we can add it to our network:
$ nmcli con modify home-wifi wifi-sec.key-mgmt wpa-pskThe modify verb lets us configure an existing connection. Next, we specify the actual password for our Wi-Fi:
$ nmcli con modify home-wifi wifi-sec.psk ptclptclWith our credentials added, we’re now ready to connect to the network.
We can connect to the network with the up verb:
$ nmcli con up home-wifiLet’s test our connectivity with ping:
$ ping -c 1 baeldung.com
PING baeldung.com (172.66.40.248): 56 data bytes
64 bytes from 172.66.40.248: icmp_seq=0 ttl=56 time=49.470 ms
--- baeldung.com ping statistics ---
1 packets transmitted, 1 packets received, 0% packet loss
round-trip min/avg/max/stddev = 49.470/49.470/49.470/0.000 msWe can remove the connection from the system using the delete verb:
$ nmcli con delete home-wifi
Connection 'home-wifi' (0dfc98e2-be00-480c-bf1f-674b9b3403d8) successfully deleted.Once we have a basic understanding of using nmcli, we can quickly connect to a hidden network with a single command:
$ nmcli dev wifi connect z password ptclptcl hidden yesHere, the hidden switch is necessary. If we omit this, Network Manager will complain.
nmtui is a handy text-based interface to nmcli that lets us quickly add and configure networks. It’s part of the Network Manager package, so it should already be installed.
We can launch nmtui by simply typing nmtui into the terminal:
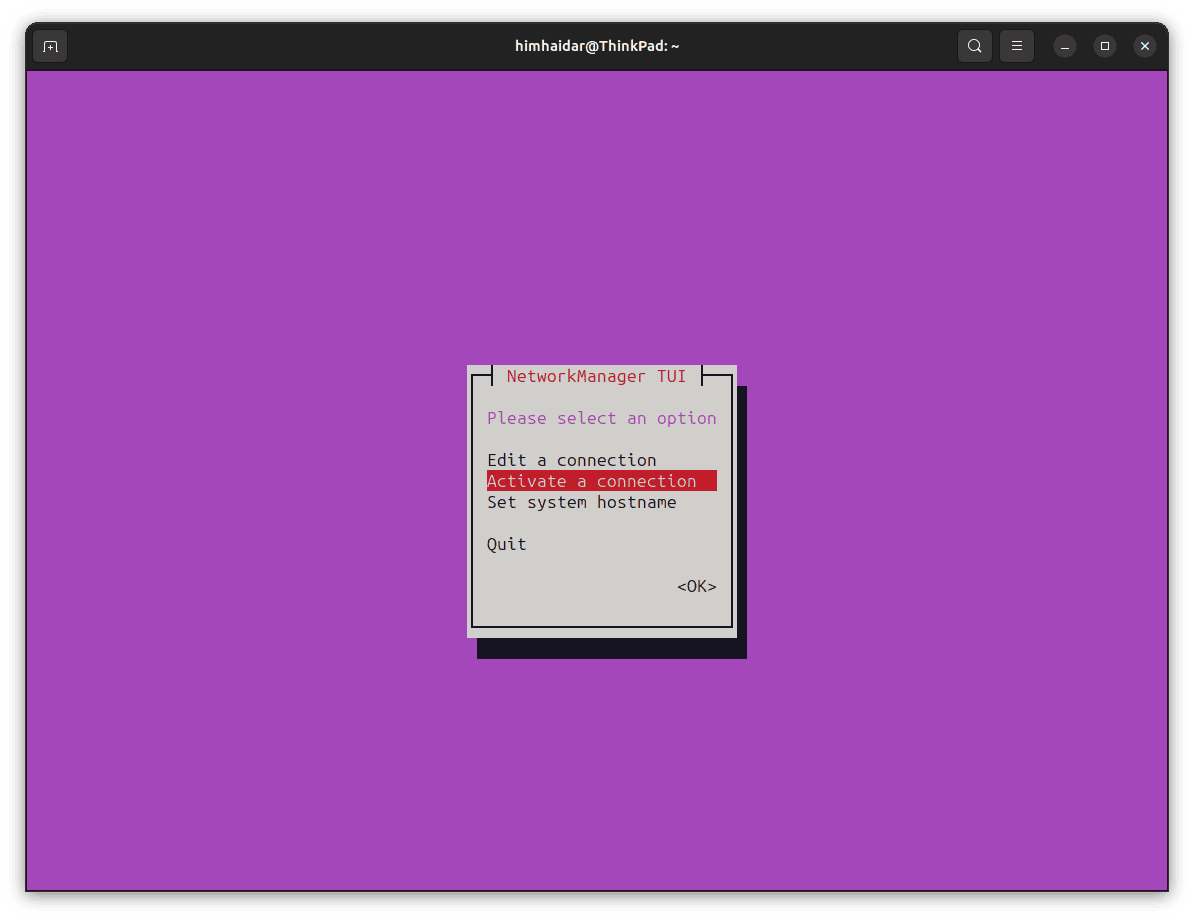
$ nmtuiNext, we should see the main view for nmtui:
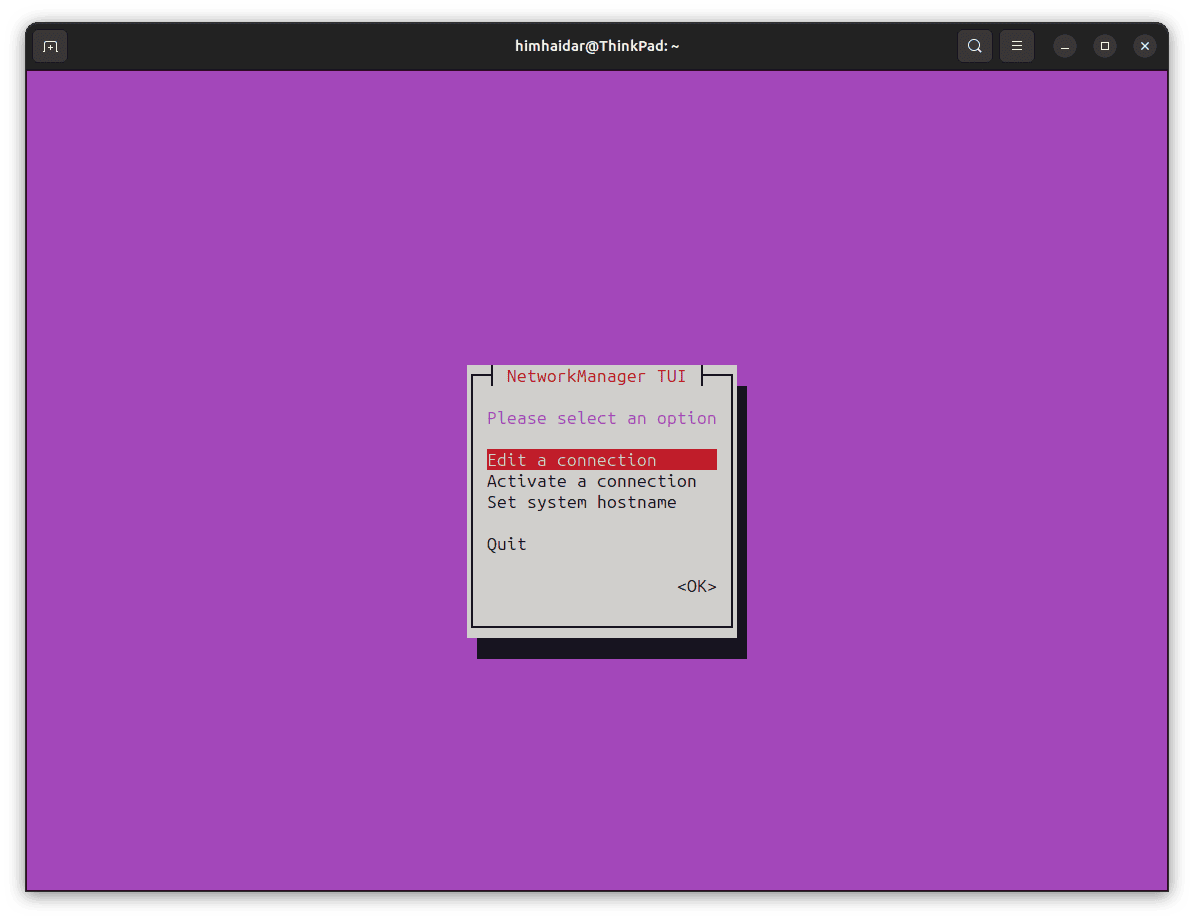
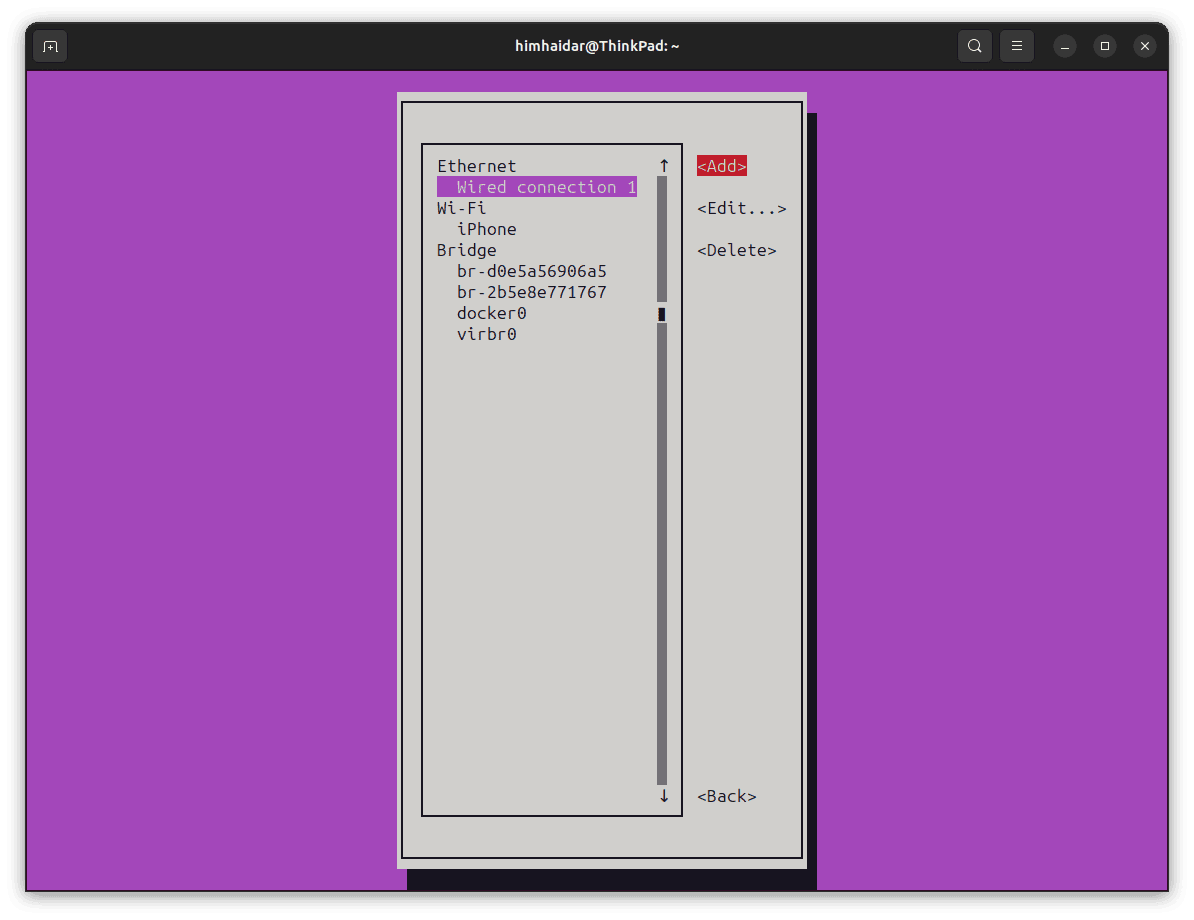
Here, we select Edit a connection entry from the list to add our network. From there, we press the Add button to create a new connection:
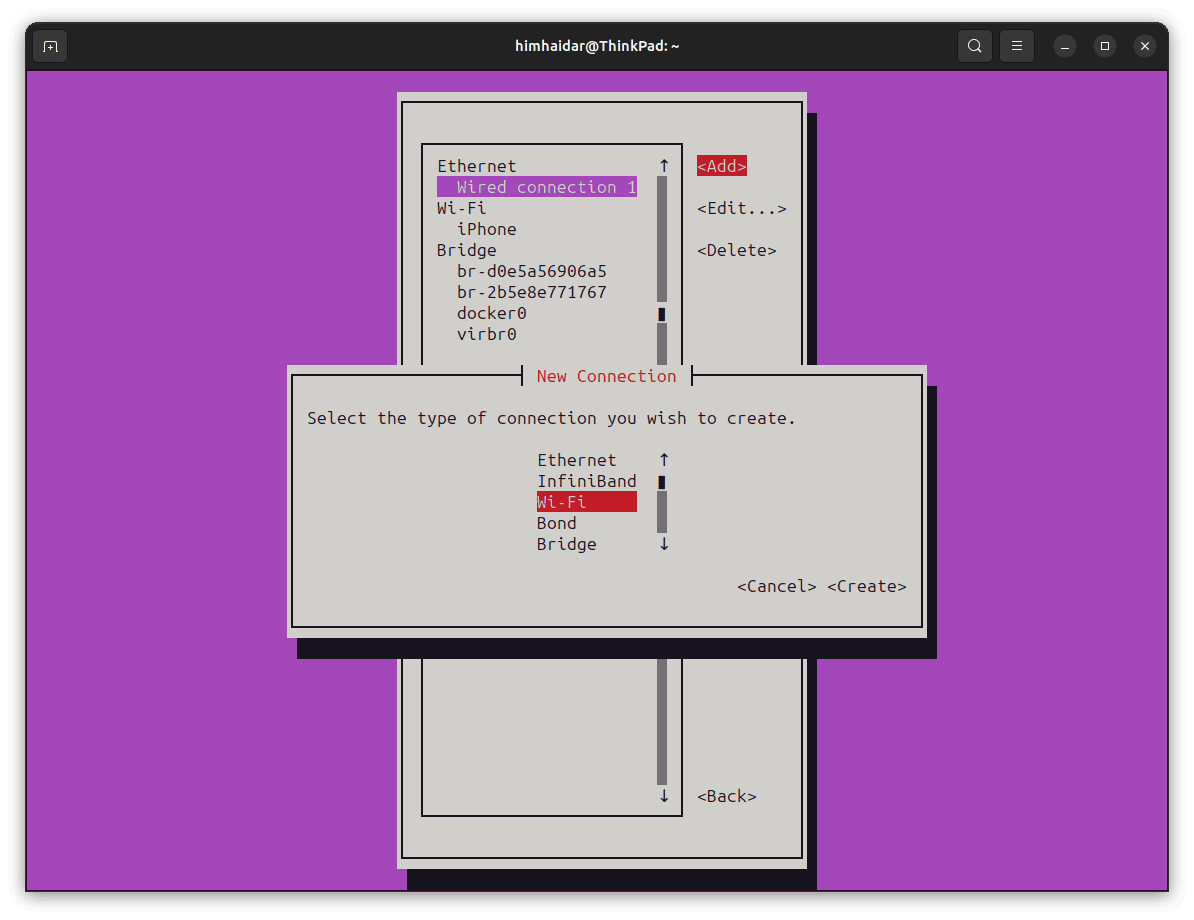
Now, let’s select the network type:
After pressing the Create button, we’ll be taken to the connection editor form. Here, we add the required information for our connection as we did in the previous section:
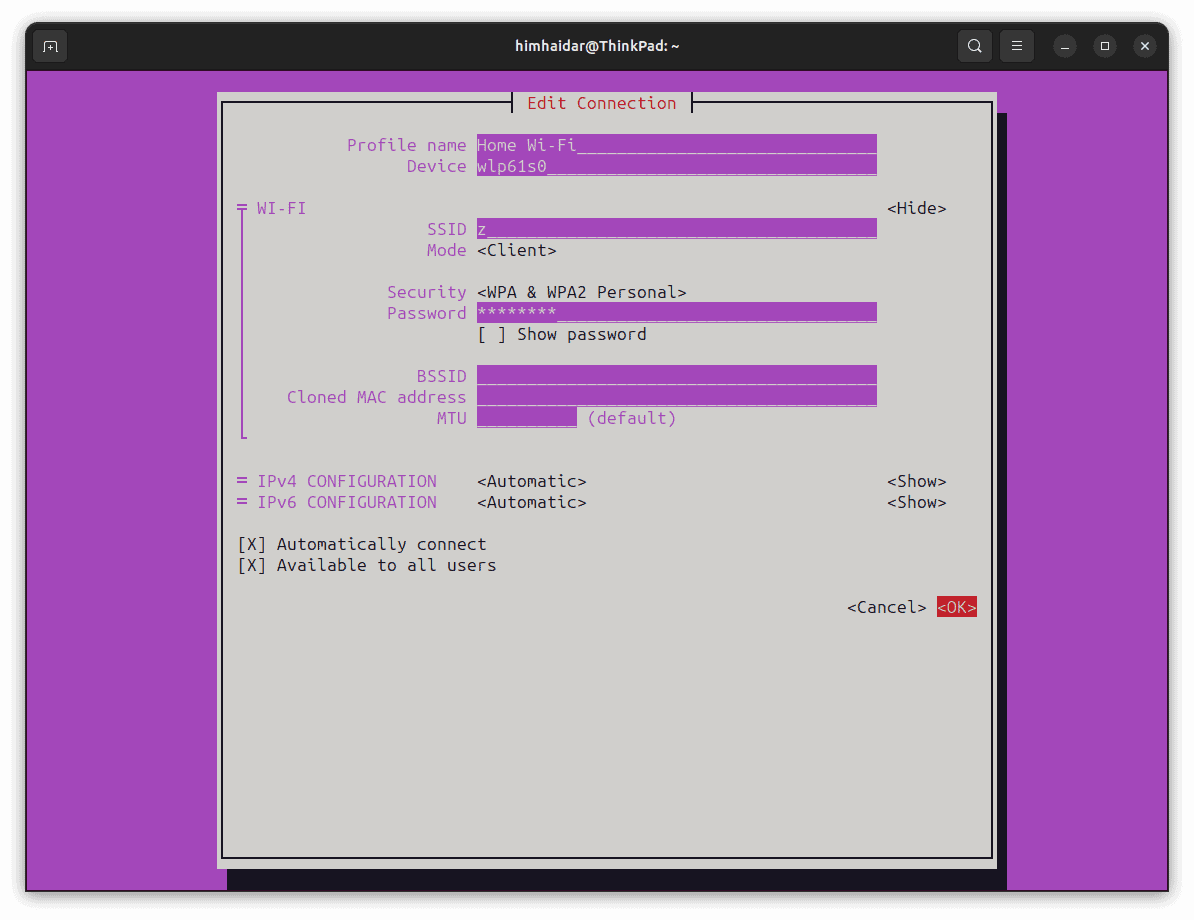
We fill in the required fields like Profile name, Device, SSID, Security, and Password. This should suffice for a basic connection setup. However, we can modify the other configurations if we wish to. Once everything is good, we select OK.
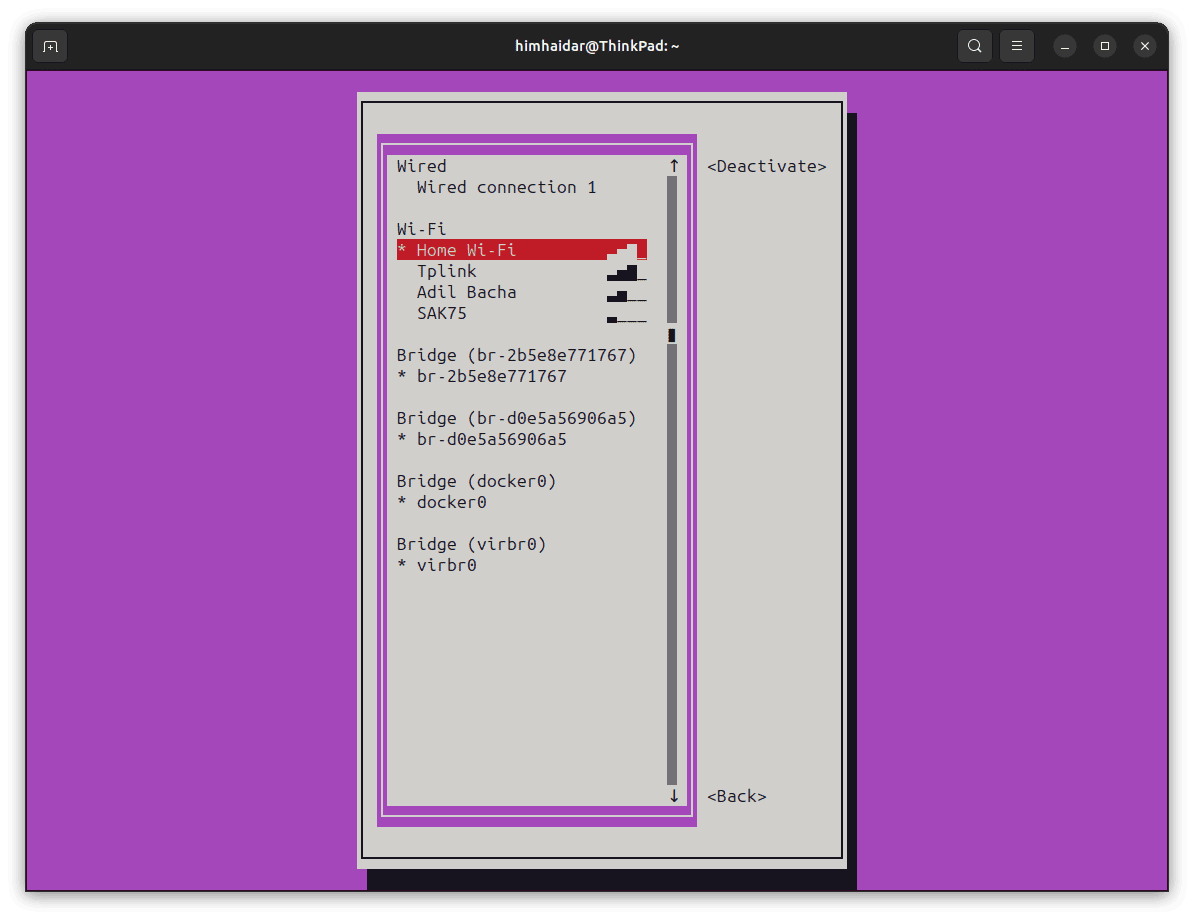
Now, we can navigate back to the main view using the Escape key. From there, we select Activate a connection:
Here, we can notice that our network has been added. By pressing the Enter key, our interface connects to the network:
In this article, we discussed how we can connect to a hidden wireless network with Network Manager. For that purpose, we used the nmcli and nmtui utilities that come with Network Manager.