

Learn through the super-clean Baeldung Pro experience:
>> Membership and Baeldung Pro.
No ads, dark-mode and 6 months free of IntelliJ Idea Ultimate to start with.
Last updated: July 31, 2024
Learn through the super-clean Baeldung Pro experience:
>> Membership and Baeldung Pro.
No ads, dark-mode and 6 months free of IntelliJ Idea Ultimate to start with.
In this tutorial, we’ll look at how to prevent the Apache2 web server from serving particular directories. The Apache2 web server provides various functions that we can configure to restrict or allow access to specific directories. We’ll look at rules that can grant or prohibit access to folders and learn how to protect a folder using a password.
Apache2 web server is a free and open-source web server. It’s cross-platform and among the commonly used web servers in Linux. In some Debian systems, Apache2 isn’t present by default.
Let’s run apt-get to install the web server:
$ sudo apt-get update
$ sudo apt-get install apache2 apache2-utils
If the installation is successful, the web server should be active:
$  sudo systemctl status apache2
● apache2.service - The Apache HTTP Server
     Loaded: loaded (/lib/systemd/system/apache2.service; enabled; vendor preset: enabled)
     Active: active (running) since Mon 2023-04-03 08:17:10 EAT; 4min 47s ago
     Docs: https://httpd.apache.org/docs/2.4/
     Main PID: 3759 (apache2)
     Tasks: 55 (limit: 1636)
     Memory: 7.0M
     CPU: 117ms
The apache2-utils package contains a configuration file called .htpasswd that we can configure to store passwords, which the server uses to restrict content. To configure Apache2, we modify the following files:
After saving the changes we’ve made to the main configuration file, we can quickly check if the setting is correct by running:
$ sudo apachectl configtest
AH00526: Syntax error on line 179 of /etc/apache2/apache2.conf:
Either all Options must start with + or -, or no Option may.
Action 'configtest' failed.
The Apache error log may have more information.
This command will quickly point to any wrong configuration we might be having in the file. Any changes to the main configuration files are only effective after Apache2 is started or restarted.
Apache2’s ruled-based access control allows us to specify the specific resources that various users can access. We can create rules that allow or deny access to directories from specific URLs or IP addresses. We can also create rules that control the kind of resources that users can access over the network.
Let’s look at some rules we can make to limit directory access.
If we want to restrict a particular IP or range of IP, we can define it in the following ways.
First, we can specify the IP address to allow or block, e.g., Allow 192.168.0.1. Secondly, we can specify the beginning octets of the IP address, e.g., Allow 192.168 or Deny 200.10.0. When we create Allow directives, we should ensure that the correct IP can only access the resources it needs.
Let’s configure this rule in apache2.conf to restrict access to the directory from particular IP:
<Directory /var/www/html/webaccess/register_info>
        Order allow,deny
        Allow from 127.0.0.1
</Directory>We can configure Apache2 to allow or deny access based on the hostname of where the request came from. For this to work, Apache2 performs a reverse DNS lookup of the hostname that has made the request. Only the allowed hostname can access the resource, e.g., Allow hostname.example.com:
<Directory /var/www/html>
	Order Deny,Allow
	Deny from all
	Allow from hostname.example.com
</Directory>
We can also create rules that deny access to a particular directory. Once the rule is applied, the sub-directories inherit the same rules:
<Directory /var/www>
        Options Indexes FollowSymLinks
        AllowOverride None
        Require all granted
</Directory>
Additionally, we can also create access rules based on environment variables in the HTTP session. This makes it possible for us to allow or deny access to a resource based on a variable such as a user agent (browser) or referrer.
When we create the rules, we must specify them explicitly. This ensures the directive set will only match the specific directory provided in the path. Even though rules are inherited by the child directories, we can enable subdirectories anywhere in the tree by writing directives that oppose the parent rules:
<Directory /var/www/html/webaccess>
Options FollowSymLinks Indexes
AllowOverride None
Order deny,allow
deny from all
</Directory>
<Directory /var/www/html/webaccess/testapp>
Order allow,deny
allow from all
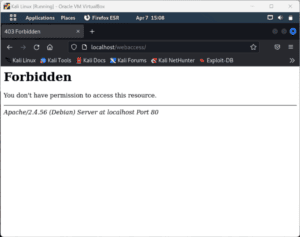
</Directory>We can’t access the webaccess/ directory through the browser:
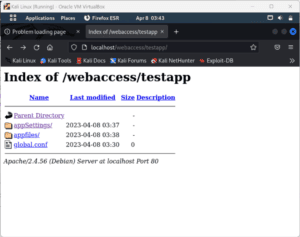
On the other hand, we’re able to access the child directory testapp/:
If we don’t want this setup, we can use the <LocationMatch> directive, which does a regex search on all files and directories in the directory tree. Also, it overrides any directive provided anywhere in the directory structure:
<LocationMatch "^/da">
	Order deny,allow
	deny from all
</LocationMatch>
This directive would apply to any directory whose name begins with “da” in the directory tree.
In this section, we’ll look at how we can only server directories to authorized users. Anyone from the authorized users cannot access the password-protected directory unless they have a password. We can configure the Apache2 web server to restrict access to any directory.
First, let’s create a password file that Apache2 will use to authenticate users. We create a hidden file called .htpasswd and place it inside the /etc/apache2/ directory:
$ sudo htpasswd -c /etc/apache2/.htpasswd restricteduser
New password:
Re-type new password:
Adding password for user restricteduser
$ cat /etc/apache2/.htpasswd
restricteduser:$apr1$ygHh/XYr$Qjz5tgHEQ6L/f5rpq0ct71
If it’s the first time creating this file, we must use the -c flag to add a user. On running the command, it prompts us to enter and confirm a password for the user.
Next, let’s configure Apache2 to read this file before serving our restricted content. When we’re setting up password protection, we can either use the virtual host or set up a .htaccess file.
If we decide to use a virtual host, we add the following block to the configurations file:
$ sudo vi /etc/apache2/sites-enabled/000-default.conf
<VirtualHost *:80>
<Directory "/var/www/html">
	AuthType Basic
	AuthName "Restricted Content"
	AuthUserFile /etc/apache2/.htpasswd
	Require valid-user
</Directory>
</VirtualHost>
Let’s save and restart the web server:
$ sudo service apache2 restartWe’ve added our password protection to the virtual host file, and adding it here improves performance.
If we’re using .htacces instead, let’s edit the apache2.conf:
$ sudo vi /etc/apache2/apache2.confFollowing, let’s locate the <Directory /var/www> block where we add the following lines:
<Directory /var/www/html>
	Options Indexes FollowSymLinks
	AllowOverride All
	Require all granted
</Directory>
To enable .htaccess file processing, we change the AllowOverride from “none” to “All”. The AuthUserFile directive tells Apache2 where to find the password file we created. Lastly, the valid-user ensures that only the verified users can be served this resource.
Finally, we add the .htaccess file to the directory we want to restrict. For example, to restrict the entire document root we create the .htaccess file in the html/ directory:
$ sudo vi /var/www/html/.htaccess
AuthType Basic
AuthName "Restricted Content"
AuthUserFile /etc/apache2/.htpasswd
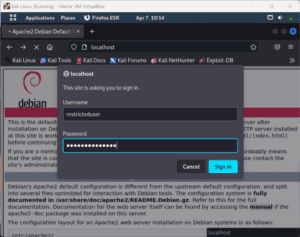
Require valid-userWe save and close the file and then restart the server for the changes to take effect:
$ sudo service apache2 restartIf we access the server through the browser, it should prompt for a password:
In this article, we’ve looked at how to prevent Apache2 from serving particular directories. We’ve discussed how we use directives to take a directory offline, restrict IP addresses from accessing specific directories and restrict URLs. We’ve also looked at how to password-protect our directories and only allow authorized users to access those directories.