1. Overview
In this tutorial, we’ll learn how to use Postman to test an endpoint secured with Basic Authentication.
We’ll see how to use the “Authorization” tab to generate the header based on the raw credentials. After that, we’ll learn how to do it manually. Finally, we’ll see how Postman Interceptor works and how it can come in handy.
2. Basic Authentication
Basic Authentication is a method of securing HTTP requests through a special header:
Authorization: Basic <credentials>
To generate the credentials token, we need to write the username and password, joined by the semicolon character. After that, we need to encode the resulting string with Base64.
Let’s assume the username is “admin” and the password is “baeldung“. First, we’ll create the credentials string, which will be “admin:baeldung“. Then, we’ll encode it with Base64, add the “Basic” keyword, and set it as the header’s value:
Authorization: Basic YWRtaW46YmFlbGR1bmc=
3. Authorization Tab
Firstly, let’s send a GET request to a Basic Auth-secured endpoint and expect an Unauthorized status for the response:

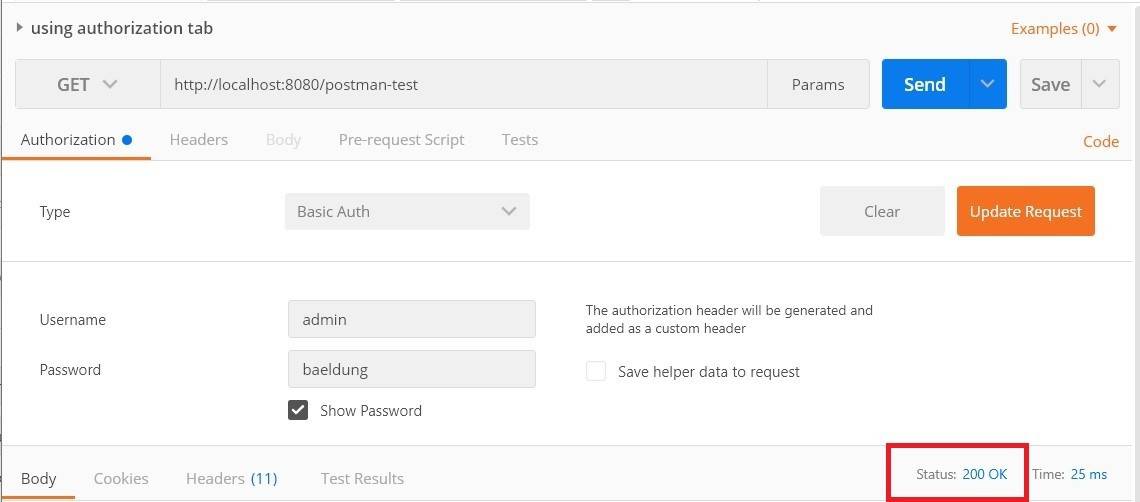
Now, let’s add the credentials. To do this, we simply go to the “Authorization” tab and select “Basic Auth” as the authorization type. After that, we insert the username and password and we’re all set:

Consequently, we can see that the request was authorized and the response code is 200. Furthermore, if we click on the “code” link, we can see how the authorization header was now added to the request:
GET /postman-test HTTP/1.1
Host: localhost:8080
Authorization: Basic YWRtaW46YmFlbGR1bmc=
Cache-Control: no-cache
Postman-Token: 6ad07f7c-4846-9c3f-2a3e-b24e8d2273ad
Postman allows us to manually add headers. As a result, we can add the authorization header directly, if we already have the credentials token.
We can do this from the “Headers” tab. First, we set “Authorization” as the key. After that, we’ll add the credentials token:

If we inspect the HTTP request, we’ll see that nothing differs from the previous one.
5. Postman Interceptor
Postman Interceptor is a Chrome extension that allows us to bind the Postman application to a browser session. In other words, it allows Postman to execute requests on behalf of the user who is logged in on the browser.
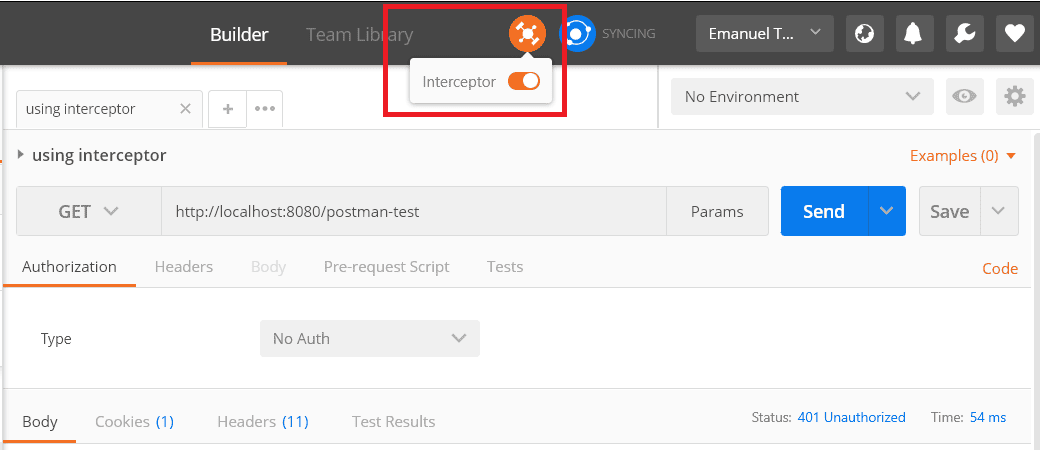
Firstly, we need to download and install the Chrome extension. After that, we enable the interceptor from the Postman application, by clicking on the satellite icon:

Now, the Postman application is bonded with the browser session. If we navigate the web, we’ll be able to see all the requests in Postman’s “History” tab. However, if we try to execute the GET request now, we’ll still get the 401 Unauthorized response because we haven’t logged in yet.
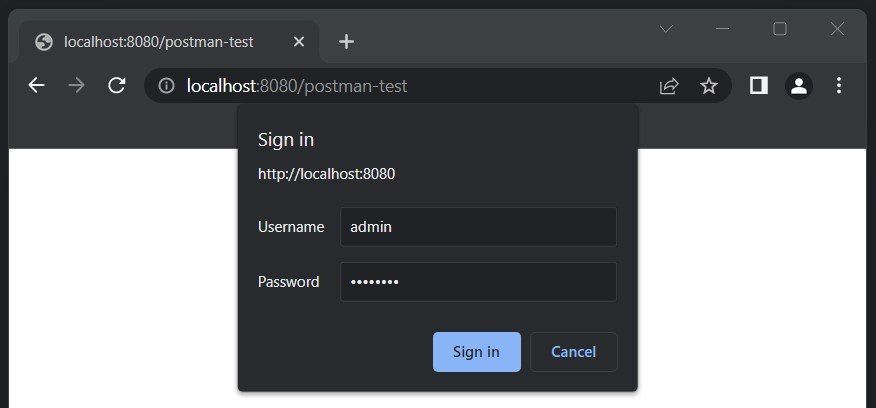
Let’s use the browser to navigate to the Basic Auth-secured page:

After we sign in using the browser pop-up, we can go back to Postman and execute the request again. This time, the request will be authorized.
6. Conclusion
In this article, we learned how Basic Authentication works and explored various ways of testing a secured endpoint with Postman.
We saw how we can manually add the Authorization header, and how to use Postman to generate it based on raw credentials. Finally, we learned about Postman Interceptor and we discovered that we can use it to send requests on behalf of the user logged in from the browser.
The code backing this article is available on GitHub. Once you're
logged in as a Baeldung Pro Member, start learning and coding on the project.


