

Mocking is an essential part of unit testing, and the Mockito library makes it easy to write clean and intuitive unit tests for your Java code.
Get started with mocking and improve your application tests using our Mockito guide:
Handling concurrency in an application can be a tricky process with many potential pitfalls. A solid grasp of the fundamentals will go a long way to help minimize these issues.
Get started with understanding multi-threaded applications with our Java Concurrency guide:
Spring 5 added support for reactive programming with the Spring WebFlux module, which has been improved upon ever since. Get started with the Reactor project basics and reactive programming in Spring Boot:
Since its introduction in Java 8, the Stream API has become a staple of Java development. The basic operations like iterating, filtering, mapping sequences of elements are deceptively simple to use.
But these can also be overused and fall into some common pitfalls.
To get a better understanding on how Streams work and how to combine them with other language features, check out our guide to Java Streams:
Explore Spring Boot 3 and Spring 6 in-depth through building a full REST API with the framework:
Yes, Spring Security can be complex, from the more advanced functionality within the Core to the deep OAuth support in the framework.
I built the security material as two full courses - Core and OAuth, to get practical with these more complex scenarios. We explore when and how to use each feature and code through it on the backing project.
You can explore the course here:
Spring Data JPA is a great way to handle the complexity of JPA with the powerful simplicity of Spring Boot.
Get started with Spring Data JPA through the guided reference course:
Refactor Java code safely — and automatically — with OpenRewrite.
Refactoring big codebases by hand is slow, risky, and easy to put off. That’s where OpenRewrite comes in. The open-source framework for large-scale, automated code transformations helps teams modernize safely and consistently.
Each month, the creators and maintainers of OpenRewrite at Moderne run live, hands-on training sessions — one for newcomers and one for experienced users. You’ll see how recipes work, how to apply them across projects, and how to modernize code with confidence.
Join the next session, bring your questions, and learn how to automate the kind of work that usually eats your sprint time.
1. Overview
Testing plays an essential role in modern software development. Gradle, as a powerful build automation tool, provides built-in capabilities to create detailed HTML test reports that display test results in an easily readable format. In Gradle projects, JUnit is the preferred choice for unit and integration testing.
In this tutorial, we’ll explore how to generate JUnit HTML reports in both single-module and multi-module Gradle projects. We’ll also cover configuration, runnable examples, and unit tests. These reports include information about passed and failed tests, execution time, and detailed error messages when tests fail.
2. Setting Up JUnit in Gradle
Gradle automatically generates HTML reports for JUnit tests when we execute the test task. The default configuration requires minimal setup and works out of the box with standard Gradle projects. The configuration below should be added to build.gradle.kts file:
test {
    useJUnitPlatform()
    reports {
        html.enabled = true
        junitXml.enabled = true
    }
}
This ensures we have both XML and HTML reports available after each test execution. The HTML reports are generated by default in the build/reports/tests/test directory. This location contains an index.html file that serves as the main entry point for viewing test results. To demonstrate the HTML report generation, let’s create a simple Gradle project that exercises basic functionality.
3. Single Module Project Report
To begin, we need a simple project using Java and jvm-test-suite plugins. A single module project is the simplest way to get started with JUnit reports in Gradle. By applying the Java and jvm-test-suite plugins, we can configure JUnit 5 tests with minimal effort. When the test task runs, the test execution produces a detailed HTML report and creates a visual report to review test outcomes at the package and class level.
The following configuration applies the required plugins and dependencies for the project, ensuring that tests run seamlessly and reports are generated automatically:
plugins {
    id("java")
    id("jacoco")
}

group = "com.baeldung.gradle"
version = "1.0-SNAPSHOT"

repositories {
    mavenCentral()
}

dependencies {
    testImplementation(platform("org.junit:junit-bom:5.10.0"))
    testImplementation("org.junit.jupiter:junit-jupiter")
}

tasks.test {
    useJUnitPlatform()

    reports {
        html.required = true
        junitXml.required = true
    }

    finalizedBy(tasks.jacocoTestReport)
}
This Gradle build script applies the Java and JaCoCo plugins, configures JUnit 5 for testing, and ensures test results are generated in both HTML and XML formats. It also links the jacocoTestReport task to run automatically after tests complete for coverage reporting.
3.1. Example Implementation
The Calculator class demonstrates simple arithmetic operations along with its corresponding test class:
public class Calculator {

    public int add(int a, int b) {
        return a + b;
    }

    public int subtract(int a, int b) {
        return a - b;
    }

    public int multiply(int a, int b) {
        return a * b;
    }

    public int divide(int a, int b) {
        if (b == 0) {
            throw new ArithmeticException("Division by zero is not allowed");
        }
        return a / b;
    }
}
3.2. Example Test Class
By running this test class, Gradle executes the unit tests and produces a structured report with pass/fail statistics and detailed outcomes for each method:
public class CalculatorUnitTest {

    private Calculator calculator;

    @BeforeEach
    void setUp() {
        calculator = new Calculator();
    }

    @Test
    void shouldAddTwoNumbers() {
        int result = calculator.add(5, 3);
        assertEquals(8, result);
    }

    @Test
    void shouldSubtractTwoNumbers() {
        int result = calculator.subtract(10, 4);
        assertEquals(6, result);
    }

    @Test
    void shouldThrowExceptionForDivisionByZero() {
        assertThrows(ArithmeticException.class, () -> calculator.divide(10, 0));
    }

    @Test
    void shouldMultiplyTwoNumbers() {
        int result = calculator.multiply(4, 7);
        assertEquals(28, result);
    }
}
When we run ./gradlew test, an HTML report will be generated at build/reports/tests/test/index.html path in the project. Here’s how the report is displayed in a browser:
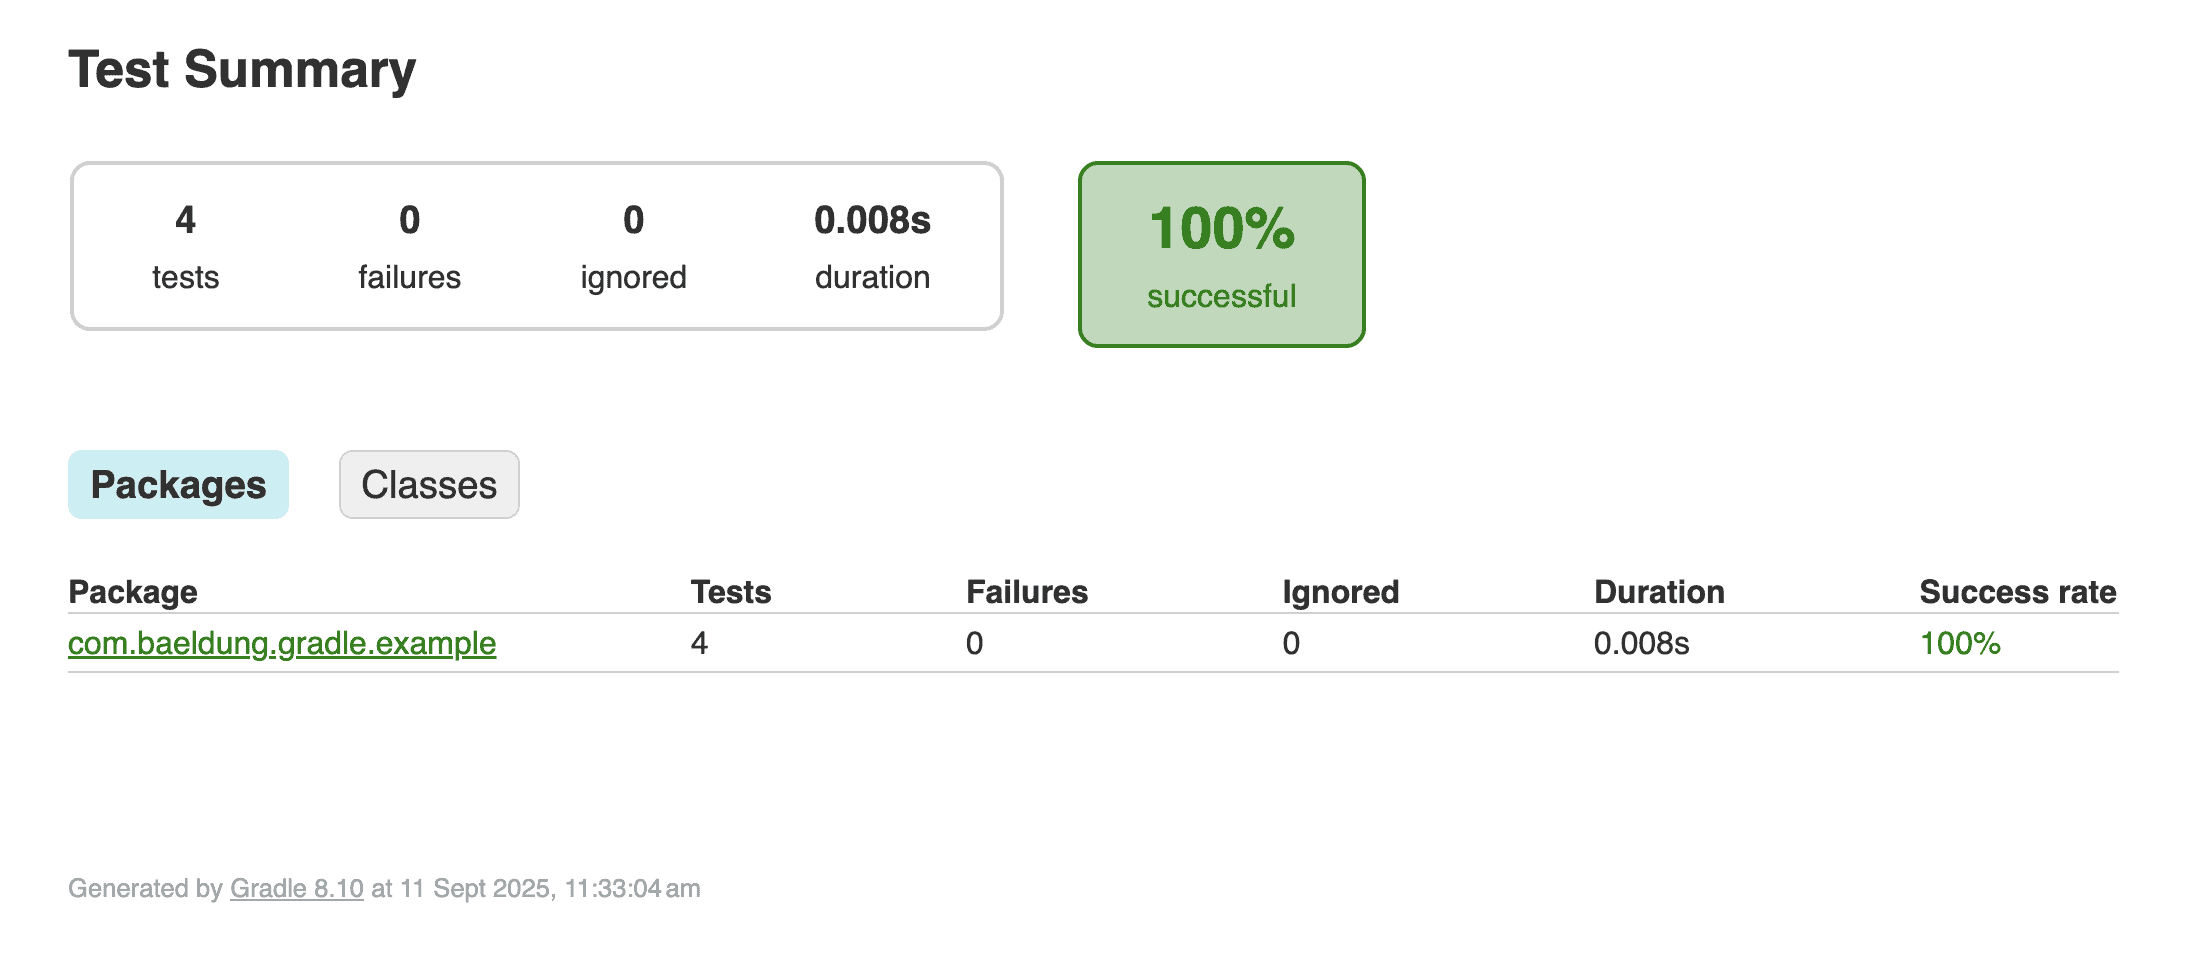
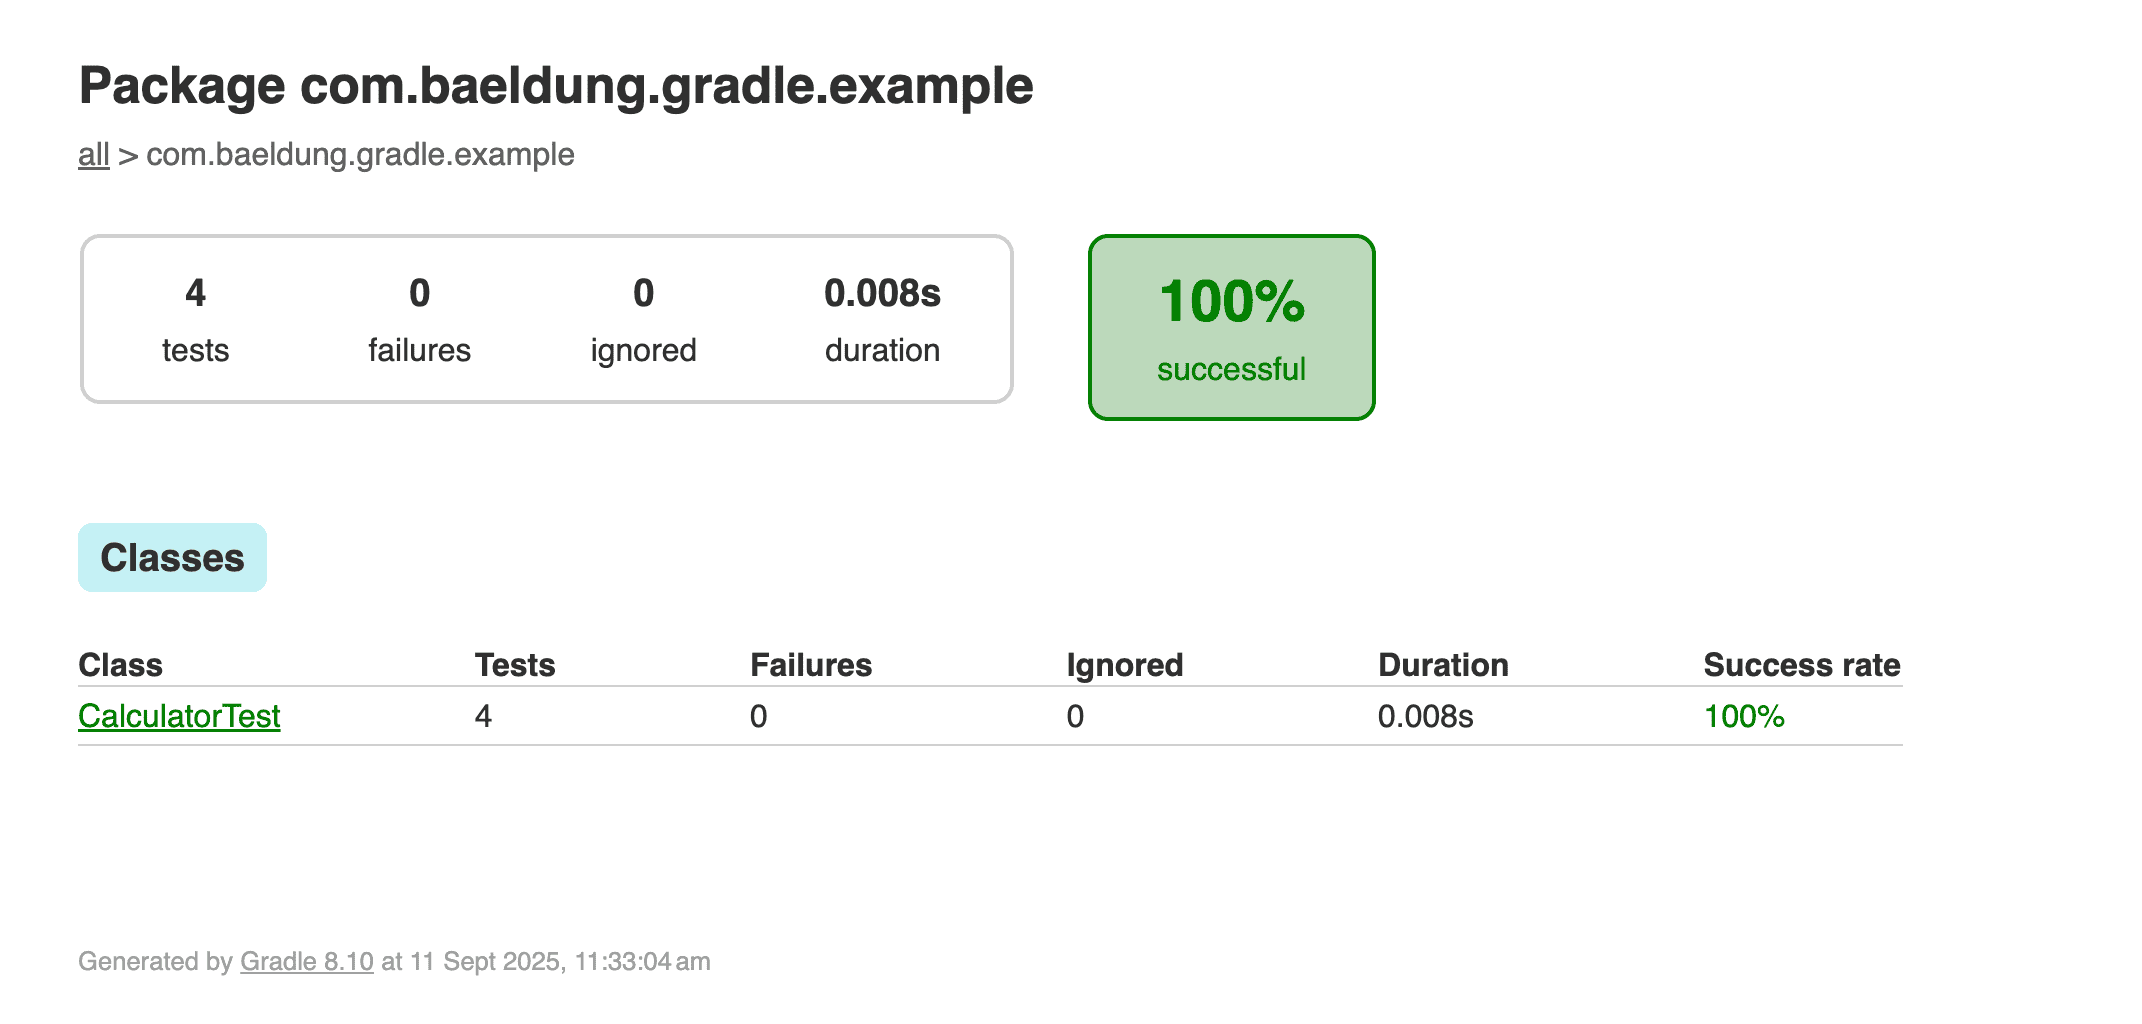
The report provides a clear breakdown of packages and test classes, making it easy to navigate and analyze test results.
4. Multi-Module Project Report
In large applications, it’s common to structure the codebase into multiple modules, and by default, each module generates its own test report. While this is useful for module-level insights, it can make it harder to assess the overall test health of the project.
To address this, Gradle provides the test-report-aggregation plugin, which collects results from all modules. Using this plugin, we can generate a single unified HTML report at the root level, giving a comprehensive view of the entire project’s test status in one place.
In a multi-module Gradle project, we maintain more than one build.gradle.kts file. One at the root level and another at each module level. Both serve different purposes.
4.1. Root Build File
This file applies the test-report-aggregation plugin to collect and combine test results from all modules. It also defines the reporting configuration and wires subprojects into the aggregation process. The outcome is a single unified HTML report at the root level that reflects the overall test status of the project:
plugins {
    id("java")
    id("jvm-test-suite")
    id("test-report-aggregation")
}

repositories {
    mavenCentral()
}

dependencies {
    testImplementation("org.junit.jupiter:junit-jupiter:5.10.0")
}

testing {
    suites {
        val test by getting(JvmTestSuite::class) {
            useJUnitJupiter()
        }
    }
}

reporting {
    reports {
        val testAggregateTestReport by existing(AggregateTestReport::class)
    }
}

dependencies {
    subprojects.forEach { sub ->
        testReportAggregation(project(sub.path))
    }
}
Running ./gradlew test executes all unit tests in the project and its submodules, generating individual reports. The testAggregateTestReport task then collects those results and produces a single combined HTML report at the root. Running both together ensures fresh results in the aggregated report.
4.2. Module Build File
Each module uses the java-library and jvm-test-suite plugins to configure its own tests with JUnit Jupiter. These module-level configurations ensure that individual modules can run and validate their tests independently, while still contributing their results to the aggregated report at the root level:
plugins {
    id("java-library")
    id("jvm-test-suite")
}

repositories {
    mavenCentral()
}

testing {
    suites {
        val test by getting(JvmTestSuite::class) {
            useJUnitJupiter()
        }
    }
}
Together, this setup allows us to review test outcomes at both the module scope and the project-wide scope, ensuring clarity and comprehensive visibility.
4.3. Example Tests in Modules
In this article, we’ll have two modules, modulea and moduleb, each containing its own test files. By default, these modules generate separate reports when tests are executed. With test-report-aggregation at the root level, their results are combined into a single consolidated HTML report for the entire project.
Example Test in Module A:
class ModuleATest {

    @Test
    void givenNumbers_whenAdd_thenCorrect() {
        int sum = 2 + 3;
        assertEquals(5, sum);
    }
}
Example Test in Module B:
class ModuleBTest {

    @Test
    void givenString_whenCheckLength_thenCorrect() {
        String word = "Hello World";
        assertTrue(word.length() > 3);
    }
}
To generate the aggregated report, run the command ./gradlew test testAggregateTestReport from the root of the project.
The combined report will then be available at junit-report-multi-module/build/reports/tests/index.html. When opened in a browser, the report provides a consolidated view of test results across all modules, as shown below:
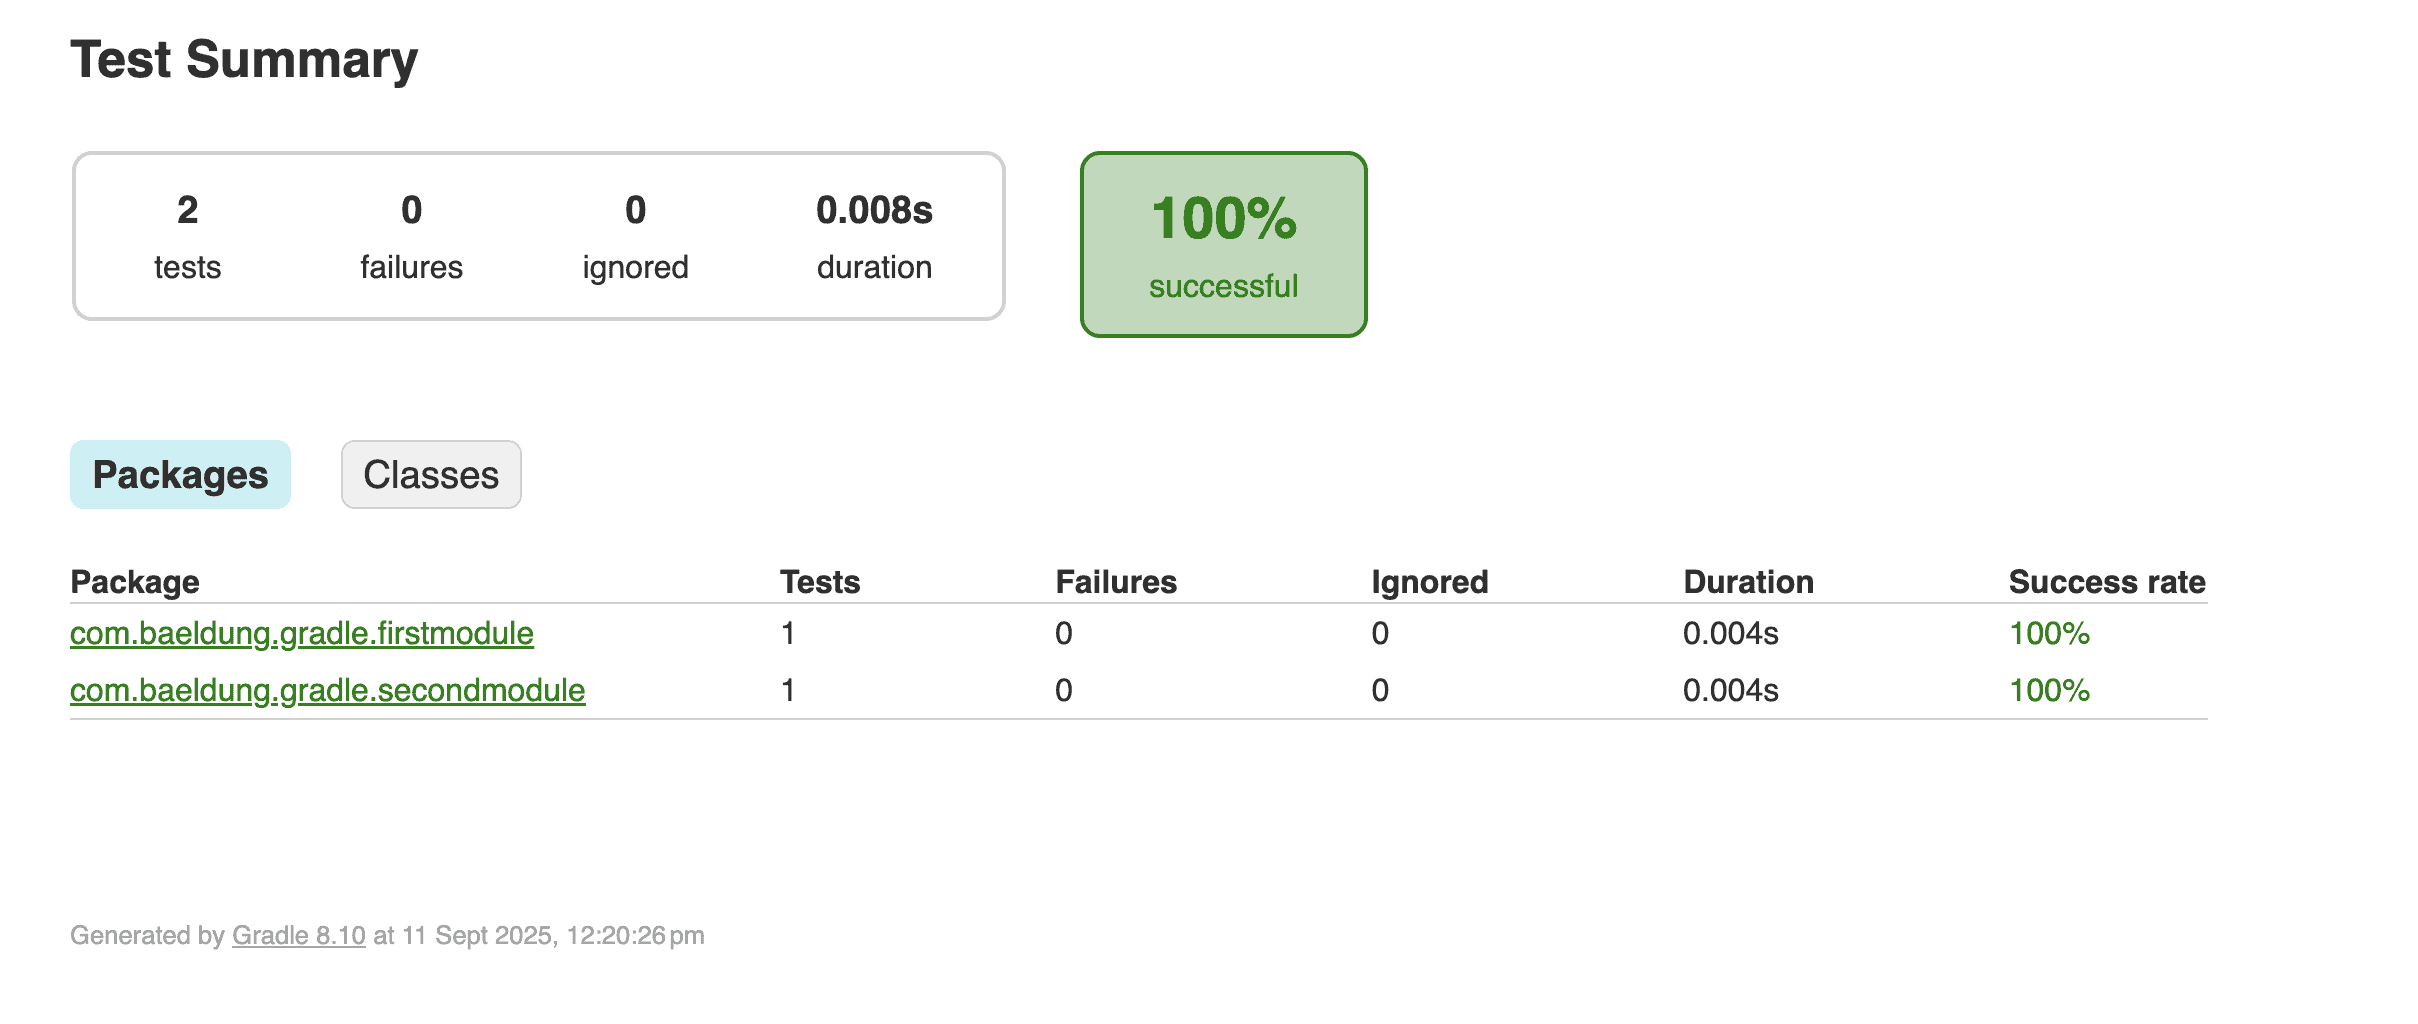
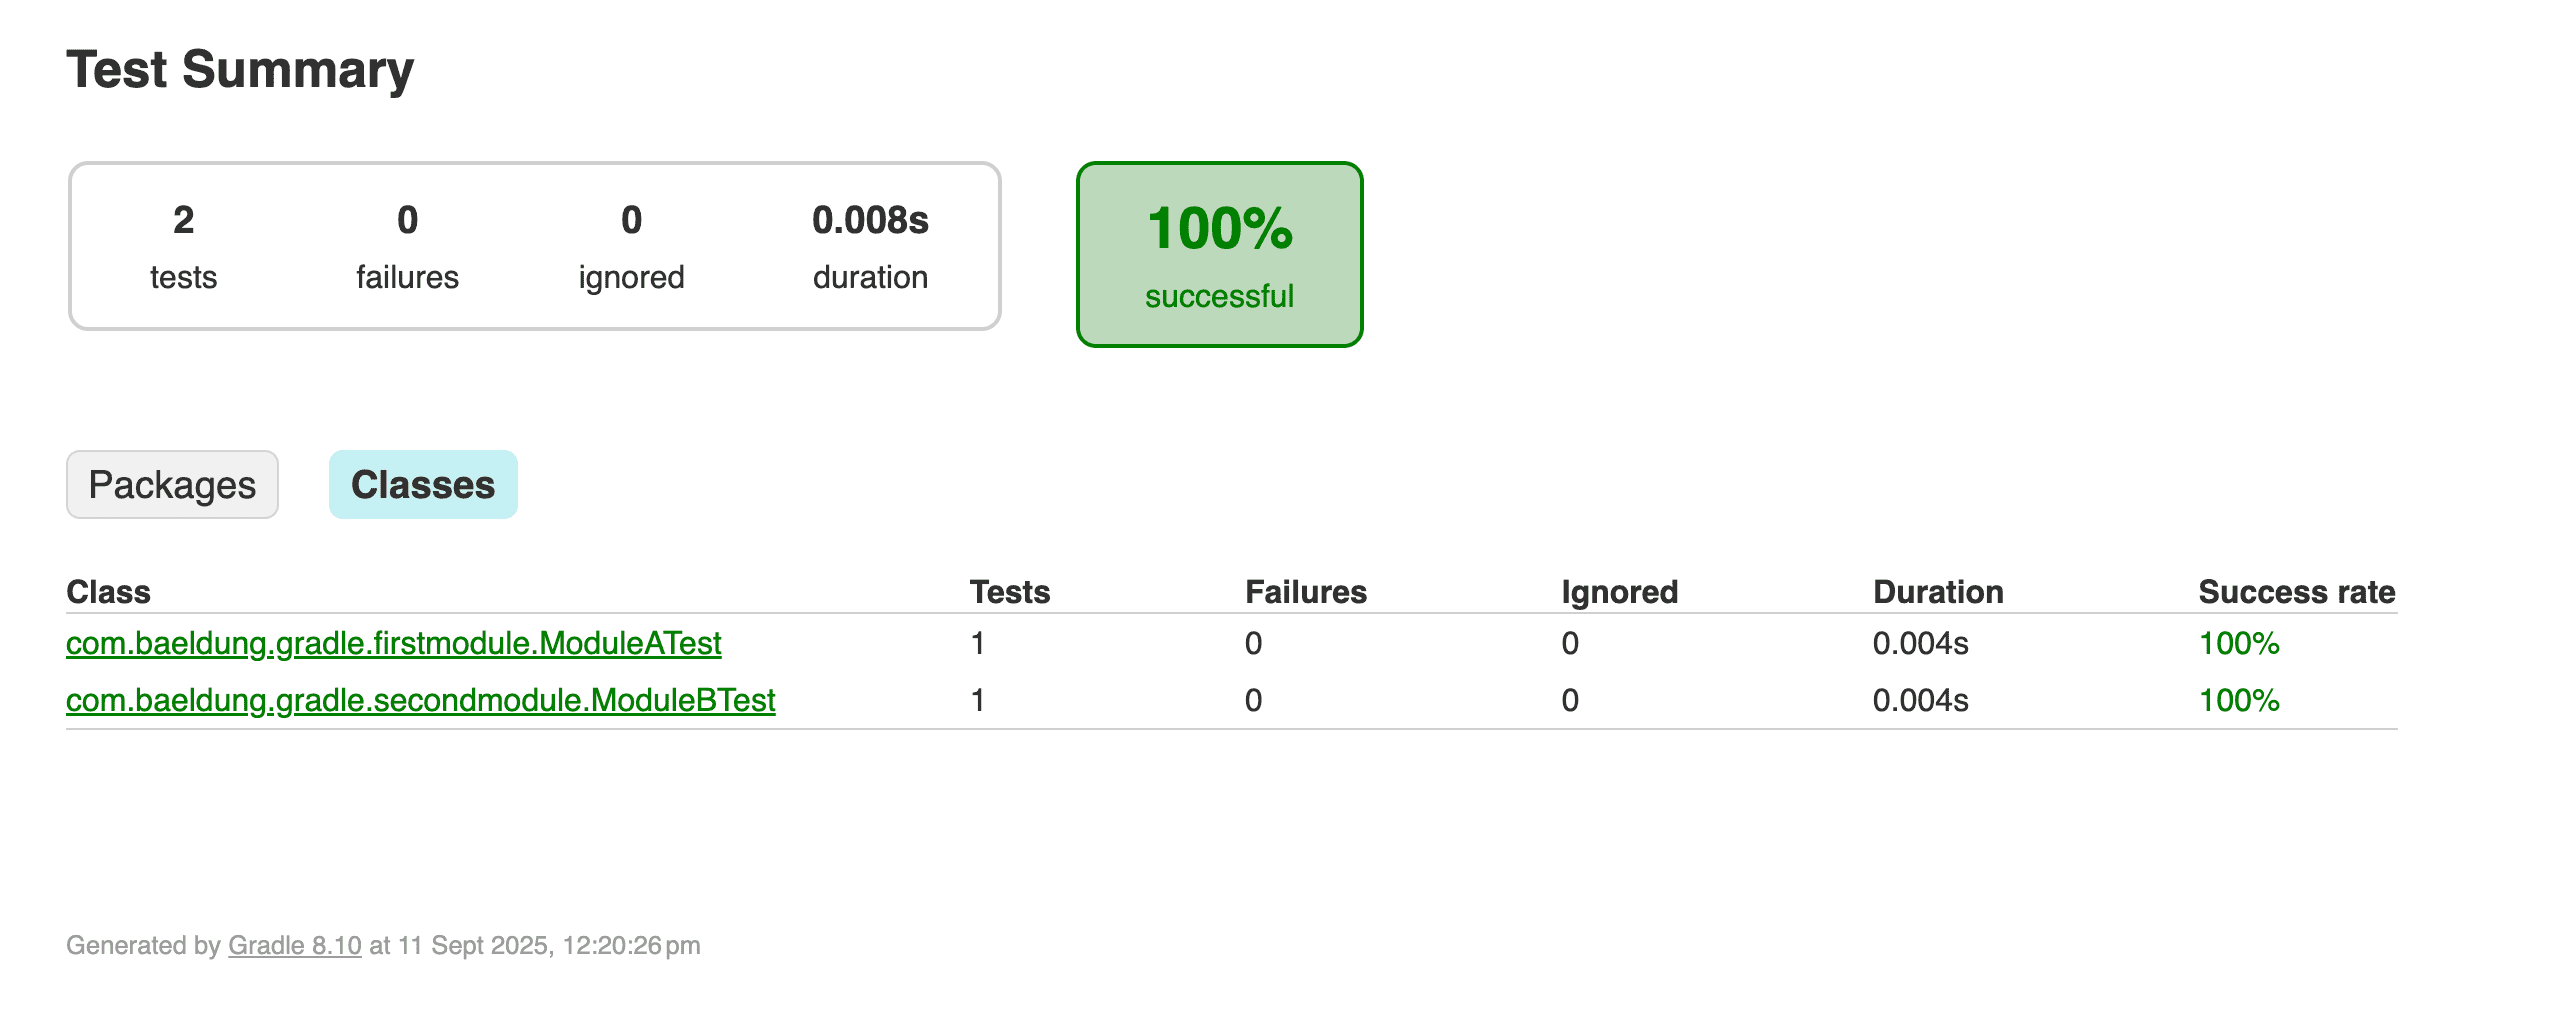
The above report merges test results from all modules into one unified HTML output. It includes information about passed and failed tests, execution time, success rate, and detailed error messages when tests fail.
5. Conclusion
JUnit HTML reports in Gradle provide clear visibility into test execution, helping teams track quality effectively. With minimal setup, single-module projects automatically produce detailed reports that summarize results, highlight failures, and aid in debugging. For larger, multi-module projects, the test-report-aggregation plugin becomes essential, combining results from all modules into a single unified HTML report.
Testing complex systems like microservices or large monoliths requires a consolidated view, which is especially useful. By configuring the root project and wiring submodules properly, teams can simplify quality assurance, improve collaboration, and gain a comprehensive view of the project.


