SSO with Apache Tomcat
Last updated: November 24, 2022

Mocking is an essential part of unit testing, and the Mockito library makes it easy to write clean and intuitive unit tests for your Java code.
Get started with mocking and improve your application tests using our Mockito guide:
Handling concurrency in an application can be a tricky process with many potential pitfalls. A solid grasp of the fundamentals will go a long way to help minimize these issues.
Get started with understanding multi-threaded applications with our Java Concurrency guide:
Spring 5 added support for reactive programming with the Spring WebFlux module, which has been improved upon ever since. Get started with the Reactor project basics and reactive programming in Spring Boot:
Since its introduction in Java 8, the Stream API has become a staple of Java development. The basic operations like iterating, filtering, mapping sequences of elements are deceptively simple to use.
But these can also be overused and fall into some common pitfalls.
To get a better understanding on how Streams work and how to combine them with other language features, check out our guide to Java Streams:
Explore Spring Boot 3 and Spring 6 in-depth through building a full REST API with the framework:
Yes, Spring Security can be complex, from the more advanced functionality within the Core to the deep OAuth support in the framework.
I built the security material as two full courses - Core and OAuth, to get practical with these more complex scenarios. We explore when and how to use each feature and code through it on the backing project.
You can explore the course here:
Spring Data JPA is a great way to handle the complexity of JPA with the powerful simplicity of Spring Boot.
Get started with Spring Data JPA through the guided reference course:
Refactor Java code safely — and automatically — with OpenRewrite.
Refactoring big codebases by hand is slow, risky, and easy to put off. That’s where OpenRewrite comes in. The open-source framework for large-scale, automated code transformations helps teams modernize safely and consistently.
Each month, the creators and maintainers of OpenRewrite at Moderne run live, hands-on training sessions — one for newcomers and one for experienced users. You’ll see how recipes work, how to apply them across projects, and how to modernize code with confidence.
Join the next session, bring your questions, and learn how to automate the kind of work that usually eats your sprint time.
Yes, we're now running our only Summer Sale. All Courses are 30% off until 20th July, 2026:
Yes, we're now running our only Summer Sale. All Courses are 30% off until 20th July, 2026:
1. Overview
In this article, we’ll learn about the Tomcat server fundamentals, how it works, and how to enable Tomcat’s Single Sign-On (SSO) feature. We’ll explore the Tomcat server and the web app’s required configurations.
2. Tomcat Architecture
The main pieces that compose the Catalina servlet container are the server that contains services that will define connectors and an engine built of hosts, and finally, these hosts will contain contexts or web apps.
Connectors listen to the client’s requests and send back the responses. In Tomcat 10, we can find connectors to the following protocols: HTTP/1.1, HTTP/2, and AJP.
The engine will process the requests received by the connectors and produce the output. It will contain a processing pipeline, which is a chain of processes that will be executed per request to produce the response. These processes are the Tomcat’s valves. For instance, the SSO on Tomcat is implemented as a valve.
After that, we find hosts that will define virtual hosts that associate a network name with a server. This is the level where the SSO valve will be defined, so all the contexts of the host will be under the SSO.
And finally, we’ll have contexts elements associated with hosts. These contexts are the web applications that will run on the server. The contexts must follow the servlet specification 2.3 or later.
3. Single Sign-On on Tomcat
Tomcat implements the Single Sign-On feature in a valve that must be configured at the host level. The way it works is that the SSO valve will store the user credentials and will pass them when required, so the user won’t need to log in again.
The SSO valve needs that the following requirements are met:
- The Realm or the “users database” must be shared by all the web apps under the virtual host.
- Web apps authentication mechanism must be one of the standard authenticators: Basic, Digest, Form, SSL, or SPNEGO.
- When a client requests a protected resource, the server will execute the authentication mechanism of the web app.
- The server will use the roles of the authenticated user to access protected resources of the web apps under the virtual host without login in again.
- When the user logs out of a web app, the server will invalidate the user session in all the web apps.
- The client must accept cookies. The cookies store the token that associates the requests with the user credentials.
3.1. Tomcat Server Configurations
On the server-side, we need to configure the SingleSignOn valve and the Realm or “user database”. These configurations are inside the server.xml file under the conf folder of Tomcat’s installation. To add the SSO valve, we need to uncomment the following line:
<Valve className="org.apache.catalina.authenticator.SingleSignOn" />For the article’s example, we’ll rely on the default configured Realm, and we’ll only need to add the users to the database. The Realm definition looks like this:
<Realm
  className="org.apache.catalina.realm.UserDatabaseRealm"
  resourceName="UserDatabase"/>
This configuration uses a global JNDI resource to define the source of the user’s database:
<Resource name="UserDatabase" auth="Container"
  type="org.apache.catalina.UserDatabase"
  description="User database that can be updated and saved"
  factory="org.apache.catalina.users.MemoryUserDatabaseFactory"
  pathname="conf/tomcat-users.xml" />
The resource will instantiate an object of type org.apache.catalina.UserDatabase and will populate it from the tomcat-users.xml file using the factory class org.apache.catalina.users.MemoryUserDatabaseFactory.
Finally, here we see how to add a user with the admin role required by the example of the article. We need to modify the tomcat-users.xml file:
<tomcat-users xmlns="http://tomcat.apache.org/xml"
  xmlns:xsi="http://www.w3.org/2001/XMLSchema-instance"
  xsi:schemaLocation="http://tomcat.apache.org/xml tomcat-users.xsd"
  version="1.0">
    <role rolename="admin"/>
    <user username="demo" password="demo" roles="admin"/>
</tomcat-users>
3.2. Web Apps Configuration
Once we have configured the server, let’s configure the servlets through the web.xml configuration file that is inside the WEB-INF folder of each servlet.
All the web apps that require SSO must have protected resources and use one of the Tomcat authentication methods. As defined in the Servlet API specification 2.3, the authentication mechanism of the web apps is defined in a login-config element inside the web-app element. This element will contain an auth-method form that needs to use one of the following values: BASIC, DIGEST, FORM, or CLIENT-CERT. Each authentication method will have a different configuration, but we’ll discuss only the DIGEST and FORM authentication methods in the Tomcat Web Apps Configuration section.
To complete the web app configuration, we need to set up the protected areas. Inside the web.xml file under the web-app element, we can add as many security-constraint elements as needed. Each security constraint defines the URL pattern to the protected resources and will set the roles permitted. Furthermore, we need to define security-role elements with all the roles, and they must match the definitions in the tomcat-users.xml file. We’ll see an example in the next section.
4. Example Authentication Mechanisms
Now that we know how to configure the web apps, let’s see two examples: Ping and Pong. We have chosen different authentication mechanisms to show that the SSO works well with different mechanisms.
4.1. Ping Authentication Mechanism
At the ping web app, we use the FORM authentication method. FORM authentication method requires a login form, and the login failed the web page. For instance, this method will be useful when we want to customize the login page to look like the web app, and the configuration will look like this:
<login-config>
    <auth-method>FORM</auth-method>
    <form-login-config>
        <form-login-page>/logging.html</form-login-page>
        <form-error-page>/logging_error.html</form-error-page>
    </form-login-config>
</login-config>
The login page must follow some strict rules defined in the Login Form Notes of the servlet specification 2.3 because we can choose neither the names of the form nor the input fields. They must be j_security_check, j_username, and j_password. This is to achieve that the login form works with all kinds of resources and to remove the need to configure the action field of the outbound form in the server. Here we can see an example of what it must look like:
<!DOCTYPE html>
<html>
<head>
<title>Ping - Login</title>
</head>
<body>
<form method="post" action="j_security_check">
<table >
<tr>
<td>User name: </td>
<td><input type="text" name="j_username" size="20"/></td>
</tr>
<tr>
<td>Password: </td>
<td><input type="password" name="j_password" size="20"/></td>
</tr>
</table>
<p></p>
<input type="submit" value="Submit"/>
<input type="reset" value="Reset"/>
</form>
</body>
</html>To understand what will happen on the server when it receives a request from a protected resource of a FORM authenticated web app, let’s summarize the flow of this authentication mechanism.
First of all, the client requests a protected resource. If the server doesn’t contain a valid SSO session ID, the server will redirect the client to the logging form. After the user has filled out the form and sent its credentials to the server, the authentication mechanism will start.
After the user authentication succeeds, the server will check the roles of the user, and if the security constraint allows at least one of them, the server will redirect the client to the requested URL. In another case, the server will redirect the client to the error page.
4.2. Pong Authentication Mechanism
At the Pong web app, we use the DIGEST authentication mechanism, and the configuration will look like this:
<login-config>
    <auth-method>DIGEST</auth-method>
</login-config>
The DIGEST authentication mechanism flow is similar to the BASIC authentication: when the client requests a protected resource, the server returns a dialog box to request the user credentials. If the authentication succeeds, then the server returns the requested resource, but in another case, the server sends the authentication dialog box again.
Although DIGEST and BASIC authentication methods are similar, there is an important difference: the password remains in the server.
4.3. Web Apps Security Constraint Configuration
At this point, we aren’t going to make distinctions between Ping and Pong. Despite they having elements with different values, the important part of the configuration will remain the same in both apps:
<security-constraint>
    <display-name>Ping Login Auth</display-name>
    <web-resource-collection>
        <web-resource-name>PingRestrictedAccess</web-resource-name>
        <url-pattern>/private/*</url-pattern>
    </web-resource-collection>
    <auth-constraint>
        <role-name>admin</role-name>
    </auth-constraint>
    <user-data-constraint>
        <transport-guarantee>NONE</transport-guarantee>
    </user-data-constraint>
</security-constraint>
The security constraint defines that everything under the private folder is a protected resource and also defines the need to have an admin role to access the resources.
5. Running the Example
Now we need to install a Tomcat 10 server, adjust the configuration as shown previously in the article, and put Ping and Pong web apps under Tomcat’s web app folder.
Once the server is up and running, and both apps have been deployed, request the resource http://localhost:8080/ping/private. The server will show the login authentication because we aren’t logged in:
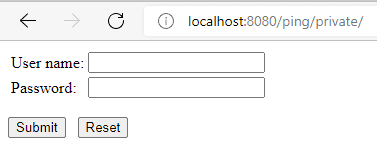
Then we need to introduce the credentials configured in the Tomcat server configurations section and submit the form. If the server validates the credentials, then we’ll see a web page with a link pointing to the pong’s private section:

In case the server doesn’t validate the access, we’ll see the login error page.

After successful login to the Ping app, we could see the SSO mechanism in action, clicking the link to the pong’s private section. If the session is already active, the server will send the Pong’s protected resource without requiring that we login in again.

Finally, we could check that after the session expires, the server will show the login page again. We can do that by waiting a couple of minutes and clicking the link to the ping’s private section.
6. Other SSO Solutions
In this article, we’ve covered the Web-SSO implemented by the Tomcat server. In case we want to explore other SSO options, here are some popular ones:
- Spring Security and OpenID Connect
- Spring Security OAuth with KeyCloak
- SAML with Spring Security
- Apereo Central Authentication Service
7. Conclusion
In this tutorial, we’ve learned the basics of Tomcat architecture. Later on, we have reviewed how to configure the server. Finally, we have reviewed the configuration of the servlets or web apps that must be included under the SSO.


